• Ships of Scale has incorportated an extra level of security when you log In. Please follow on-screen prompts to acknowledge that you are not a robot via a "Check Box" or a "Pictorial Check Box Puzzle". This is needed due to higher level of AI Activity Security.
  • SUBSCRIBE TO SHIPS IN SCALE TODAY!

    The beloved Ships in Scale Magazine is back and charting a new course for 2026!
    Discover new skills, new techniques, and new inspirations in every issue.

    NOTE THAT OUR NEXT ISSUE WILL BE July/August 2026
  • Win a Free Custom Engraved Brass Coin!!!
    As a way to introduce our brass coins to the community, we will raffle off a free coin during the month of August. Follow link ABOVE for instructions for entering.

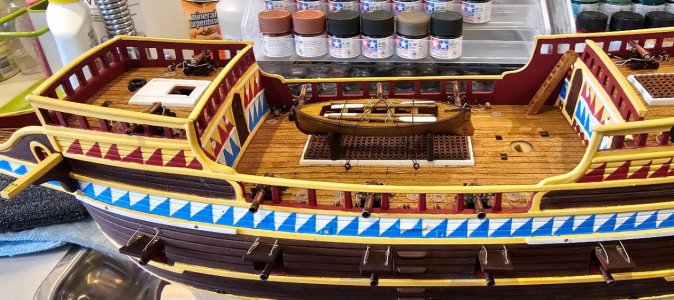
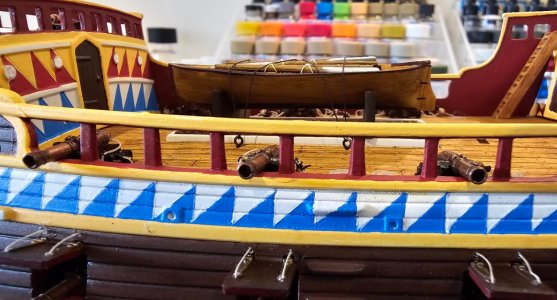
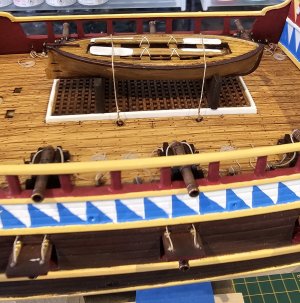
Golden Hind 1/72 by Aifix with added rigging and details

Good day John,
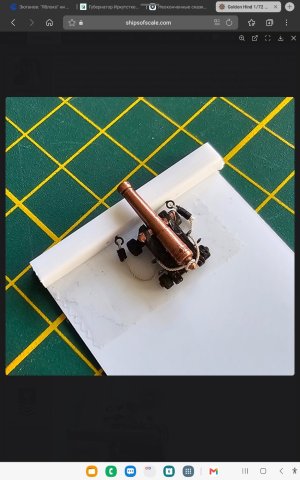
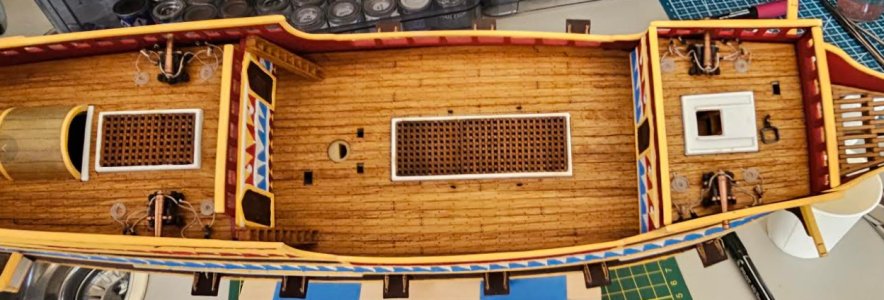
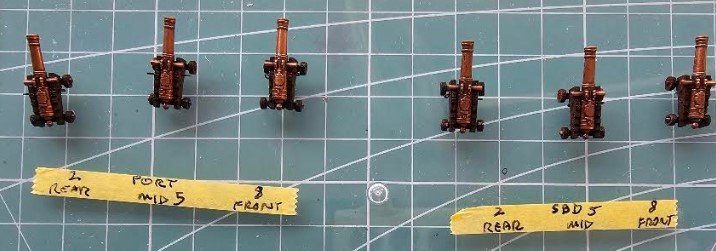
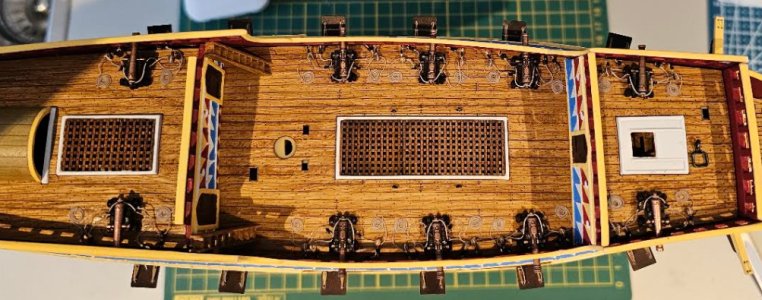
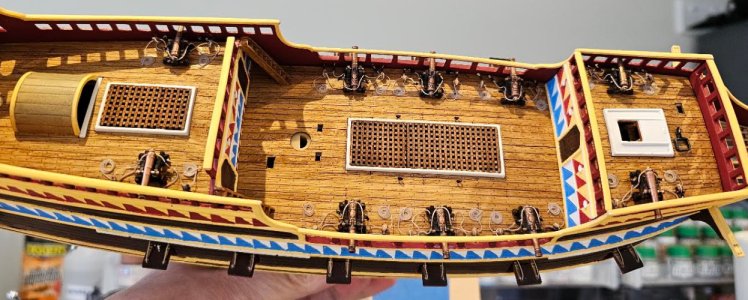
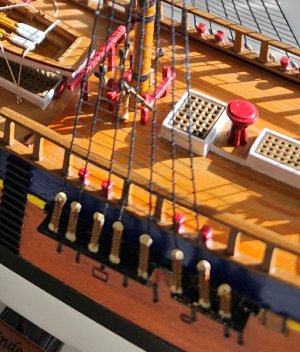
May be there is a sence to leave breech line only ,and do not show no any other blocks( only indicated eye bolts)?
If You don't have them in proper scale size and correct tackles construction...
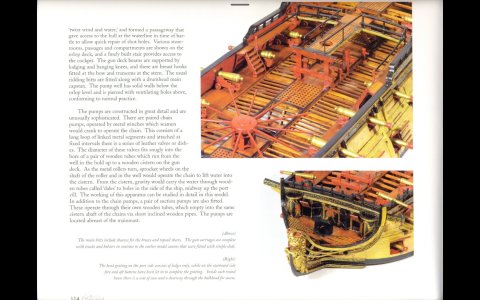
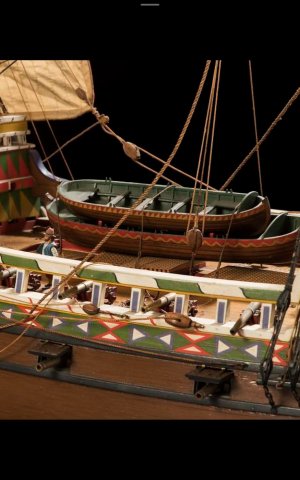
As I understood , a lot of museum classic ships models do not show guns tackles at all., and in a quite bigger size than your model...

Screenshot_20260806_184317_Samsung Browser.jpg

Screenshot_20260806_190525_Gallery.jpg

Screenshot_20260806_190149_Gallery.jpg
 
Last edited:
Hi Kirill
Yes, that is a good idea and I thought long and hard about it. I decided to go with the tackles, although a reduced set due to the crowding on the deck. But in future I might indeed just put the breech lines. Another good point, you make. thanks!
 
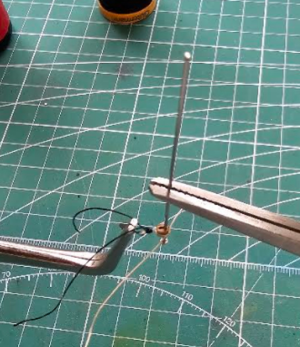
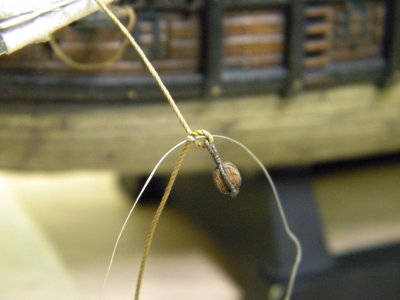
I have finally hit on a way to make a becket that is easy for me, and produces reasonably neat results in a few minutes. I have seen other methods that work very well but I could not get them to work with a 2mm block :-) So I thought I would put my method here.

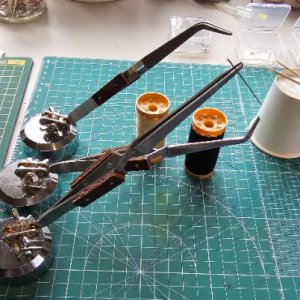
The useful tools are straight and angled self-holding tweezers with a good solid base

Pic-0775.jpg

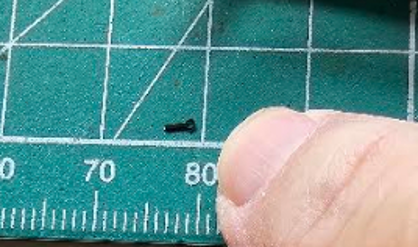
I have been using 0.9mm diameter eyebolts for the gun tackles. These are to be attached to the inside of the railings for the guns.

1 Take the eyebolt or hook or whatever.
1787373899045.png

2 Hold it with angled tweezers.
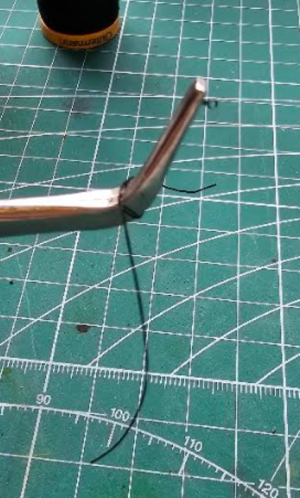
3 Tie a knot in the seizing thread (black) and slip it over the end of the tweezers.
1787373995692.png

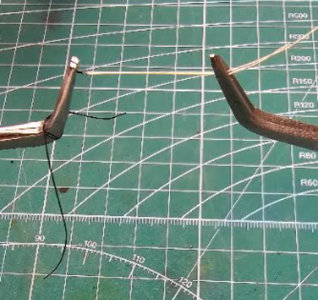
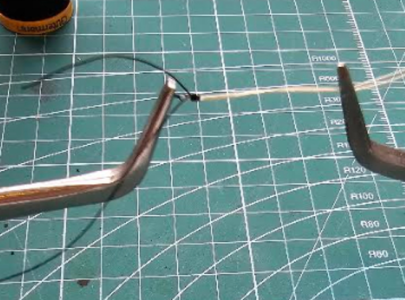
4 Thread the stropping thread (tan) through the hook, eyelet etc
5 Hold it tight with a second pair of (angled) tweezers
1787374053234.png

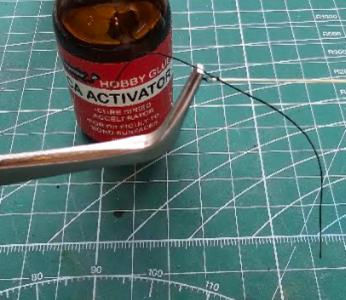
6 Add a drop of CA glue where the seizing will go. Try not to add too much – keep it small and where the
seizing will go.
7 Move the seizing thread into place and pull tight.
8 Add a tiny bit of CA accelerator to ...er....accelerate proceedings.
1787374118833.png

9 This holds the black knot in place when we wind the seizing… otherwise it rotates
10 Wind seizing around a few times. Finish with a knot.
11 If necessary, push the black thread together so that it is a solid seizing.
12 If there is a tiny gap, and some white thread shows, colour it with a black pen!
13 Trim black seizing and we have a nice hook or eyebolt etc
1787374246264.png
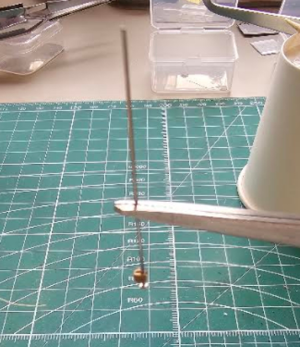
14 Get a pin with a head and thread the block onto it.
15 Hold with straight ended tweezers.
1787374293814.png
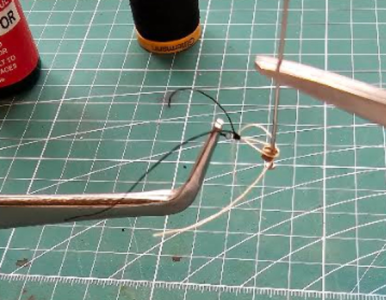
16 Tie a loose knot in the white thread.
17 Position the knot around the block.
NB – the tweezer on the RHS can rotate in all directions, so we can get the knot in the thread on the opposite side to the seizing
and the eyebolt. Similarly, we can get the block square. It is a little fiddly but much better than trying to do it on the table!
1787374354005.png
18 When happy add a drop of CA glue on the knot in the white thread.
19 And a drop of CA bonder to hold it.
20 Then white glue on the other sides of the strop to secure it.
1787374415020.png

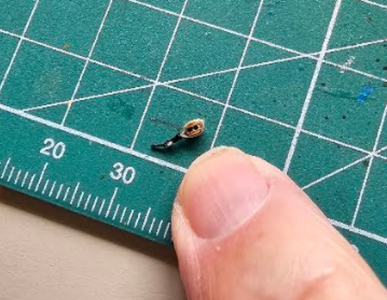
21 Trim loose ends and we are done!
1787374459963.png

I found this was relatively easy and relatively quick :-)
 
Last edited:
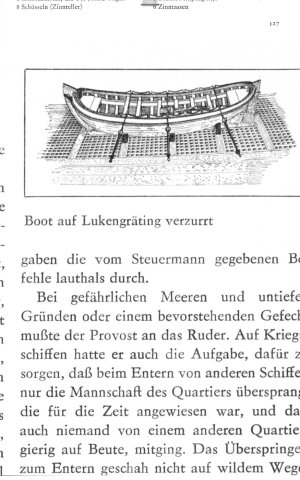
Kirill, you are of course correct! I had never notcied before but I checked and you are correct.

My AI agent searched my books and gave me much detail, and explained why I was confused.
"The advice you received from your friend is largely supported by the sources, particularly for the era of the Golden Hind (late 16th century). While diagonal lashings (gripes) were eventually used for boats suspended from davits, boats stowed on deck were typically secured with lashings that ran straight across."
I asked it why this was and this is the reply:
"The primary engineering goal of securing a boat on deck was to provide a direct downward force to keep the boat firmly seated in its cradle during heavy rolling.
  • Mechanical Efficiency: A rope running straight across provides the most efficient downward pressure. Diagonal ropes tend to pull the boat fore or aft; if the boat is already fitted into shaped chocks, this longitudinal pull is unnecessary and can actually work against the "seat" of the boat in its cradle.
  • Simplicity: Historical rigging prioritized "strength, convenience, and simplicity". A straight lashing is faster to set up and easier to keep taut than a complex diagonal "X" pattern."
Indeed I agree - strength, convenience and simplicity should rule in complex situations.

I might be able to undo the ropes (they are secured with glue ho=wever...) but I will try to fix this error :-)

Thanks!

I am reminded of the motto of my University (MNonash): "Ancora Imparo" or, in English, "I Am Still Learning".
 
John
Awesome job on the beckets for your tackle, and with a 2mm block! With all the steps you described, I can't believe it was "relatively easy and quick"
 
John
Awesome job on the beckets for your tackle, and with a 2mm block! With all the steps you described, I can't believe it was "relatively easy and quick"
Well I looked at the instructions vides I have seen and I was unable to do them very well and they were taking me longer than I thought they should. I got this down to about 3 minutes which isn;t oo bad...for me :-)

But I am new to ships and with more practice I hope to get better...certainly my stropping has become neater, but still not as good as the experts.
 
Very interesting!
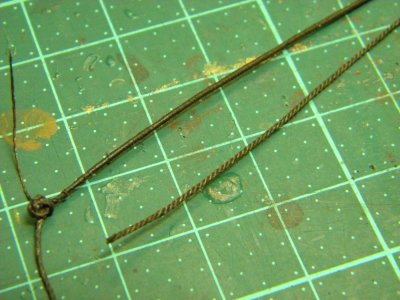
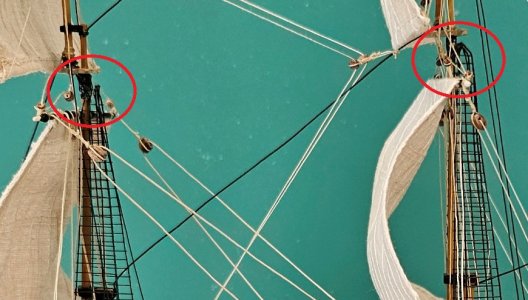
For our models, in large scales, I think we can ommit two first stages and use 3rd stage of "serving" only, to imitate full ropes treatments... this could be done by using very thin tread wraping around "normal" rope... or using some kind of "rubber" paint...

f761t2801p47453n11_dNhmxUkl.jpg

f761t2801p47453n3_jDClbrFe.jpg

20318626.jpg
 
I have finally hit on a way to make a becket that is easy for me, and produces reasonably neat results in a few minutes. I have seen other methods that work very well but I could not get them to work with a 2mm block :-) So I thought I would put my method here.

The useful tools are straight and angled self-holding tweezers with a good solid base

View attachment 628878

I have been using 0.9mm diameter eyebolts for the gun tackles. These are to be attached to the inside of the railings for the guns.

1 Take the eyebolt or hook or whatever.
View attachment 628879

2 Hold it with angled tweezers.
3 Tie a knot in the seizing thread (black) and slip it over the end of the tweezers.
View attachment 628881

4 Thread the stropping thread (tan) through the hook, eyelet etc
5 Hold it tight with a second pair of (angled) tweezers
View attachment 628882

6 Add a drop of CA glue where the seizing will go. Try not to add too much – keep it small and where the
seizing will go.
7 Move the seizing thread into place and pull tight.
8 Add a tiny bit of CA accelerator to ...er....accelerate proceedings.
View attachment 628883

9 This holds the black knot in place when we wind the seizing… otherwise it rotates
10 Wind seizing around a few times. Finish with a knot.
11 If necessary, push the black thread together so that it is a solid seizing.
12 If there is a tiny gap, and some white thread shows, colour it with a black pen!
13 Trim black seizing and we have a nice hook or eyebolt etc
View attachment 628885
14 Get a pin with a head and thread the block onto it.
15 Hold with straight ended tweezers.
View attachment 628886
16 Tie a loose knot in the white thread.
17 Position the knot around the block.
NB – the tweezer on the RHS can rotate in all directions, so we can get the knot in the thread on the opposite side to the seizing
and the eyebolt. Similarly, we can get the block square. It is a little fiddly but much better than trying to do it on the table!
View attachment 628887
18 When happy add a drop of CA glue on the knot in the white thread.
19 And a drop of CA bonder to hold it.
20 Then white glue on the other sides of the strop to secure it.
View attachment 628889

21 Trim loose ends and we are done!
View attachment 628891

I found this was relatively easy and relatively quick :-)

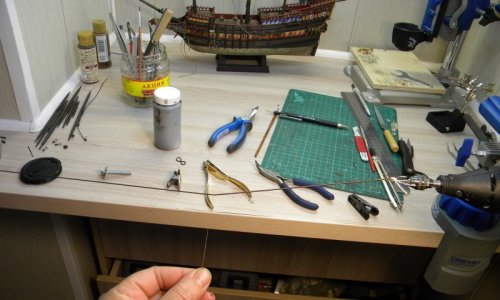
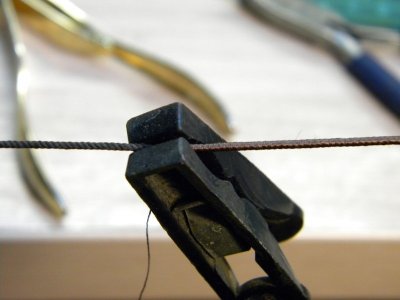
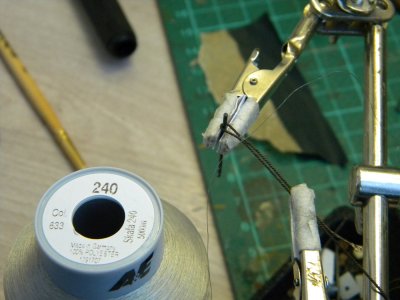
There could be used Gutermann Scala 240 for imitation ropes splicing , blocks seizing and for imitation ropes serving

f761t2801p194456n5_fLKJydbF.jpg

f761t2801p194765n9_sVhHZfBj.jpg

f761t2801p194834n13_DIpoKzfh.jpg

f761t2801p194765n3_DUFsneIT.jpg
 
Good day John,
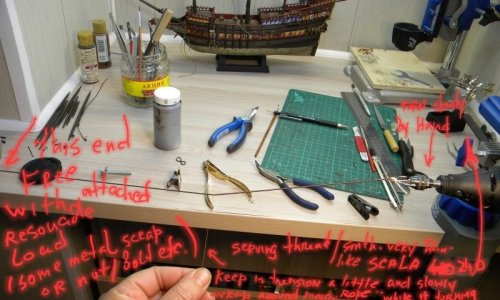
It is very simple - look at the picture, when it done ,last serving coil need to be fixed by drop of CA, detached or not from "device",
than "served rope " need to be full length good painted by sponge with m8x of acrylic + warnish or oil paint + warnish/ or tick oil of suitable color and placed somewhere for complete drying...
I used mix of acrylic paint + acrylic warnish, it is drying very fast and I like it, oil paint will dry longer

f761t2801p47453n11_dNhmxUkl.jpg
 
Serving line scala 240 need to be sufficient length, I used it from the spool bellow table,to fix it in the begining of rope , keep it slightly pressed in your left uand fingers to provide light tension while rotating slowly drill with fixed rope by your right hand and control accurate distribution of serving line along rope, actually it distributes itself while you rotating main rope , from your side need only minor control
 
No progress on the GH recently - I have been trying to make some progress on my Junk. I've also been crazily buying ship books at a rate about 1000 times faster than I can read them. But there are some great books around.

But I am getting close to the scary part - the shrouds! This GH is only my second ship and on the first one (Endeavour) I used the horrible plastic deadeyes and lanyards on the shrouds...

Pic-1713.jpg

I refuse to do that this time...but it means this is my first time rigging them...

On the Endeavour I used the jig/loom to make the shrouds and ratlines. It worked OK, after I made adjustments to ensure that they actually lined up with the deadeyes. But I did not think ahead ... I did not consider how the top of the shrouds was working and they did not fit very well (my mistake entirely) so I had to do some adjustments when installing the shrouds. And then hide them under the tops as much as I could!

Pic-1715.jpg

All of this is an introduction to my question...which is on the ORDER of doing these things. The hull and deck are almost finished and I think the order of progress from here is the following:
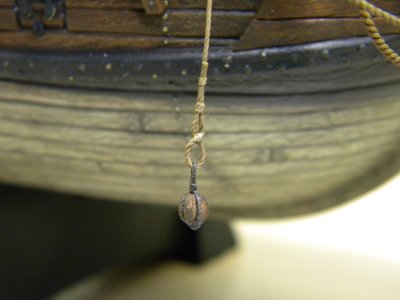
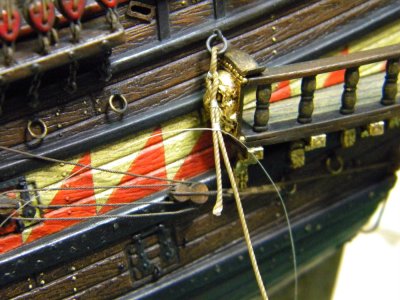
  1. Map all belaying points and ensure there are pins, cleats or whatever on the deck ready for later use
  2. Add knights, pin rails, and any extra pins/cleats as required
  3. Add channels for the shrouds
  4. Add masts and bowsprit
  5. Add (fore)stays for all masts
  6. Take deep breath
  7. Add shrouds and ratlines

Does this seem right?

Maybe I add the lower deadeyes to the channels before adding the channels to the hull? Might be easier?

As for the shrouds themselves am going to try Harry Houdini's tools...but more on that later. That is still some time off!
 
Good day John!
From my side I would recommend to use Eugine Tropmann GH rigging plan or Mondfeld GH rigging plan to use , both of them are very good for GH model rigging...this is reqarding No1 in your actions list...
2nd - yes , follow No1 plan
3rd - agree
4th (5 +6 +7)- my personal advise - start from bowsprit and F mast only and to make all relative rigging , standing and running including F M sails rigging ...
4th Main Mast do the same
4th mizzen mast , all the same and completion all rigging lines...including some of uncompleted rigging of F.M and M.M.
Doing in this sequence You will always have sufficient/ wide place in front of Your hands to work with all relevant mast's rigging... just do masts one by one ... it is easiest way in my opinion to rigg your model...completed of almost 90 % rigging of F.M.with sails You can start to fitt MM and than to start to fitt M.M. rigging - shrouds( to use carton patern is very simple to arrange proper position of deadeyes and shrouds, than stays one by one level moving up,starting from main mast level rigging following topmsails and top gallant sails rigging if necessary) and completion with mizzen mast and its rigging and sails( +sails rigging)...
There is no need at all to copy real sequence of real vessel rigging, like to fitt all masts sections, than start standing rigging followed by running rigging and so on! , this is a model, and by my opinion it need to be rigged in most comfortable way, sometimes ,some standing and running rigging could be made even in reverse mode, doesn't matter...:)))
the only final result should loooks right, I think...
Wish You luck and all the best in your rigging adventure! :)
Ps
There are You could find many pictures/ still exists/ in this forum, of my early rigging experiments which I was talking above here... may be some of them would be usefull in your own rigging works... lets try...there is how I did one mast rigging after another...
 
Last edited:
Thanks Kirill. I had not thought of that but it does make sense... As you say, leaves maximum room for wrangling the rigging :)

I might indeed try that. And I had totally forgotten to list the bowsprit, which is first in any case...

More soon
 
Back
Top