H.M.S. Endeavour 1768 ( Artesania Latina Kit )

Joined
Feb 5, 2018
Messages
21
Points
48

Location
Buena Park, California
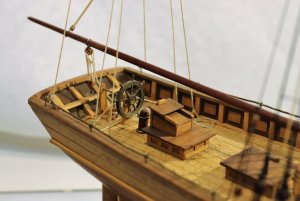
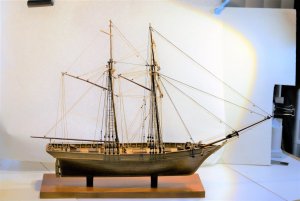
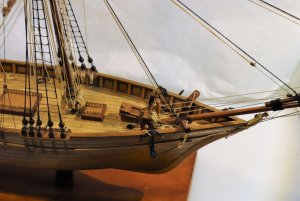
I’m finally ready to start my H.M.S. Endeavour build. I wanted a place for my shipyard inside the house, that way I can work on it year round. After some negotiations with the Admiral I built a place a work space in the house. I need to do some repair to my Scottish Maid that I build in the 1980’s. She ran into some rough rocks on our last move and had some severe damage to the bow. Also wanted to build a case for her. She’s now shipshape and tuck away in her display case.
63F60646-19F1-4BFC-9AC7-091C19B5FC32.jpeg837309E1-BBBE-47E9-8AF0-E5B50CE85B08.jpeg956F45E1-DC1B-4568-8257-5A37F2469FE3.jpeg

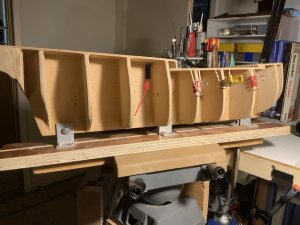
I actually started the H.M.S. ENDEAVOUR right after I finished the Scottish Maid. All I got done was the frame. Then other things got in the way of finishing it and She was packed it way. In its lay away it had developed a bow in the keel but I corrected this by clamping the keel in a reverse bend. After it seemed to be straight, I've watched it unclamped and it seems to be stable with no bend. I figured when I get the first layer of planking on it, it should permanently set the keel straight. I've cleaned up the hull and sanded the frames to meet the curve of the planking. I’m now laying out a three shift pattern for the main deck planking then move on to the poop and forecastle.
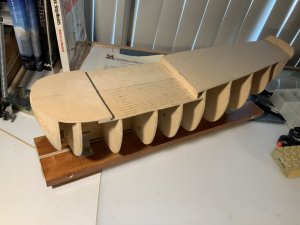
CE2A0ED5-6F55-4D9F-8486-CF8D909B192D.jpeg
 
Hi Fred, and welcome aboard SOS!
A very nice model of a Scottish Maid, thank you sharing with us! Taking the chair and will keep an eye while you will build her.
 
I didn’t think I would run into trouble this quickly, but I did. I started planking the center deck, I did about an inch wide strip and noticed that the mukali wood used for planking had some shading differences which was enough in one area that I didn’t like the look. I removed what I had done and will be watch the wood a little more closely from here on out,
But before I removed it, I sanded the decking to see if i could improve the shading problem. The sanding seem to darken the wood giving a dirty look. When I built the Scottish Maid, the reference book I had on ship building suggested using thin black string for caulking which I did. Never again, when you lightly sand the finished decking or side planking it had a tendency to pull out the caulking. Fought this the whole build.
This time I looked into several different sources and it seem that using a lead pencil or sharpie to darken the edges of the planking will give the effect of caulking. I decide to go with the sharpie, but i’m wondering if this is causing the darkening of the wood when I sanded. Suggestions?
No sanding,use a sharp mini scraper or a razor blade and scrape the deck like I did on my Santa Maria

 
Thanks Zoltan, I will try this. It’s very thin wood which makes me worry a bit, but you probably don’t scrap that much off. I went thru your build on the Santa Maria, beautiful work! Truthfully I was a little disappointed not to see you finish Santa Maria, I was enjoying the changes and solution you were making. I am looking forward to the finished diorama.
 
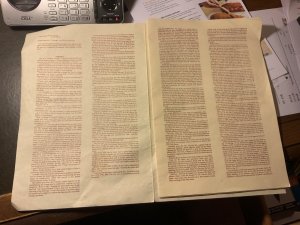
Still continuing with the deck planking, but have been reading ahead on Artesiania Latina instructions preparing for the next steps in the build. It’s a 25 year old kit and the instruction show it. The assembly section consist of 3 1/2 pages of very small print. My old eyes can’t handle the small size so I have to use a magnifying glass to read it. I do not know how many times I read it, but it reads as if it’s a single hull planking, but they did include a bundle of thin wood for the second planking. Then I noticed that the keel (this is the main plywood that the frames attach to) does not have cutouts for the three masts to rest in. Back to reading the instructions. I find just before the start of the rigging they instruct you to drill the holes for the masts. This would be a blind drill into the deck, since the hull is completed. I have decided to cut out the keel area for the mast now, they are only an inch deep into the keel, so integrity should not be a problem. This should allow me a more accurate job, see picture, I put tape to show where the mast will rest . I worry about the more intricate assemblies and these instruction.

E9312575-092E-4B62-9CB8-69F25600E414.jpegA769C192-BD46-4541-ADD7-CD5B0652FA38.jpeg
 
Good catch, Fred. I am wondering if that instruction translated using Google Translator... ;) Often time, I compare our hobby to the chess (game), where you need to think a few moves ahead before making a decision.
 
Thanks Jim. If you were wondering if the instruction was translated by Google translator. I bought the kit in the early 1990’s and it came with the English instruction. I don’t think the translator was around then, in fact I’m not sure google was around. LOL
One thing that come out of me mentioning the instruction was when I used my IPad to take the picture for my post I realized I could expand the picture on my IPad and read it find, no need for a magnifying glass.
 
Well we’re back from the Mediterranean cruise and of course the wife came down with a cold when we returned. She graciously shared it with me. I’m back-up to speed now and ready to get back to the H.M.S. I’m Endeavour.
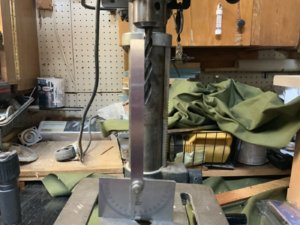
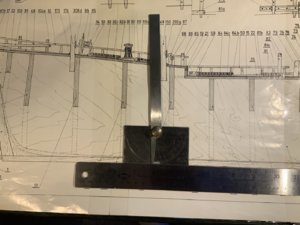
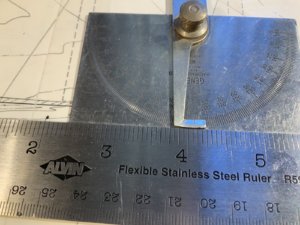
As I had stated above the keel does not have the holes drilled in the keel for the masts. So I decided that this was a good time to drill the holes. I used an angle gage to determine the angle of the mast and transfer this to the drill-press. After this I set the drill- press to a depth of 25mm. Which is the depth of the holes on the drawing. From here it was a lot of measuring to determine were the holes should be drilled and placing the ship in the right position. After the holes where drilled, I installed the masts and rechecked the mast angle to the deck this time. The mizzenmast and foremast were spot on but the main mast for some reason was off. A little file work I achieved the right angle. Back to planking the the deck.7C308574-182D-4636-AC80-EE10B5F9C8CD.jpeg E30C5865-4F52-4DCB-B83F-09E3C68652A3.jpeg469A3BEC-C574-4204-BC47-2776A4CFF163.jpeg
 
Hallo Fred, alias @FredV ,
we wish you all the Best and a HAPPY BIRTHDAY
Birthday-Cake
Hope you can celebrate with family and friends and you still find some time to work on your H.M.S. Endeavour
 
Hi Fred,

I too, built this kit, about 40 years ago. It was my first ever ship kit and the learning curve was extremely steep! No on-line help back then. I can't give you any help with the building, except to say that I did double plank it - twice! The first time it was very obvious that I had the run of the planks wrong and the only thing to do was to strip it off and start again. And that thin strip wood was almost impossible to bend around the bow but somehow I managed it.

Enjoy.
Richard
 
Back
Top