H.M.S. Victory Constructo - by Wooden Ship Crafts

I just went through your build, good read. I’m on an older Constructo kit, looks like they have come a long way.
im using Satin poly on my ship. I was going to do the first mast I completed, but after a glass of wine reading your build, I’m prob not going to seal it. Lol. Nice build!!
 
It's official. I came back to my wooden shipbuilding work... after 4 months of a lockdown in my area.
It appeared that I am only on step #6 of the instructions book. As my wife said, I made so much (actually only 6) videos that she thought I completed the H.M.S. Victory ship. Can you imagine? It's like 193 steps to go and each step includes days of work. With my current speed 6 steps per 6 months, I might need 16 more years to finish ROTF. I hope this is a joke and I will finish earlier... maybe in 5 years.

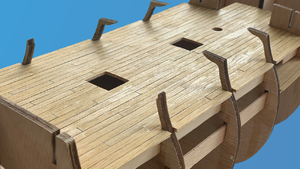
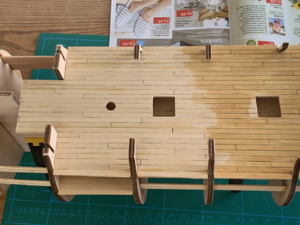
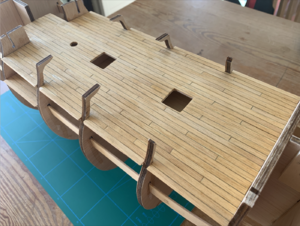
Let's get back to work. I applied 2 layers of varnish for the lower deck. Looks amazing, if to be honest with you. At least it is now more professional than after I did an endless amount of sandpaper moves for this deck.

image.png

After one layer of varnish, I figured out that at least one more is required. See the before and after varnish, the result is amazing. On the left side, there is no varnish and on the right-hand side - I started with one layer of varnish.
Screenshot 2020-07-14 at 23.17.17.png


Screenshot 2020-07-14 at 23.17.05.png

Also, I made a video explaining my process and the transformation of the lower deck.


Looking forward to hearing your thoughts and feedback.

Thanks,
Max
 
It's official. I came back to my wooden shipbuilding work... after 4 months of a lockdown in my area.
It appeared that I am only on step #6 of the instructions book. As my wife said, I made so much (actually only 6) videos that she thought I completed the H.M.S. Victory ship. Can you imagine? It's like 193 steps to go and each step includes days of work. With my current speed 6 steps per 6 months, I might need 16 more years to finish ROTF. I hope this is a joke and I will finish earlier... maybe in 5 years.

Let's get back to work. I applied 2 layers of varnish for the lower deck. Looks amazing, if to be honest with you. At least it is now more professional than after I did an endless amount of sandpaper moves for this deck.

View attachment 164535

After one layer of varnish, I figured out that at least one more is required. See the before and after varnish, the result is amazing. On the left side, there is no varnish and on the right-hand side - I started with one layer of varnish.
View attachment 164536


View attachment 164537

Also, I made a video explaining my process and the transformation of the lower deck.


Looking forward to hearing your thoughts and feedback.

Thanks,
Max
The deck finish is looking very good - very accurate work btw..... Thumbsup
 
It's official. I came back to my wooden shipbuilding work... after 4 months of a lockdown in my area.
It appeared that I am only on step #6 of the instructions book. As my wife said, I made so much (actually only 6) videos that she thought I completed the H.M.S. Victory ship. Can you imagine? It's like 193 steps to go and each step includes days of work. With my current speed 6 steps per 6 months, I might need 16 more years to finish ROTF. I hope this is a joke and I will finish earlier... maybe in 5 years.

Let's get back to work. I applied 2 layers of varnish for the lower deck. Looks amazing, if to be honest with you. At least it is now more professional than after I did an endless amount of sandpaper moves for this deck.

View attachment 164535

After one layer of varnish, I figured out that at least one more is required. See the before and after varnish, the result is amazing. On the left side, there is no varnish and on the right-hand side - I started with one layer of varnish.
View attachment 164536


View attachment 164537

Also, I made a video explaining my process and the transformation of the lower deck.


Looking forward to hearing your thoughts and feedback.

Thanks,
Max
Max,
This is a great build and so well documented Thank you
 
Hi Max, just found your build. I am currently working on the Le Fayette by Artesania. I was looking for something a bit bigger for my next build. I found out quickly that size equates to price. I found the HMS Victory and it just drew me in. I cant wait to get her started. I will be following your build with interest. Hopefully learn about any issues with the build. I have seen other post about gun port placement problems. Also I noticed mine came with 2 sets of planking as an option. I guess if the first doesn’t work out you can do it again. Keep up the great work and Stay Safe!
 
Hi Max I have been following your journey the highs and lows I have just started my Constructo Victory 1/94 and am benefitting from your fantastic log build your photos and detailed explanations are superb, the benefits I have gained so far include using the blocks to get my angles, I have gone straight for Gorilla glue, using foil between the blocks, I'm also considering permanently securing the blocks in place that was suggested to you by another member, Keep up the great work mate and who knows when this pandemic is over Dublins not that far from me(Leeds) I would love to buy you a pint of Guinness as way of a thank you
 
Hello, Ship of Scale friends,

After reading around the Ships of Scale forum, I decided to start my own Build Log. I have no experience building such models, so it will be great if you could support me here. My model is H.M.S. Victory wooden ship from Constructo.

Size
It is a 1 to 94 scale model.
Length: 111cm
Width: 40cm
Height: 80cm

Why did I decide to build Victory?
First of all, I like how it looks. It is big enough to dig into the details. Also, I wanted to work less with colors, and focus on wood and oil when building. When I was searching on the internet, I checked different models, but after seeing HMS Victory, my eye didn't stop with the other model.

8 years ago, I did try to start with the Deagostini HMS Victory, however, I made a mistake. I decided to wait for all 120-140 (don't remember for sure) magazines before I start. So I've lost motivation. While waiting, I bought a small version of HMS Victory with a solid body, so I can work on something while waiting for Deagostini complete set of magazines. I've built it, but, it is nothing compared to kits when you have to build a ship body yourself.

Pricing
The price for this wooden ship model from Constructo is £309 on Amazon UK. I've seen on other websites plus-minus £30.

Quality
Pictures on the Amazon UK website for this model were better than other ones I've checked, that was one of the reasons I stopped with Constructo. The box, as well as its content, is just great. I have no previous model ships to compare with, but from what I saw on the other videos, mine is pretty good quality.

Motivation
In order to keep myself motivated and receive some feedback, I created a YouTube channel called Wooden Ship Crafts. The plan is to upload my progress on a weekly basis.
Also, this particular model is a birthday present from my wife, so I just don't have any excuse, why shouldn't I build it :).

I could never imagine, I would find a forum like this where like-minded people build and share their progress. So I am happy to find Ships of Scale forum as well as the Build Logs.

What's inside the box?
In the video, I've created a few days ago, I show the content of the H.M.S. Victory wooden ship model. Have a look, and let me know your thought or if you have any questions related to the content or any item inside. I will be happy to answer.


HMS Victory History
HMS Victory is a 104-gun first-rate ship of the line of the Royal Navy, ordered in 1758, laid down in 1759 and launched in 1765. She is best known for her role as Lord Nelson's flagship at the Battle of Trafalgar on 21 October 1805.

She additionally served as Keppel's flagship at Ushant, Howe's flagship at Cape Spartel and Jervis's flagship at Cape St Vincent. After 1824, she was relegated to the role of harbour ship.

In 1922, she was moved to a dry dock at Portsmouth, England, and preserved as a museum ship. She has been the flagship of the First Sea Lord since October 2012 and is the world's oldest naval ship still in commission, with 241 years' service as of 2019.
Hallo Max alias @Wooden Ship Crafts
we wish you all the BEST and a HAPPY BIRTHDAY
Birthday-Cake
 
Hi Max I have been following your journey the highs and lows I have just started my Constructo Victory 1/94 and am benefitting from your fantastic log build your photos and detailed explanations are superb, the benefits I have gained so far include using the blocks to get my angles, I have gone straight for Gorilla glue, using foil between the blocks, I'm also considering permanently securing the blocks in place that was suggested to you by another member, Keep up the great work mate and who knows when this pandemic is over Dublins not that far from me(Leeds) I would love to buy you a pint of Guinness as way of a thank you
I am happy to see you found my build log interesting. Indeed, the pandemic did affect my progress, however, I am positive that the Constructo Victory is the build for years, and I can make it anyway :). Happy to follow your progress.
 
Black Friday!
Good day to update my build log.

I have some progress with my Victory, according to my instructions book, I am on step 10. I don't want to even check to see how many left haha.

Just for my followers who also build Constructo Victory and you are stuck as I did on the step with two stairways. And probably for my future self.
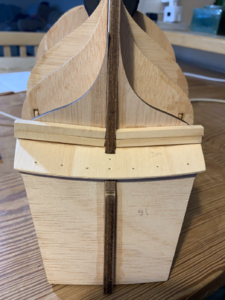
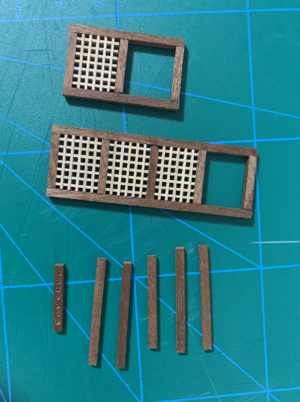
The no. 32 and no. 33 uprights frames are ready for cut and you don't need to build on your own. There are pieces in a small plastic envelope prepared for stairways. The only thing you have to do is to find the right 0.5x5x600 Sapelly part that should be used for steps. That's it. I've spent ages to find out that 32 and 33 exist.

Ok, so I have two stairways ready to go.

Grating comps pieces no. 35 require sanding. I sanded around 1.5-2 mm in order to make them fit into frames and make them look like 2 pieces somehow identical.

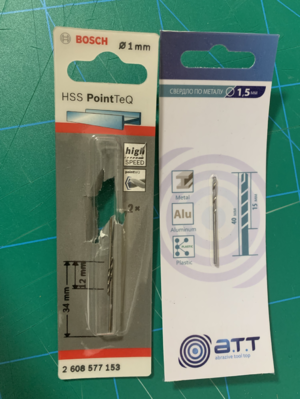
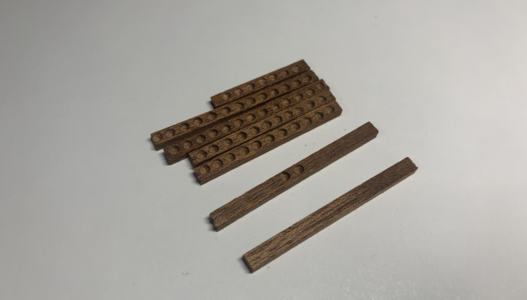
I bought 1mm and 1.5mm diameter drill to make wholes for ammunition crates no. 41, 42, and 43. While writing this, I found out that I need to have a 2 mm diameter, but when I prepared my first part with 1mm it is looking like the holes shouldn't be bigger. I will revisit and maybe go with at least 1.5 mm.
 
A small update on my ammunition crates progress.
I've bought a 2mm drill and started work over the weekend on ammunition crates. 2 pieces to go.
Screenshot 2020-11-29 at 21.37.17.png

Any recommendations for the future on what instrument do you use for such type of work are more than welcome.
 
Back
Top