Hayling 1760 - Model Ship Dockyard - Pear

Joined
Aug 22, 2019
Messages
51
Points
78

This is my first ever wooden kit. I have Scratch built, using a supplied hull, various British Navy ships, and one other wooden kit. That was a total failure, not even good for the fire as I had resorted to Cyno as a last ditch repair. It failed.

So I am going to need a lot of hand holding.

First question, recommended glue any one?

Not being the most patient of people I have cracked on.

The first thing I had to do was apply heat to my cutting mat, and then put a large weight on it to flatten it. The mat had been used as a guard to protect cables from our puppy and had warped. Note to self, she loves chewing wood, so don't drop anything.

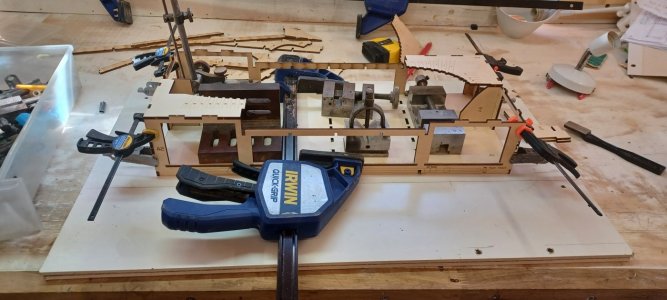
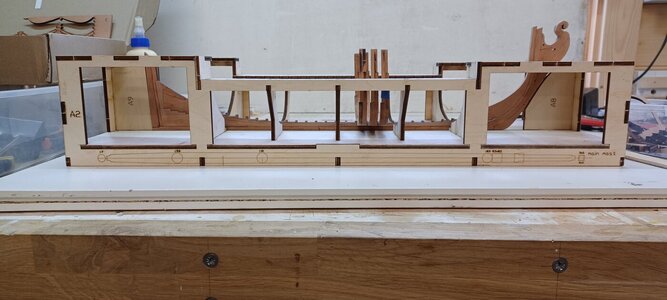
The first step is to build the jig. A nice easy introduction to the build. Every thing just slots together, beautifully, it's dry fitted at the moment. Just as well as the fore and aft jigs (A3) are handed and I had put them in the wrong way round. Easily rectified.

Now got to take the mutt out for a walk, and will glue up tomorrow.

The glue sitting in the jig are what I shall use for the jig.

Colin
Building Jig.jpg
 
First question, recommended glue any one?
First off, thank you for starting a build log. If you have a flat glass, a Long time back they put it on top of the table as protection, I would recommend putting together the jig on that surface. Or any perfectly flat surface you may have (marble countertop will suffice), just don't let your wife know. In general, the base (jig) is one of the important elements of the assembly, It must be absolutely symmetrical, without any warps.

As for the glue, personally, I am using PVA-based glue. I have many different brands and like them all. I use Elmer's carpenters Max, I also use Gorilla wood glue. I also use Titebond. They are all PVA-based glues and work excellent for wood.

You are off to a good start, I will be watching your build...
 
Looks like great start on the project, keep updates coming, we will be sitting back and watching.

On of best parts of build logs, is you can ask questions, post photos of what problem is and great folks here will normally give you a direct answer or options on how to fix or work the problems you have.

We are not all experts so don't think your work must be perfect masterpiece, we all have issues and skill level challenges to overcome.
 
Very good start - I will follow this log with big interest - also because the kit is very interesting
 
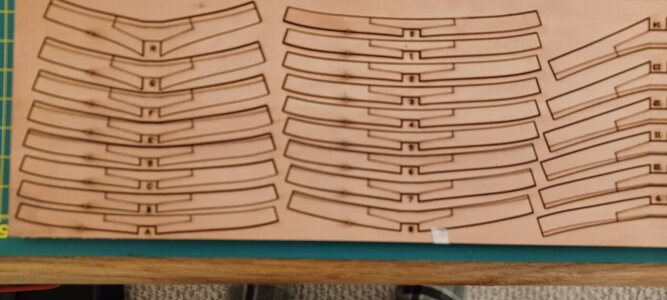
First stage of the glue up of the jig today. Very straight forward, all parts fit nicely. Had a closer look at the frames today. Will need to sort out a methodology or I can see myself getting very confused, there's a lot of them, made up of a lot of parts. The Irwin clamp is just a shade overkill. but its all I had wide enough, thought it might be better than my 4ft metal sash clamp.

20220826_094841.jpg
 
JUST MY PERSPECTIVE ON YOUR COMENT ABOUT METHOLDOGY OF FRAMES THE FIRST THING I DO IS GET BAGGIES THE LUNCH KIND AND LABEL EACH BAG WITH MODEL AND FRAME PARTS NO. OR SOME IDETYFING MARK FOR THE FRAME MAKE UP MARK ON THE FRAME THE NO IN A PLACE YOU CAN ERASE IT ONE AT A TIME YOU CAN GET EASILY CONFUSED AND BELIEVE ME IT IS A MESS TO STRAIGHTEN OUT. GOD BLESS STAY SAFE ALL DON
 
JUST MY PERSPECTIVE ON YOUR COMENT ABOUT METHOLDOGY OF FRAMES THE FIRST THING I DO IS GET BAGGIES THE LUNCH KIND AND LABEL EACH BAG WITH MODEL AND FRAME PARTS NO. OR SOME IDETYFING MARK FOR THE FRAME MAKE UP MARK ON THE FRAME THE NO IN A PLACE YOU CAN ERASE IT ONE AT A TIME YOU CAN GET EASILY CONFUSED AND BELIEVE ME IT IS A MESS TO STRAIGHTEN OUT. GOD BLESS STAY SAFE ALL DON
I thought I might cut a length of masking tape and wrap it around the frame and number it. I hadn't considered baggies, good idea, may be safer.
First off, thank you for starting a build log. If you have a flat glass, a Long time back they put it on top of the table as protection, I would recommend putting together the jig on that surface. Or any perfectly flat surface you may have (marble countertop will suffice), just don't let your wife know. In general, the base (jig) is one of the important elements of the assembly, It must be absolutely symmetrical, without any warps.

As for the glue, personally, I am using PVA-based glue. I have many different brands and like them all. I use Elmer's carpenters Max, I also use Gorilla wood glue. I also use Titebond. They are all PVA-based glues and work excellent for wood.

You are off to a good start, I will be watching your build...
Marble work top?? Jeez if we had one, and I used it for such a purpose my wife would have testicles for a necklace!!! I actually used the side of a piece of flat packed furniture (probably Ikea, but other brands are available). Would like to say I took one apart for the purpose, but no it was spare and used in the past for setting out/laying up various projects.
 
JUST MY PERSPECTIVE ON YOUR COMENT ABOUT METHOLDOGY OF FRAMES THE FIRST THING I DO IS GET BAGGIES THE LUNCH KIND AND LABEL EACH BAG WITH MODEL AND FRAME PARTS NO. OR SOME IDETYFING MARK FOR THE FRAME MAKE UP MARK ON THE FRAME THE NO IN A PLACE YOU CAN ERASE IT ONE AT A TIME YOU CAN GET EASILY CONFUSED AND BELIEVE ME IT IS A MESS TO STRAIGHTEN OUT. GOD BLESS STAY SAFE ALL DON
I thought I might cut a length of masking tape and wrap it around the frame and number it. I hadn't considered baggies, good idea, may be safer.
 
First stage of the glue up of the jig today. Very straight forward, all parts fit nicely. Had a closer look at the frames today. Will need to sort out a methodology or I can see myself getting very confused, there's a lot of them, made up of a lot of parts. The Irwin clamp is just a shade overkill. but its all I had wide enough, thought it might be better than my 4ft metal sash clamp.

View attachment 325509
Do you have any machine tools? I see v-block, angle plate milling vice, surface guage etc.

EJ
 
Colin, You are off to a good start, PVA glue is the safest way to start. All possible errors con be corrected and redone if something goes wrong during the pasting process. Don't worry about errors, check everything twice or more. Never proceed with the work if you have doubts. Accumulated errors will destroy your final work.
Good luck !
 
Do you have any machine tools? I see v-block, angle plate milling vice, surface guage etc.

EJ
Only a Proxon mill. The Blocks you see were made by either my dad, an old school precision engineer, or myself a failed mechanical engineer (bailed out of an apprenticeship). I did have more very useful "bits/tools" but when I cleared out Dads garage, the wrong boxes were sent to the skip. Just a tad annoyed.
 
We all tossed things we wished we had saved. I have my fathers machinist's chest, but not many of the tools that were in it pertained to machining as he had it when he worked for General Motors back in 1946 or 47 as a maintenance electrician. Wile in my 30's, I worked as a machinist for Oliver Machinery Co, a builder of industrial woodworking machines. On the job training, worked on 3 sizes of vertical milling machines, two sizes of 6" and " boring mills, Blanchard grinder and a surface grinder with a 10" wide grinding wheel. I accumulated a larger machinist's chest and a number of machinist's tools and measuring / layout tools. I only stayed with that profession for about 4 years though, as I found I could make more money as a self employed home builder / contractor. I still have all that stuff and use some of it in model building. I did acquire a "mini" bench lathe at one time, but found it not capable of doing what I wanted to do, so sold it. I wish I hadn't, as it would have been perfect for model building and nowadays would cost 2 or 3 thousand dollars to buy new. Too late now. I've been looking for used mini or small bench lathes and mills, but with no success. Will just keep looking. What I really would like, with one of each machine and the accessories and tooling would cost me 5 to 7 thousand dollars. Try justifying that to the Admiral.

EJ
Not happening. Actually, she wants to buy me a scroll saw and a band saw. No where to put them. I thought about putting in a shed in the back yard to make room in the garage. Then I added up the cost for everything and decided for myself it’s not happening. I can still dream.
 
Put frame zero together yesterday, jumped the Keel construction as some of the parts are undercut, Victor is sending out replacements.
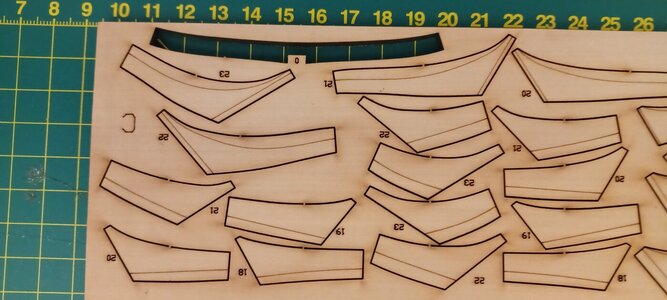
All went well, exept its wrong. Must have been on another planet when I did it. I used the wrong center section. Turns out there are 2 much the same, on different sheets. ones 4mm, the other 5mm, both different woods, (as is blatantly obvious after the vent). I have used a 4mm, should have used the 5mm!!!
Started to clean up the frame but thinking I may well do that when all the framing is complete and the hull removed from the jig. As separate frames I feel that they are somewhat fragile, once complete they will be much stronger, and it will fair better. I will sand of the glue blobs.
The template is placed in a clear plastic envelope which is the taped down to a soft wood board. pins are pushed in along the lines and the parts then mounted as required.
Next frame will be 1, must do it right this time.

Frame 0.jpg

Sheet I should have used.jpg

Wrong sheet.jpg
 
The boss hasn't been around much for a few days so I have been free to play. So keel shaped, seeing how many different shaped pieces are to go together, it all went rather well. I do have a few gaps, but Pear sawdust and glue will help disguise the errors. ( basically, I am sure I can improve on that fit. I couldn't!)
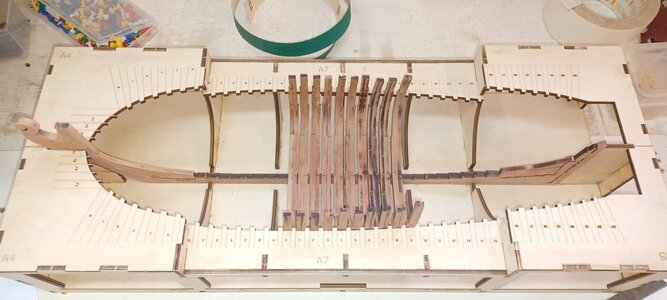
3 frames dry fitted. Are you meant to glue the top deck down? only I have found that to get the frames out I had to lightly squeeze the frames in.

Colin

First 3 frames.jpg
 
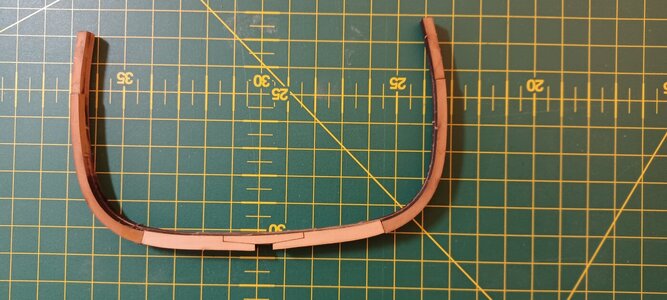
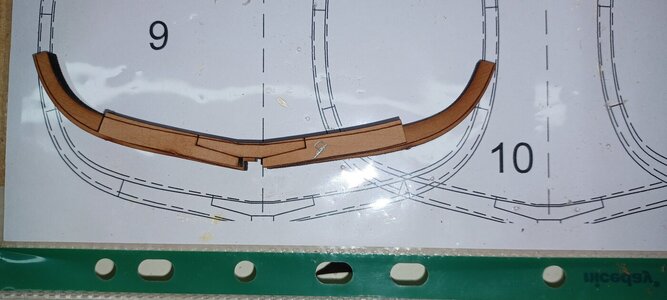
Help. I have now got on to frames6,7,8. These are the first ones that need sanding to a profile/sanding lines. So, take the "lower" 3 parts ( left & right, and a center piece that joins the previous 2) all 3 have lines etched on them. Thing is, how do you glue them together? do the edges go together and then you sand to a line, but doing that you lose one of the etched lines. Or, do you glue them so that the center piece touches the etched line of the 2 parts? as in photo. Just want tyo make sure before I go any further.

Frame 9 query.jpg
 
I have now worked out that I do not have a clue what I am doing.
I have built Frames 6,7 & 8 wrong. Partly due to the instructions being wrong, and partly because I'm an idiot. The A & B parts sit flush to each other with the etched lines visible on both sides, makes perfect sense as that gives you the sanding lines. I did try that initially but it didn't work out the way it said in the instructions. I should have gone with my gut feeling. I now have 3 frames where the B part faces the wrong direction. I can fix that as Victor has made good on his word and sent out replacement sheets which will give me all the parts except the center B part. I'm thinking I might cut up the wrong frames, and sand/shape till I achieve the B part I need. Not sure yet. Back on track now and enjoying the build. Victor has now corrected the instructions.
The photo shows 6,7/8 facing the wrong way.

20220911_105226.jpg
 
Back
Top