-

Win a Free Custom Engraved Brass Coin!!!
As a way to introduce our brass coins to the community, we will raffle off a free coin during the month of August. Follow link ABOVE for instructions for entering.
-

PRE-ORDER SHIPS IN SCALE TODAY!
The beloved Ships in Scale Magazine is back and charting a new course for 2026!
Discover new skills, new techniques, and new inspirations in every issue.
NOTE THAT OUR FIRST ISSUE WILL BE JAN/FEB 2026
You are using an out of date browser. It may not display this or other websites correctly.
You should upgrade or use an alternative browser.
You should upgrade or use an alternative browser.
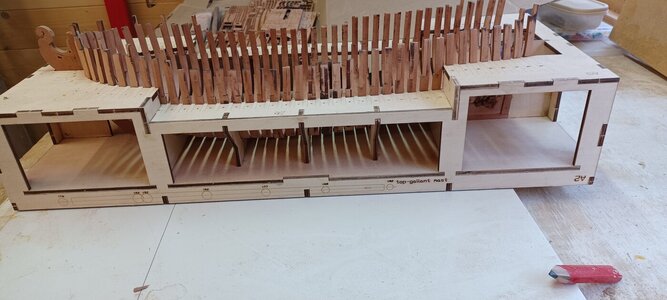
I'm trying one of kits these as well but got stuck at an earlier point than what you've done. When building the cradle I didn't see that the two pieces labeled A3 were slightly different. The taller one should go in the stern and the shorter in the bow. But I thought they were the same piece, so got them reversed. However it looks like the critical thing is that pieces A4 and A5 fit into the sides, A2, properly. As long as I do that things should be OK. It'll just mean altering the front end of A4 it fits flat on A2.
Like you showed in this photo it was correct how the frame elements have to be positionedHelp. I have now got on to frames6,7,8. These are the first ones that need sanding to a profile/sanding lines. So, take the "lower" 3 parts ( left & right, and a center piece that joins the previous 2) all 3 have lines etched on them. Thing is, how do you glue them together? do the edges go together and then you sand to a line, but doing that you lose one of the etched lines. Or, do you glue them so that the center piece touches the etched line of the 2 parts? as in photo. Just want tyo make sure before I go any further.
View attachment 327619
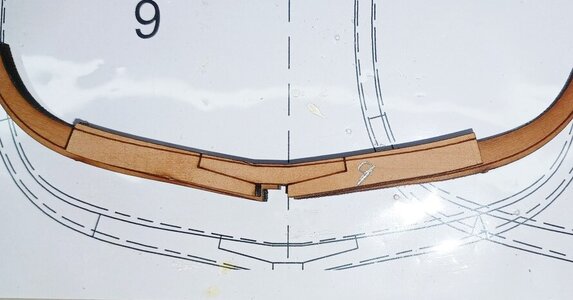
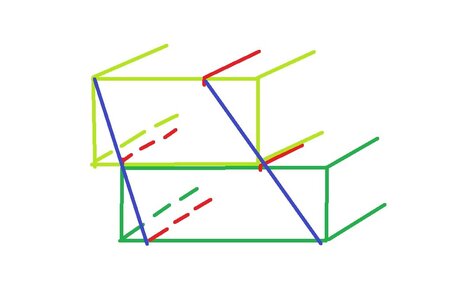
I tried to make a sketch showing a tcpical double frame
green are the two framw element, so f.e. two futtocks
red are the laser lines on the elements
blue are the final edges of the finished sanded frame, when you follow the red laser marked sanding lines
Oh NUTS!!!!!!!!!!!!!! I asked Victor how to do this and think I may have interpreted his answer wrong. I have ended up putting the 2 layers on top of each other, with the edges flush, with the etched marks facing out. I did do 3 the way you have shown, but that didnt seem to work out either. I am now up to frame 15, with all edges flush.Like you showed in this photo it was correct how the frame elements have to be positioned
View attachment 328182
I tried to make a sketch showing a tcpical double frame
green are the two framw element, so f.e. two futtocks
red are the laser lines on the elements
blue are the final edges of the finished sanded frame, when you follow the red laser marked sanding lines
View attachment 328183
I hope, that I did not misinterprete your photoOh NUTS!!!!!!!!!!!!!! I asked Victor how to do this and think I may have interpreted his answer wrong. I have ended up putting the 2 layers on top of each other, with the edges flush, with the etched marks facing out. I did do 3 the way you have shown, but that didnt seem to work out either. I am now up to frame 15, with all edges flush.
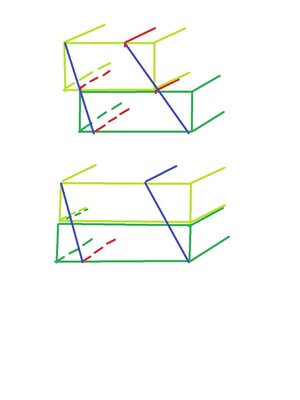
You have to check this with the drawings where the sanding lines are also shown.
Check the width of parts and compare with the lines on the drawings
The top or the lower system
On the top the parts are smaller and have usually on both sides the laser lines
On the bottom they are wider and have only on one side a laser line
Hello Uwek, thank you for taking the time to help. I am now pretty sure that the lower of your sketches is the correct way. However I shall proceed with caution and check a bit more carefully in future.I hope, that I did not misinterprete your photo
You have to check this with the drawings where the sanding lines are also shown.
Check the width of parts and compare with the lines on the drawings
The top or the lower system
On the top the parts are smaller and have usually on both sides the laser lines
On the bottom they are wider and have only on one side a laser line
View attachment 328448
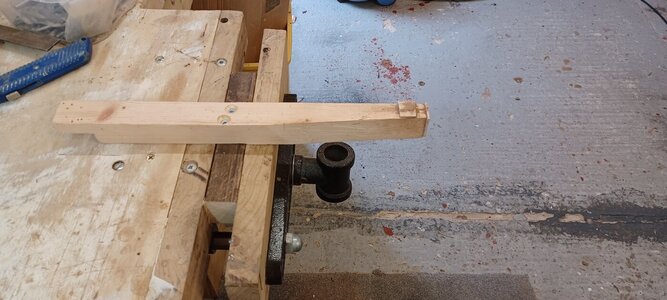
My fingers were getting kind of sore and achey from holding the frames. Due to the change in thickness I didnt want to put them in a vice, so I came up with this anvil, It certainly helps and has made sanding easier, especially on the exterior. Just a piece of junk wood, tapered with a stop on the top and on the ends.

- Joined
- Aug 14, 2018
- Messages
- 825
- Points
- 403

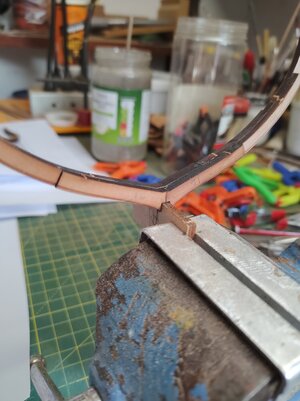
Hi Colin, I have been watching you log and have been wondering if a small stepped jig the same width as the slot in the frame that fits into the keel came with your kit? There should be a rise of about 2mm. If so then you would put the 'b' frame in the lower part of the slot and the 'a' frame in the higher section, at least that is how it works with MSD'S Blandford kit. Hard to explain but these pic's might help.
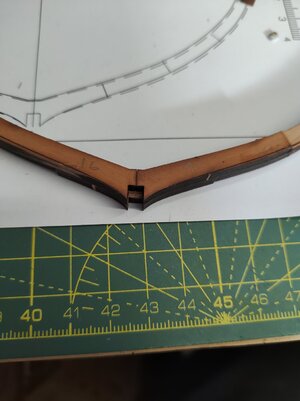
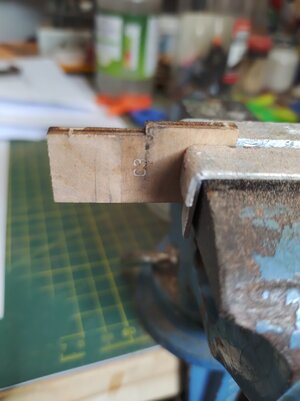
I have been putting the sections with both etched sides facing out so that they can be sanded to the visible fairing lines. Cheers JJ..


I have been putting the sections with both etched sides facing out so that they can be sanded to the visible fairing lines. Cheers JJ..
I haven't found any such jig, however I did knock one up for myself, just a piece of scrap the right thickness to suit the keel. It just lines up the center and the 2 Left & Right sectionsHi Colin, I have been watching you log and have been wondering if a small stepped jig the same width as the slot in the frame that fits into the keel came with your kit? There should be a rise of about 2mm. If so then you would put the 'b' frame in the lower part of the slot and the 'a' frame in the higher section, at least that is how it works with MSD'S Blandford kit. Hard to explain but these pic's might help.
View attachment 328646View attachment 328647View attachment 328648
I have been putting the sections with both etched sides facing out so that they can be sanded to the visible fairing lines. Cheers JJ..
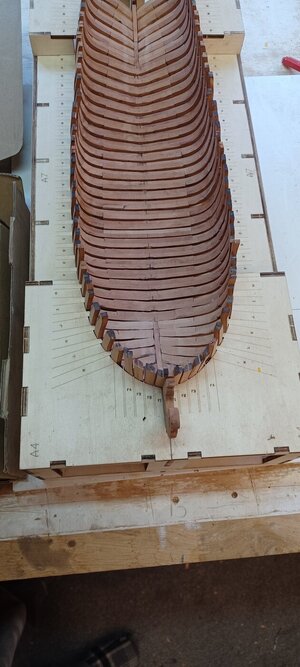
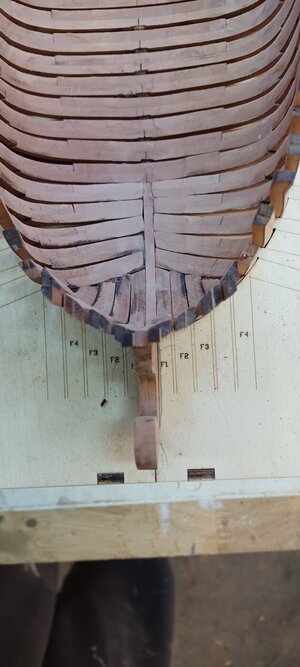
Hi all. Finished the "centre" frames, reasonably happy, but as my report cards from the distant past used to say "could do better". I have some small wire brushes that fit in to my mini drill, antiquated Black & decker" hobby drill, great to use but now sounds like a bucket of bolts. Could do with replacing it, any suggestions? Now I am on to the stern frames. These are a total pain as they are in 2 halves which I find very difficult to hold whilst sanding. May go over to Super glue for these half frames as there is no way to clamp them in place whilst the white glue I am using sets.
I hadnt quite appreciated the amount of repetitive work required and I have really slowed down.
Not all my frames are coming out the to the same level at the tops (sheerline?), but hopefully I can/will sort this out later.
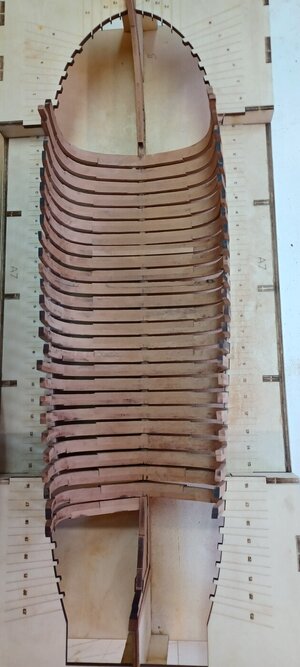
I hadnt quite appreciated the amount of repetitive work required and I have really slowed down.
Not all my frames are coming out the to the same level at the tops (sheerline?), but hopefully I can/will sort this out later.

Very nice progress, Colin! Your Hoy is getting shape.
- Joined
- May 31, 2021
- Messages
- 86
- Points
- 88

Hi Colin, I am a bit ahead of you and when it came to profiling those bow and stern 1/2 frames, I bought this from Amazon. It feels like it's built as well as the much more expensive Dremel cordless. It made light work of the sanding but you will need to get lots of the largest sanding drums and a box of face masks 'cos it don't half make a lot of dust.
Cheers
SabreCut CraftMate SCMG002UK Lithium Ion 10.8v Cordless Rotary Tool Multipurpose with 42 Accessories Included
Good work BTW. Mine is also of the 'could do better' but I'm persevering with it.Cheers
Greetings Tom, We would like to see the progress of your Hoy assembly in a build log. How about that? Is it feasible? Thank you in advance,Good work BTW. Mine is also of the 'could do better' but I'm persevering with it.
So which bit do you use?Hi Colin, I am a bit ahead of you and when it came to profiling those bow and stern 1/2 frames, I bought this from Amazon. It feels like it's built as well as the much more expensive Dremel cordless. It made light work of the sanding but you will need to get lots of the largest sanding drums and a box of face masks 'cos it don't half make a lot of dust.
SabreCut CraftMate SCMG002UK Lithium Ion 10.8v Cordless Rotary Tool Multipurpose with 42 Accessories Included
Good work BTW. Mine is also of the 'could do better' but I'm persevering with it.
Cheers
I haver a selection of "mini" drum sanders but found them to be rather aggressive, care needed. I learnt (or didn't) the hard way. ! slightly mullered frame!
As for new mini drill I am looking at the Proxxen. I have had many "cheap" mini drills and they have all not been too good.
Last edited:
- Joined
- May 31, 2021
- Messages
- 86
- Points
- 88

I didn't use a drill bit, just the sanding drums. I know exactly what you mean by 'aggressive' - especially the 80 and 120 grits but I've found some 240's which are a lot less evil.So which bit do you use?
I haver a selection of "mini" drum sanders but found them to be rather aggressive, care needed. I learnt (or didn't) the hard way. ! slightly mullered frame!
As for new mini drill I am looking at the Proxxen. I have had many "cheap" mini drills and they have all not been too good.
Cheers
- Joined
- May 31, 2021
- Messages
- 86
- Points
- 88

Hi Jim, you do realise that I'm the worlds worst when it comes to remembering to take photos and post updates? I will though, start a build log soon - and cross fingers I keep it up to date.Greetings Tom, We would like to see the progress of your Hoy assembly in a build log. How about that? Is it feasible? Thank you in advance,

Cheers
many thanks for accepting the offer, but don't worry if you forget to post in a timely manner, we will remind youHi Jim, you do realise that I'm the worlds worst when it comes to remembering to take photos and post updates? I will though, start a build log soon - and cross fingers I keep it up to date.
Cheers
Very good progress with a good result - 

- Joined
- Apr 16, 2021
- Messages
- 44
- Points
- 103

Colin great to see some progress. Looks like you made the same mistake as me on the hawse pieces. If you look in my build log from #36 you can seen what is wrong. I corrected it after that the fit was much beter


