Hayling Hoy: POF kit [COMPLETED BUILD]

Joined
Mar 17, 2021
Messages
286
Points
238

Location
San Diego, CA
Hi Everyone,

I've been trying to work my way up through different skill level kits to get to, some day, be able to build my own plank-on-frame scratch model. Now there seems to be a number of nice POF kits in quality hardwood from China and I, perhaps foolishly, decided to cut the line. I had been looking at David Antscherl's book from Seawatch on Hayling Hoy from the 1760's. It was to be my first POF scratch build, some day. It seemed like a good choice, but the primer for the book I bought turned out to be "The Fully Framed" model series of 4 books plus an optional on rigging. So, out of reach for someone who has built 5 kits and struggled with a hybrid scratch/kit project for traditional building techniques on 20th work boats. Until I saw some of these POF kits.
The real issue is payoff. I have some beautiful models I built but they are mostly basswood and airbrushing. Somehow, it's not the same as a hardwood POF with frames showing. I couldn't start of with the Sovereign of the Seas but found Hayling Hoy offered by Dry Dock Models and Parts. The price was right too. I ordered my kit in cherry, perhaps my favorite wood.
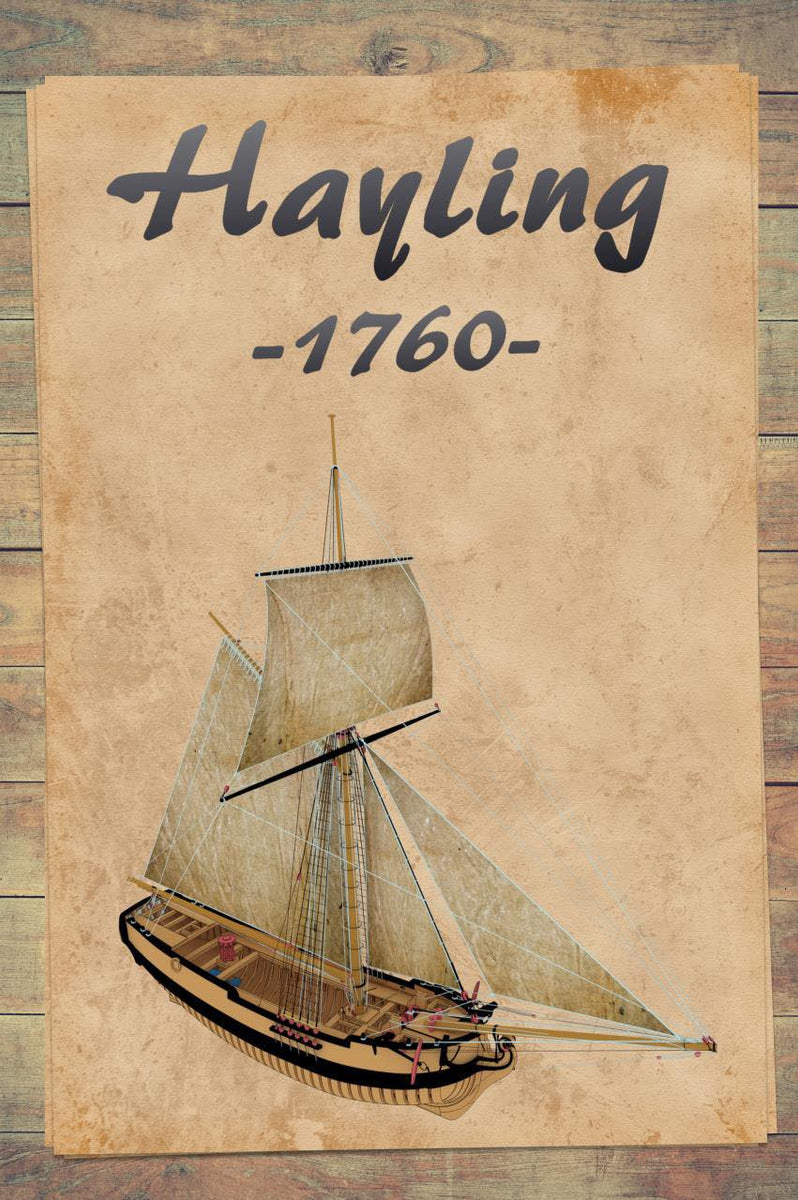
I got the kit and, as I suspected, it's not for beginners. The biggest challenge that I have gathered from these Chinese models are the instructions. This one has nice illustrations and a short couple of pages of instructions, but there is still plenty left to imagination and the broken English can be a little tough at times. But I have heard of another one of the POF kits where the instructions are nearly incomprehensible. I think this manufacturer tried to make up for a lack of proper grammar by including excellent illustrations. I'll take it.
So here it is. My expectations are sky high but my goals are low. If I can get to the fully assembled frame and have done a nice job with it, I will be happy. Anything past that is all gravy.
 
Last edited:
I thought of doing an unboxing, but wanted to get right to it; there's so much to do. Plus, if you like what you see and want to try it yourself, i didn't want to rob you of the pleasure of pouring over the well cut pieces of clear good quality cherry, the other parts from various materials, and one nicely cast/printed galley oven. One thing you notice is the incredible density of parts on the laser cut sheets. I have a whole bunch of parts carriers from other models. No need to keep the ones from this model unless you just want a shaving. But maybe this thrift has contributed to the very reasonable price.

The illustrations, four view plans, presentations, and instructions are on a USB stick. I had a lot of trouble with the files. Fortunately, there are trouble-free versions posted in a Google Drive site. The link is further down the webpage posted above. It's great you get to see all of that information before you buy it. That's what sold me on the kit. The instructions made it seem like an advanced intermediate level builder could handle parts or all of the model.
 
So, off to the races. I started this kit beginning of June 2023. Let's see how long it takes/how long I can enjoy it.
The instructions for the keel were pretty easy, got most of the information from the pictures.
1692715172190.png
You can see the printed illustrations in the back. All the parts are numbered as best I can tell, and the illustrations have the callouts.
For reference, I am using Titebond Quick & Thick for adhesive. It has a good working time if you have a very good fit and have practiced assembling in advance. It's pretty fast. You get strong adhesion in about a minute, sufficient adhesion for further assembly in 5, but would recommend overnight if you want to work the wood. The glue tends to be a little buger-y, be sure to apply carefully with a brush and clean up any squeezed out material as you go. The nicest thing is the short but manageable work time makes it easy to go on to the next part quickly, for those who are driven for showing progress. Plus, it is still PVA so i-propanol/water still work to un-bond and clean up parts. But enough about glue.

I cleaned up the parts for the bow. They look great but I made a mistake. In my jeal to remove char, I probably oversanded/filed, especially on the decorative piece. It's a shame, but it doesn't fit together air-tight anymore. I did my best and used a little filler made from cherry saw dust when I finally assembled it. It doesn't look so bad, but total rookie mistake.
1692714898544.png

In my defense, and as an overall comment, the wood does seem a little scorched and the cuts are less than smooth. You'll want to do a lot of careful finishing. But the quality of the wood is such that it's worth it. If you make it to 240 grit, you'll get a nice luster and my color tone on the cherry is medium. I'm sure it will vary from kit to kit, but I wasn't taken by surprise.
**************************************************
NOTE FROM MY FUTURE SELF: the false keel is not a pearwood strip anymore as called out in the instructions. It's part L22a-c on sheet 10. It's a nice, so far undocumented, upgrade. I'm looking into what the engravings are on the pieces. Unfortunately, in the future, the keel assembly is already in the jig getting framed.
 
Last edited:
I built the jig for framing. It wasn't too bad. Sorry I don't have any pictures, I was just on fire. It took a minute to figure out how the pieces go together, but rest assured, they do. It's kind of cool, they have guides for shaping the spars etched onto the building jig. Gosh, I definitely don't want to make room by chucking the jig too early.

This leads to the frames. The parts for each frame are three different thicknesses. It's easy to follow once you figure out which part carriers have what. I made copies of all the frames drawings and cut one out per frame to use as a template for each frame assembly. I removed char from the ends but left the char on the side in anticipation of sanding things flush and to a bevel.
1692715684168.png
I think the template is a good practice but it lead to a bit of a deception. I don't know if I was eyeballing parts onto the template wrong, but I got several a bit cock-eyed. This led to some painful disassenbly (Titebond Quick & Tight seems to be more stubborn about de-bonding than other PVA glues I've used). Also, I ended up carrying some forward and it led to disaster, but that's later.

I found assembling 3-4 at the same time was about right. By the time you cycled through each part for each frame, the adhesive was sufficiently bound to be stable.
1692715935321.png
The key here is to STAY ORGANIZED. The parts aren't marked unless you mark them so keep everything segregated or just do one frame at a time. Fortunately, I stayed organized. I had 4 Ziploc bags that I marked with frame numbers using a Sharpie, deposited the pieces I cut out, and then laid out the individual frames on the templates that I taped to the workspace. After assembly I reused the bags after re-marking. I'm sure you have your own way to do it, but just be careful if you want to do more than one at a time. Oh, and don't forget to mark the assembled frames.
 
I show the frame assembly using pieces of the part carrier with different thicknesses to hold the frame straight to dry on the template. In retrospect, I wouldn't recommend it. It lead to some tilting into the plane and it turns out it's just not necessary. If you squeeze the parts together really hard until they are cold-welded together and then position them, you can just wait 30-60 seconds before you put them down without the spacers. I think it made for a better joint as well. If very little glue squeezes out, I would pull it apart and add more before trying again. Of course, be mindful of extra glue sticking out. It will gum up your sandpaper later if you don't clean up now.
 
Had a huge break in all garage projects. A wedding, family reunion, and lingering family for a week. Yikes! Glad to get back to the shop.
Here I am sanding of char on the face of the frames. I stopped doing that. I was getting bits of glue and leftover char on the sides back onto the faces. I decided to finish them at the end instead.
1692716622070.png
Now that I am, in real time, further ahead, I might have continued sanding the faces. You still have to re-sand the bulk of the frame faces, but the ones I did it in advance as well just looked neater. Up to you, it's a lot of time for a marginal gain. But if you, like me, are really in it for the frames, it might be worth it.
 
Here is a first wave of frames going into the building jig.
View attachment 390911
I had problems fitting into the keel. After trying to get the frames between the spacers, for some reason I decided to use a chisel to neatly cut away a little of the spacer and squeeze in the frame. Jump ahead to the future and I will find out some frames are just too thick for their space on the keel. On the half frames, where you can't just cut away the spacers, some parts were too thick and had to be sanded quite a bit for thickness before they dropped in neatly, especially at the bow. I have a feeling I am going to pay a price in the future for my promiscuity with the chisel.

1692716840675.png
 
I forgot to mention about the false keel. No parts in the box. My guess is that shipping replacement parts from China would be prohibitive so I sought some online. I won't mention the vendor, but it turned out to be harder and longer than getting them from China. I should have asked, Dry Dock Models and Parts have been really good to me. I am still assembling frames with no false keel, but the space was pretty small (2mm), and in actual construction it was fastened later anyway.
Here's a shot I forgot to post earlier of the keel assembly. I was contemplating getting the tarred flannel look. To that end, I got the loose char off but left the darkened wood, assuming it would give good adhesion (which it did). I think it looks pretty good. It might have been better with some pigment mixed into the glue, but it's a start. Boy, do I wish I had left the dark wood on the pieces of the bow, it would have fit together better and looked sweet.
I stopped because I didn't know exactly what joints were treated this way and which weren't. Also, the rising deadwood is modelled as a single piece, so already missing some detail. In retrospect and looking at this picture, I wish I had done a little research. But this is my first POF. I will focus primarily on the assembly and the quality of the finish on the wood. Next time, I'll experiment more with tarred flannel simulation and do my homework.
1692717689196.png
I wish I had done it, but glad I didn't let my perfectionism get in the way of getting something done. Live and learn.
 
Last edited:
I started cleaning up frames. I used a disc sander for the outside as much as I could and a Dremel for the inside.
1692717994984.png
The hand-held Dremel was a disaster. It lead to all sorts of chaos: erratic edges, thin spots, unwanted bevels, and boo-boos of various kinds. I reduced the grit from 120 to 400 and it helped, but it was still a bit erratic. I ruined frames, 0, 2, 3 B, and C right from the get-go with frame 0 being the worse. That frame was so far gone that I would have never gotten a fair looking clamp in there.
I was ready to give up. I could try to fair the inside of the frames, despite the instructions recommending against it (and then suggesting it again later). But the difference in thickness was too much I thought, it would be too much thinning and work to get a smooth run. I decided to give up.
But then I decided I could do better. I was going to fabricate the frames from the drawings.
 
I forgot to mention about the false keel. No parts in the box. My guess is that shipping replacement parts from China would be prohibitive so I sought some online. I won't mention the vendor, but it turned out to be harder and longer than getting them from China. I should have asked, Dry Dock Models and Parts have been really good to me. I am still assembling frames with no false keel, but the space was pretty small (2mm), and in actual construction it was fastened later anyway.
Here's a shot I forgot to post earlier of the keel assembly. I was contemplating getting the tarred flannel look. To that end, I got the loose char off but left the darkened wood, assuming it would give good adhesion (which it did). I think it looks pretty good. It might have been better with some pigment mixed into the glue, but it's a start. Boy, do I wish I had left the dark wood on the pieces of the bow, it would have fit together better and looked sweet.
I stopped because I didn't know exactly what joints were treated this way and which weren't. Also, the rising deadwood is modelled as a single piece, so already missing some detail. In retrospect and looking at this picture, I wish I had done a little research. But this is my first POF. I will focus primarily on the assembly and the quality of the finish on the wood. Next time, I'll experiment more with tarred flannel simulation and do my homework.
View attachment 390912
I wish I had done it, but glad I didn't let my perfectionism get in the way of getting something done. Live and learn.
Hi Glenn ,do you still need the fakse keel replacement part?
 
HI GLENN A TIP FROM THIS OLD ONE ABOUT DEBONDING PARTS I HAVE POSTED THIS BEFORE MOST HAVE NOT TRIED IT BUT HERE IT IS I HAVE USED THIS FOR YEARS AS I DEBOND REGURLY WITH MY MISTAKES IT HAS BEEN 95% OK WHAT I DO IS GET NAIL POLISH REMOVER IT HAS TO HBE 100% ACOTONE I BRUSH IT ON THE JOINT AND VERY CAREFULLY PRY IT APART YOU PROBALLY NEED TO DO IT A COUPLE OF TIME IT WILL COME APART WITH NO DAMAGE IT WORKS ON CA AND PVA GLUES TRY IT ON SCRAP. GOD BLESS STAY SAFE YOU AND YOURS DON
 
HI GLENN A TIP FROM THIS OLD ONE ABOUT DEBONDING PARTS I HAVE POSTED THIS BEFORE MOST HAVE NOT TRIED IT BUT HERE IT IS I HAVE USED THIS FOR YEARS AS I DEBOND REGURLY WITH MY MISTAKES IT HAS BEEN 95% OK WHAT I DO IS GET NAIL POLISH REMOVER IT HAS TO HBE 100% ACOTONE I BRUSH IT ON THE JOINT AND VERY CAREFULLY PRY IT APART YOU PROBALLY NEED TO DO IT A COUPLE OF TIME IT WILL COME APART WITH NO DAMAGE IT WORKS ON CA AND PVA GLUES TRY IT ON SCRAP. GOD BLESS STAY SAFE YOU AND YOURS DON
Thanks Don
 
I heard from Victor at Model Ship Dockyard about the false keel. It turns out the false keel is actually on the laser cut sheets now, sheet M, parts L22a-c. I'm not sure what the engraved lines mean yet, but it's nice I already have them. The instructions do call for "1*6 pear wood strips". I think putting them on the sheet is an undocumented upgrade, hopefully they will through in an addendum.
I am going to use the power of editing to go back in time and leave a comment earlier in my build so that those reviewing it can see this issue before they try to build it.
 
I completed the aft half frames. It was a bit tricky getting the angle to mate to the keel right, or at least for a beginner. I am a little off on several but nothing some extra glue and a keelson wouldn't cover up. Except for frame 18. I really made a mess of that one. In trying to correct it, I ended up changing the angle on the surface in a way that makes it tilt more outboard as well. What a mess. I'm going to have to cut a new one. You can see it in the bottom right with a good gap between it and the full frame in front of it. I thought about cutting a wedge and gluing it on, but the angle is so complex, it's just not going to look good. Plus, I am already firing up the laser cutter for the other frames.
1692885252872.png
 
I finally got closer on the angles for mating the half frames to the keel. The bevels included just aren't on the money, as you might expect, especially for the shallow angles. I used a protractor between keel and marking on the jig for the frame and then put that angle on the tilting table on my disc sander. Yes, it's a nice thing to have, not a necessity, but I'm not sure I could reliably get closer to the right angle. The fore half frames look pretty good. Here's all the frames on the keel, not affixed.
1692885688693.png
Now that I've assembled, shaped, and fitted all the frames, it looks like I have 2 full and one half frame I must redo. There are another 3 dodgy full frames I'd like to retry as well.
 
Here are two of the frames traced in Illustrator onto scans of the frames from the documentation. Each is broken into components. Don't forget, 2 ea of 4 of the 5 pieces of the full frames.
1692886010882.png
The beveled frames are harder. It takes some real concentration to keep the bevel engraving right for the different pieces. It was nice to have the failed frame for reference. Here's the highly beveled frame 18. Note that for the over all outline, you have to extend the back portion to the full length of the front portion in order to capture the bevel. If you just trace what's there, you won't have enough material for the bevel. You'll see what I mean if you try to do this, just telling you so you don't think you are crazy. The drawings in the documentation are for finished frames, not what you need to cut out exactly. Here's frame 18.
1692886340282.png
 
I ordered the different thicknesses (1/8", 5/32", 3/16") from the Lumberyard, ordered 3 3"x24 of the first two sizes and 3 2"x24" of the 3/16" material. I didn't want to order and wait again. No matter how fast people send stuff, it's always too long when you are waiting for the next step. Fortunately, all the drawing took up some of that time. Here's another Illustrator file with all the paths for the parts.
I used a 1/4 sheet palm sander to get the sheets down to 220 grit, a similar finish as the kit.
1692886658097.png
These are the 5/32" parts. I made good use of the wood and got everything onto a foot of the board.
I am using an Ortur Lasermaster 3 with a 10W Violet laser. Cherry seems like a lot, especially with 3/16" stock, but it's doable with multiple passes.
 
A note on the laser cutter. If you think you can figure out Illustrator with a book and all the YouTube videos, I suggest getting a laser cutter. I made some beautiful cut parts for my Willie Bennett build by lifting them from the detailed plans. It took some fiddling, those plans are from 1980 and are, in some cases, more suggestive than actual, but it worked great. The cutter was around $400. But if you are looking to get a full sized jigsaw/scroll saw/etc, that's going to run you some as well for something of quality. And the cuts on the laser cutter are perfect, no redos, no nerve wracking moments, no paper contact cemented plans onto the wood. And if you want a redo on a part, just print another. Plus, you can do a ton of really cool custom projects with it outside of ship building.
I'm not a super experienced ship modeller, but if you aren't afraid of clearing some char, the laser cutter is the way to go when custom fabricating parts, now that they have affordable home versions. I'm not at the point where I'm ready to go full tilt with 3D printing, but I think the laser cutter is far game.
 
Back
Top