-

Win a Free Custom Engraved Brass Coin!!!
As a way to introduce our brass coins to the community, we will raffle off a free coin during the month of August. Follow link ABOVE for instructions for entering.
-

PRE-ORDER SHIPS IN SCALE TODAY!
The beloved Ships in Scale Magazine is back and charting a new course for 2026!
Discover new skills, new techniques, and new inspirations in every issue.
NOTE THAT OUR FIRST ISSUE WILL BE JAN/FEB 2026
You are using an out of date browser. It may not display this or other websites correctly.
You should upgrade or use an alternative browser.
You should upgrade or use an alternative browser.
HMS Ajax 38 gun frigate. Euromodel [COMPLETED BUILD]
- Thread starter Ken
- Start date
- Watchers 36
-
- Tags
- ajax completed build euromodel
This milestone is looking nice, Ken. No problem for us that you now take sone time for other things……Hello and welcome once again. I have just reached a milestone, all of the standing rigging is now complete, or at least I think so. The only casualty being the flagstaff which I snapped off along with its mounting, easy enough to re-make and having spotted on my last pictures the slack bobstays I re-tensioned them, they now look better. Next will be the making and fitting out of the spars, so something other than rigging. The weather has improved so I’m going to take a couple of days off from modelling, perhaps some much needed work in the garden. Thanks for watching.
View attachment 388793
View attachment 388794
View attachment 388795
View attachment 388796
View attachment 388797
View attachment 388798
View attachment 388799
View attachment 388800
Regards, Peter
Good morning Ken. She is impressive. Cheers GrHello and welcome once again. I have just reached a milestone, all of the standing rigging is now complete, or at least I think so. The only casualty being the flagstaff which I snapped off along with its mounting, easy enough to re-make and having spotted on my last pictures the slack bobstays I re-tensioned them, they now look better. Next will be the making and fitting out of the spars, so something other than rigging. The weather has improved so I’m going to take a couple of days off from modelling, perhaps some much needed work in the garden. Thanks for watching.
View attachment 388793
View attachment 388794
View attachment 388795
View attachment 388796
View attachment 388797
View attachment 388798
View attachment 388799
View attachment 388800
- Joined
- Dec 16, 2016
- Messages
- 1,178
- Points
- 493

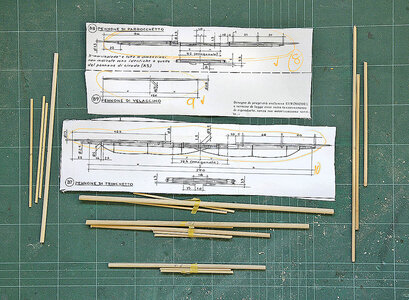
Hello again. Just a small progress report. All the spars have been cut, shaped and prepared for detailing. The plans for these were spread out in no particular order across several large sheets, to simplify things so that I didn't get confused I did something that I've never done before, I cut them out of their sheets and laid them out in order so that I wouldn't miss or double up any. Probably bad practice but I shan't be needing them again. It'll probably be a while before the next update, I'll wait until I've got some progress to show.
Thanks for looking. Ken
This shows the plans and the selected dowels cut to size and ready to shape
This shows the dowels having been shaped and ready to detail
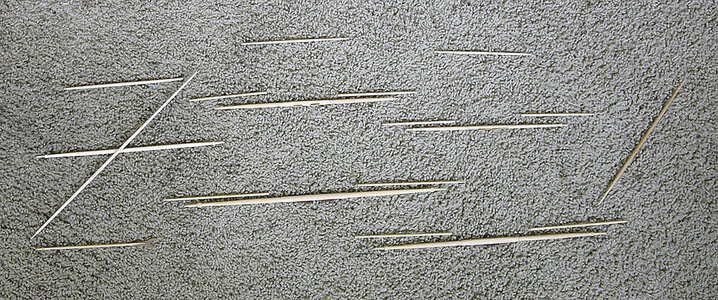
Just a closer look

Thanks for looking. Ken
This shows the plans and the selected dowels cut to size and ready to shape

This shows the dowels having been shaped and ready to detail

Just a closer look

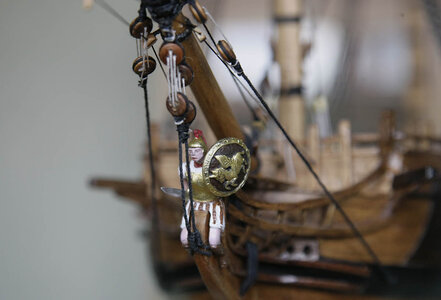
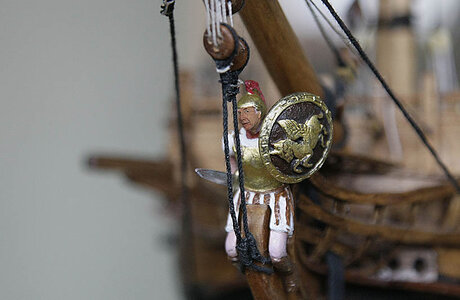
Good morning Ken. Stunning paintwork. I cannot paint those little things. I prefer the second one…. He looks photoshoppedHello. I've dug out the figurehead and given it a coat of paint, I have a choice of mythical heroes, which do you prefer?
View attachment 389609
View attachment 389610
 . Cheers Grant
- Joined
- Dec 16, 2016
- Messages
- 1,178
- Points
- 493

Hi Grant, I’ll let you into a secret, the second hero is me, yes photoshopped, good looking isn’t he!Good morning Ken. Stunning paintwork. I cannot paint those little things. I prefer the second one…. He looks photoshopped. Cheers Grant
Lol…I see you hiding in there Ken!Hello. I've dug out the figurehead and given it a coat of paint, I have a choice of mythical heroes, which do you prefer?
View attachment 389609
View attachment 389610
I thought soHi Grant, I’ll let you into a secret, the second hero is me, yes photoshopped, good looking isn’t he!
 . I think you should go with this one
- Joined
- Dec 16, 2016
- Messages
- 1,178
- Points
- 493

Again welcome, and thanks for your likes and comments.
I've been working on the yards, fitting the blocks, yard irons and parals, ( not supplied ). For the irons I use strips of black card from an old photo album and just wrapped it around the yard and arm, I drill into the yard end and through the yard arm, I use a piece of wire bent at right angle and inserted through each to simulate the end iron. It makes things very simple and looks realistic enough.
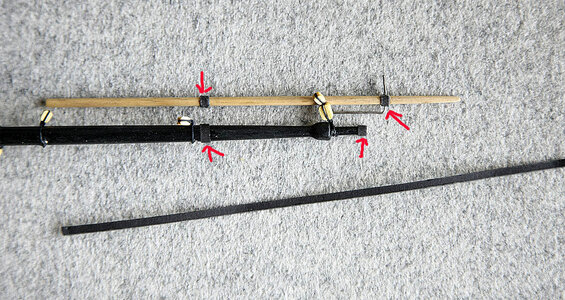

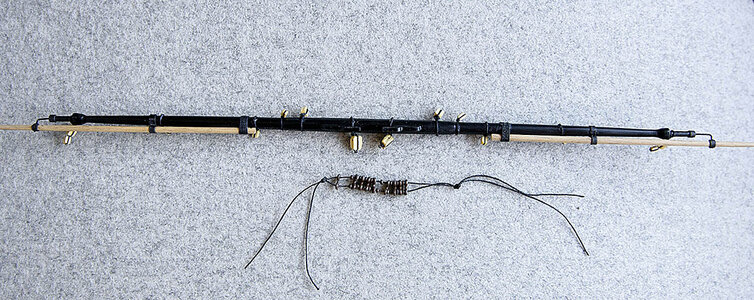
I've been working on the yards, fitting the blocks, yard irons and parals, ( not supplied ). For the irons I use strips of black card from an old photo album and just wrapped it around the yard and arm, I drill into the yard end and through the yard arm, I use a piece of wire bent at right angle and inserted through each to simulate the end iron. It makes things very simple and looks realistic enough.


- Joined
- Dec 16, 2016
- Messages
- 1,178
- Points
- 493

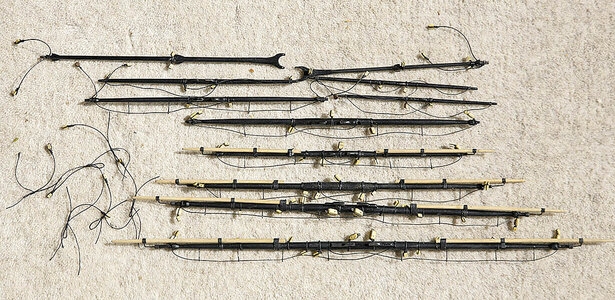
Hello, Thanks for visiting and again thanks for your likes. Today I’m just showing where I’ve progressed to; you’ll see that I have now finished off the yards and most of their necessary blocks. It’s been some time since I’ve rigged a ship and I’d forgotten just how much needs doing, I’ve already lost count of the blocks and I’ve really only just started.
With regards to the blocks those supplied in the kit are pretty rubbish, I’ll use most of them though, changing only those that are beyond bad. I’ve mentioned before about the generic fittings that Euromodel provide, no relation to any scale or suitability for the particular model, again this spoils the feel and pleasure of the kit. Take a look at these blocks, on the left is the supplied version and to the right is the scaled version that I used from my stash. The canon carriage is one supplied for the deck which as you may remember that I discarded, they are almost the same size, crazy.
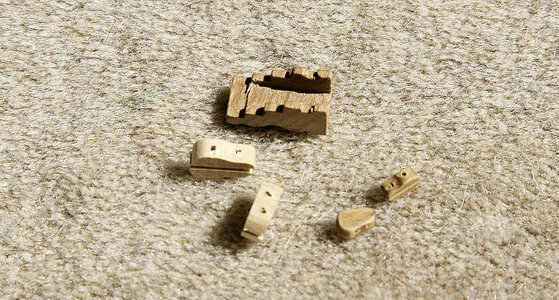
With regards to the blocks those supplied in the kit are pretty rubbish, I’ll use most of them though, changing only those that are beyond bad. I’ve mentioned before about the generic fittings that Euromodel provide, no relation to any scale or suitability for the particular model, again this spoils the feel and pleasure of the kit. Take a look at these blocks, on the left is the supplied version and to the right is the scaled version that I used from my stash. The canon carriage is one supplied for the deck which as you may remember that I discarded, they are almost the same size, crazy.


One has to wonder whether there is a conspiracy to sell aftermarket blocks considering what we sometimes receive with kits. You could cut these in half and still the larger half would be too large for this use.Hello, Thanks for visiting and again thanks for your likes. Today I’m just showing where I’ve progressed to; you’ll see that I have now finished off the yards and most of their necessary blocks. It’s been some time since I’ve rigged a ship and I’d forgotten just how much needs doing, I’ve already lost count of the blocks and I’ve really only just started.
With regards to the blocks those supplied in the kit are pretty rubbish, I’ll use most of them though, changing only those that are beyond bad. I’ve mentioned before about the generic fittings that Euromodel provide, no relation to any scale or suitability for the particular model, again this spoils the feel and pleasure of the kit. Take a look at these blocks, on the left is the supplied version and to the right is the scaled version that I used from my stash. The canon carriage is one supplied for the deck which as you may remember that I discarded, they are almost the same size, crazy.
View attachment 390561
View attachment 390562
- Joined
- Dec 16, 2016
- Messages
- 1,178
- Points
- 493

Hi Jeff, You’re right in that. The quality of the fittings in this kit are the worst that I have encountered in any kit regardless of price, you would get better quality out of a Xmas cracker. These are sold as premium kits and with that comes a premium price tag, yes they can be made up into very nice models in spite of the kit, not because of it, this was what exasperated me into almost giving up the build as I fell out of love with it. There’s more on poor kit contents to come, that won’t worry me though but that’s for a future post.One has to wonder whether there is a conspiracy to sell aftermarket blocks considering what we sometimes receive with kits. You could cut these in half and still the larger half would be too large for this use.
Last edited:
- Joined
- Dec 16, 2016
- Messages
- 1,178
- Points
- 493

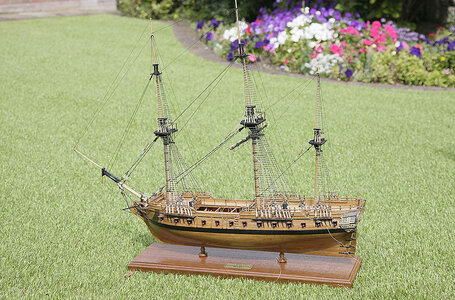
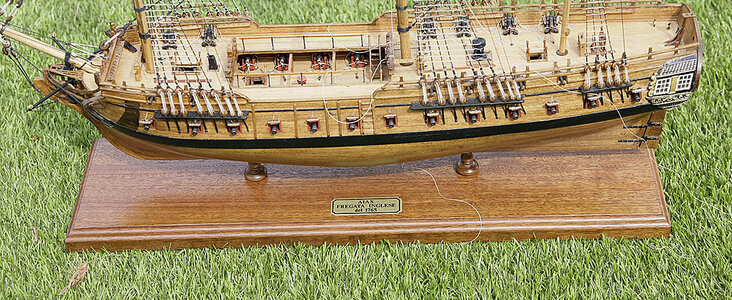
Hello, Again just a small update. As I can now see an end to this build in the near future I decided that it was a good time to make a plinth to display it on. A simple task, get a nice piece of mahogany, rout the edges and varnish. At the start of the build I'd prepared the keel to support a rod passing through it, the supports were a simple turned piece of wood and for once the kit provided a nice touch, the nameplate.


- Joined
- Dec 16, 2016
- Messages
- 1,178
- Points
- 493

Hello, I'm working my way through the rigging, but in the meanwhile I thought that I'd give you the heads up on this neat hack. I read about it somewhere and thought it worth a try, it is an abrasive sheet cleaner, a rubber glue stick, I got mine off ebay for about £3, and it really does work. A few passes with it on the abrasive sheet and it removes most of the ingrained wood dust making it look like new, the abrasive obviously isn't as sharp as new but it gets an extra lease of life, much needed on POF ribs.
The pictures show my Proxxon disc after a rub, I didn't photograph it before as I was a bit sceptical, but I'd finished with the disc and was ready to replace it, now it's got a new lease of life. The other pics show the before and after on sanding sticks and drums.
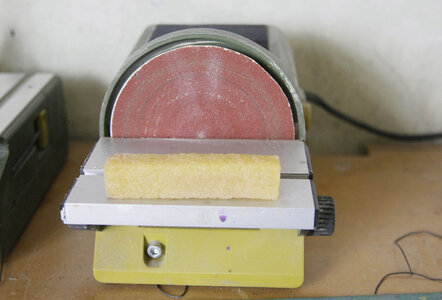
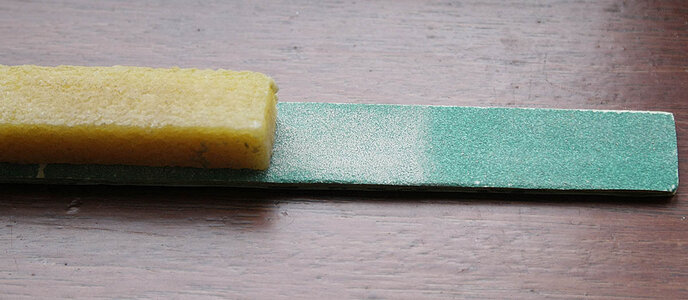
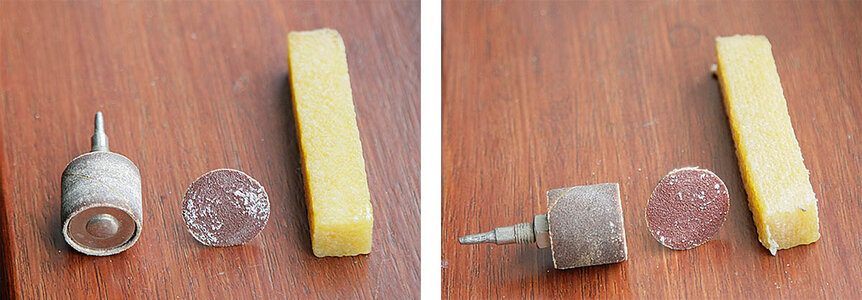
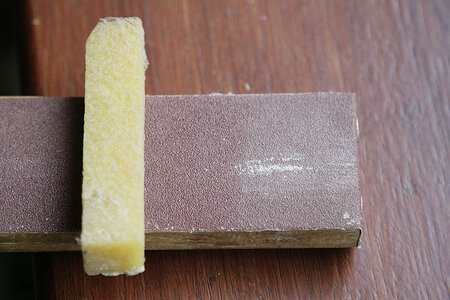
The pictures show my Proxxon disc after a rub, I didn't photograph it before as I was a bit sceptical, but I'd finished with the disc and was ready to replace it, now it's got a new lease of life. The other pics show the before and after on sanding sticks and drums.


- Joined
- Dec 16, 2016
- Messages
- 1,178
- Points
- 493

Hello, Good of you to drop by, and thank you for your interest and many likes.
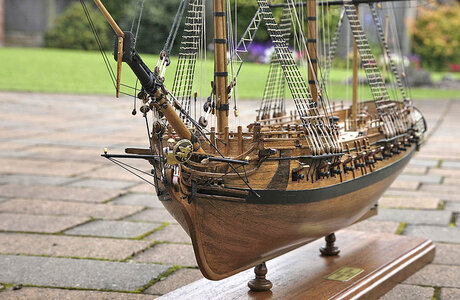
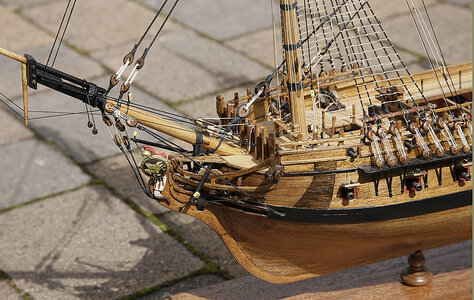
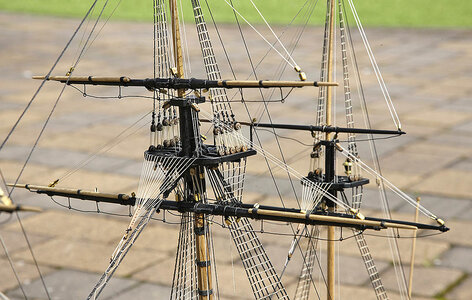
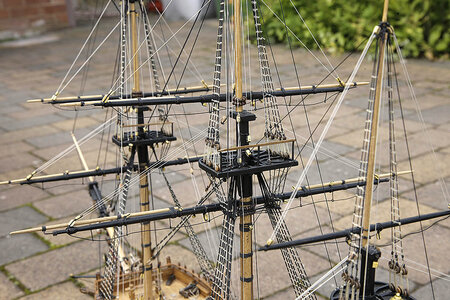
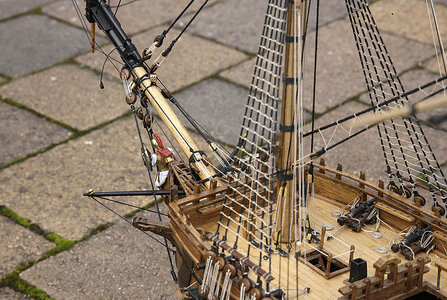
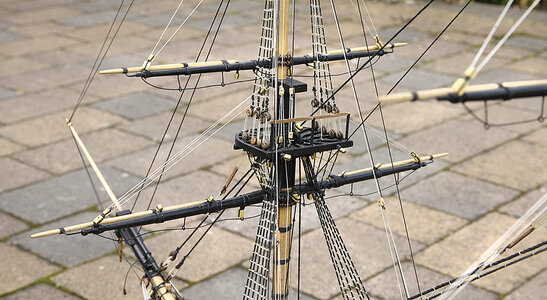
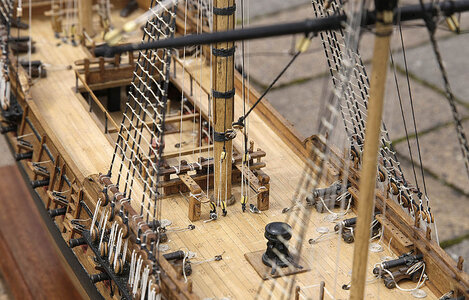
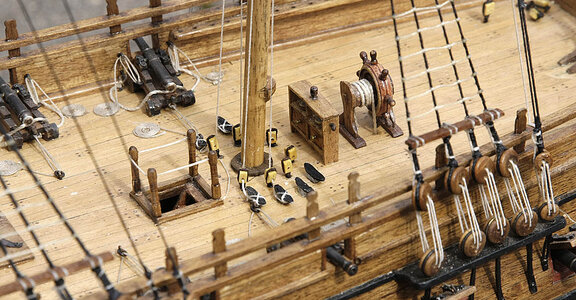
This is just an update showing were I’m up to with the rigging. I’m really struggling, I’m sure that you know the mistakes that can be made, from sharp scalpel amongst the rigging, crossed lines only seen when tensioned, errant blocks etc. well I’ve made them all but I’m slowly getting there and can see an end. As you know this will be my version of a late 18th century frigate rig and not an actual one, you will see errors and please don't count the granny knots, but nobody here will know, they’re all landlubbers, I just want to get through it with the least hassle.
There isn’t enough cord supplied in the kit and although it is a nice quality I was disappointed that only light coloured was included, dyeing is messy and isn’t fun, again penny pinching.



Last edited:
Once again,beautiful, curated and at mind blowing speed for me.
A fantastic showpiece! And if anyone points out a granny knot - show them the door (or give them a two tweezers and a tiny string and challenge them to do better)!


