• Ships of Scale has incorportated an extra level of security when you log In. Please follow on-screen prompts to acknowledge that you are not a robot via a "Check Box" or a "Pictorial Check Box Puzzle". This is needed due to higher level of AI Activity Security.
  • SUBSCRIBE TO SHIPS IN SCALE TODAY!

    The beloved Ships in Scale Magazine is back and charting a new course for 2026!
    Discover new skills, new techniques, and new inspirations in every issue.

    NOTE THAT OUR NEXT ISSUE WILL BE July/August 2026
  • Win a Free Custom Engraved Brass Coin!!!
    As a way to introduce our brass coins to the community, we will raffle off a free coin during the month of August. Follow link ABOVE for instructions for entering.

HMS Elephant Amati 1786

Thanks Iutar, great pictures. Looks like the kit either forgot the bollards/timberheads which I am guessing would be an extension of the frames or they just ignored them for some reason. Even if that is not the case, it would have been easier to install them, even if as separate pieces rather than top timber extensions before closing it all in.
Allan
 

Thanks Ютар/Игорь
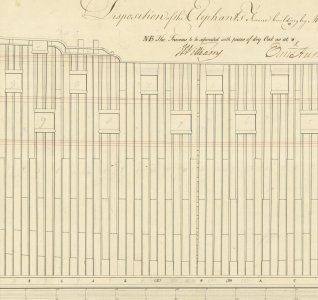
The framing plan and inboard profile (ZAZ 1070) for Elephant both show this construction. I wonder where Amati came up with their version rather than using these contemporary drawings.
Allan
 
This isn't Amati; Chris Watton drew it. We're already familiar with his "Agamemnon" project, which is also riddled with errors. Our Belgian friend Marc, with pain and suffering, is somehow finishing the Agamemnon kit on this forum, and everything is exactly like the Vanguard kit.
 
Last edited:
Post 4, Second Planking and Wales:
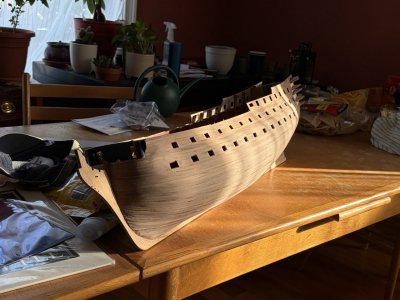
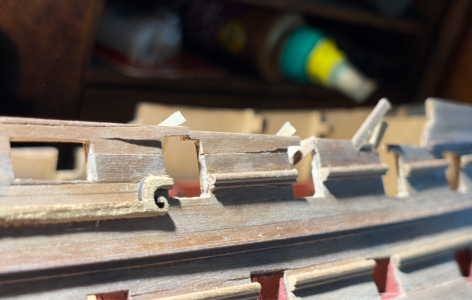
Thank you all for the plentiful resources and links. I do really like the elephant figure head, so I am going to use it. I decided to cut the bulwarks to be a bit more historically accurate. I don’t think I am experienced enough to edit the kit too much, but I do think the ship looks better with the historical bulwark. It appears I just needed to trim almost everything above the decorative scroll piece.

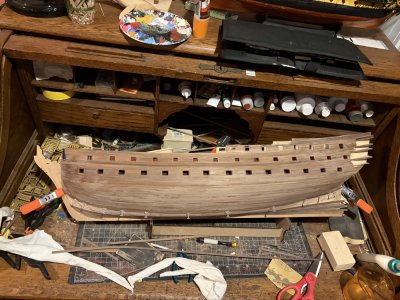
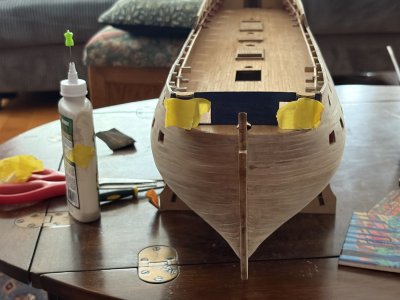
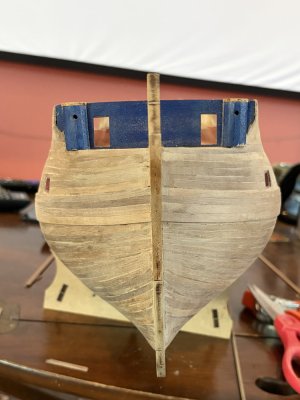
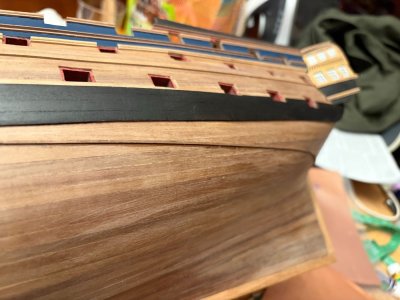
After finishing the first planking, I added the 5mm thick walnut stem and keel pieces. This made second planking easier as I could clamp the bow planks tightly. Sanding the MDF keel down at the stern was successful as my walnut second planking only required minimal sanding to be flush with the sternpost.
Second planking proceeded smoothly and steadily, with about 2 planks per day.
1783573844018.jpeg

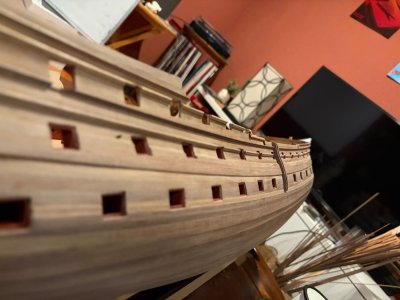
Other build logs showed an alignment issue with starting the planking from the top of the gunports as described in the instructions, so I started from the main wale. Had I started the planking from the top of the gunports, the planks would have been mostly parallel to the water line instead of the wale, which would have looked odd.

Above the main wale, the planks needed minimal tapering. Below the wale, the planks had to be tapered at the bow and eventually at the stern too. I used push pins below each plank so I could still use wood glue as opposed to cyano acrylate to allow time to adjust, and wedged them as tightly as I could against the previous plank.
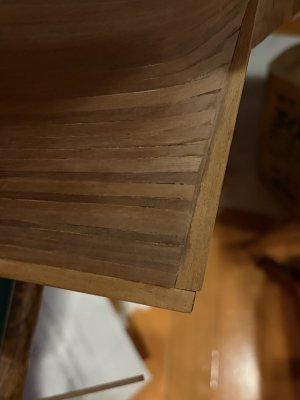
Once the planking was complete, I sanded it with 80 grit sandpaper followed by 150 grit sandpaper, using some wood filler in any small gaps. After trimming the stern planks I was pleased to see the walnut rudder post fit with almost no sanding.

1783575468790.jpeg
Bizarrely, the keel appears to be about 3mm too short. I can’t figure out where this missing length came from, as all other parts fit together neatly. Not to fear, I added a bit of extra wood to the bottom. This will all be coppered anyway.
1783574945258.jpeg
1783574622685.jpeg

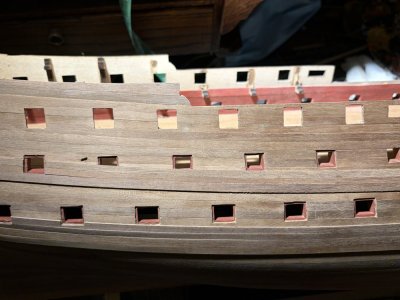
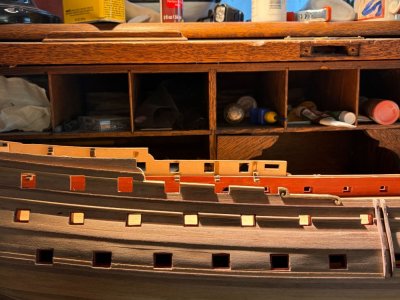
For adding the wales, I measured from the forward side of each gun port down to the top of the wale on the 1:1 set of plans, and went from there. The main plans don’t show a 0.5x3mm thick walnut strip they require that sits immediately above the topmost 4mm plank on the wale. On the plans, the wale is 18mm thick, matching 2 x 4mm + 2x 5mm strips as described. The wales needed very little bending to get to curve to the right dimensions, and I used CA glue to attach them, as I didn't want any unsightly pin holes to mar the wood. Here the decision to line the gunports first came back to bite, as I had to carefully slice the wales at multiple gunports. Still, it was far less work than lining the gunports after the 2nd planking would have been.
1783574879272.jpeg
1783574707631.jpeg
 
Post 5: Decorative strips, barrel rolling rail thingies (chestrees and fenders)
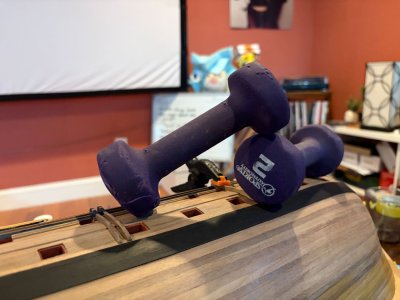
Since I hope to leave at least most of the sides of Elephant unpainted, the walnut plywood of the laser cut chestrees and fenders stood out starkly as being many shades lighter. I decided to venture out into the great unknown and make my own from 6mm walnut. I glued two strips together to approximate the thickness of the original laser cut part, traced the outline of the fenders, and slowly carved them into shape. It took 6 tries to make 4 fenders, as I kept snapping them trying to cut the notch for the wale out of the side of the ship, but the end result looks much better in my opinion. Clamping these to the side of the ship proved very difficult, so I used some of my room-mates’ weights to press down on the hull.
1785901614554.jpeg

The other walnut ply parts are two pieces of scrollwork. My woodworking skills aren’t sufficient to recreate these, so I opted to fair them a bit, and use them as is, figuring they will be surrounded by paint and thus won’t contrast so easily against the normal walnut planking. Currently my paint scheme plans are leaning towards something similar to Bellona or the Navy Board model of Hercules, with varnished sides rather than opaque ochre yellow.

There are a multitude of different walnut strips provided for the decorative strips that run parallel to the wales, with some having an “L” cross section, and others having a “P” shaped cross section. I tried to pick strips that weren’t too dark for this purpose. Putting these on was pretty simple, although cutting them around the gunports proved easier to do before applying them.

At this point, I took the Great Leap and sawed my non-historical bulwarks off. Into the abyssal unknown I go.

At this point, with her second planking and most exterior walnut decorations complete, Elephant weighs 2.8 kg.
1785901614581.png
1785901614589.jpeg
1785901614598.jpeg
 
Post 6: Stern decorations, paint job, and galleries
A bike accident meant that I had lots of time to spend on Elephant, as I couldn't go to work for a week and couldn't look at screens.
Paint
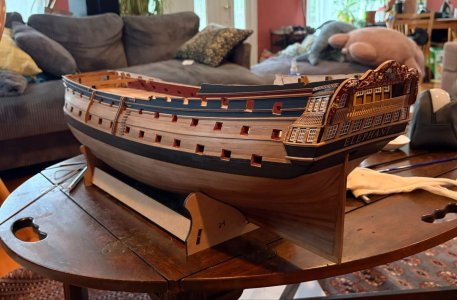
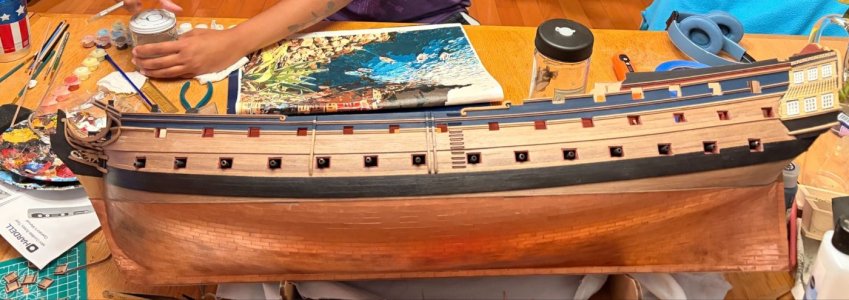
Elephant was likely painted in a good ol’ Nelson Chequer by 1801, however I think this paint scheme is used too frequently, and would cover up the lovely wood, so I opted to paint Elephant as she might have looked prior to 1798, with varnished sides and a navy blue stripe above her main gun deck. I used the model in RMG of the HMS Hercules (or Thunderer) as a reference for which parts should be colored blue. Alternatively, it’s similar to the Bellona model, just without any friezes. Her wales would have likely been black, as would the top of her bulkheads. Essentially, I just followed the Elephant/Bellerophon pre 1798 paint scheme suggested by the instructions, except that the blue extends one stripe further down the hull.

Galleries
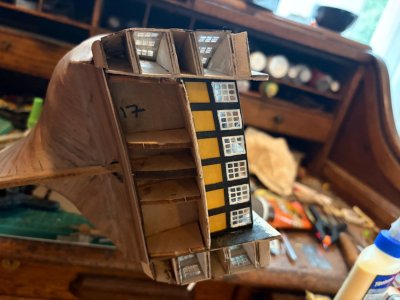
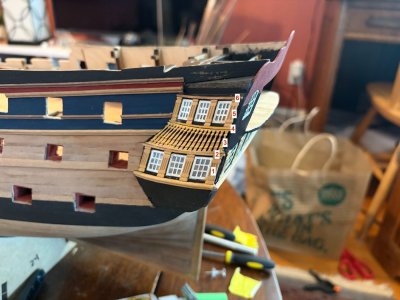
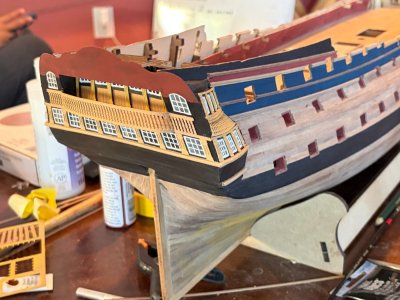
Getting the quarter galleries to align properly was reasonably easy. The brass window frames fit very snugly. Ensure the windows are glued in one at a time; they are uniquely shaped. I painted them white beforehand. I think real ships would have had them yellow ochre, but I like the contrast of the white, so white they shall remain. The windows were a piece of clear plastic provided with the kit. Instead of cutting out each window individually, I just cut a strip and glued it to the inside using CA glue, on the idea that the cloudiness created by the CA glue would not be visible through the windows. The parts between the window frames will hold some photoetch decorative stuff, and required ironing and steaming to bend appropriately.
Wood filler + black paint took care of the rest. I decided to paint the inside of the galleries white so that it’d be a bit more light and airy inside the windows.
1786322950648.jpeg
All wood trim and brass bits were painted a muted yellow ochre, created by mixing white, purple, and yellow ochre. The purple dulls the ochre and white lightens the whole thing so it doesn’t stand out as much against the walnut sides
For installing the quarter gallery pillars, I found I had to install them in a certain order. For future modelers, the easiest thing to do was:
  1. Start with the PE pillars on the lower set of windows, try and get the “notches” in the pillars to both be near the top and bottom of each window.
  2. Add the 1mm walnut strip above them.
  3. Add the PE curved piece, carefully bending it to fit the wood beneath
  4. Add the 1mm walnut strip above that
  5. Add the PE pillars of the upper windows
  6. Add the 1mm walnut strip above that.
1786322950653.jpeg

This means everything should line up decently with only small gaps.


Stern Fascia and Decorations
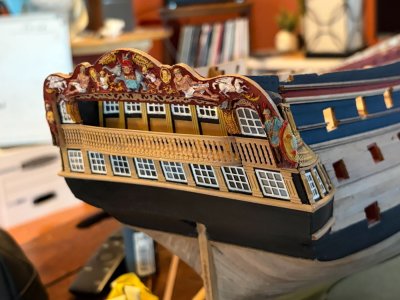
The large balcony railing is a single piece of photoetch brass. I painted it, and in the course of bending it to the shape of the protruding wood balcony, promptly peeled most of the paint off the edges. Interestingly, the balcony railing proved two pillars too long, so I trimmed them.
1786322950658.jpeg

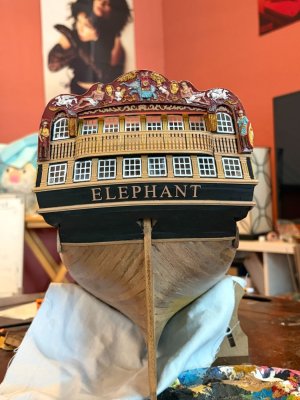
Elephant and Bellerophon use a slightly different and taller fascia than Vanguard. This piece was a little delicate, and I snapped one window frame trying to test fit it. I painted the top half red and the bottom half black. I’ve been using a mixture of black and dark umber to take the blue off the black paint.

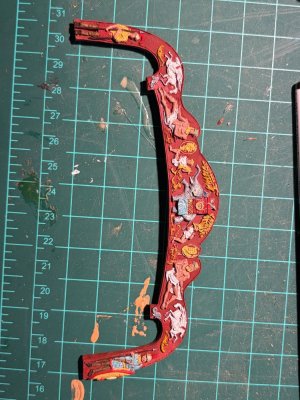
Amati provides three options for stern carvings, two resin pieces (Elephant and Vanguard), and, bizarrely, a three piece white metal one for Bellerophon. Elephant and Bellerophon share identical stern carvings save for the center piece, which on Elephant is… an Elephant. This resin piece is quite tricky to match the reasonably complicated curve of the stern fascia. It needs to bend laterally, and the two dangly bits needed to bend slightly forwards. Heating the piece over a stovetop burner using forceps heated it enough to soften and bend slightly, offering the piece up to the stern repeatedly to try and get the curve correct.

1786322950663.jpeg
Painting was quick as well. I gave the resin piece two coats of primer. Instructions say to paint the entire thing red, and then have all the carvings yellow. This is a boring paintjob, so I decided to add some more color, which only took about an hour. I made the Elephant grey, and gave some more color to the soldiers, horses, and cherubs. I then coated everything in matte polyurethane varnish, and heated the whole thing up in a microwave for 10 seconds before finally clamping it to the stern. This took three tries before the glue set properly.

1786322950668.jpeg
The part of the stern where the letters go is supposed to use some white metal pieces for moulding. I do not own a soldering iron, and think the white metal pieces looked rough, so I replaced them with some extra walnut moulding that I used on the sides of the ship. I steamed and clamped these to a cutting board to ensure they’d have a gentle curve to them.

Last but not least, the photoetch Elephant letters. I puzzled on how to align these, but in the end relied on eyeballing it based on a photograph and aligning the base of the letter to the underside of the windows, using the plans as a reference.
1786322950672.jpeg
1786322950677.jpeg
 
I am sure most do not care about this and I realize most kits include the name on British Ships of War, but the Admiralty did not allow the name on the ships except for about 10 years between about 1770 and 1780. I know this might seem petty or even stupid to some, but this kind of basic mistake might make some folks wonder what other things Amati got wrong. As Elephant (74) was launched in 1786 it is unlikely she ever had her name on the hull. Were there exceptions, probably. Exceptions seemed to be the rule at times :)
Allan
 
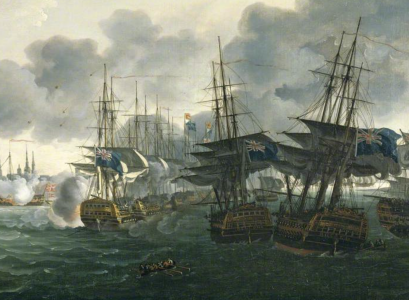
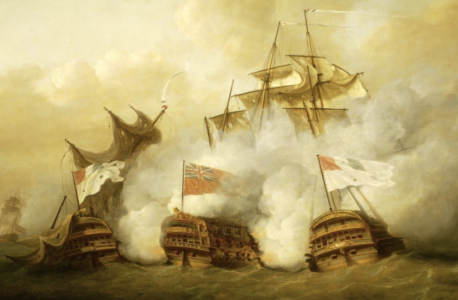
Hi Allan, I figured it was pretty unlikely for Elephant to have her name, and certainly not in raised letters like the kit, but I do like how the ship looks with the name on it. I feel Amati just included letters because it's easier to identify the model with a name on it. If it did ever have the name, it seems like it would have also had a period after it. Plans of Edgar and Cumberland that iutar linked show their names with periods, as do RMG plans of Sphinx, (although all were launched in the time frame you listed where you'd expect names), and the navy board models of Bellona and Royal George both have names with periods. The plan ZAZ1247 on RMG of Elephant that seems a similar format to the Edgar and Cumberland plans doesn't show a name on the stern, so Elephant didn't have one at launch. I am curious how enforced the rules about names were, I found a contemporary painting of the Battle of Copenhagen with names painted on the stern, and another one of the Glorious First of June, and the British ships involved seem to have their names on the upper stern counter.

copenhagen.pngScreenshot 2026-08-11 at 11.34.16 PM.png
 
I am now plotting the gun deck rigging; but one issue is drilling holes in the sides of the cast metal gun carriages supplied with the kit. Replacing all of them would be expensive. I could 3D print replacements I suppose. What drill bit do you recommend? I have a cheap pin drill from amazon that is supposedly for resin, but it just dents the metal.
 
Post 6: Stern decorations, paint job, and galleries
A bike accident meant that I had lots of time to spend on Elephant, as I couldn't go to work for a week and couldn't look at screens.
Paint
Elephant was likely painted in a good ol’ Nelson Chequer by 1801, however I think this paint scheme is used too frequently, and would cover up the lovely wood, so I opted to paint Elephant as she might have looked prior to 1798, with varnished sides and a navy blue stripe above her main gun deck. I used the model in RMG of the HMS Hercules (or Thunderer) as a reference for which parts should be colored blue. Alternatively, it’s similar to the Bellona model, just without any friezes. Her wales would have likely been black, as would the top of her bulkheads. Essentially, I just followed the Elephant/Bellerophon pre 1798 paint scheme suggested by the instructions, except that the blue extends one stripe further down the hull.

Galleries
Getting the quarter galleries to align properly was reasonably easy. The brass window frames fit very snugly. Ensure the windows are glued in one at a time; they are uniquely shaped. I painted them white beforehand. I think real ships would have had them yellow ochre, but I like the contrast of the white, so white they shall remain. The windows were a piece of clear plastic provided with the kit. Instead of cutting out each window individually, I just cut a strip and glued it to the inside using CA glue, on the idea that the cloudiness created by the CA glue would not be visible through the windows. The parts between the window frames will hold some photoetch decorative stuff, and required ironing and steaming to bend appropriately.
Wood filler + black paint took care of the rest. I decided to paint the inside of the galleries white so that it’d be a bit more light and airy inside the windows.
View attachment 625377
All wood trim and brass bits were painted a muted yellow ochre, created by mixing white, purple, and yellow ochre. The purple dulls the ochre and white lightens the whole thing so it doesn’t stand out as much against the walnut sides
For installing the quarter gallery pillars, I found I had to install them in a certain order. For future modelers, the easiest thing to do was:
  1. Start with the PE pillars on the lower set of windows, try and get the “notches” in the pillars to both be near the top and bottom of each window.
  2. Add the 1mm walnut strip above them.
  3. Add the PE curved piece, carefully bending it to fit the wood beneath
  4. Add the 1mm walnut strip above that
  5. Add the PE pillars of the upper windows
  6. Add the 1mm walnut strip above that.
View attachment 625379

This means everything should line up decently with only small gaps.


Stern Fascia and Decorations
The large balcony railing is a single piece of photoetch brass. I painted it, and in the course of bending it to the shape of the protruding wood balcony, promptly peeled most of the paint off the edges. Interestingly, the balcony railing proved two pillars too long, so I trimmed them.
View attachment 625378

Elephant and Bellerophon use a slightly different and taller fascia than Vanguard. This piece was a little delicate, and I snapped one window frame trying to test fit it. I painted the top half red and the bottom half black. I’ve been using a mixture of black and dark umber to take the blue off the black paint.

Amati provides three options for stern carvings, two resin pieces (Elephant and Vanguard), and, bizarrely, a three piece white metal one for Bellerophon. Elephant and Bellerophon share identical stern carvings save for the center piece, which on Elephant is… an Elephant. This resin piece is quite tricky to match the reasonably complicated curve of the stern fascia. It needs to bend laterally, and the two dangly bits needed to bend slightly forwards. Heating the piece over a stovetop burner using forceps heated it enough to soften and bend slightly, offering the piece up to the stern repeatedly to try and get the curve correct.

View attachment 625382
Painting was quick as well. I gave the resin piece two coats of primer. Instructions say to paint the entire thing red, and then have all the carvings yellow. This is a boring paintjob, so I decided to add some more color, which only took about an hour. I made the Elephant grey, and gave some more color to the soldiers, horses, and cherubs. I then coated everything in matte polyurethane varnish, and heated the whole thing up in a microwave for 10 seconds before finally clamping it to the stern. This took three tries before the glue set properly.

View attachment 625381
The part of the stern where the letters go is supposed to use some white metal pieces for moulding. I do not own a soldering iron, and think the white metal pieces looked rough, so I replaced them with some extra walnut moulding that I used on the sides of the ship. I steamed and clamped these to a cutting board to ensure they’d have a gentle curve to them.

Last but not least, the photoetch Elephant letters. I puzzled on how to align these, but in the end relied on eyeballing it based on a photograph and aligning the base of the letter to the underside of the windows, using the plans as a reference.
View attachment 625383
View attachment 625380

You have skills Jan, I can't paint a wall in my house neatly ;) ,unlike the tiny detailed painting you acheived.....kudos. She looks very impressive Cheers Grant.

 
I am now plotting the gun deck rigging; but one issue is drilling holes in the sides of the cast metal gun carriages supplied with the kit. Replacing all of them would be expensive. I could 3D print replacements I suppose. What drill bit do you recommend? I have a cheap pin drill from amazon that is supposedly for resin, but it just dents the metal.
HSS bits from McMaster Carr are great. They are high quality and fairly priced. https://www.mcmaster.com/products/drill-bits/high-speed-steel-drill-bits~~/
Allan
 
Last edited:
Further to the above, cobalt jobber bits are also available down to 0.002" They last a lot longer than the high speed steel bits if you are going to be drilling a lot of metal.
Allan
 
Post 7: The Great Coppering, and Bow Bits
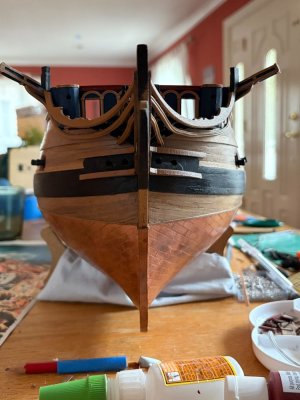
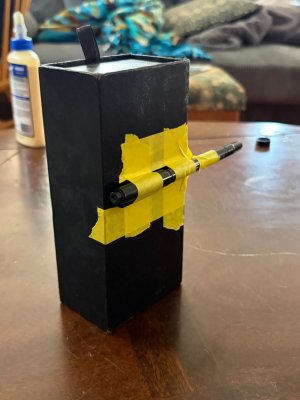
First, I created my Cheap Waterline Marker of Righteous Victory: an empty box with a pen taped to it at exactly the waterline noted when the ship rests in her cradle. On the plans the water line is 86mm from the keel. I used 1mm walnut strip to form a border around the hull to mark the waterline. The kit does not say to do this, so it uses extra wood, but the kit also has you waste a lot of 1mm wood making the stairs on the side of the hull (they also say to make the stairs 26mm wide, instead of the correct 13mm), when the leftover L shaped wood from doing the decorative strips is enough. The 1mm strips remaining are more than sufficient to do all the ribs on the launches if you choose to do this method.
1789857571009.jpeg
1789857571013.jpeg
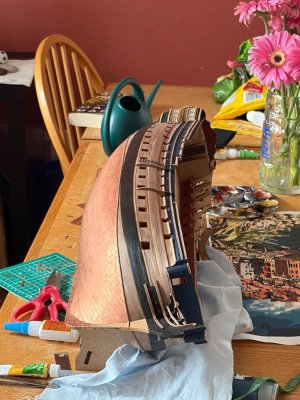
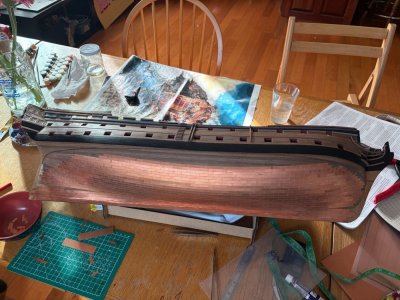
As Elephant was launched in 1786, it’s certain she’d have been coppered at launch. Amati provides you with some luscious copper plates. All you have to do is snap them off. There are five sheets each for the starboard and port sides of the hull. According to the instructions, the rivets should be on the forward and keel side of the plate.
I first wiped the surface of the hull with some tissues to remove the excessive sawdust, and then sanded the back of the copper plates with 120 grit sandpaper.
Coppering went quite smoothly. I used some thick-ish cyano acrylate glue to hold the plate in place, and glued between 1 and 3 plates at a time depending on the location.
I started at the keel and worked up towards the waterline, following the natural curve of the hull. This required stealer-like copper plates on one part of the bow, and two slices of the stern.
The copper plates are quite delicate, even once super glued, and striking the keel as I careened the ship in her cradle knocked some of the plates off. I decided to glue a false keel to the bottom of the hull, using a strip of 1x5mm walnut for this purpose. The real ship would have likely been fixed with one of these to protect against groundings and keel strikes.
1789857571016.jpeg
1789857571020.jpeg
1789857571025.jpeg

1789857571028.jpeg
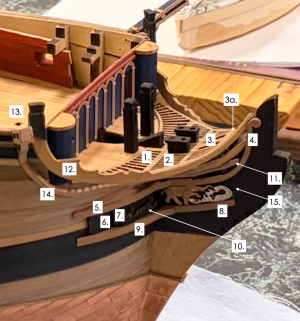
Between laying the thousands of copper tiles, I also worked on the bow of the ship. All wooden parts were painted a dull yellow ochre to match the sides of the ship. Following the plans of the instructions was pretty much what I reckoned to be the best way of assembling the various pieces. In order:
  1. Head Grating 1
  2. Head Grating 2
  3. Head Grating 3
    1. 1mm strip
  4. Upper Cheek Rail
  5. Upper Cheek
  6. Rear Hawse Pattern
  7. Forward Hawse Pattern
  8. Lower Cheek Rail
  9. Lower Cheek
  10. Outermost Hawse Pattern
  11. Lower Decorative Strip
  12. Main Headrail
  13. Cathead and support (do this first, as you need to know where the decorative strip 14 will end)
  14. Upper decorative strip
1789857571049.png

The Gratings needed a 1mm strip to sit in front of the forwardmost grating to be flush with the headrails.

Knights heads were easy to assemble. I sanded the sides of the top to bevel it slightly, as the laser cut pattern already has it bevelled on two sides. I drilled a hole in the bottom for brass wire to pin them securely to the deck.

In other news, I finally got drill bits capable of boring through the metal of the gun carriages. That shall be my next project.
 
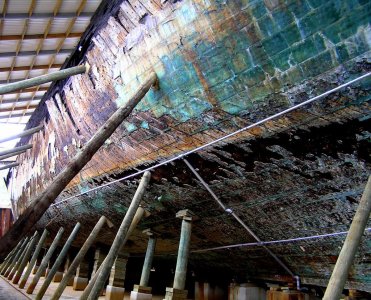
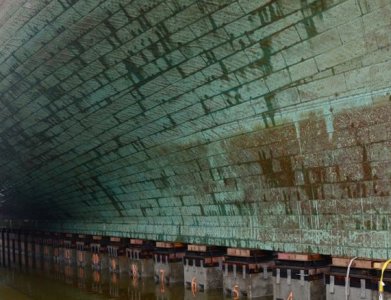
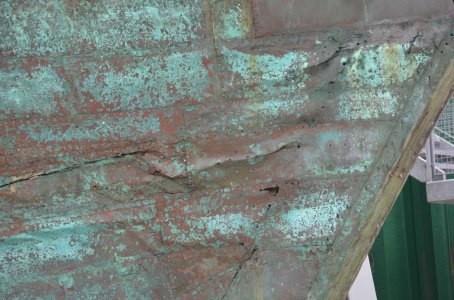
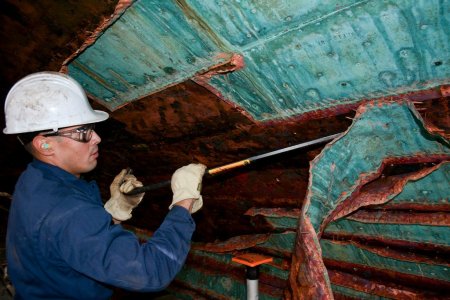
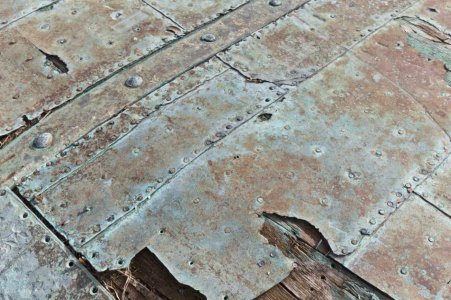
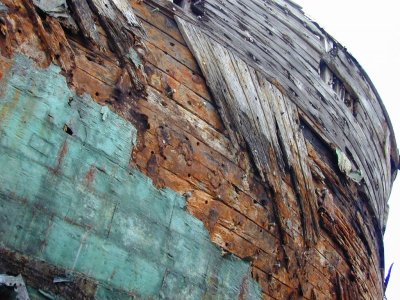
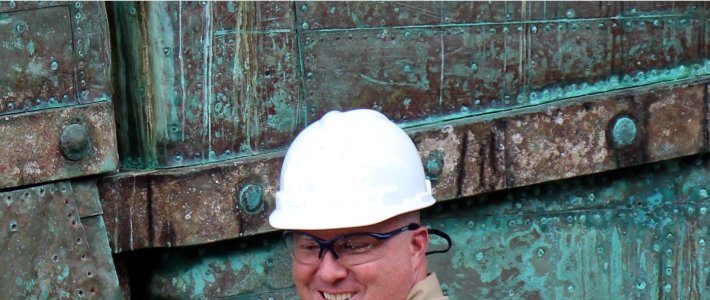
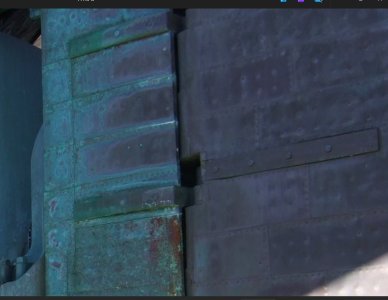
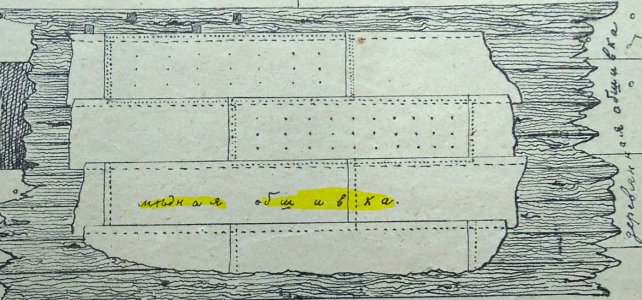
A few brief comments. From 1783 onwards, the molding along the upper edge of the copper sheathing was no longer applied. Copper sheets were laid from the waterline down to the keel, rather than from the keel up to the waterline; otherwise, the oncoming flow of water would tear the sheets off at the bow. This problem was not fully resolved until the late 19th century. Consequently, the sheets were overlapped in such a way that the water would not tear them loose.
 
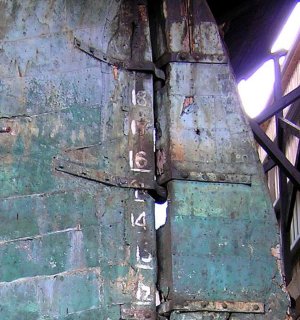
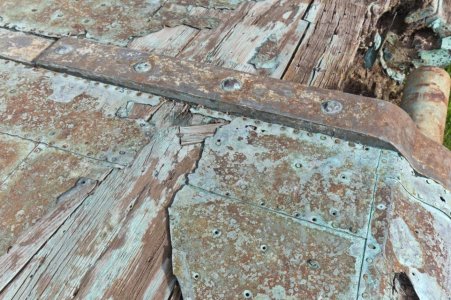
It is also clearly visible that the model's creator has not yet attached the rudder hinges. He intends to glue the rudder hinges over the copper sheets. This is a mistake. The rudder and its pintles were fitted to the ship long before the launch, whereas the copper sheathing was applied only after construction and a series of trials. The copper sheets were carefully fitted around the pintles already installed on the hull.

You need to mount the rudder hinges on the model's hull and fit pieces of sheet copper to them—cutting the metal with shears—while keeping in mind the closely spaced nails along the hinge contours.

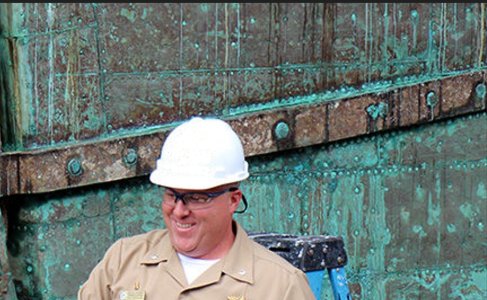
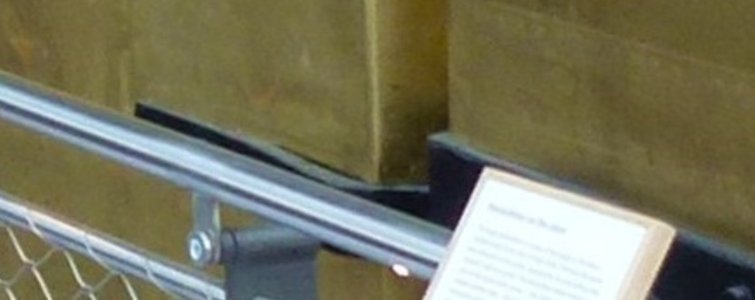
In the photographs, it is clearly visible that the sheets are laid with an overlap from top to bottom. It is also evident that the sheets are precisely trimmed to fit tightly around the rudder hinges and are secured with closely spaced nails along the perimeter of the hinges.
2ф — копия.jpg4ф.jpg09-6955973-uss-constitution-conducts-his-first-dry-dock-inspection — копия.jpg26-3185589-jyllland-1- (1).jpg22559904091_bb0708bace_b.jpgAmsterdam_2301006_Oudeschild_Museum_6143.thumb.jpg.66d3123d194b8fc3f4a49af4cdb6fa8d (1).jpgAmsterdam_2301006_Oudeschild_Museum_6148.thumb.jpg.fa7b1f9a5d4fb2f14950b2b381c1f6d4 (1).jpgDSCN0118.JPGмедная обшивка (2).jpgмедная обшивка 2.jpgмедная обшивка.jpgмедь 1.jpgМещерский_1878 год.JPG
 
Back
Top