Donnie is our System Admin and the founder of the forum.... if it is possible to change, than he is the only one (I guess) who can do it......He will reply, I am sureHi Uwe,
When I saw the mistake I also saw this:-
"Once your birthday has been entered, it cannot be changed. Please contact an administrator if it is incorrect."
I could only see the "Contact Us" and clicked on that and used the messaging service there -- so, how do I do it by "@Donnie" ?
-

Win a Free Custom Engraved Brass Coin!!!
As a way to introduce our brass coins to the community, we will raffle off a free coin during the month of August. Follow link ABOVE for instructions for entering.
-

PRE-ORDER SHIPS IN SCALE TODAY!
The beloved Ships in Scale Magazine is back and charting a new course for 2026!
Discover new skills, new techniques, and new inspirations in every issue.
NOTE THAT OUR FIRST ISSUE WILL BE JAN/FEB 2026
You are using an out of date browser. It may not display this or other websites correctly.
You should upgrade or use an alternative browser.
You should upgrade or use an alternative browser.
HMS Leopard; 50 Gun 4th Rate; 1790 - Scratch build 1:80
- Joined
- Dec 15, 2019
- Messages
- 99
- Points
- 143

Leopard lying there with most of the deck furniture added >>>

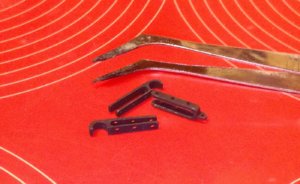
The last major project would be the rigging although there were still a few other peripheral items to be made and fitted. The bracket irons that are attached to the main channels for the main course stunsail yards was the first time I had used the milling machine on anything other than wood.
Time to have a go on brass.
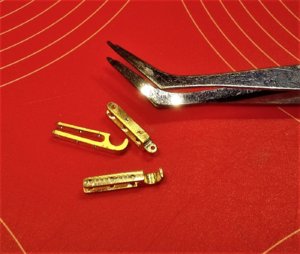
. . . and blackened >
Rigging time. The drawings/plans and any other information I have on Leopard contain virtually nothing about the rigging. Lennarth Petersson's "Rigging Period Ship Models" provided me with most of the information I would need. I said "most of the information" because his book deals specifically with the rigging of an English frigate of a similar time period and there are significant differences between a frigate and my 50 gun 4th rate.
The main differences are in the fact that Leopard does not have bulwarks on the open upper decks -- the foredeck, quarterdeck and poop deck. On Leopard these decks only have hammock cranes & netting so there is really nothing to which to attach pin rails. Around the main mast on the quarterdeck there are an adequate amount of pins for the rigging of a ship without sails but around the fore and mizzen masts I had to 'invent' many belaying positions due to the woeful lack of points in these areas.
I decided I would start at the mizzen mast and work my way forward from there.
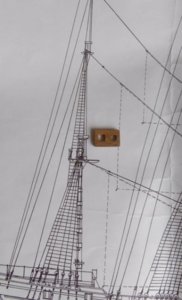
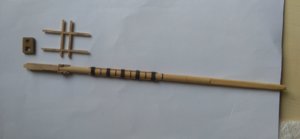
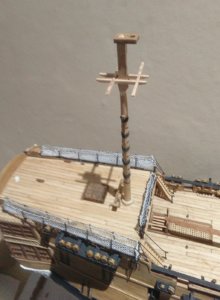
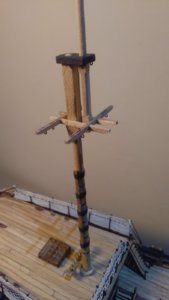
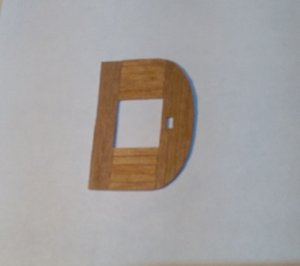
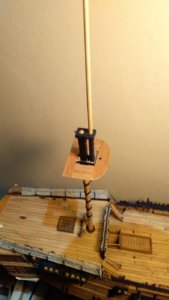
The dimensions for all mast parts and spars had to be taken from the plans and then doubled as the rigging plans were only shown half size of the rest of the ship. Here's the mizzen cap laid on the plan >
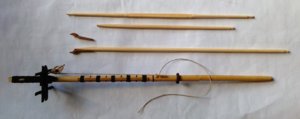
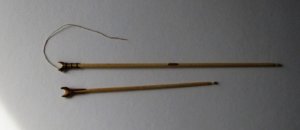
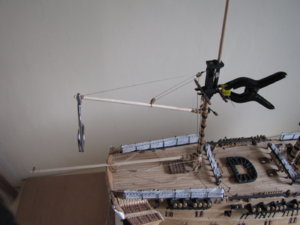

The last major project would be the rigging although there were still a few other peripheral items to be made and fitted. The bracket irons that are attached to the main channels for the main course stunsail yards was the first time I had used the milling machine on anything other than wood.
Time to have a go on brass.

. . . and blackened >

Rigging time. The drawings/plans and any other information I have on Leopard contain virtually nothing about the rigging. Lennarth Petersson's "Rigging Period Ship Models" provided me with most of the information I would need. I said "most of the information" because his book deals specifically with the rigging of an English frigate of a similar time period and there are significant differences between a frigate and my 50 gun 4th rate.
The main differences are in the fact that Leopard does not have bulwarks on the open upper decks -- the foredeck, quarterdeck and poop deck. On Leopard these decks only have hammock cranes & netting so there is really nothing to which to attach pin rails. Around the main mast on the quarterdeck there are an adequate amount of pins for the rigging of a ship without sails but around the fore and mizzen masts I had to 'invent' many belaying positions due to the woeful lack of points in these areas.
I decided I would start at the mizzen mast and work my way forward from there.
The dimensions for all mast parts and spars had to be taken from the plans and then doubled as the rigging plans were only shown half size of the rest of the ship. Here's the mizzen cap laid on the plan >


- Joined
- Dec 15, 2019
- Messages
- 99
- Points
- 143

Just as I knew it would be, the rigging would prove to be a lengthy phase in the build!
Considerable time was spent on the mizzen mast and its lower spars (crossjack & spanker gaff and boom) as well as learning where all the associated rigging went before moving forward. Around the same time I also made the mizzen topgallant/royal but as this was so spindly and delicate it went into the 'safe box' along with the topmast until much later.
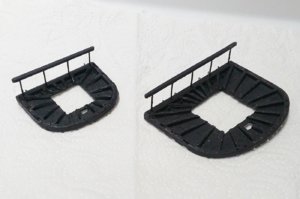
Evolution of top from the basic top shown in the previous post >
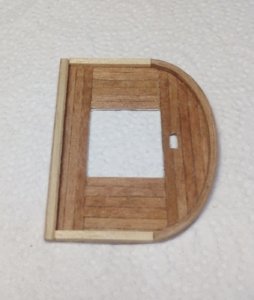
After the ribs were added each top visited the mill to have the deadeye slots milled as well as drilling for the crows foot and the after guard rail stanchions >

Mizzen top alongside one of its bigger brothers >
Was keen to see more masts so pressed on and prepared and fitted the main, shown here with the main topmast temporarily in place >
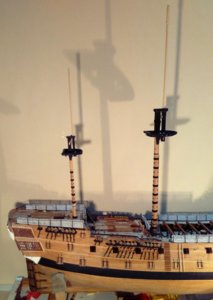
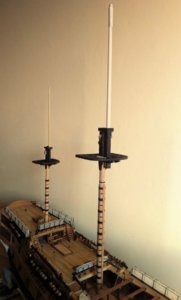
In my previous post the gaff and boom are shown temporarily in position -- they came off and went in 'the box' while I concentrated on the main components of the masts.
It's a few years since I was at that stage and I'm relying on the photos to guide me roughly through the sequence I followed.
This shows that I rigged the shrouds on the mizzen before the other masts >
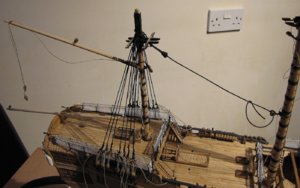
It appears I fitted the miz topmast then started on the main shrouds >
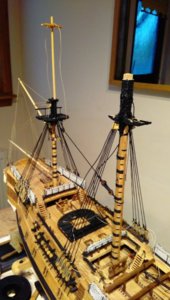
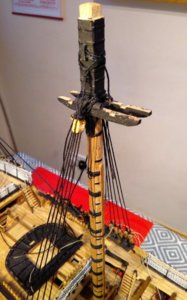
The block shown near the trestle trees is one of the jeer blocks. Although it doesn't look like it, it IS a triple block.
Throughout the build I always tried to think ahead - - fitting or preparing some components early in case they might prove troublesome if left until other parts were fitted.
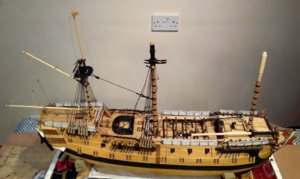
This next photo reminds me that I prepared the fore lower before the main shrouds were finished. The mizzen crossjack and main topmast lie along the skidbeams and foredeck while the main top is parked on the quarterdeck, and the miz top and topmast now in attendance >
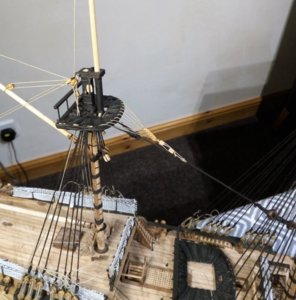
Mizzen crowsfoot (most aspects of a scratch build are very satisfying but completing a crowsfoot is particularly satisfying!) >
Now have to go look at more photos so that I can remember more sequences!
Considerable time was spent on the mizzen mast and its lower spars (crossjack & spanker gaff and boom) as well as learning where all the associated rigging went before moving forward. Around the same time I also made the mizzen topgallant/royal but as this was so spindly and delicate it went into the 'safe box' along with the topmast until much later.
Evolution of top from the basic top shown in the previous post >

After the ribs were added each top visited the mill to have the deadeye slots milled as well as drilling for the crows foot and the after guard rail stanchions >

Mizzen top alongside one of its bigger brothers >

Was keen to see more masts so pressed on and prepared and fitted the main, shown here with the main topmast temporarily in place >


In my previous post the gaff and boom are shown temporarily in position -- they came off and went in 'the box' while I concentrated on the main components of the masts.
It's a few years since I was at that stage and I'm relying on the photos to guide me roughly through the sequence I followed.
This shows that I rigged the shrouds on the mizzen before the other masts >

It appears I fitted the miz topmast then started on the main shrouds >


The block shown near the trestle trees is one of the jeer blocks. Although it doesn't look like it, it IS a triple block.
Throughout the build I always tried to think ahead - - fitting or preparing some components early in case they might prove troublesome if left until other parts were fitted.
This next photo reminds me that I prepared the fore lower before the main shrouds were finished. The mizzen crossjack and main topmast lie along the skidbeams and foredeck while the main top is parked on the quarterdeck, and the miz top and topmast now in attendance >

Mizzen crowsfoot (most aspects of a scratch build are very satisfying but completing a crowsfoot is particularly satisfying!) >

Now have to go look at more photos so that I can remember more sequences!
- Joined
- Dec 15, 2019
- Messages
- 99
- Points
- 143

This post will be a bit of a jumble of photos of various parts of the rigging in no particular logical order.
Before rigging the foremast, but after rigging the main mast shrouds I felt it was best to fit the bowsprit as the main stay and preventer originate there. I didn't want to be attempting to snake the two stays after the foremast shrouds would be in place. I was pleased I made this decision as it was tricky enough doing the snaking in the 'open space' afforded me in the absence of fore shrouds.
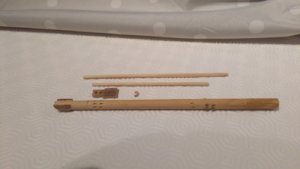
The components of the bowsprit, jib boom and flying jib boom >
The 30 or so slots for the bowsprit cleats were cut on the milling machine.
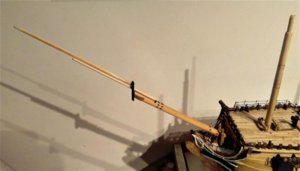
Dry fitted just to see 'if it works' >
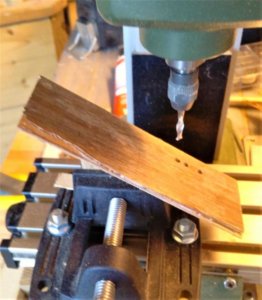
The bowsprit cap requires 3 'holes' drilled at 30 degrees to the vertical plane as the cap sits on the end. I made a cut at 30 degrees, spot glued a piece of timber at each end, leaving an unglued section in the middle for later removal, clamped the wedge in the vice and drilled the holes again on the mill. >
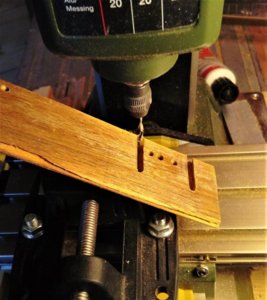
While still in the vice I also used the mill cutter to make the top and bottom cuts, still at 30 degrees. >
My plans/drawing of Leopard didn't show a bowsprit fairlead, but as I had seen this feature on many models I opted to make one.
I made a ply of 3 very thin slices of Makore, drilled a 1mm hole near the centre, placed the ply on a 1mm pin (brass wire) on a jig attached to the travelling table of the mill and used the cutter to drill the required holes and also make the outer and inner cuts by revolving the ply by hand as the cutter did its job >
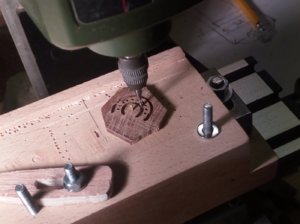
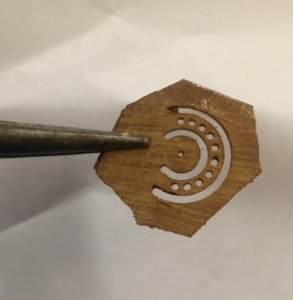
The rough blank cut out >
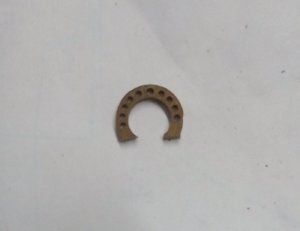
. . . and on the bowsprit >
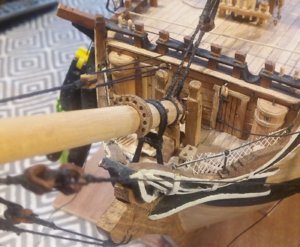
Main stay and preventer>
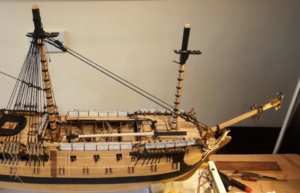
Snaking done and crows foot >
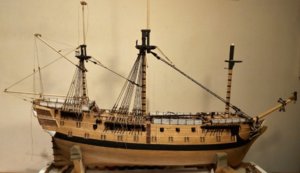
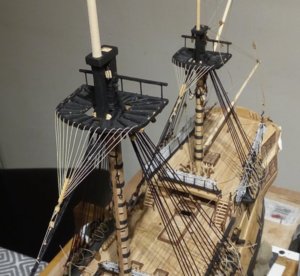
Before rigging the foremast, but after rigging the main mast shrouds I felt it was best to fit the bowsprit as the main stay and preventer originate there. I didn't want to be attempting to snake the two stays after the foremast shrouds would be in place. I was pleased I made this decision as it was tricky enough doing the snaking in the 'open space' afforded me in the absence of fore shrouds.
The components of the bowsprit, jib boom and flying jib boom >

The 30 or so slots for the bowsprit cleats were cut on the milling machine.
Dry fitted just to see 'if it works' >

The bowsprit cap requires 3 'holes' drilled at 30 degrees to the vertical plane as the cap sits on the end. I made a cut at 30 degrees, spot glued a piece of timber at each end, leaving an unglued section in the middle for later removal, clamped the wedge in the vice and drilled the holes again on the mill. >

While still in the vice I also used the mill cutter to make the top and bottom cuts, still at 30 degrees. >

My plans/drawing of Leopard didn't show a bowsprit fairlead, but as I had seen this feature on many models I opted to make one.
I made a ply of 3 very thin slices of Makore, drilled a 1mm hole near the centre, placed the ply on a 1mm pin (brass wire) on a jig attached to the travelling table of the mill and used the cutter to drill the required holes and also make the outer and inner cuts by revolving the ply by hand as the cutter did its job >


The rough blank cut out >

. . . and on the bowsprit >

Main stay and preventer>

Snaking done and crows foot >


- Joined
- Dec 15, 2019
- Messages
- 99
- Points
- 143

Foremast shrouds eventually in place. In this pic the unfinished fore top is parked on the skidbeams and the crossjack straddles the waist hammock netting >

This finished all the three lower sets of shrouds and it's easy to show all this within a few photos . . . but the photos don't show the 3 or 4 months this took!
During the 'shroud time' I diverted to some other, less tedious tasks. One was making the mizzen crossjack (which has already been seen lurking around the ship) >
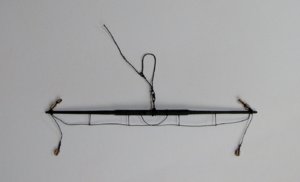
. . . and eventually rigged >
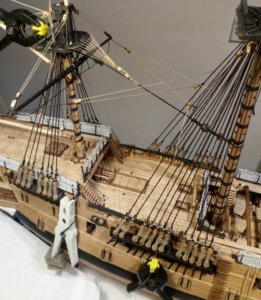
Well - - - not completely rigged, because although the braces are present and may appear to be rigged they are not made off as the merest tension was pulling the aftmost main mast shrouds out of line. In the photo above a clamp can be seen holding onto the bitter end of the port brace. (another clamp holding the starboard brace is hidden over on the port side.)
In the next photo the main shroud can be seen well out of line. This photo also shows that a start has been made on the main lower ratlines and my decision to start here was made so that I could tie all the shrouds together up to the futtock stave so that the crossjack could eventually be braced properly. >
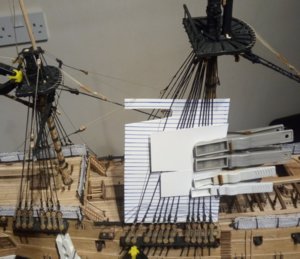
Tying ratlines isn't my favourite activity and it seemed like an eternity by the time I reached this stage >
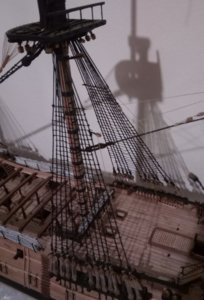
. . . but I was then able to finalise the rigging of the mizzen cro'jack!
On with the task of ratlines on the other masts. This was punctuated with several diversions to carry out work on other small projects around the ship.
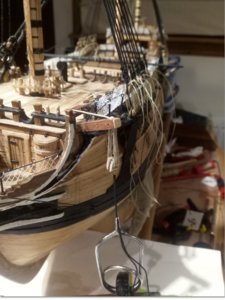
Rigging the port cat tackle -- just a small job, but that cathead is just over 6mm wide and getting that line reeved through the three sheaves (in the cathead) and the three sheaves in the block seemed like it was going to need a magic trick! >
Assembling a bower anchor wasn't too difficult although bending that rod into a circle proved a bit tricky.
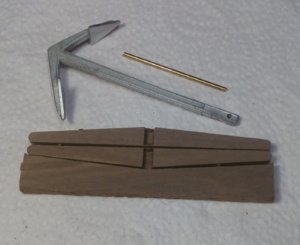
Here, the anchor awaiting its bands for the stock >
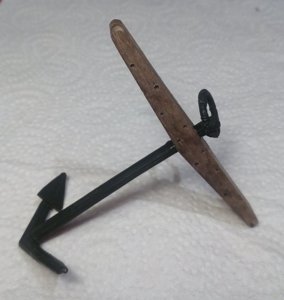
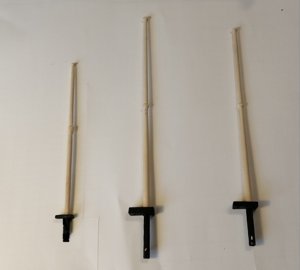
The three topmasts were also made during this time >
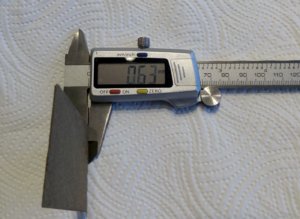
These presented another new challenge. The topmast tops being quite different to the lower tops are also quite small and fragile, especially at this scale. I couldn't imagine that a single piece of solid timber would be strong enough so I set about to make up a ply hoping that would be stronger. I was able to cut very thin pieces of Makore at 0.63mm thick >
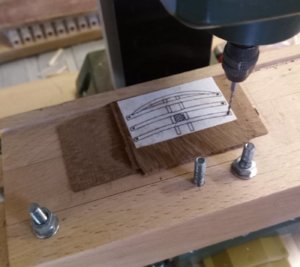
Four of these laminated at opposing grain directions gave me a piece around 2.5mm thick, and a paper copy of a top glued on gave the required shapes of the blanks >
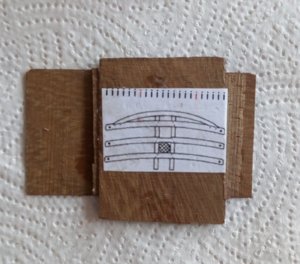
Before cutting out, the mill took care of drilling the six holes with accuracy >
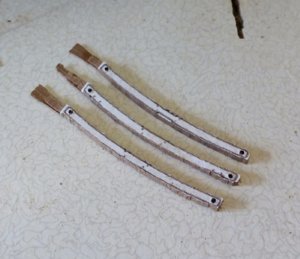
Then to the bandsaw >

. . . and the rough individual blanks >
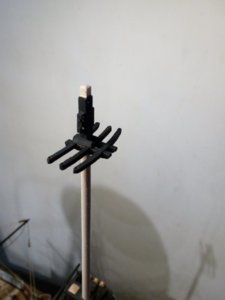
The main topmast top >

This finished all the three lower sets of shrouds and it's easy to show all this within a few photos . . . but the photos don't show the 3 or 4 months this took!
During the 'shroud time' I diverted to some other, less tedious tasks. One was making the mizzen crossjack (which has already been seen lurking around the ship) >

. . . and eventually rigged >

Well - - - not completely rigged, because although the braces are present and may appear to be rigged they are not made off as the merest tension was pulling the aftmost main mast shrouds out of line. In the photo above a clamp can be seen holding onto the bitter end of the port brace. (another clamp holding the starboard brace is hidden over on the port side.)
In the next photo the main shroud can be seen well out of line. This photo also shows that a start has been made on the main lower ratlines and my decision to start here was made so that I could tie all the shrouds together up to the futtock stave so that the crossjack could eventually be braced properly. >

Tying ratlines isn't my favourite activity and it seemed like an eternity by the time I reached this stage >

. . . but I was then able to finalise the rigging of the mizzen cro'jack!
On with the task of ratlines on the other masts. This was punctuated with several diversions to carry out work on other small projects around the ship.
Rigging the port cat tackle -- just a small job, but that cathead is just over 6mm wide and getting that line reeved through the three sheaves (in the cathead) and the three sheaves in the block seemed like it was going to need a magic trick! >

Assembling a bower anchor wasn't too difficult although bending that rod into a circle proved a bit tricky.

Here, the anchor awaiting its bands for the stock >

The three topmasts were also made during this time >

These presented another new challenge. The topmast tops being quite different to the lower tops are also quite small and fragile, especially at this scale. I couldn't imagine that a single piece of solid timber would be strong enough so I set about to make up a ply hoping that would be stronger. I was able to cut very thin pieces of Makore at 0.63mm thick >

Four of these laminated at opposing grain directions gave me a piece around 2.5mm thick, and a paper copy of a top glued on gave the required shapes of the blanks >

Before cutting out, the mill took care of drilling the six holes with accuracy >

Then to the bandsaw >

. . . and the rough individual blanks >

The main topmast top >

Last edited:
- Joined
- Dec 15, 2019
- Messages
- 99
- Points
- 143

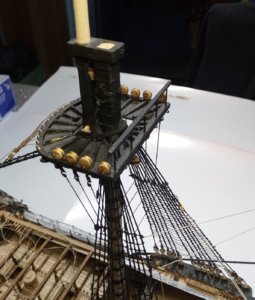
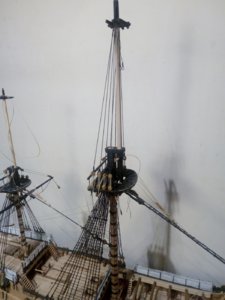
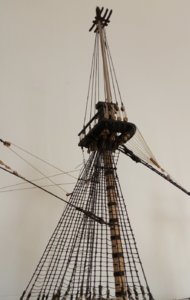
Ratlines just seemed to go on forever and to preserve my sanity there were plenty other 'more interesting' projects that received my attention.
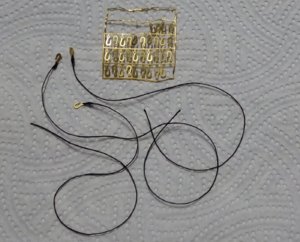
Futtock shrouds and topmast & topgallant shrouds followed. Although this was a scratch build, there were a few items that were bought 'over-the-counter' >
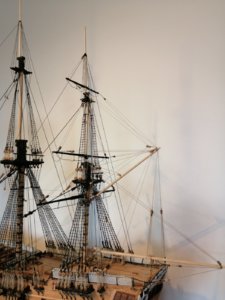
I call the next photo "1892" >>>
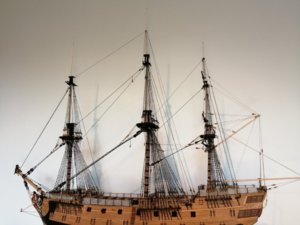
Nothing to do with the year 1892 - - - that was the first photo taken after the last of one thousand, eight hundred and ninety two (1892) ratlines was tied!
At this point only the smaller yards of the mizzen mast were in attendance. Time now for the 'bigger boys'.
Fore topsail and fore and main lower yards >
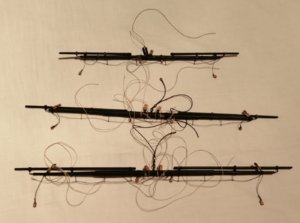
Main topsail yard >
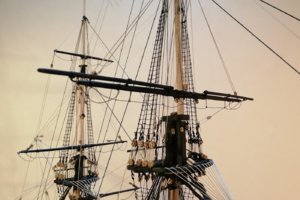
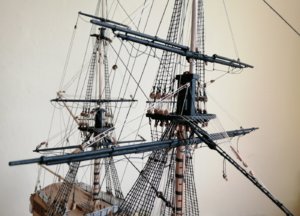
Rigging the jeers had been something that I hadn't been looking forward to, but the main jeers proved much easier that I expected >
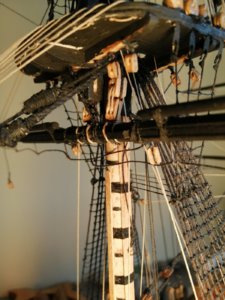
Rigging the truss pendants and the nave line however were something else. Without doubt, this was the most difficult and frustrating part of the entire rigging >
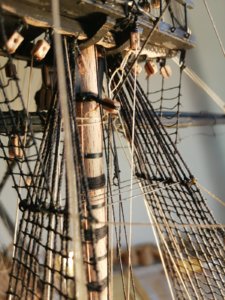
Well, that was until I arrived at the foremast, because, as there was much less space there in which to work, both fore jeers and truss pendants & nave line surpassed the "fun" I had at the main!
Futtock shrouds and topmast & topgallant shrouds followed. Although this was a scratch build, there were a few items that were bought 'over-the-counter' >


I call the next photo "1892" >>>

Nothing to do with the year 1892 - - - that was the first photo taken after the last of one thousand, eight hundred and ninety two (1892) ratlines was tied!
At this point only the smaller yards of the mizzen mast were in attendance. Time now for the 'bigger boys'.
Fore topsail and fore and main lower yards >

Main topsail yard >


Rigging the jeers had been something that I hadn't been looking forward to, but the main jeers proved much easier that I expected >

Rigging the truss pendants and the nave line however were something else. Without doubt, this was the most difficult and frustrating part of the entire rigging >

Well, that was until I arrived at the foremast, because, as there was much less space there in which to work, both fore jeers and truss pendants & nave line surpassed the "fun" I had at the main!
Awesome job, Jim. You have an eye for those small details! 

Beautiful work. I tip my hat to you sir.
- Joined
- Dec 15, 2019
- Messages
- 99
- Points
- 143

Another diversion from the monotony of the ratlines was to have a try at the figurehead. I wasn't really looking forward to that either as the only thing resembling carving I have ever done were the small things on the stern. As I had used molding clay for these, I tried to make the figurehead with that as well. I don't know if the clay was old and a bit past its best but it just wasn't working for me with the figurehead. So I picked up a scrap piece of softwood just for a bit of practice. I chopped away at it expecting some small delicate part or parts to break off but everything held together. I was quite surprised at the result I got but as it was only softwood I bought a piece of basswood from a hobby shop and proceeded to make a "proper" figurehead. Well, it wasn't long before bits were popping off the first attempt with the basswood. The second attempt was no more successful so I returned to my softwood prototype and spent some time trying to refine it into something that wouldn't look too bad up there at the beakhead.
Here, an early version looks back at the only image I have of the figurehead. At this point she is still very 'large' and knowing how women like to be slim a lot of scalpel work followed this photo >>
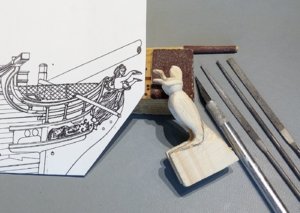
I have no photos of it in its intermediate stages but here she is sitting 'up front'. (She looks like she's holding in her hands two cymbals apart from each other --- I really have no idea what these 'cymbal-like' things are meant to be and I've never been able to find out???) >>
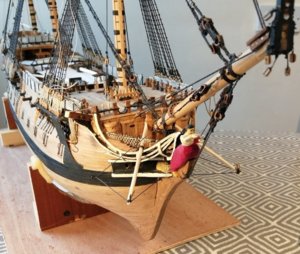
A collection of random photos.
Futtock shrouds and catharpins >
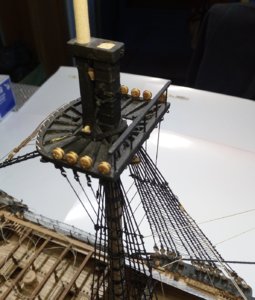
Futtock ratlines (more ratlines!) >
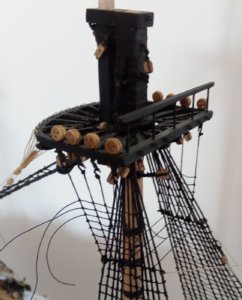
Some photos with bits of string in them >>
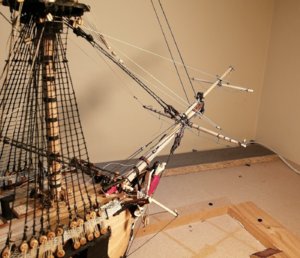
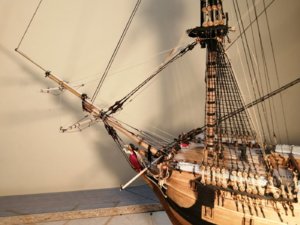
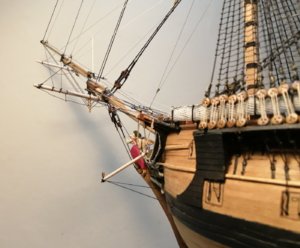
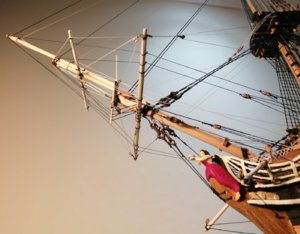
A general view with all its "string" attached (port bower anchor getting a 'test run' as another anchor sits under the ship) >>
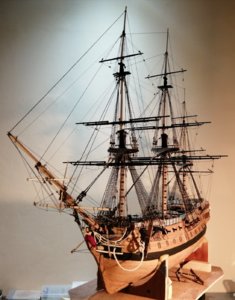
Here, an early version looks back at the only image I have of the figurehead. At this point she is still very 'large' and knowing how women like to be slim a lot of scalpel work followed this photo >>

I have no photos of it in its intermediate stages but here she is sitting 'up front'. (She looks like she's holding in her hands two cymbals apart from each other --- I really have no idea what these 'cymbal-like' things are meant to be and I've never been able to find out???) >>

A collection of random photos.
Futtock shrouds and catharpins >

Futtock ratlines (more ratlines!) >

Some photos with bits of string in them >>


A general view with all its "string" attached (port bower anchor getting a 'test run' as another anchor sits under the ship) >>

- Joined
- Dec 15, 2019
- Messages
- 99
- Points
- 143

A few final photos before Leopard went into her case.
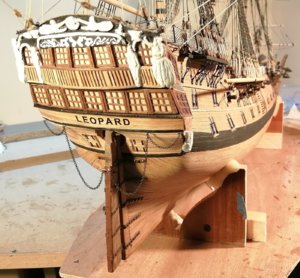
Eventually, after almost nine years, Leopard got her name. I tried to create my own lettering, but at this scale my lettering was truly awful so I ended up buying stick-on letters. Here with name and rudder pendants >
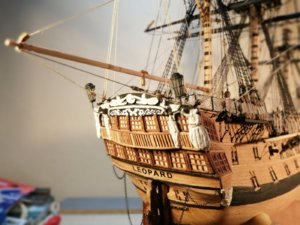
. . . and with stern lanterns >
A bit more colour up at the sharp end >
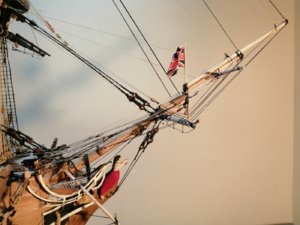
I made the bowsprit jack (1801 version) by gluing a 'right-way-round' one back to back with a horizontally flipped copy and crinkled the flag while the glue was still wet to get the 'blowing-in-the-wind' effect.
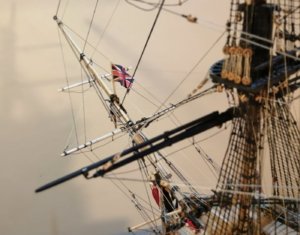
Starboard anchors and anchor buoy >
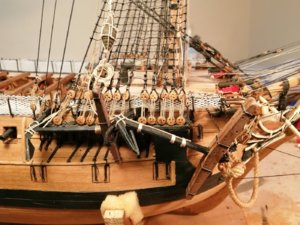
One of the 2 blocks that are mounted in these "tripod" style brackets which are fixed to the hull side just ahead of the mizzen mast. (I expect these have an official name -- but I don't know that name?) >
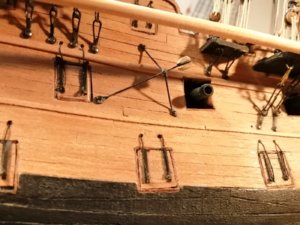
The starboard main course lower stunsail boom >

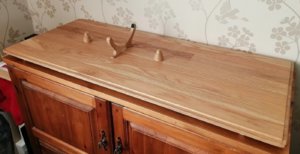
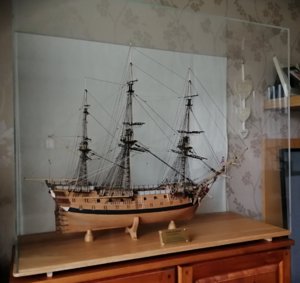
By this time, Leopard was about ready to go in her case. I did 'splash out' some cash and bought a custom sized acrylic case but made the base myself. My neighbour was renewing her kitchen and was throwing out all the "old" solid oak doors. (There's really no such thing as 'old' oak -- it's all useable!) The base used to be part of a kitchen -- some work and modification and it looked like this >

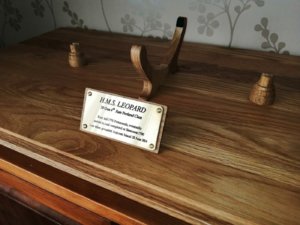
. . . and with the case >
Eventually, after almost nine years, Leopard got her name. I tried to create my own lettering, but at this scale my lettering was truly awful so I ended up buying stick-on letters. Here with name and rudder pendants >

. . . and with stern lanterns >

A bit more colour up at the sharp end >

I made the bowsprit jack (1801 version) by gluing a 'right-way-round' one back to back with a horizontally flipped copy and crinkled the flag while the glue was still wet to get the 'blowing-in-the-wind' effect.

Starboard anchors and anchor buoy >

One of the 2 blocks that are mounted in these "tripod" style brackets which are fixed to the hull side just ahead of the mizzen mast. (I expect these have an official name -- but I don't know that name?) >

The starboard main course lower stunsail boom >

By this time, Leopard was about ready to go in her case. I did 'splash out' some cash and bought a custom sized acrylic case but made the base myself. My neighbour was renewing her kitchen and was throwing out all the "old" solid oak doors. (There's really no such thing as 'old' oak -- it's all useable!) The base used to be part of a kitchen -- some work and modification and it looked like this >


. . . and with the case >

Congratulation for this great model - well done !!!
Congratulation ,nice job!!
you may want to post the finished photos in the completed models category,and Donnie can add them to the Gallery if you want,thank you!
you may want to post the finished photos in the completed models category,and Donnie can add them to the Gallery if you want,thank you!
Submit Images of Completed Models Here
This forum is for those that would like to upload their completed ships for the Showcase.
shipsofscale.com
Completed Models Showcase [1] . . . [25]
Completed Models Showcase Entries: Kit and Scratch Builds, Dioramas, Aircraft, Military, and Cars, and more are welcome!
shipsofscale.com
Kurt Konrath
Kurt Konrath
very nice build indeed, worthy of a fine case to display her in.
What will you do next with Free Time!
What will you do next with Free Time!
- Joined
- Dec 15, 2019
- Messages
- 99
- Points
- 143

Thank you Uwe, Knut, Zoltan and Kkonrath for your comments and the others for the likes and visits.
Zoltan, when I can gather the few photos of the finished model that I have, I'll post over on completed builds.
Kkonrath ~ what is "Free Time" !!! - - - I may be retired and also in the middle of a lockdown, but I can still find plenty to keep me occupied . . . and I'm already getting on with my next project, a cross section of . . . . . Yes! H.M.S. Leopard. (Link below)


