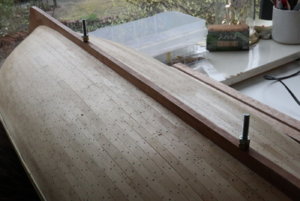
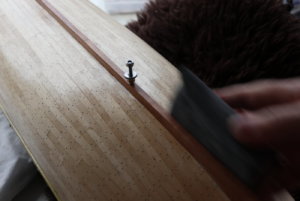
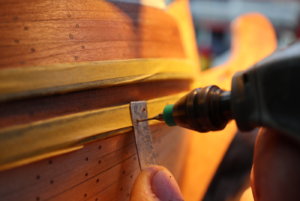
Hi Alex, as far as I know the decks were nailed and then plugged with wood, so they were not treenailed like the hull planks. This means you have to simulate a plug instead of a treenail. 0.5 mm is 15mm in real en size, I think that is on the small side and 0.7-0.8 would fit better.
-

Win a Free Custom Engraved Brass Coin!!!
As a way to introduce our brass coins to the community, we will raffle off a free coin during the month of August. Follow link ABOVE for instructions for entering.
-

PRE-ORDER SHIPS IN SCALE TODAY!
The beloved Ships in Scale Magazine is back and charting a new course for 2026!
Discover new skills, new techniques, and new inspirations in every issue.
NOTE THAT OUR FIRST ISSUE WILL BE JAN/FEB 2026
You are using an out of date browser. It may not display this or other websites correctly.
You should upgrade or use an alternative browser.
You should upgrade or use an alternative browser.
HMS Royal Caroline kit ZHL 1/30 (Following the Maarten's RC)
- Thread starter Alex T
- Start date
- Watchers 25
-
- Tags
- royal caroline zhl
Dear Maarten, how to simulate the plug? And what the hell is it?!you have to simulate a plug
Dear @Maarten , I am very grateful. Thank you!definately more then 1,5 cm
Well, I see 5cm plugs here, which mean 1.6mm holes in my case. That's a surprise. Would you recommend such a size? or shall I pick something smaller like 1.2 or 1.0 mm?
Last edited:
I would go for 1mm.Dear @Maarten , I am very grateful. Thank you!
Well, I see 5cm plugs here, which mean 1.6mm holes in my case. That's a surprise. Would you recommend such a size? or shall I pick something smaller like 1.2 or 1.0 mm?
Playing with carving patterns.
Well, I have realized that I will probably have to move the front deck down ~8mm.
Otherwise there is too much space above and below the carvings.
@Maarten (as he follows the original drawings) avoided it, but John got into this trap 8-(
View attachment 137097
G'day Alex, I didn't get into the trap, I made a decision just to build the kit out of the box, if you go to the first two pages of Maartens log
we are talking about the things that are different from the Anatomy of the ship plans and the kit and below is one of the things we were
talking about,
I had a few problems fitting in the carvings along the ships side and had to use builders license to trim some to fit, there are a few issues with some things, like the Forecastle deck is slightly higher on the kit than it is on the one in the book, but overall is a fantastic kit and I am really enjoying building it, I look forward to your future posts, enjoy,
and this is where I said that I was just going to build it out of the box,
I thought I had made a lot of progress with the Royal Caroline, but I still have sheets and sheets of parts and fittings, like you said its a beautiful well made kit, I'm not going to deviate from the kit, just build her out of the box, having said that I did double plank the insides of the bulwarks and the Cabin for extra strength, I'm not sure whether I will fully mast and rig her or just have stump masts, time will tell, any way enjoy your building and I will catch ya soon.
I was going to change things but was a bit concerned about the flow on effect, so I decided to just build it the way the instructions said, if Maarten had been building his first then I would have followed his log and done it his way, but anyway every ones build will be a little bit different, it would be a boring world if we were all the same, I'm enjoying following all the builds and i think Greg is just about to start his Royal Caroline soon, so that will make four of us building her, enjoy,
best regards john,
Dear John,I made a decision just to build the kit out of the box
I understand your approach, and please forgive me for using wrong words. I did not mean to hurt.
I guess in my case I do not have any specific "goal", like "do it according to original drawings" (like Maarten) or "do it right from the kit" (like you). I guess I adjust my development on the run. Probably it is partially because I do not have much time to think about it, as my father develops the ship with such huge speed that I hardly manage to supply him with guidelines. So, I am very opportunistic in this project.
I am lucky I got a present: 4 free days: I was supposed to speak at the conference in Andorra today, but I was afraid of stupid anti-virus actions of Spanish/Andorra government, and decided to drive from Amsterdam to Andorra instead of flying (It's 14 hours driving). Can you imagine, I got a call from the organizers when I passed 200km, and they cancelled it... only today! So, I am back home and can also allocate more time on the shipbuilding!
Dear @Maarten , I need your advice on the front deck.
2 questions:
1. it is too high
2. it has wrong geometry.
Q1. Too high.
I think I prefer to to lower it, because of the carvings, otherwise they do not look good enough. But will it affect any other systems? E.g. the bowsprit positioning? or anything else? I am not sure I feel it good.
Q2. Wrong geometry.
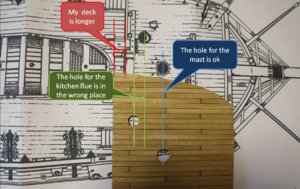
a) it is too long (red lines)
Should I cut it? I am afraid it will not leave me any space for the boat. Also, I do not recognize the devices under the front of the board. Will these devices be affected by the long deck?
b) if I cut it, I have an issue with the flue hole. I can move to the front where it belongs but it means replacing 3 planks which is not fun at all.
Any comments? You feel this ship much better than I do. I hope you can give me some balanced advice.
Yours,
Alex
2 questions:
1. it is too high
2. it has wrong geometry.
Q1. Too high.
I think I prefer to to lower it, because of the carvings, otherwise they do not look good enough. But will it affect any other systems? E.g. the bowsprit positioning? or anything else? I am not sure I feel it good.
Q2. Wrong geometry.

a) it is too long (red lines)
Should I cut it? I am afraid it will not leave me any space for the boat. Also, I do not recognize the devices under the front of the board. Will these devices be affected by the long deck?
b) if I cut it, I have an issue with the flue hole. I can move to the front where it belongs but it means replacing 3 planks which is not fun at all.
Any comments? You feel this ship much better than I do. I hope you can give me some balanced advice.
Yours,
Alex
Hi Alex the height of the deck in my RC was OK. It is just on top of the FWD multiplex frame. However I raised the most forward deck just below the bowsprit as my top wale is in a slightly higher position because I gave the lower and top wales the same flow with three full planks between the lower and top wale. In the kit they narrow the space between the lower and top wale which to my opinion is disturbing the nice shape of the hull.
This means that the space you decrease at the carvings is added to the space between the wales.
As I just build it I can't exactly give you the measurement.
The lenght of the deck I have to check as I didn't use the deck template but build it from scratch.
Below the deck is the riding bit, if the deck is longer it will be more positioned under the deck out of visibility but it is possible. The longer deck wil not give you any major issues, the only I can think of is the position of the stairs to the deck in relation to the most forward gun, that is what you have to check. A too long deck will poisition these strairs on top or directly next to your gun carriage.
Hope it helps, otherwise let me know.
Dear John,
I understand your approach, and please forgive me for using wrong words. I did not mean to hurt.
I guess in my case I do not have any specific "goal", like "do it according to original drawings" (like Maarten) or "do it right from the kit" (like you). I guess I adjust my development on the run. Probably it is partially because I do not have much time to think about it, as my father develops the ship with such huge speed that I hardly manage to supply him with guidelines. So, I am very opportunistic in this project.
I am lucky I got a present: 4 free days: I was supposed to speak at the conference in Andorra today, but I was afraid of stupid anti-virus actions of Spanish/Andorra government, and decided to drive from Amsterdam to Andorra instead of flying (It's 14 hours driving). Can you imagine, I got a call from the organizers when I passed 200km, and they cancelled it... only today! So, I am back home and can also allocate more time on the shipbuilding!
No worries Alex, I do appreciate all comments and I like members getting involved, I probably over reacted but just wanted to let you know what I was doing, as you know the instructions and drawings are sometimes hard to follow,
Best regards john,
G'day Alex, maybe I can answer your questions,
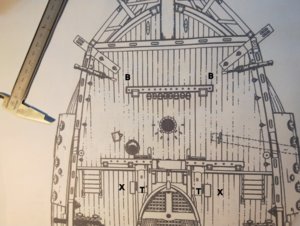
The items to the right and left of X are the riding bitts, the items marked T are the spare topmasts that the
boat sits on, there are other inconsistency's look up at the letters B and then have a look at the kits pics,
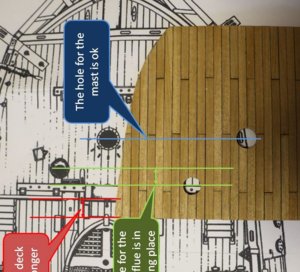
You are right your deck is longer than on the drawings see my next pic,
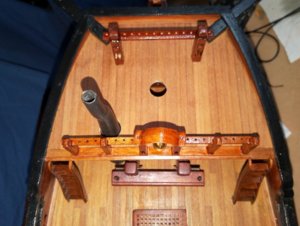
It is approm13mm longer than the drawings,
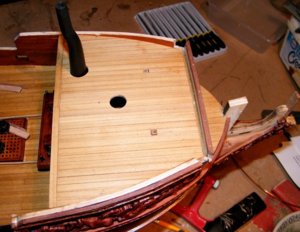
another view, on the drawings you would see more of the beam below the edge of the deck,
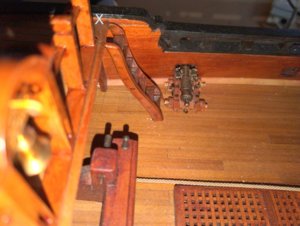
Here is another view looking down on mine, as you can see what Maarten was saying about the steps and the cannon
I am going to cut my steps into the moulding that goes across the Focsle where the X is and probably trim some
off the top of the steps as well,
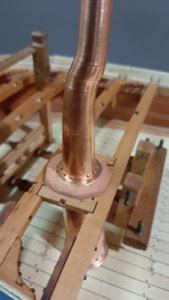
and a photo Of Maartens, hope you dont mind Maarten, which is scratch built where as mine is from the kit,
there doesn't seem to be a lot of difference,
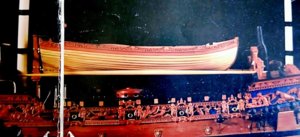
This is a pic from the manual showing the launch sitting on the beams, you can see how much room is at the
front and the rear,
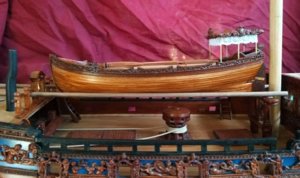
My launch just sitting on a couple of dowels, you can see the same spaces at both ends,
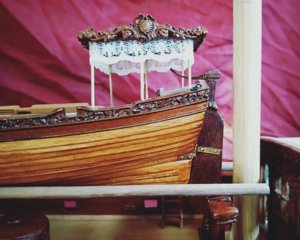
Close up of the rear,
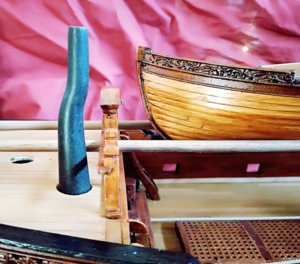
and close up of the front, also remember that you have increased the length of your deck so if you just want to
add the kit fore deck you should have no troubles with the space,
hope this helps you to make a decision,
best regards john,

The items to the right and left of X are the riding bitts, the items marked T are the spare topmasts that the
boat sits on, there are other inconsistency's look up at the letters B and then have a look at the kits pics,

You are right your deck is longer than on the drawings see my next pic,

It is approm13mm longer than the drawings,

another view, on the drawings you would see more of the beam below the edge of the deck,

Here is another view looking down on mine, as you can see what Maarten was saying about the steps and the cannon
I am going to cut my steps into the moulding that goes across the Focsle where the X is and probably trim some
off the top of the steps as well,

and a photo Of Maartens, hope you dont mind Maarten, which is scratch built where as mine is from the kit,
there doesn't seem to be a lot of difference,

This is a pic from the manual showing the launch sitting on the beams, you can see how much room is at the
front and the rear,

My launch just sitting on a couple of dowels, you can see the same spaces at both ends,

Close up of the rear,

and close up of the front, also remember that you have increased the length of your deck so if you just want to
add the kit fore deck you should have no troubles with the space,
hope this helps you to make a decision,
best regards john,
Dear John, I fully agree: the mismatch between drawings and the kit are massive. Unfortunately I just do not have time to dive into them and build a clear strategy (like Maarten did), as my father is too fast. He will go back to Moscow soon for 3 months or so, which leaves me some time to process all manuals, drawings etc.as you know the instructions and drawings are sometimes hard to follow
WOW! That was a perfect explanation! Thank you, John, this provides enough info to make my decisions!hope this helps you to make a decision,
You know, it is the first time I am building the ship with such a support, and this is just amazing. I do enjoy it.
Ah... I see.However I raised the most forward deck just below the bowsprit as my top wale is in a slightly higher position because I gave the lower and top wales the same flow with three full planks between the lower and top wale.
Dear @Maarten , thank you! Your comments helped me to understand the environment. As usual, I admire your level of expertise. I mean it. It's a real pleasure to have your support!


