-

Win a Free Custom Engraved Brass Coin!!!
As a way to introduce our brass coins to the community, we will raffle off a free coin during the month of August. Follow link ABOVE for instructions for entering.
-

PRE-ORDER SHIPS IN SCALE TODAY!
The beloved Ships in Scale Magazine is back and charting a new course for 2026!
Discover new skills, new techniques, and new inspirations in every issue.
NOTE THAT OUR FIRST ISSUE WILL BE JAN/FEB 2026
You are using an out of date browser. It may not display this or other websites correctly.
You should upgrade or use an alternative browser.
You should upgrade or use an alternative browser.
HMS Royal Caroline kit ZHL 1/30
- Thread starter Maarten
- Start date
- Watchers 112
-
- Tags
- royal caroline zhl
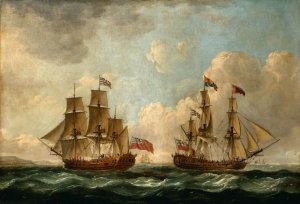
Interesting painting. It doesn't show the blue around the carvings........that's very strange for a naval artist of that time.
Looks more like a redish background. There seems to be more paintings of the rc available showing also different rigging. Doesnt make it mo ree simple.
Today I had a spare hour to start with the chimney funnel. As mentioned due to Gregs research confirmed with several paintings it look like a copper funnel. To do this I use the pear chimney supplied with the kit which I will cover with copper tape.
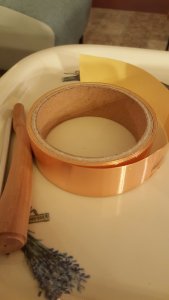
This tape is available at every garden shop or better diy shops and is normally used to tape around pots to avoid snails from getting in (free tip .)
.)
This tape I will fit in three strokes around the lower part of the funnel.
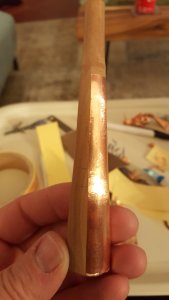
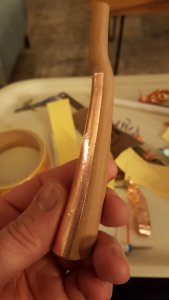
It is quite tricky and delicate to get it around without any folds and cracks.
But finally managed to get it all around the lower part.
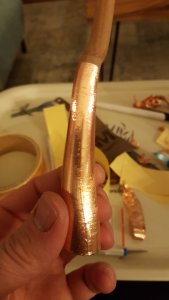
The top I fitted with 2 small strips wrapped around to cover the bend in the funnel followed by the straight section in the top. Resulting in this.
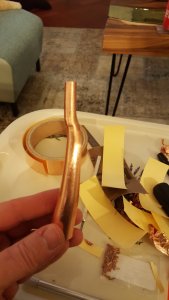
The last step was polishing it to a nice flat surface without any wrinckels, for this I used the nice round aluminium handle of an exacto knive polishing this along the funnel.
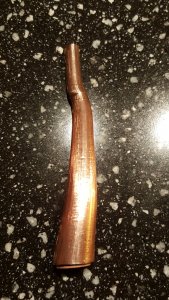
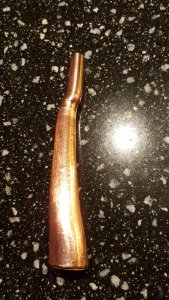
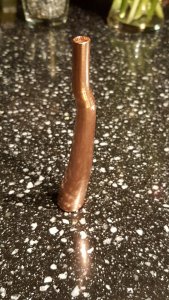
Next step is adding ribbets to the surface, for this I use tiny 1mm copper ribbets.
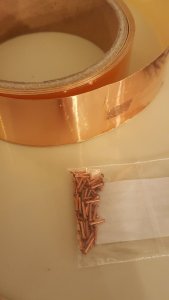
This is followed by aging of the copper and painting the inside black, but that is next time.
Today I had a spare hour to start with the chimney funnel. As mentioned due to Gregs research confirmed with several paintings it look like a copper funnel. To do this I use the pear chimney supplied with the kit which I will cover with copper tape.

This tape is available at every garden shop or better diy shops and is normally used to tape around pots to avoid snails from getting in (free tip
This tape I will fit in three strokes around the lower part of the funnel.


It is quite tricky and delicate to get it around without any folds and cracks.
But finally managed to get it all around the lower part.

The top I fitted with 2 small strips wrapped around to cover the bend in the funnel followed by the straight section in the top. Resulting in this.

The last step was polishing it to a nice flat surface without any wrinckels, for this I used the nice round aluminium handle of an exacto knive polishing this along the funnel.


Next step is adding ribbets to the surface, for this I use tiny 1mm copper ribbets.

This is followed by aging of the copper and painting the inside black, but that is next time.
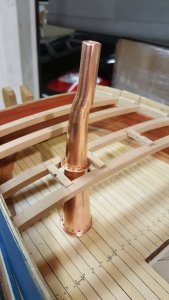
Today I added the ribbets and made the flanges for the deck passage of the chimney.
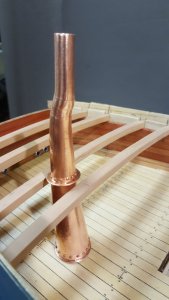
First I thought I would also add ribbets vertically but I think I wil cancel that for being to much.
Now the chimney can be aged by aging the copper.
Under the flanges there will be a terracotta clay as insulation between the copper and the wood but before shaping this I first have to prepare the deck structure where the pipe is passing through.
I am now working on this deck beam construction.
To be continued.

First I thought I would also add ribbets vertically but I think I wil cancel that for being to much.
Now the chimney can be aged by aging the copper.
Under the flanges there will be a terracotta clay as insulation between the copper and the wood but before shaping this I first have to prepare the deck structure where the pipe is passing through.
I am now working on this deck beam construction.

To be continued.
Very nice work Maarten, excelent detail,
best regards john.
best regards john.
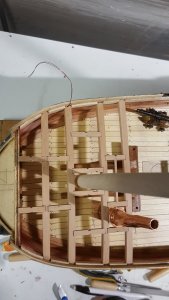
Further progress on the deckbeam construction.
The small beams(carlings) in between are build from two strips of pear cut and filed in shape and then glued together.
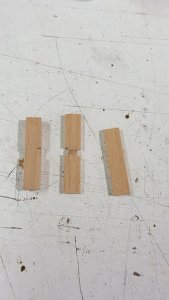
The notches in the beams are cut with an exacto knive.
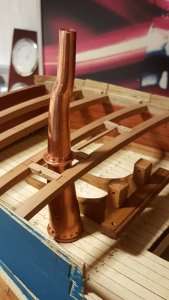
Around the mast additional carlings should be fitted to carry the forces of locking the mast in the deck. For this I dry fitted the fwd mast.
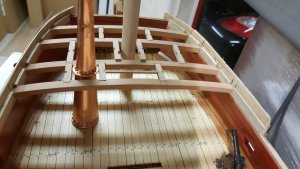
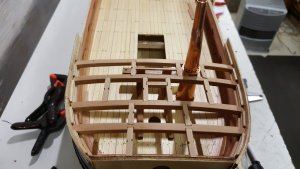
All the beams and carlings are now dry fitted and only the ledges (smallest beams between the carlings) will follow, only one fitted at the moment.
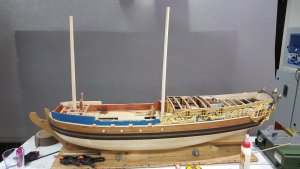
To line up the fwd mast both masts are dry fitted. It shows the hudge size of this model.
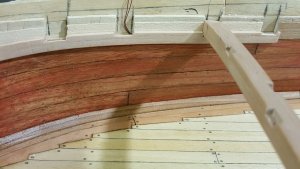
Mast again removed followed by creating the shelf clamp (deck beam carrier).
This is the result after today.
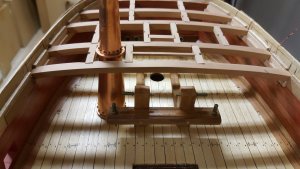
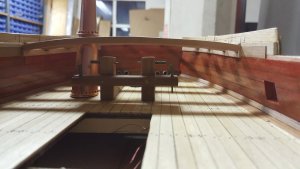
Next time creating the ledges and the knees for the deck beams.
It is a lot of additional work but really upgrades the models compared with the multiplex deck provided and it is a lot of fun to do it.
The small beams(carlings) in between are build from two strips of pear cut and filed in shape and then glued together.

The notches in the beams are cut with an exacto knive.

Around the mast additional carlings should be fitted to carry the forces of locking the mast in the deck. For this I dry fitted the fwd mast.

All the beams and carlings are now dry fitted and only the ledges (smallest beams between the carlings) will follow, only one fitted at the moment.

To line up the fwd mast both masts are dry fitted. It shows the hudge size of this model.

Mast again removed followed by creating the shelf clamp (deck beam carrier).

This is the result after today.


Next time creating the ledges and the knees for the deck beams.
It is a lot of additional work but really upgrades the models compared with the multiplex deck provided and it is a lot of fun to do it.
Maarten,
As always - brilliant work
As always - brilliant work
G'day Maarten
As per normal, you have gone the extra mile on this section. And the results speak volumes.......
Great ideas you are showing all of us.
Are you going to put a LED light in this area?
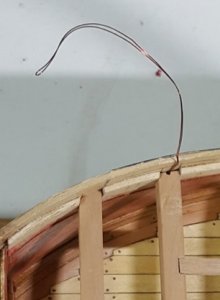
Again a marvelous idea.
Keep them coming memattie.
As per normal, you have gone the extra mile on this section. And the results speak volumes.......
Absolutely brillimaartenant!
I hope that you don't mind, I will try to endeavour to follow your high standards.Great ideas you are showing all of us.
Are you going to put a LED light in this area?

Again a marvelous idea.
Keep them coming memattie.
Many thx to all for your comments and likes.G'day Maarten
As per normal, you have gone the extra mile on this section. And the results speak volumes.......
Absolutely brillimaartenant!I hope that you don't mind, I will try to endeavour to follow your high standards.
Great ideas you are showing all of us.
Are you going to put a LED light in this area?
View attachment 75872
Again a marvelous idea.
Keep them coming memattie.
Greg, yes there will be two lanterns hanging from this deck beam.
Beautiful work, Maarten!
Just one thing to consider: the mast (in this case the fore mast) was firmly secured to the main deck with mast partners. Then it must not be secured the same way to the forecastle deck, because the mast would be overloaded and would breake easily. Hence in the forecastle deck there should not be a mast partner installed, there was just clearance all around the mast, mostly not even round, but square, as the beams and carlings have been laid. I also used mast partners at the forecastle deck in my Royal Caroline but now I think it was incorrect. Correct me if I am wrong!
Janos
Hi Janos,
Thx for the comment, I couldn't find anything about it in my literature. If this is the case then I can just leave it like it is now. I will have a look at batavia how they did it there, allthough there is over 100 years and a different country in between.
The aots drawings are not showing the details also.
Maybe just leave it and seal the mast to the deck with canvas.
its so exciting to see your latest posts Maarten. Wonderful stuff.
Hi Janos,Hi Janos,
Thx for the comment, I couldn't find anything about it in my literature. If this is the case then I can just leave it like it is now. I will have a look at batavia how they did it there, allthough there is over 100 years and a different country in between.
The aots drawings are not showing the details also.
Maybe just leave it and seal the mast to the deck with canvas.
I could find this in my drawings on the Dutch ship 7 provinciën where you can clearly see the mast is locked in the main decks and not in the fore castle deck.
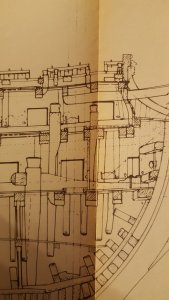
So I think I will follow your advise and just create a sealing of the deck.
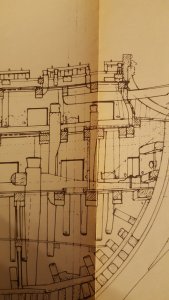
G'day Greg, can you see the three lines coming down from above the ship and they go right down to bottom
of the hull to where the mast sits in the step just above the keel,
best regards john,
Last edited:
Thanks JohnG'day Greg, can you see the three lines coming down from above the ship and they go right down to bottom
of the hull to where the mast sits in the step just above the keel,
best regards john,
I can see it now. PoopPoopPoopPoop
Thx john for your clarification. It is indeed nearly invisible. Old copies from blue prints.
Yesterday evening I have been working on the ledges and the horizontal knees.
First I draw the shape of the knee on solid pear of 8 mm thick.
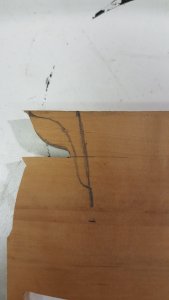
Then after cutting it on ny Hegner saw I cut it in two over the length to have two identical knees.
This saves a lot of time.
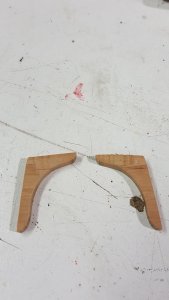
Then finishing by sanding and fix it to the deck beam.
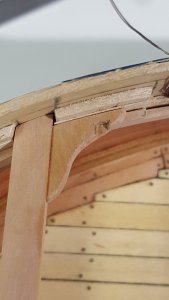
6 knees are fitted only two left to fit against the front bulkhead.
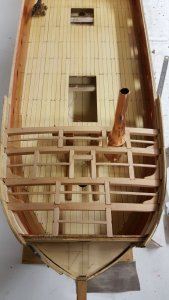
The ledges are also dry fitted.
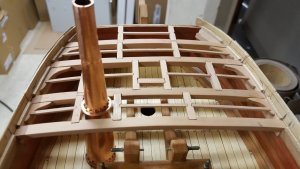
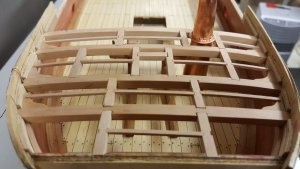
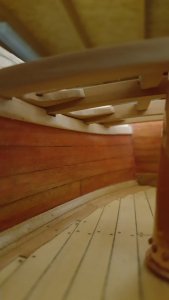
Next time the last two horizontal knees and then time for 8 vertical knees.
First I draw the shape of the knee on solid pear of 8 mm thick.

Then after cutting it on ny Hegner saw I cut it in two over the length to have two identical knees.
This saves a lot of time.

Then finishing by sanding and fix it to the deck beam.

6 knees are fitted only two left to fit against the front bulkhead.

The ledges are also dry fitted.


Next time the last two horizontal knees and then time for 8 vertical knees.
Lovely work Maarten, will you be leaving some of the deck planking off so as to be able to see these details, and I really like your photos, especially the one under the deck,
Best regards John.
Best regards John.


