Ditto on the dittoditto

-

SUBSCRIBE TO SHIPS IN SCALE TODAY!
The beloved Ships in Scale Magazine is back and charting a new course for 2026!
Discover new skills, new techniques, and new inspirations in every issue.
NOTE THAT OUR NEXT ISSUE WILL BE MARCH/APRIL 2026 -

Win a Free Custom Engraved Brass Coin!!!
As a way to introduce our brass coins to the community, we will raffle off a free coin during the month of August. Follow link ABOVE for instructions for entering.
You are using an out of date browser. It may not display this or other websites correctly.
You should upgrade or use an alternative browser.
You should upgrade or use an alternative browser.

Amazing build Oleg, it’s an inspiration!!! May l ask what kind of wood do you use to fill the gaps between bulkheads?First I installed the nightheads and plenked the beakhead and forward part o the upperdeck
View attachment 216091View attachment 216092View attachment 216093
- Joined
- Oct 15, 2017
- Messages
- 1,197
- Points
- 443

Hi Oleg,
Wonderful work, as always. One question for you. I've seen many different ways to register each half of casting molds, but yours has me stumped. Would you please explain how you created the "crinkle" looking patterns to lock both sides of your molds.
Thank you.
- Joined
- Dec 19, 2022
- Messages
- 72
- Points
- 113

everything is quite simple, cut to the middle with a wave, then push the mold apart and cut to the model, the halves will always correspond to each otherHi Oleg,
Wonderful work, as always. One question for you. I've seen many different ways to register each half of casting molds, but yours has me stumped. Would you please explain how you created the "crinkle" looking patterns to lock both sides of your molds.
Thank you.


Hi Ken, yes, I cut the mold into 2 parts with a knife creating a zigzag pattern.
This was my first experience and I actually messed it up: I did excessively big molding boxes. It's only when I started cutting the molds in 2, I realized my mistake: the molds were so big that I was not able to cut them. So I had to cut off the slices of mold material from all sides to make the mold smaller. Unfortunately, because of this, subsequently I was not able to put the mold back into the original mold boxes to do the casting. Usually that's what you do: you put your mold halves back into the box where they were created and close the box. Since this is the box from which the mold is coming, the walls of the box perfectly match the surfaces of the mold, so you will never over-press the 2 parts of the mold. In my case I couldn't do that, since my molds were now smaller than the interior of the boxes. So I had to clamp the 2 halves together by other means and as slightly as I could, but still firm enough. However, in this way it's not possible to completely get rid of the slight ovality of the resulting castings. It's not catching the eye, but still it's there. I know it's there.
This was my first experience and I actually messed it up: I did excessively big molding boxes. It's only when I started cutting the molds in 2, I realized my mistake: the molds were so big that I was not able to cut them. So I had to cut off the slices of mold material from all sides to make the mold smaller. Unfortunately, because of this, subsequently I was not able to put the mold back into the original mold boxes to do the casting. Usually that's what you do: you put your mold halves back into the box where they were created and close the box. Since this is the box from which the mold is coming, the walls of the box perfectly match the surfaces of the mold, so you will never over-press the 2 parts of the mold. In my case I couldn't do that, since my molds were now smaller than the interior of the boxes. So I had to clamp the 2 halves together by other means and as slightly as I could, but still firm enough. However, in this way it's not possible to completely get rid of the slight ovality of the resulting castings. It's not catching the eye, but still it's there. I know it's there.
Last edited:
So, for the materials:
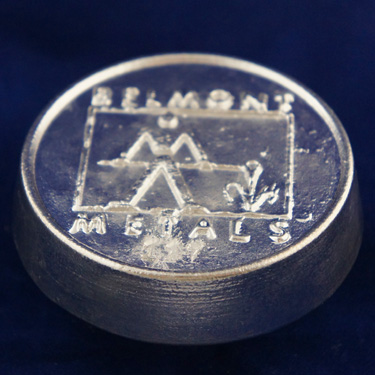
 www.belmontmetals.com
TRU Alloy, 281 F, 138 C Eutectic Low Melting Alloy - Belmont Metals
This is a Bismuth based Eutectic low melting alloy whose main attribute is the minimal volume change between its liquid and solid state. This is the highest melting point of the bismuth-base alloys commonly used in the industry and provides an easily castable material ready for use soon after it...
To blacken the canons, I had to do the copper plating first (electroless).
For that, I used the solution made of distilled water, sulfuric acid and copper sulfate.
All 100 cannons are done and I started installing them on the ship.

 fortnine.ca


For that, I used the solution made of distilled water, sulfuric acid and copper sulfate.
All 100 cannons are done and I started installing them on the ship.
Yuasa Electrolyte Battery Acid
Features: Easy to use single use packaging Clean: no mess Prevents waste of good batteries when electrolyte is lost
- Joined
- Oct 15, 2017
- Messages
- 1,197
- Points
- 443
Thanks for taking the time out of your day to provide such a detailed answer Oleg. I have done some trials myself, using Max Mold 60, but always looking for the best solution. The reason I asked about the mold material was in your second set of photos, the mold material is white. Max Mold 60, as you know is red/brown. It seemed to me a little "chalky" to cut without some crumbling. But now that you've explained how, I need to do another test.Hi Ken, yes, I cut the mold into 2 parts with a knife creating a zigzag pattern.
This was my first experience and I actually messed it up: I did excessively big molding boxes. It's only when I started cutting the molds in 2, I realized my mistake: the modls were so big that I was not able to cut them. So I had to cut off the slices of mold material from all sides to make the mold smaller. Unfortunately, because of this, subsequently I was not able to put the mold back into the original mold boxes to do the casting. Usually that's what you do: you put your mold halfs back into the box where they were created and close the box. Since thi is the box from which the mold is coming, the walls of the box perfectly match the surfaces of the mold, so you will never over-press the 2 parts of the molds. In my case I couldn't do that, since my molds were now smaller than the interior of the boxes. So I had to clamp the 2 halfs together by other means and as slightly as I could, but still firm enough. However, in this way it's not possible to completely get rid of the slight ovality of resulting castings. It's not catching the eye, but still it's there. I know it's there.

I then used clay to create each side of the mold, different from your method, I think and maybe an unnecessary step.


It may be a year or more before I actually do any production casting, but I'm a planner and would like to have my process finalized with clear expectations.
You've helped me a lot. Thanks again Oleg.
Cheers!

- Joined
- Dec 19, 2022
- Messages
- 72
- Points
- 113
Oleg, electrolyte should not be used, it is harmful to health, food vinegar 9% is quite suitable as a substitute.To blacken the canons, I had to do the copper plating first (electroless).
For that, I used the solution made of distilled water, sulfuric acid and copper sulfate.
All 100 cannons are done and I started installing them on the ship.
Yuasa Electrolyte Battery Acid
Features: Easy to use single use packaging Clean: no mess Prevents waste of good batteries when electrolyte is lost
View attachment 395133View attachment 395134View attachment 395135View attachment 395136
Ok, good to know. All the recipes for copper plating that I had found on the internet, were with the acidOleg, electrolyte should not be used, it is harmful to health, food vinegar 9% is quite suitable as a substitute.
Hallo @TotmozHi Oleg!
I've done etching before with the same problems. Now I just ordered laser cutting.
And the model is great!
we wish you all the BEST and a HAPPY BIRTHDAY

Sorry Oleg to use your log for these wishes

Happy Birthday, Oleg !
Happy Birthday, Oleg !
not me haha
The story with guns is finally finished. All of them assembled and installed on the ship together with carriages and equipment. Port lid tackles also installed. I made a set of photos to reflect the curresnt stage, since the hull is almost complete. Only decorations are missing, and a boat.


 WOW!!!!
Sensational work Oleg, love all the fine details and the combination of wood tones !!!
- Joined
- Apr 20, 2020
- Messages
- 6,419
- Points
- 738

Oleg, such a beautiful model, great workThe story with guns is finally finished. All of them assembled and installed on the ship together with carriages and equipment. Port lid tackles also installed. I made a set of photos to reflect the curresnt stage, since the hull is almost complete. Only decorations are missing, and a boat.
View attachment 401224View attachment 401225View attachment 401226View attachment 401227View attachment 401228View attachment 401229View attachment 401230View attachment 401231View attachment 401232View attachment 401233View attachment 401234View attachment 401235View attachment 401236View attachment 401237View attachment 401238View attachment 401239View attachment 401240View attachment 401241View attachment 401242View attachment 401243View attachment 401244


