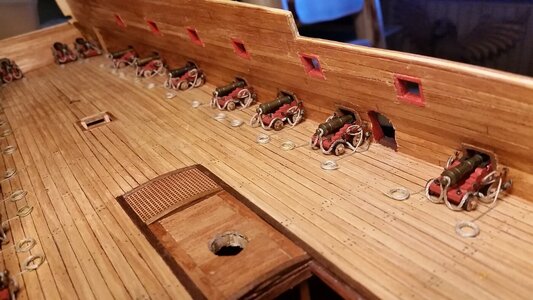
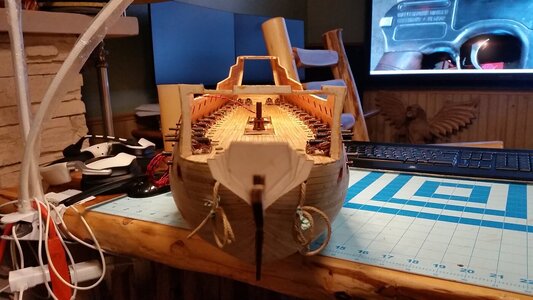
It's a bit more difficult, but not nearly as difficult as rigging un tackles through the gun port with a barrel poking out. That's impossible, unless you can pay some army ants contractors to go inside and do the work.I am with Saha (@Alexander74), it is much more difficult to put the final planks while the guns protruded and will be even more difficult to shape. But...I am confident, you know, you do it right.
-

Win a Free Custom Engraved Brass Coin!!!
As a way to introduce our brass coins to the community, we will raffle off a free coin during the month of August. Follow link ABOVE for instructions for entering.
-

PRE-ORDER SHIPS IN SCALE TODAY!
The beloved Ships in Scale Magazine is back and charting a new course for 2026!
Discover new skills, new techniques, and new inspirations in every issue.
NOTE THAT OUR FIRST ISSUE WILL BE JAN/FEB 2026
You are using an out of date browser. It may not display this or other websites correctly.
You should upgrade or use an alternative browser.
You should upgrade or use an alternative browser.
HMS Sovereign of the Seas - Bashing DeAgostini Beyond Believable Boundaries
- Thread starter DARIVS ARCHITECTVS
- Start date
- Watchers 105
those exist???It's a bit more difficult, but not nearly as difficult as rigging un tackles through the gun port with a barrel poking out. That's impossible, unless you can pay some army ants contractors to go inside and do the work.
- Joined
- Aug 8, 2019
- Messages
- 5,582
- Points
- 738

They are called Smurfs. they got tiny blue fingers to do that stuffthose exist???
I guess they don’t have navy ants.It's a bit more difficult, but not nearly as difficult as rigging un tackles through the gun port with a barrel poking out. That's impossible, unless you can pay some army ants contractors to go inside and do the work.
More progress today. One of the hardest things to make in detail is the railings for ladders. They were conspicuously missing from my last model, and the small scale makes it virtually impossible to make the bannisters with turned spindles. Most builders build them much larger to scale so they aren't left out, but for months I looked for a better solution, and I think I found it with this build.
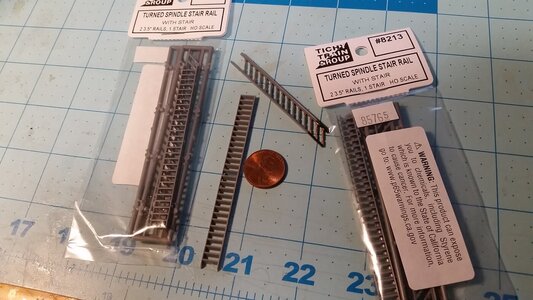
Railroad model accessories sometimes are useful in ships, and in this case, the molded plastic ladders seemed workable for this build at 1:72 scale. The ladders were too narrow but the railings were perfect. Lost of internet searching turned up the ladders below. Several sets were purchased to be used on this model and future ones. Cutting and fitting what was needed, the parts were painted black and gold, and railing sections were glued together with CA glue to make slender and delicate railings. The experiment proved workable and the results look good.
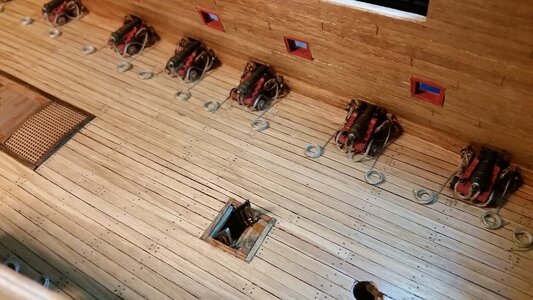
Then reinforcement timbers were begun around the fore mast hole, and deck rings installed behind all the gun carriages for train tackles. "J" shaped blacked wire hooks inverted and glued in holes hold blackened rings to the deck. In the case of this early ship, dedicated train tackles were not used. Instead it is believed that one or both gun tackles were unhooked form the bulwark and hooked onto rings at the rear end of the carriage and to deck rings to haul the carriage back when needed.
Railing partially installed. Needs top rail section.
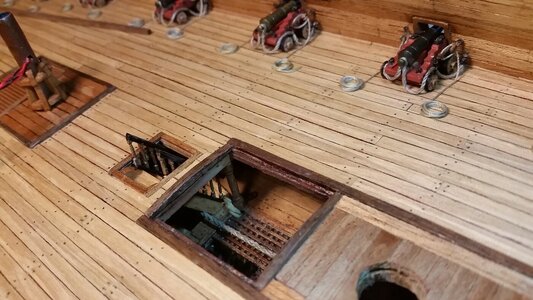
The flashlight allows you to see the ladder better.
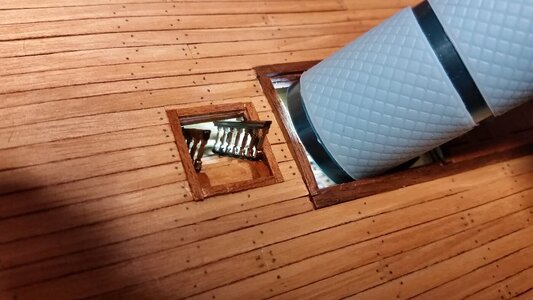
Aft ladder being installed.
First section of top rail test fitted.
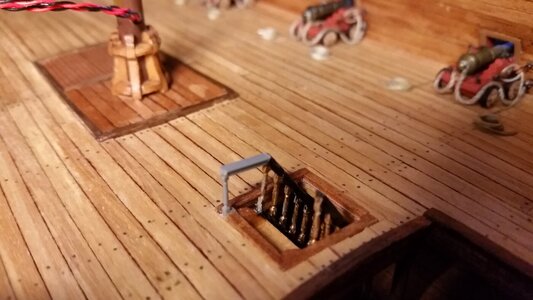
Finished forward ladder railing.
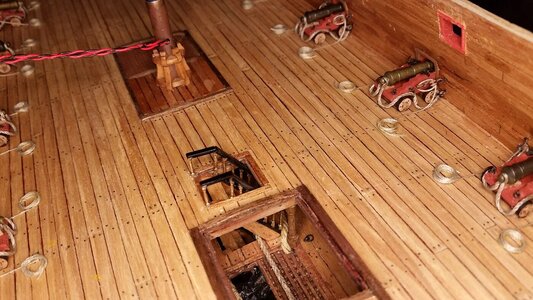
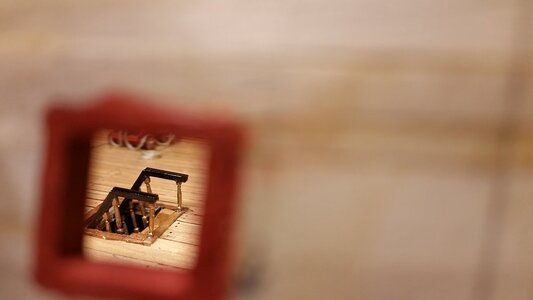
Finished aft ladder railing, best viewed through gun port.
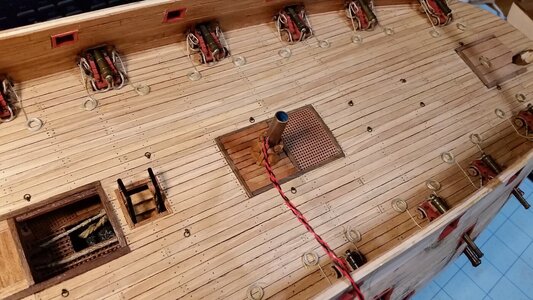
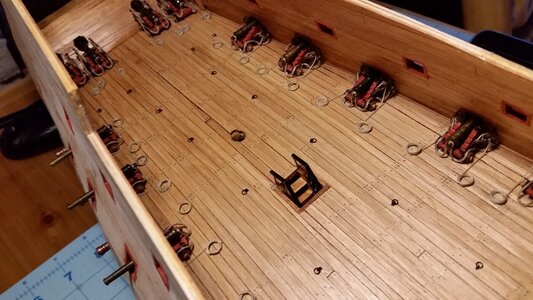
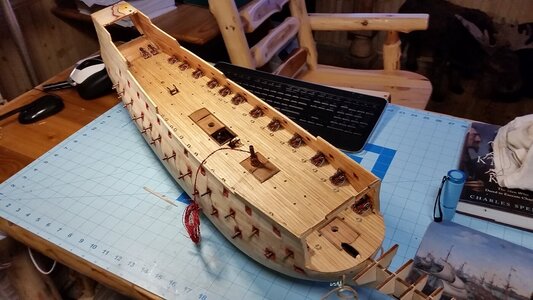
Railroad model accessories sometimes are useful in ships, and in this case, the molded plastic ladders seemed workable for this build at 1:72 scale. The ladders were too narrow but the railings were perfect. Lost of internet searching turned up the ladders below. Several sets were purchased to be used on this model and future ones. Cutting and fitting what was needed, the parts were painted black and gold, and railing sections were glued together with CA glue to make slender and delicate railings. The experiment proved workable and the results look good.
Then reinforcement timbers were begun around the fore mast hole, and deck rings installed behind all the gun carriages for train tackles. "J" shaped blacked wire hooks inverted and glued in holes hold blackened rings to the deck. In the case of this early ship, dedicated train tackles were not used. Instead it is believed that one or both gun tackles were unhooked form the bulwark and hooked onto rings at the rear end of the carriage and to deck rings to haul the carriage back when needed.

Railing partially installed. Needs top rail section.

The flashlight allows you to see the ladder better.

Aft ladder being installed.

First section of top rail test fitted.

Finished forward ladder railing.

Finished aft ladder railing, best viewed through gun port.


Those stairs look great Kurt,nice bit of lateral thinking.To try and turn those tiny spindles would have been a nightmare and chances are they may have ended up too fat as you would be very close to the limit of the strength of the timber.There seems to be a lot of snobbery around using plastic on these models but in some instances I applaud it.As model makers I feel we should embrace everything available to us and consider each option regardless of material to suit a given application.
I already have thought of a use for those balusters on another project.Getting Tichy Train stuff in the UK is a little awkward though.
Kind Regards
Nigel
I already have thought of a use for those balusters on another project.Getting Tichy Train stuff in the UK is a little awkward though.
Kind Regards
Nigel
More deck details were started today. A way to scratch build mast wedges and coats needed to be figured out. Since I have some wood dowels which are larger than the ones furnished for the masts in the kit, it seemed possible to make wood rings to carve the wedge and coat for each mast. Here is how I did it with simple tools.
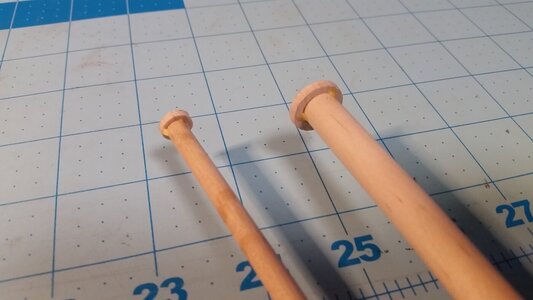
The wedged and coat for the foremast will be made first. Drill a shallow hole into the end of a dowel which is 30% larger in diameter than the diameter of the mast. Make sure the hole is centered. If not, cut the end of the dowel off and start again. I was too lazy to go out to the shop and use the lathe, and it really didn't require precision anyway.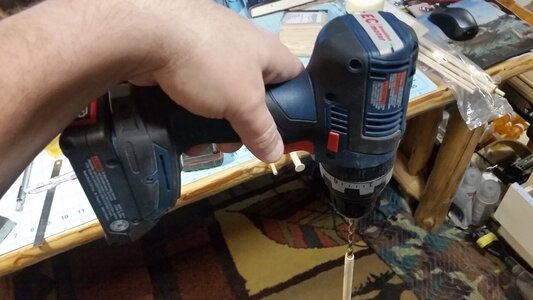
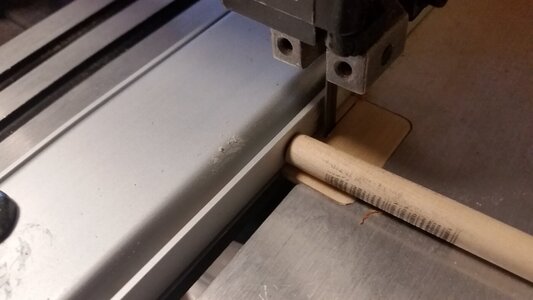
Slice off a couple rings off the end of the dowel.
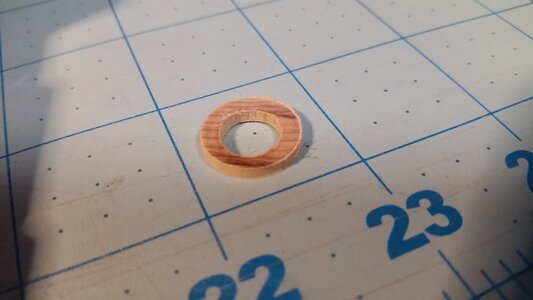
Choose the best looking ring and file the inner diameter until it fits over the dowel to be used to make the mast later.
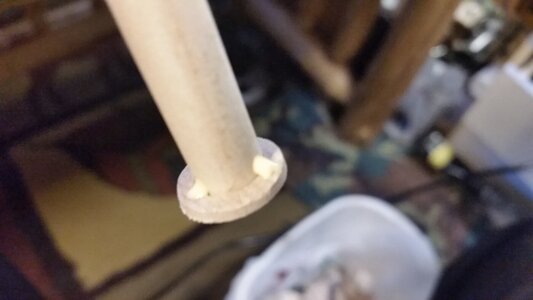
Add three drops of glue to the inside corner joint to temporarily attach the ring to the mast dowel.
These two are for the mainmast and mizzen mast and will be shaped to final form later.
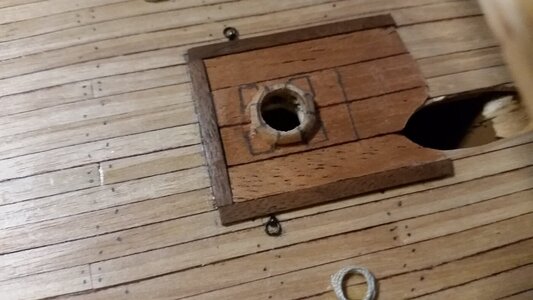
While using the mast dowel as a handle, use a sanding block to make an octagon out of the ring. Then round over the upper edge of each facet, and make the vertices with pencil. Insert the mast dowel into the model and make sure the bottom end sits within the depression in the lower gun deck below. Slide the ring over the mast all the way to the deck, and apply a very small bit of CA glue to the joint where the ring meets the deck, being careful not to let any glue get to the dowel. Check the mast dowel angle relative to the ship. The foremast in this case is straight vertical. Adjust the mast angle before the CA glue sets up. This sets the lower mast angle. Remove the mast dowel and apply some more CA to the wedge and coat joint to secure it firmly to the deck. A pencil was used to draw joint lines on the timbers immediately surrounding the coat, which is a shortcut to making individual square blocks of wood in these four locations.
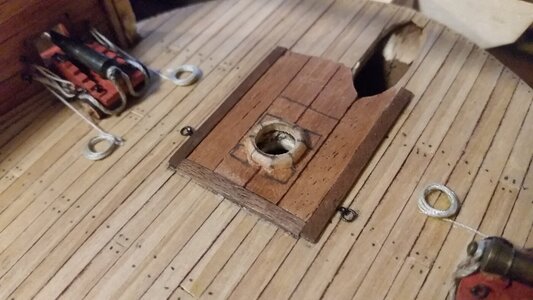
After a bit of satin finish is sprayed and allowed to dry, the color of the wood comes out and here is the result. This is simple and easy even at this small scale. Later, this will be repeated for the main and mizzen masts on the middle gun deck.
The wedged and coat for the foremast will be made first. Drill a shallow hole into the end of a dowel which is 30% larger in diameter than the diameter of the mast. Make sure the hole is centered. If not, cut the end of the dowel off and start again. I was too lazy to go out to the shop and use the lathe, and it really didn't require precision anyway.

Slice off a couple rings off the end of the dowel.

Choose the best looking ring and file the inner diameter until it fits over the dowel to be used to make the mast later.

Add three drops of glue to the inside corner joint to temporarily attach the ring to the mast dowel.

These two are for the mainmast and mizzen mast and will be shaped to final form later.

While using the mast dowel as a handle, use a sanding block to make an octagon out of the ring. Then round over the upper edge of each facet, and make the vertices with pencil. Insert the mast dowel into the model and make sure the bottom end sits within the depression in the lower gun deck below. Slide the ring over the mast all the way to the deck, and apply a very small bit of CA glue to the joint where the ring meets the deck, being careful not to let any glue get to the dowel. Check the mast dowel angle relative to the ship. The foremast in this case is straight vertical. Adjust the mast angle before the CA glue sets up. This sets the lower mast angle. Remove the mast dowel and apply some more CA to the wedge and coat joint to secure it firmly to the deck. A pencil was used to draw joint lines on the timbers immediately surrounding the coat, which is a shortcut to making individual square blocks of wood in these four locations.

After a bit of satin finish is sprayed and allowed to dry, the color of the wood comes out and here is the result. This is simple and easy even at this small scale. Later, this will be repeated for the main and mizzen masts on the middle gun deck.

Hi Kurt,
I have just boarded your mighty Sovereign after all this time and what a build I have been missing out on. Your decking is outstanding, with a very realistic look. Most impressive though are your canons and rigging. I know full well what it is like to work with 1.5 and 2mm blocks, the quantity you had to rig up would have just made my head burst. The one thing that looks a little off to me is the deck grating slat spacing or opening size, seems too small but maybe that is how it scales.
I'm intrigued by your oscillating Dremel cutter. I may have to get one for my next build. Any way I am here for the remainder of your build (unless you make me walk the plank for being almost 2 years late).
Really? I made the gratings that small because I thought most model gratings were too large. I guess I need to look at more real ship photos. Many thanks for the observations. I'll look into that. You haven't seen any updates for two years? Boy, are you going to be busy today catching up! Hope you at least kept up with Paul's Wasa log. He's been really busy on it. Working on the cannons took a couple days to install. For me, it's one of the more interesting parts of the model.Hi Kurt,
I have just boarded your mighty Sovereign after all this time and what a build I have been missing out on. Your decking is outstanding, with a very realistic look. Most impressive though are your canons and rigging. I know full well what it is like to work with 1.5 and 2mm blocks, the quantity you had to rig up would have just made my head burst. The one thing that looks a little off to me is the deck grating slat spacing or opening size, seems too small but maybe that is how it scales.
I'm intrigued by your oscillating Dremel cutter. I may have to get one for my next build. Any way I am here for the remainder of your build (unless you make me walk the plank for being almost 2 years late).
Unglaublich! Drilling without a press. Your hands must be very steady.More deck details were started today. A way to scratch build mast wedges and coats needed to be figured out. Since I have some wood dowels which are larger than the ones furnished for the masts in the kit, it seemed possible to make wood rings to carve the wedge and coat for each mast. Here is how I did it with simple tools.
The wedged and coat for the foremast will be made first. Drill a shallow hole into the end of a dowel which is 30% larger in diameter than the diameter of the mast. Make sure the hole is centered. If not, cut the end of the dowel off and start again. I was too lazy to go out to the shop and use the lathe, and it really didn't require precision anyway. View attachment 307696
Slice off a couple rings off the end of the dowel.
View attachment 307697
Choose the best looking ring and file the inner diameter until it fits over the dowel to be used to make the mast later.
View attachment 307698
Add three drops of glue to the inside corner joint to temporarily attach the ring to the mast dowel.
View attachment 307699
These two are for the mainmast and mizzen mast and will be shaped to final form later.
View attachment 307700
While using the mast dowel as a handle, use a sanding block to make an octagon out of the ring. Then round over the upper edge of each facet, and make the vertices with pencil. Insert the mast dowel into the model and make sure the bottom end sits within the depression in the lower gun deck below. Slide the ring over the mast all the way to the deck, and apply a very small bit of CA glue to the joint where the ring meets the deck, being careful not to let any glue get to the dowel. Check the mast dowel angle relative to the ship. The foremast in this case is straight vertical. Adjust the mast angle before the CA glue sets up. This sets the lower mast angle. Remove the mast dowel and apply some more CA to the wedge and coat joint to secure it firmly to the deck. A pencil was used to draw joint lines on the timbers immediately surrounding the coat, which is a shortcut to making individual square blocks of wood in these four locations.
View attachment 307701
After a bit of satin finish is sprayed and allowed to dry, the color of the wood comes out and here is the result. This is simple and easy even at this small scale. Later, this will be repeated for the main and mizzen masts on the middle gun deck.
View attachment 307702
I love your work Kurt! As an interesting aside - rigging cannons has thus far been the part of the build that I have liked the least! I would rather do ratlines for days than trying to get the blasted hooks to stay on the eyebolts.Working on the cannons took a couple days to install. For me, it's one of the more interesting parts of the model.
Last edited:
Kurt, you are right. On most models, the cell size on the gratings does not correspond to scale. In my construction according to Victory, I showed a comparison of the gratings from the set with what should be in scale. Life size cell size 3 inches. Convert to your scale and get your size. On my Victory in 84 scale, the cell size was 0.9 mm. If you have a model in 72 scale, then the cell is 1.05 mm. Can be rounded up to 1 mm.Really? I made the gratings that small because I thought most model gratings were too large. I guess I need to look at more real ship photos. Many thanks for the observations. I'll look into that. You haven't seen any updates for two years? Boy, are you going to be busy today catching up! Hope you at least kept up with Paul's Wasa log. He's been really busy on it. Working on the cannons took a couple days to install. For me, it's one of the more interesting parts of the model.
- Joined
- Sep 3, 2021
- Messages
- 5,199
- Points
- 738

Now you did it... Now I can't get that smurf-song out of my head from that guy called vader Abraham. Thanks!They are called Smurfs. they got tiny blue fingers to do that stuff
Smurf song, so now you can all suffer. Once you heard it, even if it's in Dutch, you can't unhear it.
- Joined
- Aug 8, 2019
- Messages
- 5,582
- Points
- 738

Just listen to this song. And you will forget about these blue monsters.Now you did it... Now I can't get that smurf-song out of my head from that guy called vader Abraham. Thanks!
Smurf song, so now you can all suffer. Once you heard it, even if it's in Dutch, you can't unhear it.
- Joined
- Sep 3, 2021
- Messages
- 5,199
- Points
- 738

Yep...Just listen to this song. And you will forget about these blue monsters.

- Joined
- Aug 30, 2020
- Messages
- 676
- Points
- 353

NoooooooJust listen to this song. And you will forget about these blue monsters.
I sit here after three coffees, half a packet of biscuits eyes and mouth wide open like a stunned mullet having journeyed through 46 pages of; build, destroy, reject, assemble, dismantle, start-overs. I’m simply blown away by the daring, expertise, precision and innovations and improvised tooling methods encountered. The model is looking fabulous and the work incredible way beyond my wildest abilities. Awesome work Mr Darivs Architectvs. Full respect to you. Now I’ll go back to my model “cut part A and glue to part B, hope it sticks etc. – Cheers.
Natürlich! If they weren't there would be huge holes in my hands and wrists, and the entire model would be red with blood. I'm starting the drill slowly to establish that the hole will be centered, then only using light to moderate pressure to drill about 5mm into the end of the dowel. That's all you need. The drill is easy to control if you press your elbows to your sides for stability.Unglaublich! Drilling without a press. Your hands must be very steady.
Thanks. You've succeeded where hundreds have failed in scarring my brain for life. Did Paul pay you to do that?!Just listen to this song. And you will forget about these blue monsters.


