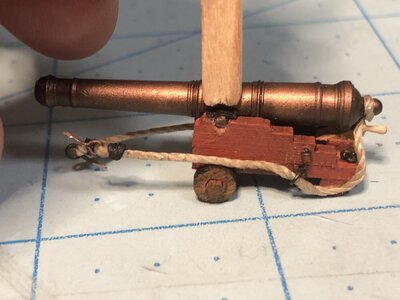
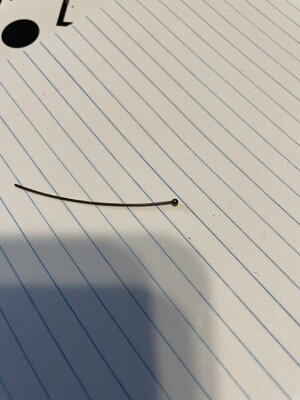
Will you be putting the knobs on the backs of your quoins? I found some dark gray pins in the craft section of Walmart that had little knobs at the end I just cut them off and glued them into the triangular blocks of wood.The first six gun carriages for the upper deck for gun ports 1 through 3 have been assembled. The caps for the barrel trunnions were cut from thick paper strips using a ruler and razor knife. I guess junk mail is good for something after all. The strips were stained with black wood stain, and chopped into short segments with the razor chopper, then glued in place over the trunnions of the cannon barrels.
View attachment 348634
Strips are stained black to simulate iron and excess stain is wiped off with dirty smelly old sock... still useful.
View attachment 348635
The quoin and barrel is glued to the carriage with CA glue. The breeching line is made by first seizing an eyelet to one end, threading it through the ring one side, looping and gluing it around the cascabel, passing it through the ring on the opposite side, the seizing another eyelet on the end.
View attachment 348636
The line is glue to the sides of the carriage near the rear skids, then stiffened with PA glue and the line draped for realism.
View attachment 348637
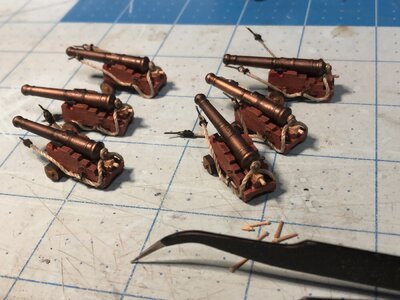
The first 6 demi-culverin drakes are ready to install on the upper gun deck. Four of these are inside the forecastle.
View attachment 348638
-

Win a Free Custom Engraved Brass Coin!!!
As a way to introduce our brass coins to the community, we will raffle off a free coin during the month of August. Follow link ABOVE for instructions for entering.
-

PRE-ORDER SHIPS IN SCALE TODAY!
The beloved Ships in Scale Magazine is back and charting a new course for 2026!
Discover new skills, new techniques, and new inspirations in every issue.
NOTE THAT OUR FIRST ISSUE WILL BE JAN/FEB 2026
You are using an out of date browser. It may not display this or other websites correctly.
You should upgrade or use an alternative browser.
You should upgrade or use an alternative browser.
HMS Sovereign of the Seas - Bashing DeAgostini Beyond Believable Boundaries
- Thread starter DARIVS ARCHITECTVS
- Start date
- Watchers 105
I was thinking about using cut down wooden belaying pins for that. Are the Walmart pinheads spherical?Will you be putting the knobs on the backs of your quoins? I found some dark gray pins in the craft section of Walmart that had little knobs at the end I just cut them off and glued them into the triangular blocks of wood.
They are, and they're the right color. It's pretty easy to attach them on my scale (1:77). Just snip off almost all the pin.
What's the diameter of the heads of those pins? I'm looking for 1/16" for cannonballs.
You can find 1/16" balls for cannon shot without having to cut the heads off pins. which are not spherical anyway. I found 100 of them at a hobby store in St. Paul, MN. You can paint THESE black and you'll have the same thing.What's the diameter of the heads of those pins? I'm looking for 1/16" for cannonballs.
DittoI said it before; I don't consider myself to be a gifted modeler, so I do read the build logs of the prodigies for enjoyment but also to try and improve myself. In the end, most of my work comes out like yours; a bit used and a bit dirty...
Despite suffering from Covid and feeling like hammered shit (can we say shit here? too late...), and being desperately bored, some work on the cannon carriages is being done. In answer to Vic's Super-Detailing Challenge, some very convincing quoin handles were made from some Falkonet 9mm belaying pins, which actually have the correct shape. Tiny hole were drilled in the back end of the quoins for six carriages, the belaying pins handles were cut and glued in the holes. If I get any smaller on detail, Vic, I'm going to need a new set of eyes.
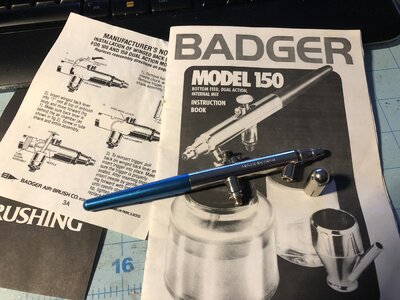
Anyone know where I can buy a cap for the paint cup on my airbrush? I'm tired of sloshing paint all over my desk!

Anyone know where I can buy a cap for the paint cup on my airbrush? I'm tired of sloshing paint all over my desk!

The best I've found is beads and I'd like to avoid all the bodywork involved with them.You can find 1/16" balls for cannon shot without having to cut the heads off pins. which are not spherical anyway. I found 100 of them at a hobby store in St. Paul, MN. You can paint THESE black and you'll have the same thing.
I'm hoping you feel better soon Kurt. Let's not repeat your first encounter...
I got a new set of eyes: 3.5 X reading glasses. My kids can call me Popeye!Despite suffering from Covid and feeling like hammered shit (can we say shit here? too late...), and being desperately bored, some work on the cannon carriages is being done. In answer to Vic's Super-Detailing Challenge, some very convincing quoin handles were made from some Falkonet 9mm belaying pins, which actually have the correct shape. Tiny hole were drilled in the back end of the quoins for six carriages, the belaying pins handles were cut and glued in the holes. If I get any smaller on detail, Vic, I'm going to need a new set of eyes.
View attachment 350243
Anyone know where I can buy a cap for the paint cup on my airbrush? I'm tired of sloshing paint all over my desk!
View attachment 350249
I've built my entire Vasa behind a set of 3.5xI got a new set of eyes: 3.5 X reading glasses. My kids can call me Popeye!
Get well soon Kurt !
Amazon and Fleabay apparently a good source for paint jars with syphon feed. Just make sure it is compatible with you airbrush. Both mine are gravity fed so have no personal experience buying these
Kind Regards
Nigel
Amazon and Fleabay apparently a good source for paint jars with syphon feed. Just make sure it is compatible with you airbrush. Both mine are gravity fed so have no personal experience buying these
Kind Regards
Nigel
Last edited:
Sorry to hear about the COVID, Kurt. I hope you feel better soon. Guns are looking really great, btw!
More guns were prepared for installation. This time, it's the four bow chase guns on the upper gun deck had breaching ropes and barrel trunnion caps installed.
The caps are made from thin strips of tagboard stained black.
Chopping paper trunnion caps
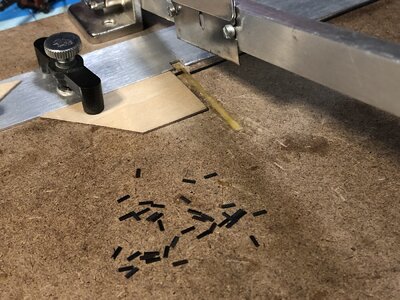
Caps glued over trunnions
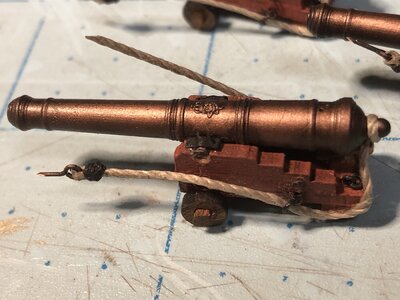
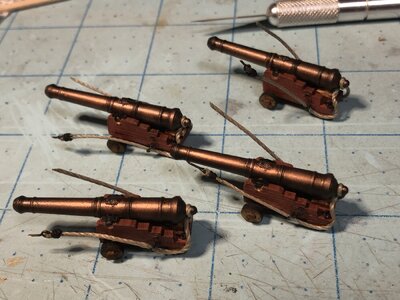
Second eyebolt on breeching line is seized after routing the line through rings and around cascabel.
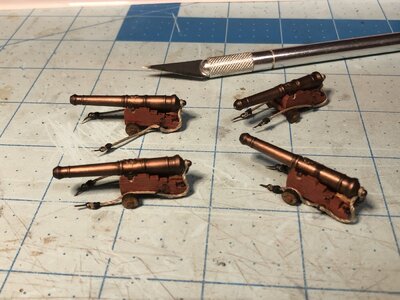
The caps are made from thin strips of tagboard stained black.
Chopping paper trunnion caps

Caps glued over trunnions


Second eyebolt on breeching line is seized after routing the line through rings and around cascabel.

Do you have to soak the trunnion caps or does the glue wet them enough to form over the trunnions
Nice work on those guns Kurt.
I hope you are starting to feel a little better and managing to kick that covid crap “into touch”.
I hope you are starting to feel a little better and managing to kick that covid crap “into touch”.
I used black card stock strips. I pinched around the trunnions to get them to form around them and glued with white glue. It worked. You might try some different methods to see what works for you.Do you have to soak the trunnion caps or does the glue wet them enough to form over the trunnions
No. They are paper, so they conform easily. The method used to glue them down is really simple. One of the trunnion caps is picked up by the edges using the small black tweezers, and touched to a drop of CA glue that was placed on the cutting mat. This wets the bottom of the part with glue. The cap is then placed over the trunnion on the carriage. The round end of flat craft pick of softwood was cut off and a shallow depression filed in the end, making a tool that is used to pressed and bend the paper cap over the trunnion. It holds it's shape well.Do you have to soak the trunnion caps or does the glue wet them enough to form over the trunnions
