I'm very happy you like the work so far.Hey Kurt,
please excuse me for asking. But I think you're doing a really fantastic job....Genial. I'll stay loyal to your build report.
Cheers Günther
Vielen Dank!
 |
As a way to introduce our brass coins to the community, we will raffle off a free coin during the month of August. Follow link ABOVE for instructions for entering. |
 |
 |
The beloved Ships in Scale Magazine is back and charting a new course for 2026! Discover new skills, new techniques, and new inspirations in every issue. NOTE THAT OUR NEXT ISSUE WILL BE MARCH/APRIL 2026 |
 |
I'm very happy you like the work so far.Hey Kurt,
please excuse me for asking. But I think you're doing a really fantastic job....Genial. I'll stay loyal to your build report.
Cheers Günther
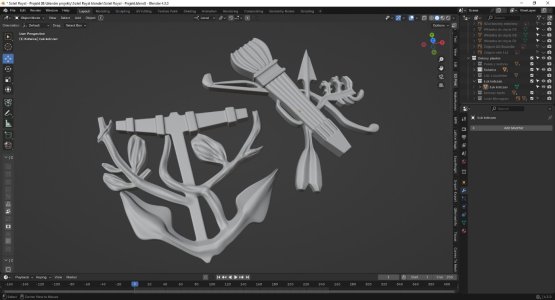
In total admiration with what you are doing and achieving with Blender. One question; do you isolate the images from an uploaded into Blender, photo or pdf, then reconstruct or do you create the profiles yourself in Blender by using/viewing external drawings?Starting on the CR (Carlos Rex) badge on the beakhead. The "C R" characters are shaped from appear to be roots or tree branches. In order to model these, I am using nurb circles. Basically, a nurb circle is a circle that has a a square made of four segments that act as handles, allowing you to resize or stretch the circle into and oval. So, if you take one circle, and extrude it many times, you can create a series of cylinders which you can shrink or stretch to form the branch shape whoch forms the "C". The crown is the same one used in previous work, but the eagle was modified and re-sculpted from an online model asset.
View attachment 523800
View attachment 523801
Close to being finish with the "C". The individual branches in the "C" are made as separate objects that are merged together using the Boolean Union tool.
View attachment 523805
Once this shaping is done, the object is converted from a series of nurbs into a mesh of polygons. Then the entire "C" shape is flattened a bit and attached to the background object later.
View attachment 523820
A little smoothing using the sculpt tools, and it's done. This is all done using the most basic tools and functions in Blender, and what take so much time is finding those functions among the hundreds of features in this program.
View attachment 523823
Hello @ConsNZ !In total admiration with what you are doing and achieving with Blender. One question; do you isolate the images from an uploaded into Blender, photo or pdf, then reconstruct or do you create the profiles yourself in Blender by using/viewing external drawings?







Hello @ConsNZ !
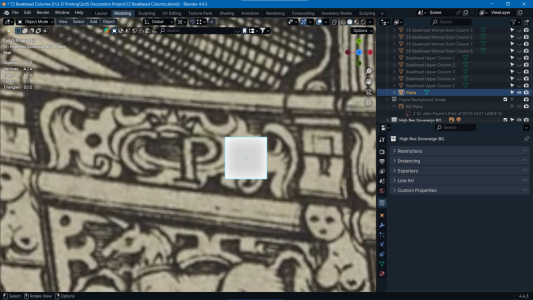
In order to create the models as close to Payne's engraving as possible, a high resolution .JPG image of the engraving is placed onto a rectangular plane. While I am modeling, the image is set to only appear when the view window is angled straight along the Z axis, looking squarely at the engraving image. If I rotate the view at any other angle, the background image of the engraving becomes invisible. This setting is to ensure that when I move points around, and the background image is visible, those points only move in the X-Y plane (right-left, up-down) and never in the Z plane (inward-outward), as if you were drawing on paper, and the back face of the object remains flat.
I have now set the background image to be visible and ANY angle, so now you can see the image with the view looking at the 3-D column objects from the side.
View attachment 525580
View attachment 525581
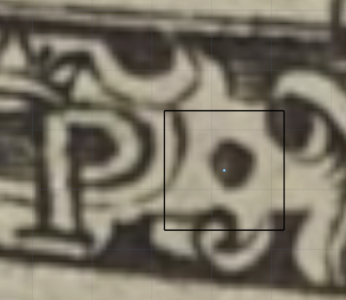
Now since this high resolution image STILL does not have enough detail, I use portions of a SUPER HIGH resolution image placed on a smaller rectangle located a very small distance in front of the first image.
View attachment 525582
All my 3-D objects thus far are not created using software to convert a 2-D image into a 3-D object. Instead, I draw the outline of an object using points and edges just above the planes which are painted with the images of Payne's engraving.
I start by adding a square plane.
View attachment 525589
Erase the polygon face, but leave the points and edges.
View attachment 525590
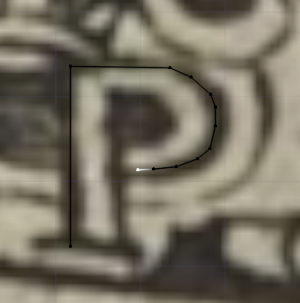
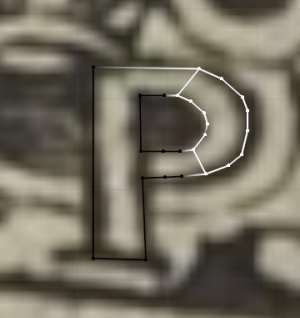
Erase some edges to leave a few points, and drag points to positions over the image we want to model. Let's make a "P". Here's a start:
View attachment 525591
Grab a point, and extrude (e) the point many times to trace the outline of the P.
View attachment 525592
After you are done traceing the outlines, create polygons from the edges and points.
View attachment 525593 View attachment 525594
View attachment 525595
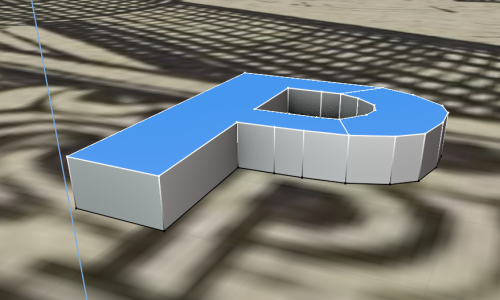
Select the polygons and extrude them up along the Z axis.
View attachment 525596
That's the basic idea on how to make the background portions of the decorations. The shapes of animals and other things in the foreground of each decoration are often created from modified 3-D objects others have made in order to save time, and because I'm not talented enough to create human figures and animals from scratch. I just bash others' work into shapes I need. It's how I can turn the upper object into the bottom object shown below.
View attachment 525602
All the functions I have used thus far are basic, and you just have to combine them in clever ways to get great results. The hardest part has been learning where the submenus and key presses are to find the right tools, then use them long enough to remember them. Once you have several methods of shaping the polygons, the complexity of your 3-D models increases.
An example of 3-D model bashing; changing the pose of the hound from the 3-D asset found online to match the pose of the hound at the beakhead. First the section of ground was cut off the model and the hole in the foot patched. Then, and skeleton of bones was created inside the volume of the hound. The bones are set to be visible through the hound model at all angles to allow for easy positioning of them.
View attachment 525618
Once the skeleton is finshed and in place, it is linked to the hound model. Moving the bones will pull all the hound model polygons to new positions, effectively changing the shape of the hound model. Each bone has a magnetic field to pull and push the polygons around it.
View attachment 525625
Once the changes to the pose of the hound is done, the hound model is frozen in place and the skeleton is removed.
View attachment 525626
Any folds or pinced areas can be smoothed out with the scupting tools. Parts of the hound's stomach can be sculpted to better appear like the hound in Payne's engraving. Then the hound can be merged with the scroll once that is made.
Wow! That was an excellent summation, much more than was expected and for this I am truly thankful. Blender does have a reputation for being difficult but only due, as you point out, to the vast number of features, the majority of which may never be used. Following your post as often as possible I find myself in the category of ‘Sinker, Line and very close to ‘Hook’”. Seeing that Blender is a free program and after reading your above answer/comments, time permitting, I’ll give it a go.Hello @ConsNZ !
In order to create the models as close to Payne's engraving as possible, a high resolution .JPG image of the engraving is placed onto a rectangular plane. While I am modeling, the image is set to only appear when the view window is angled straight along the Z axis, looking squarely at the engraving image. If I rotate the view at any other angle, the background image of the engraving becomes invisible. This setting is to ensure that when I move points around, and the background image is visible, those points only move in the X-Y plane (right-left, up-down) and never in the Z plane (inward-outward), as if you were drawing on paper, and the back face of the object remains flat.
I have now set the background image to be visible and ANY angle, so now you can see the image with the view looking at the 3-D column objects from the side.
View attachment 525580
View attachment 525581
Now since this high resolution image STILL does not have enough detail, I use portions of a SUPER HIGH resolution image placed on a smaller rectangle located a very small distance in front of the first image.
View attachment 525582
All my 3-D objects thus far are not created using software to convert a 2-D image into a 3-D object. Instead, I draw the outline of an object using points and edges just above the planes which are painted with the images of Payne's engraving.
I start by adding a square plane.
View attachment 525589
Erase the polygon face, but leave the points and edges.
View attachment 525590
Erase some edges to leave a few points, and drag points to positions over the image we want to model. Let's make a "P". Here's a start:
View attachment 525591
Grab a point, and extrude (e) the point many times to trace the outline of the P.
View attachment 525592
After you are done traceing the outlines, create polygons from the edges and points.
View attachment 525593 View attachment 525594
View attachment 525595
Select the polygons and extrude them up along the Z axis.
View attachment 525596
That's the basic idea on how to make the background portions of the decorations. The shapes of animals and other things in the foreground of each decoration are often created from modified 3-D objects others have made in order to save time, and because I'm not talented enough to create human figures and animals from scratch. I just bash others' work into shapes I need. It's how I can turn the upper object into the bottom object shown below.
View attachment 525602
All the functions I have used thus far are basic, and you just have to combine them in clever ways to get great results. The hardest part has been learning where the submenus and key presses are to find the right tools, then use them long enough to remember them. Once you have several methods of shaping the polygons, the complexity of your 3-D models increases.
An example of 3-D model bashing; changing the pose of the hound from the 3-D asset found online to match the pose of the hound at the beakhead. First the section of ground was cut off the model and the hole in the foot patched. Then, and skeleton of bones was created inside the volume of the hound. The bones are set to be visible through the hound model at all angles to allow for easy positioning of them.
View attachment 525618
Once the skeleton is finshed and in place, it is linked to the hound model. Moving the bones will pull all the hound model polygons to new positions, effectively changing the shape of the hound model. Each bone has a magnetic field to pull and push the polygons around it.
View attachment 525625
Once the changes to the pose of the hound is done, the hound model is frozen in place and the skeleton is removed.
View attachment 525626
Any folds or pinced areas can be smoothed out with the scupting tools. Parts of the hound's stomach can be sculpted to better appear like the hound in Payne's engraving. Then the hound can be merged with the scroll once that is made.
I think the time invested in learning Blender so far was well worth it. In fact, I didn't have any choice if I was to create the decorations to the level detail I desired. If you don't start working with a time vampire like Blender, you won't ever get the job done. At least after about a year of fiddling with the modeling tools, the models are starting to look decent and should print out fine when the time comes. My last post left out all the key presses for the tools used in Blender. If you have specific questions once you get the program up and running, I can help you jump the basic hurtles and keep your practice sessions going.Wow! That was an excellent summation, much more than was expected and for this I am truly thankful. Blender does have a reputation for being difficult but only due, as you point out, to the vast number of features, the majority of which may never be used. Following your post as often as possible I find myself in the category of ‘Sinker, Line and very close to ‘Hook’”. Seeing that Blender is a free program and after reading your above answer/comments, time permitting, I’ll give it a go.
Wonderful being a member of SOS. Continual learning, constant experimenting and so much altruism in members sharing their expertise and knowledge.
Again, I must express my admiration at this wonderful post and build. Awesome work Kurt, Cheers.
Thank you, that will be much appreciated. All the best to you.I think the time invested in learning Blender so far was well worth it. In fact, I didn't have any choice if I was to create the decorations to the level detail I desired. If you don't start working with a time vampire like Blender, you won't ever get the job done. At least after about a year of fiddling with the modeling tools, the models are starting to look decent and should print out fine when the time comes. My last post left out all the key presses for the tools used in Blender. If you have specific questions once you get the program up and running, I can help you jump the basic hurtles and keep your practice sessions going.


To set up flat views you choose from 1,3,4,6,7,9.This setting is to ensure that when I move points around, and the background image is visible, those points only move in the X-Y plane (right-left, up-down) and never in the Z plane (inward-outward), as if you were drawing on paper, and the back face of the object remains flat.






OMG! I'm loving you people. This is awesome addition to Kurt's answer to my query. Cheers.Hello Kurt. You've made so much progress. At this rate, all the decors will soon be completed.
If you don't mind I would like to add some points to your advice.
To set up flat views you choose from 1,3,4,6,7,9.
When adding a background picture you can also do some other small calibrations to make work easier. In top right corner you have filters, selecting filter is very helpful when working with background images as it lets you turn off your image from working files. When working with multiple images opacity slider is also a good option to play with. It lets you choose clearness.
View attachment 525631
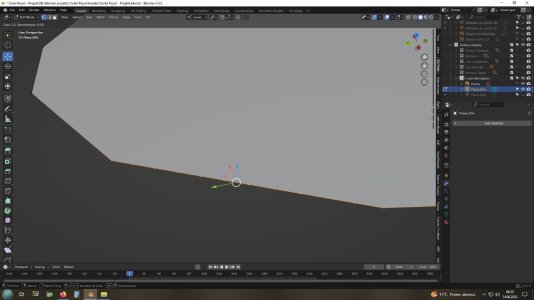
For tracing I would use little diffrent technice as extruding vertex(points) introduces problems in sculpting phase of modeling. When adding more resolution to model it becomes impossible to sculpt.
I'll show you alternative method that leaves option for sculpting more details.
Same flower traced by vertex only and both vertex and edeges
VertexView attachment 525633
Vertex and edges
View attachment 525634
To sculpt a model we need to extrude in Z axis and add Plane cuts(CTRL+R). Plane cuts automatically divide model just roll up or down middle mouse button depending how dense mesh you want to be. With model traced by vertex blender limits plane cuts only to one edge while in model traced by edges, plane cut divides along whole model.
View attachment 525635
View attachment 525636
View attachment 525637
View attachment 525638
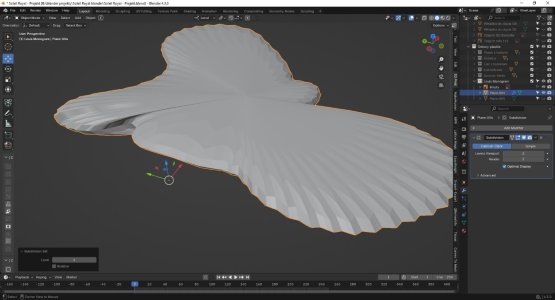
To prapre mesh for sculpting we need to extrude in Z axis and add subdivision surface modyfier, but before adding modyfier extruded plane must be also plane cut because without that it will become a messy pulp.
View attachment 525639
Now a little better
Still as I mentioned in beggining it introduces errors which doesn't allow sculpting. Mesh just becomes unstable for further sculpting
View attachment 525640
View attachment 525641
With other method the clay brush works properly. This is just only introduction. Sculpting itself is quite tricky to get it right. With more complex model you nedd even difrent approach to prepering mesh, but for simpler stuff it'll get the job done
View attachment 525642
Those are results after hours of work
View attachment 525643
Hope you don't mind this intercalation Kurt.Little blender advice for everyone is always helpful
THIS is the sort of feedback I've been BEGGING to receive! THANK YOU for the incredible tutorial! I am truly in your debt! Please post any and all pearls of wisdom you have on 3-D modeling.Hello Kurt. You've made so much progress. At this rate, all the decors will soon be completed.
If you don't mind I would like to add some points to your advice.
To set up flat views you choose from 1,3,4,6,7,9.
When adding a background picture you can also do some other small calibrations to make work easier. In top right corner you have filters, selecting filter is very helpful when working with background images as it lets you turn off your image from working files. When working with multiple images opacity slider is also a good option to play with. It lets you choose clearness.
View attachment 525631
For tracing I would use little diffrent technice as extruding vertex(points) introduces problems in sculpting phase of modeling. When adding more resolution to model it becomes impossible to sculpt.
I'll show you alternative method that leaves option for sculpting more details.
Same flower traced by vertex only and both vertex and edeges
VertexView attachment 525633
Vertex and edges
View attachment 525634
To sculpt a model we need to extrude in Z axis and add Plane cuts(CTRL+R). Plane cuts automatically divide model just roll up or down middle mouse button depending how dense mesh you want to be. With model traced by vertex blender limits plane cuts only to one edge while in model traced by edges, plane cut divides along whole model.
View attachment 525635
View attachment 525636
View attachment 525637
View attachment 525638
To prapre mesh for sculpting we need to extrude in Z axis and add subdivision surface modyfier, but before adding modyfier extruded plane must be also plane cut because without that it will become a messy pulp.
View attachment 525639
Now a little better
Still as I mentioned in beggining it introduces errors which doesn't allow sculpting. Mesh just becomes unstable for further sculpting
View attachment 525640
View attachment 525641
With other method the clay brush works properly. This is just only introduction. Sculpting itself is quite tricky to get it right. With more complex model you nedd even difrent approach to prepering mesh, but for simpler stuff it'll get the job done
View attachment 525642
Those are results after hours of work
View attachment 525643
Hope you don't mind this intercalation Kurt.Little blender advice for everyone is always helpful

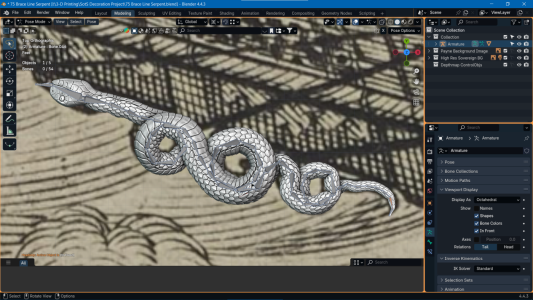
Nope. I have no experience in printing, and that hurtle will be jumped later.Just curious, have you test printed any of the elements yet? Will you be testing different materials to see which renders the best detail? Not having any 3D printing experience, I find this area fascinating.
A long line of curious visitors is waiting.. but no pressureNope. I have no experience in printing, and that hurtle will be jumped later.

