-

Win a Free Custom Engraved Brass Coin!!!
As a way to introduce our brass coins to the community, we will raffle off a free coin during the month of August. Follow link ABOVE for instructions for entering.
-

PRE-ORDER SHIPS IN SCALE TODAY!
The beloved Ships in Scale Magazine is back and charting a new course for 2026!
Discover new skills, new techniques, and new inspirations in every issue.
NOTE THAT OUR FIRST ISSUE WILL BE JAN/FEB 2026
You are using an out of date browser. It may not display this or other websites correctly.
You should upgrade or use an alternative browser.
You should upgrade or use an alternative browser.
TKAM what impressed me was the rigging and amount of deck hardware. Was it built out of the box? If so between your two Mamoli builds I am becoming impressed with the brand. One last question, what paint/color did you use for the blue?Oh gawd I knew absolutely nothing when I made Bounty. I Forrest Gumped my way through it so there are mistakes for sure. Good luck with your build!
- Joined
- Mar 27, 2019
- Messages
- 823
- Points
- 403

TKAM what impressed me was the rigging and amount of deck hardware. Was it built out of the box? If so between your two Mamoli builds I am becoming impressed with the brand. One last question, what paint/color did you use for the blue?
Yeah as it was my first ship it never occurred to me to bash the kit in any way. If I had to do it over again I'd at the very least go with premium blocks. But by and large I really like the quality of Mamoli quality.
I used the Model Shipways Prussian Blue, which they don't sell anymore. It should have been the medium blue but I liked the darker shade.
I just heard Mamoli went out of business?But I got a new catalog from Model Expo today and I see they have Mamoli now. I do like the darker blue and will use it on my Bounty.
- Joined
- Mar 27, 2019
- Messages
- 823
- Points
- 403

I just heard Mamoli went out of business?But I got a new catalog from Model Expo today and I see they have Mamoli now. I do like the darker blue and will use it on my Bounty.
That's how I got my Bounty on sale about four years ago, a going out of business sale. Not sure what's going on but yeah Model Expo has many Mamoli kits in nice shiny new boxes.
- Joined
- Mar 27, 2019
- Messages
- 823
- Points
- 403

Imagine my Surprise (pun intended) when I realized I still had not installed the keel nor the stern post nor the bow stem. I'm beating my self up over it but found a solution that is so far working. All of the above mentioned parts are laser cut from walnut. The bulkheads extend, in some cases, well down into the keel proper which for me suggested the rabbit should be cut into the walnut keel rather than the central structure that holds each bulkhead like normal. ?Design flaw? To be clear nothing in the directions mention anything about a rabbit or installation of the keel, stern post, and bow stem, all of that is left up to the builder.
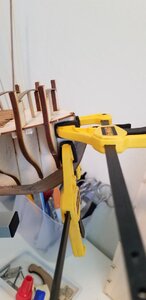
I dry fitted each piece of keel/post/stem and traced out where each bulkhead ended. Then I just cut the rabbit into the keel according to the marked lines. Glued in with carpenter's glue and clamped. Then I drilled holes and sunk nails through the keel and into that central piece. I'm pretty confident it is one of the most solid keels I've ever made. I've been setting a first-layer plank up against my rabbit at various locations and so far what I cut out is working pretty well. Tomorrow is the last keel section and stern post.
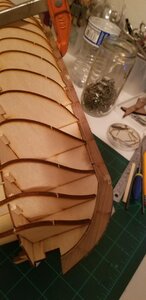

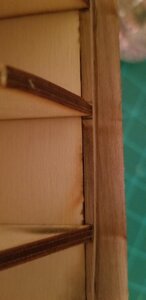
I dry fitted each piece of keel/post/stem and traced out where each bulkhead ended. Then I just cut the rabbit into the keel according to the marked lines. Glued in with carpenter's glue and clamped. Then I drilled holes and sunk nails through the keel and into that central piece. I'm pretty confident it is one of the most solid keels I've ever made. I've been setting a first-layer plank up against my rabbit at various locations and so far what I cut out is working pretty well. Tomorrow is the last keel section and stern post.


- Joined
- Mar 27, 2019
- Messages
- 823
- Points
- 403

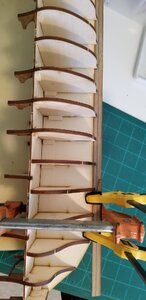
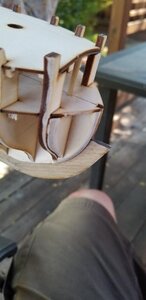
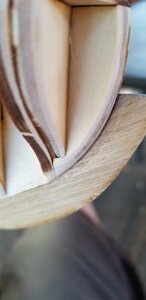
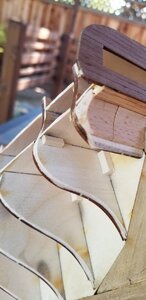
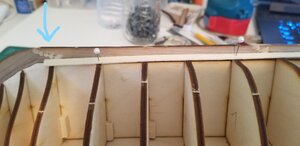
OK I'm gonna stop here and try and get some expert help. Now that I've laid down most of the keel and the the bow stem I'm not sure following exactly the line of where the bulkheads end at the keel for the rabbit. Notice in the picture towards the bow (and also towards the stern) the height of the keel rises due to the bulkheads being shorter. In the middle of the ship they are exactly parallel.
So should I re-cut the rabbit so the height of the exposed keel is exactly parallel all the way from where the hull planks start to meet the bow stem all the way back to the stern post? Or is parallel in amidships and more exposed keel towards the bow and stern normal?
Again, no direction in the plans for this. I'm used to cutting according to a pre-printed bearding line so I guess I'm a bit spoiled. Help!

- Joined
- Nov 25, 2018
- Messages
- 635
- Points
- 403

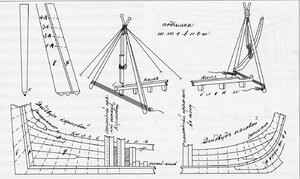
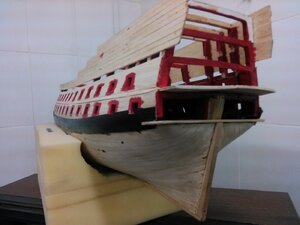
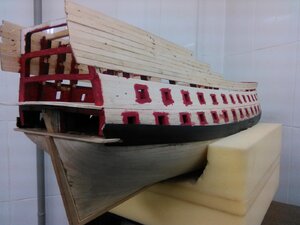
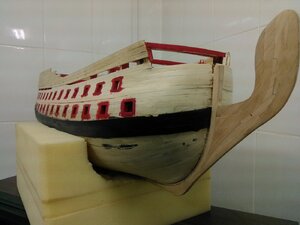
Here on the model you can see that the groove runs parallel to the keel.Covering boards are negated in the area of the sternpost.In the keel at this point, you need to cut out the quarters, the thickness of the first skin.In the nose of the ship, you also need to select a groove.The front ends of the planking boards are laid there.I after gluing the first skin, the engraver makes another groove on its edge.But already for the insertion of the second skin there.




- Joined
- Nov 25, 2018
- Messages
- 635
- Points
- 403

Here on the model you can see that the groove runs parallel to the keel.Covering boards are negated in the area of the sternpost.In the keel at this point, you need to cut out the quarters, the thickness of the first skin.In the nose of the ship, you also need to select a groove.The front ends of the planking boards are laid there.I after gluing the first skin, the engraver makes another groove on its edge.But already for the insertion of the second skin there.
- Joined
- Apr 20, 2020
- Messages
- 6,239
- Points
- 738

Unfortunately I finished building the model long before I joined our special group.Thank you Shota-san. Do you have any build blogs I can take a peak at?
The construction took several years because I was simultaneously engaged in a sporting hobby of marathons, which you can imagine requires many hours of training and this along with the commitments to family and work.
I will search in my photo databases for photos documenting the construction process.
I remember the construction process pretty well, so I would love to help with the tips. Have a lot of success
- Joined
- Mar 27, 2019
- Messages
- 823
- Points
- 403

Unfortunately I finished building the model long before I joined our special group.
The construction took several years because I was simultaneously engaged in a sporting hobby of marathons, which you can imagine requires many hours of training and this along with the commitments to family and work.
I will search in my photo databases for photos documenting the construction process.
I remember the construction process pretty well, so I would love to help with the tips. Have a lot of success
That would be extremely helpful Shota-san.
- Joined
- Mar 27, 2019
- Messages
- 823
- Points
- 403

- Joined
- Mar 27, 2019
- Messages
- 823
- Points
- 403

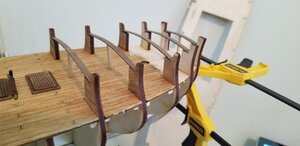
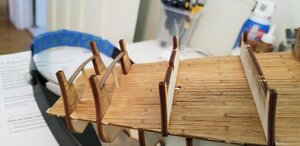
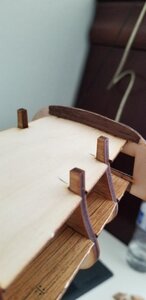
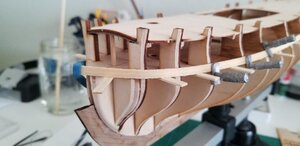
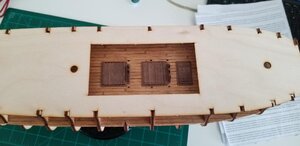
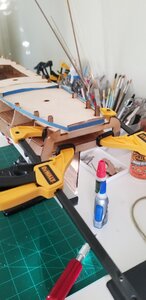
False deck installed. It fit perfectly well except on one side one of the bulkheads being a tad bit too high despite laying down the curved support exactly flush. I wonder if this might also be a problem once I start hull planking. Time will tell.
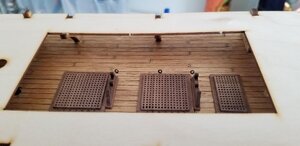
You can see just how little of the gun deck will be visible from up above. Yeah sure a lot of wasted effort planking the entire gun deck level but I know those planks are there. And you might catch a glimpse through the gun ports.
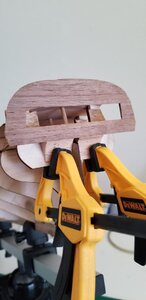
Transom also installed. Next up tomorrow is planking the transom inside and out and then I'll start fairing the hull in anticipation of hull planking.


- Joined
- Mar 27, 2019
- Messages
- 823
- Points
- 403

well done

I'm quite surprised I'm at this point after only about three weeks. Lots of time being locked down I suppose.
- Joined
- Nov 25, 2018
- Messages
- 635
- Points
- 403

Just take your time.In my opinion, you still need to remove the facet on the frames in the nose.Often apply the rail to check the smoothness of the contours of the vessel's hull.Will there be two panels?In the stern, make a ledge in the area of deadwood.


