HMS Surprise by Mamoli

I'm quite surprised I'm at this point after only about three weeks. Lots of time being locked down I suppose.
Do not take too hard, take all the time thet you need and patiently.
Enjoy from the road and the construction process.
You can see in my two blogs about models that I build , that I do the same, trying to reach professionalism and improve abilities along with enjoying the process.
Best of luck
 
Do not take too hard, take all the time thet you need and patiently.
Enjoy from the road and the construction process.
You can see in my two blogs about models that I build , that I do the same, trying to reach professionalism and improve abilities along with enjoying the process.
Best of luck


Dude I've been searching but can't find your blogs. Can you post a link for me?
 
Just take your time.In my opinion, you still need to remove the facet on the frames in the nose.Often apply the rail to check the smoothness of the contours of the vessel's hull.Will there be two panels?In the stern, make a ledge in the area of deadwood.

Yep. Double planking. I plan on coppering the hull so all I need is a smooth surface from the waterline on down.
 
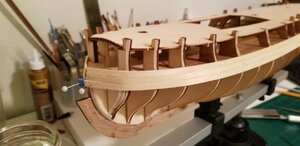
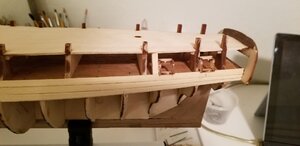
Four rows of planks from the gun ports moving down installed. I'm being more mathematical this time, instead of eyeballing the narrowing fore and aft of hull planks I'm measuring and cutting more precisely than I have in the past. So far I'm amazed at how smoothly it's going. The planking from the gun ports up is very simple. I'm almost at the point where the coppering will begin and move towards the keel and so far no big gaps or bumps. Maybe I've learned something from my previous four builds and it's easier this time....

I also lept ahead a bit in the plans and installed the aft most two gun ports on the larboard side just to see how the process works. The gun ports are solidly installed and will be trimmed up so the protruding wood will be cut off and/or sanded off flush. Then the second planking will neaten the look of the gun port nicely in my opinion. The way the plans/practicum has the order of things, however, was to install the main false deck first, then begin the hull planking, THEN install the gun ports. Again, easy enough to cut/sand flush the protruding wood of the gun ports but the problem is two-fold: First, there is going to be massive amounts of sanding to get the first planking ready for the second planking/coppering. All that dust is going to end up in the now closed up gun deck because the main deck false deck is now installed. Somehow I must get all that sand dust out of the closed up gun deck. Secondly, the 13 completed (I'm working on them between installing hull planks) gun carriages complete with cannon MUST be installed prior to closing up the upper hull and sanding as the false deck is irreparably installed . These are not false cannon plugging the gun port holes, they are complete carriages. I'm not detailing too much of the carriages other than iron straps to hold down the cannon mounting points but they will still be sticking out proud when I begin trimming the protruding wood of the gun ports and sanding like a maniac. If I did this model again I would have installed the cannons first,THEN installed the main deck. Food for thought for those coming up behind me.

dafgsfd.jpgfvxf.jpg
 
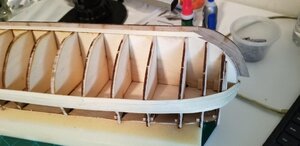
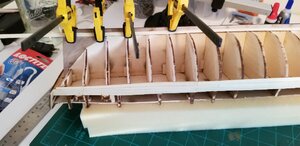
After the first four layers of hull planks right below the gun ports are installed, customary is to install the garboard plank against the keel. Again, I must have learned something on my previous builds as this is going smoothly so far.

zdFCZD.jpgxfSDZ.jpg
 
Working on the cannon and gun carriages in between waiting for hull planks to dry. The kit provided cannon and the two carronades will do fine for all those gun deck level long guns and two on deck carronades, although I'm looking at my previous Syren build to construct the sleds and hardware for the carronades, and practically no rigging of the gun deck cannon as they can't be seen from topside. The carronades are mounted at the bow on the main deck and I'll rig those out fully. There are also six cannon located on the quarterdeck which I will also rig fully as they'll be in view. I've already ordered kits for these on deck long guns. I'll leave these brass with all the fancy fittings that come with the kits. They ain't cheap but I figure they'll really add to the finished model and are worth the expense.

CFXGSFD.jpg
 
Dude I've been searching but can't find your blogs. Can you post a link for me?
DEAR TKAM
I get the impression that you did learn a lot from the written guides and that you apply here in the model what you also learned from the practical experience in construction.
It looks like a beautiful image. You have the links to my blogs here on the site

 
DEAR TKAM
I get the impression that you did learn a lot from the written guides and that you apply here in the model what you also learned from the practical experience in construction.
It looks like a beautiful image. You have the links to my blogs here on the site


Thanks Shota-san I'll check those out.
 
Looking very good TKAM. This is the part I like as it begins to look like a ship.Do you find using shorter planks vs one long plank is easier?


I find tapering very difficult when using shorter strips. Generally, I divide up a plank run in three sections. The middle section needs no tapering and I make that one as long as possible. Towards the bow I'll start the strip the same width as that untapered middle strip and trim it 1/3 to 2/3 that width. Towards the stern if tapering is necessary I'll do the same.

I agree this part can be fun but that open gap gets harder and harder to get right without twisting a strip too much and having it splinter. I think however that this limewood provided in the kit is better for a first planking than basswood. Basswood splinters way too much.
 
Most of the gun deck planking is complete. I must confess that deck planking is one of my favorite parts of building a model ship. Of course there is effort involved but the payoff in the finished product is huge compared to the effort expended. There is of course huge satisfaction on fabricating something difficult that takes much time and effort that pays off, that's not what I'm talking about. This is at the other end of the spectrum of time consuming fabrication and as important it isn't something that just requires days and weeks on end of repetition (like rat lining - yuch!).

I went ahead and planked the entire gun deck despite only about 1/3 will ever be seen. An additional tiny peek might, and I stress the word "might", be seen by someone peeking into the gun port, especially if I choose not to install electric lighting. But just the knowledge of the decking being from stem to stern is warm and fuzzy. I did not however go overboard and space out planks and blacken the edges and simulate tree nails of all those planks under deck. I will of course have to obtain more of the lathes from either Mamoli or MS because I've used almost half the provided supply to plank all that decking that will never be viewed.

View attachment 169552View attachment 169553View attachment 169554View attachment 169555
Beautiful decking ... and I'm one of those who would absolutely peek into every possible location to see the incredible detail that totally fascinate me! Love it! :)
 
I finished up the three gratings that go on the gun deck underneath the longboat as well at the longboat cradle. All these pieces are made from Walnut so even with a neutral clear stain they are of a very dark hue. When placed on top of the gun deck the starkness in colors between the deck planking and the gratings was extreme and I didn't like it one bit. So I "watered down" some Minwax Golden Oak and applied another coat on the deck planking. I sure Forrest Gumped my way through this part of the project, the end result I really like. I also added some shot racks along the side of each large grating, this feature is not on the plans. I'll install the cannon balls after planking the hull and Surprise is right side up again.

The second picture is the kit provided cast longboat which I won't use. I just ordered another Falconet longboat that I just finished for my Rattlesnake build, this is picture three. It's 5mm longer than the kit provided boat but it'll fit just perfect in the longboat cradle.

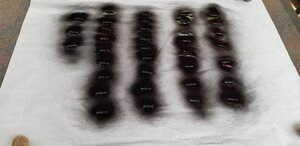
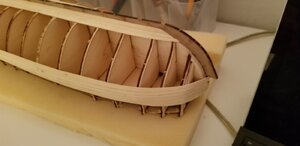
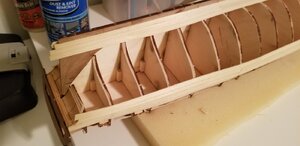
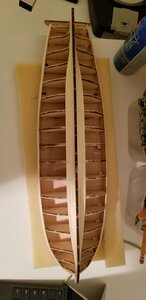
The last picture is an example of the supports for the deck immediately above the gundeck, forecastle up front and quarterdeck in the rear, notice the camber that the false deck and then deck planks will follow. The plans call for the center pillar being 21.5mm long. I found the camber to be very pronounced and so I shaved a bit off that central pillar, it's more like 20mm long now.

View attachment 170088View attachment 170089View attachment 170091View attachment 170092
Starting to see more of the incredible detail I love so much!

BTW I like the new avatar! :)
 
Most of the gun deck planking is complete. I must confess that deck planking is one of my favorite parts of building a model ship. Of course there is effort involved but the payoff in the finished product is huge compared to the effort expended. There is of course huge satisfaction on fabricating something difficult that takes much time and effort that pays off, that's not what I'm talking about. This is at the other end of the spectrum of time consuming fabrication and as important it isn't something that just requires days and weeks on end of repetition (like rat lining - yuch!).

I went ahead and planked the entire gun deck despite only about 1/3 will ever be seen. An additional tiny peek might, and I stress the word "might", be seen by someone peeking into the gun port, especially if I choose not to install electric lighting. But just the knowledge of the decking being from stem to stern is warm and fuzzy. I did not however go overboard and space out planks and blacken the edges and simulate tree nails of all those planks under deck. I will of course have to obtain more of the lathes from either Mamoli or MS because I've used almost half the provided supply to plank all that decking that will never be viewed.

View attachment 169552View attachment 169553View attachment 169554View attachment 169555
Hi TKAM just ran across this and was wondering for some pointers, how are you treating your planks and how long are you making them
 
Back
Top