HMS Surprise by Mamoli

Looking good and the wonderful detail is starting to pique my interest even more! :)
 
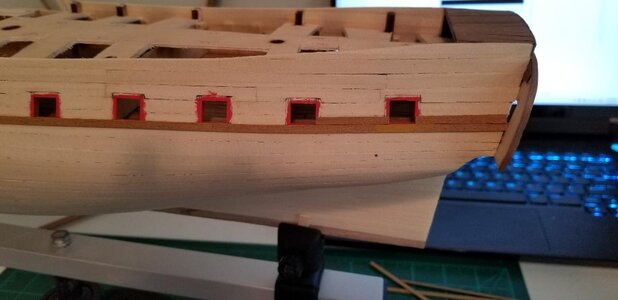
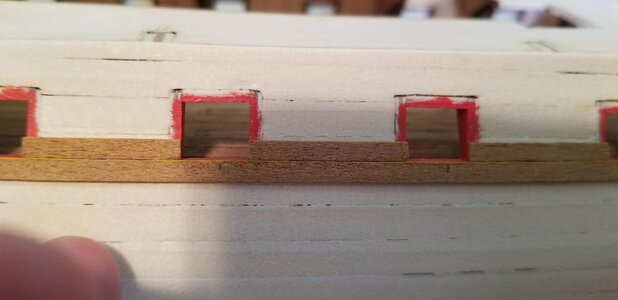
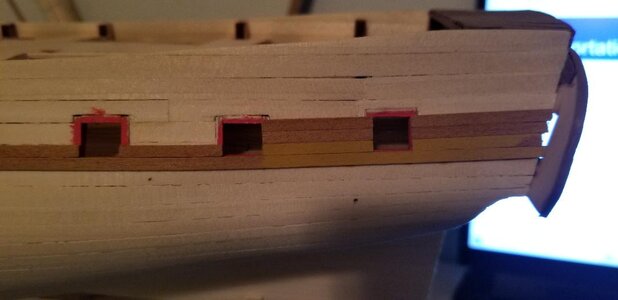
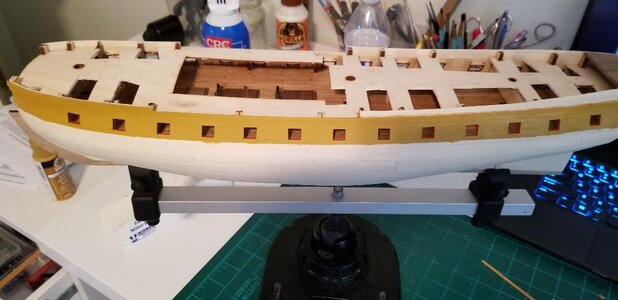
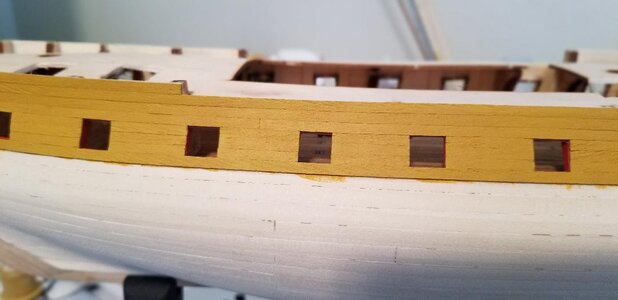
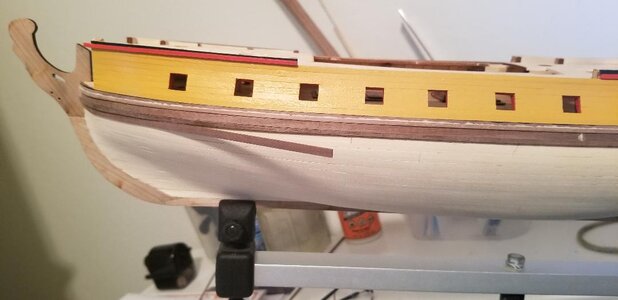
Second planking starting from the gun ports, moving up. The planking material for from the gun ports up is boxwood 1mm x 3mm. The directions has the builder lay down a curving strake from bow to stern then doing the planking from that curving (flush with aft most gun port, 5mm below middle gun port, 3mm below forward most gun port), this strake stands proud almost 1mm thicker than the hull planks moving up. In other words somehow I must fit between the lower edge of the gun ports a constantly changing, in width, plank for 45 centimeters? Yep, that's the directions, all in some misguided attempt to save materials I guess. So instead I'm laying down the first plank then working up. After finishing that I'll start again at that even plank layed down right below the gun port sills and move down to the keel. THEN I can install the strakes with their curving nature. Hull planks are yellow ocre and the strakes are black, and I can get all the yellow painted cleanly before laying down pre-painted black strakes so I think my approach makes much more sense unless somebody can help me and clue me in to something I'm missing.

I left my yellow ochre paint at my other residence and I wanted to get going so I picked up some yellow ochre from the craft store, all they had was matte. I'm finding this very dull indeed, I'm not happy with this paint. But the squareness of the finished gun ports I'm really digging.

Question: Can I mix in some clear satin to give the finish a bit of a sheen or should I stick with the model shipways yellow ochre like I'm using in Rattlesnake?

Scdadsx.jpgcvbxc.jpgbcvc.jpg
 
It was first necessary to establish Barot.Then glue the skin up and down from it.Gun ports closer to the stern cut through the planks of the hull.You have them running parallel to the ports along their entire length.
 

Attachments

  • man-o-war.jpg
    man-o-war.jpg
    383.9 KB · Views: 26
All the area covered by 2nd planking that shall be yellow ochre finished on the port side. I just love the boxwood strips provided in the kit. Square and true and only occasionally splintered where I had to start again. I'm chopping rather than sawing each length and getting good results. The paint, however, is disappointing. Jo-Ann's yellow ochre is most definitely NOT British warship yellow ochre. It's too brown, and too dark, and not enough orange. I'm gonna play around with mixing to see if I can get the right shade of yellow, otherwise it's a three week wait to get my Model Shipways yellow ochre.

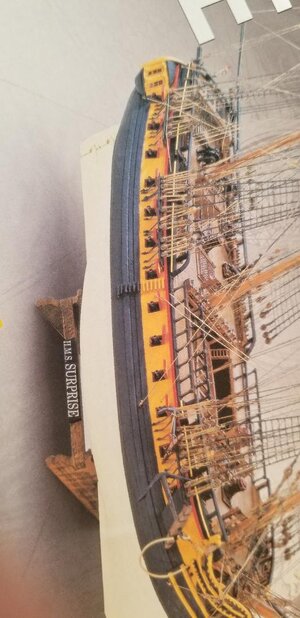
The first two pics are with the shade of yellow I'm talking about, what I applied in three coats. Then a pic of the box the model came in and finally a pic of the "HMS" Surprise moored in San Diego. My Surprise and the actual surprise might look like a similar yellow but that's the lighting in my cave here. It just ain't right.

ghccgfv.jpgnmgvcnb.jpgdgdf.jpgbgnfbcb.jpg
 
OMG! It looks like a real ship. I love it!

Have you checked Michael's for paint ... they have so much of everything crafty. You can check on their web site: www.michaels.com
 
OMG! It looks like a real ship. I love it!

Have you checked Michael's for paint ... they have so much of everything crafty. You can check on their web site: www.michaels.com
Yeah Michael's was out of everything, bare shelves. Jo-Ann's at least had one bottle of yellow ochre left but like I said it's just not the right color.

I really like the step of covering up the first planking. You really have to look through the ugliness of a first planking and concentrate on it just being smooth and ready for the hardwood that goes on top.
 
Three more coats of my special formula yellow ochre for the upper hull. Port side looking pretty good, I went ahead and finished the stern planking with the requisite red strake and black upper.

Starboard side second planking proceeding.

fghdfgx.jpgfgddfhdfg.jpgxafbxfvc.jpghgdgf.jpg
 
Yellow Ochre is a tough color but I do like your "Custom Color". The more you do the better it looks!

Thanks Vintage. After four coats I honestly can't tell the difference between Surprise and pics on the internet of HMS Victory and her yellow ochre. But with all the mixing I did to get it just right I'd never be able to come up with the same formula again! LOL
 
Port side strakes and the start of the next plank run directly underneath. I'll tell ya, soaking and bending, without cracking, 2x2 walnut strips can be frustrating. If I did this project again I'd just use basswood for this step as it's gonna be painted blackdzfzdzs.jpgghfx.jpg anyway. Basswood soaks/bends much easier. Ah well, can't be helped at this point.

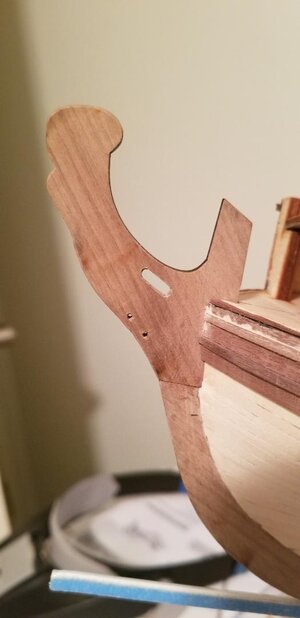
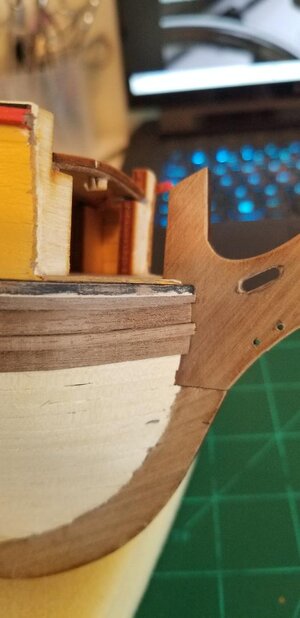
Also installed the bow stem. The bow stem came in walnut laser cut but without the openings for bowsprit rigging. I free-handed the two holes for bowsprit stays and the gammoning hole. Came out satisfactory.
 
Looking very good. I find that sometimes when bending those small strips and they start to splinter turning them 180 degrees helps. The splinter is at least on the bottom and they don't tend to crack all the way through, SOMETIMES!! Can be frustrating
 
Looking very good. I find that sometimes when bending those small strips and they start to splinter turning them 180 degrees helps. The splinter is at least on the bottom and they don't tend to crack all the way through, SOMETIMES!! Can be frustrating

Yeah I stumbled on that solution and it works. Especially if the strip will be painted, squirting some CA glue into the splintered area then sanding smooth works fine.
 
OK I need some help here. I've never been very good at planking relying heavily on paint and/or coppering to cover up my mistakes. I'm at the point in the second planking where from this run down to the waterline, about 3.5 widths of the 1x3 walnut strips, cannot be twisted without splintering. What are your best techniques for tapering or curving the bow planks?

zsdfgcfgf.jpg
 
Without doubt, the plank bender from Kolderstok. I covered it extensively in my logs on the Haarlem and the Leudo.
 
Without doubt, the plank bender from Kolderstok. I covered it extensively in my logs on the Haarlem and the Leudo.

Heinrich, what about edge bending? I mean bending with the 1mm side against the iron rather than the 3mm side? Would the device still work? This has always been my kryptonite when hull planking, getting either the taper exactly right or bending the plank without splintering too much or causing the strip to actually buckle and pucker when trying to edge bend it.
 
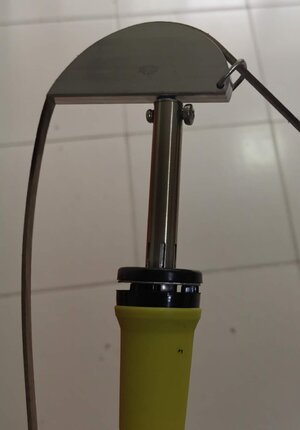
This the Kolderstok plank bender. Heat it (I leave it plugged in for about 15 minutes), run the plank under cold water until it is properly wet (do not soak it), and simply bend it.

Build 238.jpg

Obviously no plank bender in the world can edge bend a plank.

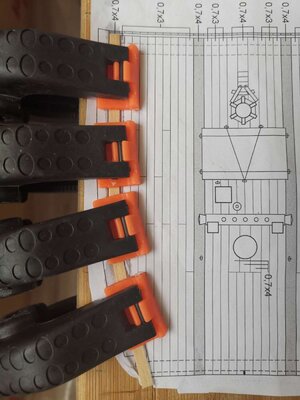
For that, wet the plank thoroughly, (soak if need be), place it on a completely flat surface, clamp the one end (proper clamps) and start bending it into the desired curvature, At the apex of each curve secure with another clamp. Leave it to dry (at least 4 hours - I prefer 8). Do not apply heat to the plank - let it dry naturally.

Build 337.jpg
 
What an incredibly interesting exchange!

I've never built a ship model, but I used to build various models with TKAM and his brothers when they were growing up. Now, I'm enjoying the experience of TKAM building his ships! :)
 
Back
Top