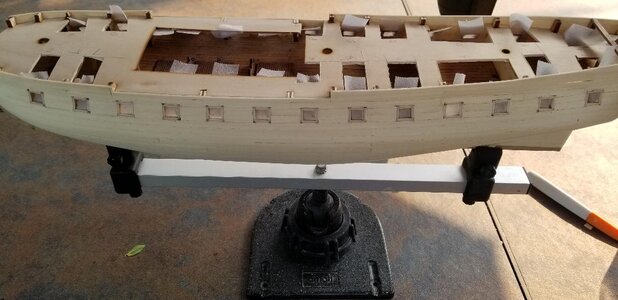
HMS Surprise by Mamoli

Hi TKAM just ran across this and was wondering for some pointers, how are you treating your planks and how long are you making them

I'm using the kit provided Tanganyika strips for the deck planking, same stuff as on my Bounty. I'm only coating them with a layer of urethane to bring out the grain and seal, but no stain as I like the hue as is. Full length planks are 80cm long staggered in a four plank pattern. See what I mean? Every four planks the pattern repeats.
 
I usually do full length planks also so I wondered when I saw your joints as Bob Hunt suggests sections as easier also in his practicums.Planing a bevel along the top edge of the plank helps a lot with the fit.


Yeah, especially towards the bow I find a bevel really helps fitting the neighbor plank in and that in turn reduces sanding and filling. Plus....it's just more elegant that way.
 
I'm using the kit provided Tanganyika strips for the deck planking, same stuff as on my Bounty. I'm only coating them with a layer of urethane to bring out the grain and seal, but no stain as I like the hue as is. Full length planks are 80cm long staggered in a four plank pattern. See what I mean? Every four planks the pattern repeats.
I started on Al Constellation and I have tried several ways to do the deck planks but I think the wood is just crap some of the plank strips has this wierd checker board pattern on them
 
I started on Al Constellation and I have tried several ways to do the deck planks but I think the wood is just crap some of the plank strips has this wierd checker board pattern on them

Some type of hardwood or the standard basswood?
 
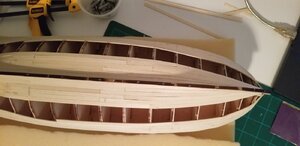
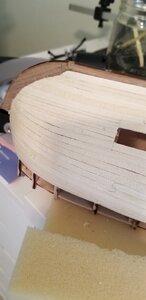
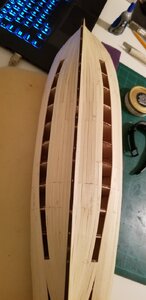
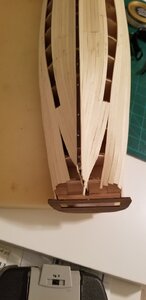
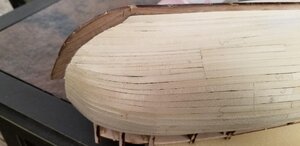
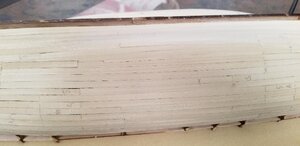
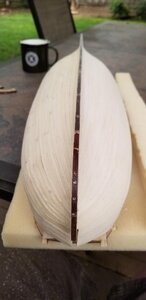
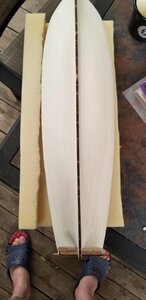
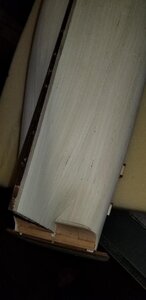
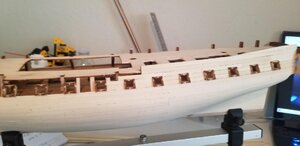
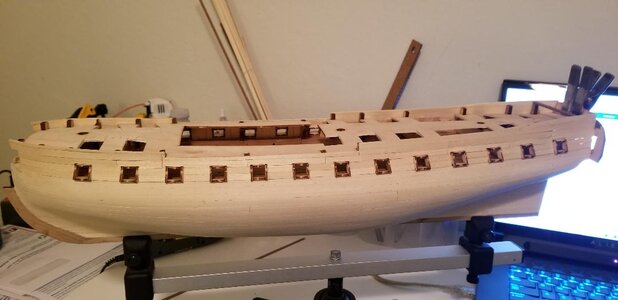
OK, so the deal is....after a judicious sanding I'm finding almost nothing to complain about. No hollows after all, no spots standing proud. Only minor cracks that I don't even have to fill, the second planking will cover those spots over with no problems. Frankly I'm astonished that the first planking came out so well. I guess I faired well after all!

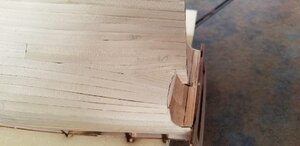
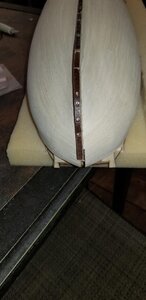
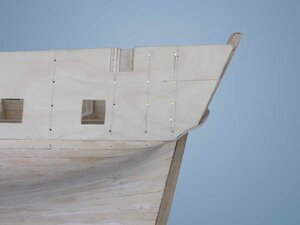
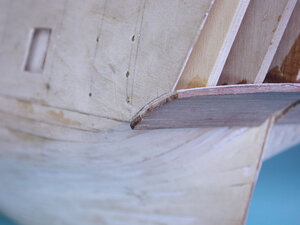
The only big flaw I can see is towards the stern post the flare from hull to keel is not quite symmetrical. I don't think there is any chance that will be spotted but I know (and now you know) that it is there. It'll stick in my craw in any case. But, I'm pleased. Time to move on to installing all the gun port frames then first planking up to the sills.

Before sanding:

jhfdg.jpgsfdsdf.jpgxffsd.jpg


After sanding (no filling).


dsfsd.jpgvxbxcvxc.jpgfghnfgb.jpgzxcxz.jpgvbndv.jpg
 
For work and effort of course like.But!Surprise_Const017_lrg.jpgSurprise_Const023_lrg.jpgSurprise_Const025_lrg.jpgWho taught you how to sew up the stem?Cut the skin along the entire length of the stem.It wasn't like that.If there is a second skin, imagine what will be the thickening in the area of the stem and keel.Covering boards are stacked in a pile on stunnah and Kiel.
 
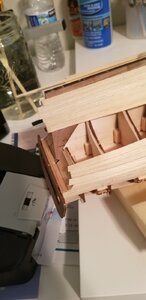
Working on installing all the gun ports and first planking the rest of the way up. This part is pretty straight forward. I have various TV programs I'm binging which are droning away as I work. Scut work but I like this part.

I decided to cut out an area of the false upper deck behind every gun port so I can set the cannons AFTER all the sanding is complete. The directions have the builder installing the cannon prior to trimming the protruding parts of the gun port frames and sanding. I just can't see how this is possible without really mucking up the works and THEN having to cut through the false deck to reset the cannon one just mucked up. Again, if I did this model again from the beginning I would not have glued down the false upper deck prior to hull planking. It just isn't practical.

I also now understand what another builder of Surprise was saying about the bulkheads being in the way. Spot on. If you take the measurement from the plans for placement of either the most forward or most aft gun port and also use the plan measurements for gun port spacing it just doesn't work. bulkheads end up being right where a gun port, and the cannon, is supposed to be. The plans are just plain wrong. I altered the spacing from 2.5cm between gun ports to 2.2 between gun ports. I also had to fudge that a tad bit in two case, otherwise I would have had a gun port right where a bulkhead is. I see this as a flaw in the design of this model.

So, if you plan on doing this kit from Mamoli plan out your gun ports well in advance and don't be shy about setting the most fore or aft gun port slightly different from the plans. Even spacing of the gun ports is more important than where they start in terms of measurement from the bow or stern.

jkhagsdskags.jpgkjlahgsjdhgs.jpgzxcSX.jpgjhsdjh.jpg
 
Last edited:
OK, so the deal is....after a judicious sanding I'm finding almost nothing to complain about. No hollows after all, no spots standing proud. Only minor cracks that I don't even have to fill, the second planking will cover those spots over with no problems. Frankly I'm astonished that the first planking came out so well. I guess I faired well after all!

The only big flaw I can see is towards the stern post the flare from hull to keel is not quite symmetrical. I don't think there is any chance that will be spotted but I know (and now you know) that it is there. It'll stick in my craw in any case. But, I'm pleased. Time to move on to installing all the gun port frames then first planking up to the sills.

Before sanding:

View attachment 178438View attachment 178439View attachment 178440


After sanding (no filling).


View attachment 178442View attachment 178443View attachment 178444View attachment 178445View attachment 178446
Wow! It is almost like watching a full-sized ship being built! ;)
 
Working on installing all the gun ports and first planking the rest of the way up. This part is pretty straight forward. I have various TV programs I'm binging which are droning away as I work. Scut work but I like this part.

I decided to cut out an area of the false upper deck behind every gun port so I can set the cannons AFTER all the sanding is complete. The directions have the builder installing the cannon prior to trimming the protruding parts of the gun port frames and sanding. I just can't see how this is possible without really mucking up the works and THEN having to cut through the false deck to reset the cannon one just mucked up. Again, if I did this model again from the beginning I would not have glued down the false upper deck prior to hull planking. It just isn't practical.

I also now understand what another builder of Surprise was saying about the bulkheads being in the way. Spot on. If you take the measurement from the plans for placement of either the most forward or most aft gun port and also use the plan measurements for gun port spacing it just doesn't work. bulkheads end up being right where a gun port, and the cannon, is supposed to be. The plans are just plain wrong. I altered the spacing from 2.5cm between gun ports to 2.2 between gun ports. I also had to fudge that a tad bit in two case, otherwise I would have had a gun port right where a bulkhead is. I see this as a flaw in the design of this model.

So, if you plan on doing this kit from Mamoli plan out your gun ports well in advance and don't be shy about setting the most fore or aft gun port slightly different from the plans. Even spacing of the gun ports is more important than where they start in terms of measurement from the bow or stern.

View attachment 178747View attachment 178748View attachment 178749View attachment 178750
The incredible detail I so enjoy is starting to appear! :)
 
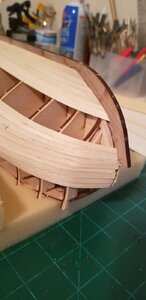
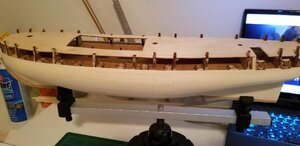
First planking 90% finished, I just need to sand it smooth and flush the gun ports. Then paint the interior of the gun ports red and then it's off and running with the second planking.

I'm really dreading the sanding down of the upper hull and flushing the gun ports. There's going to be tons and tons of sawdust and all that is going to foul the gun deck. I'm thinking maybe I can mitigate by putting some sticky tape on the inside of the gun port openings to catch some of the dust? Not sure what else I can do. Lots of compressed air when it's finished I suppose.

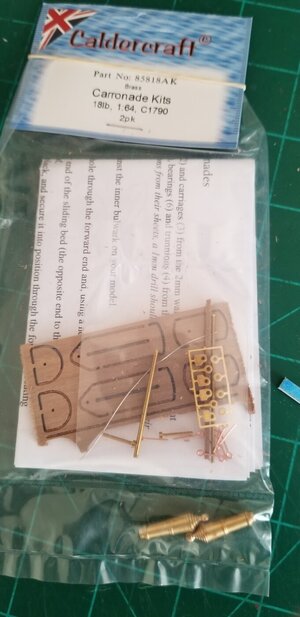
The second pic is what I ordered from Caldercraft to fit out Surprise. Surprise carried two 18 pounder carronades as bow chasers. The cast guns in the kit are nice enough but the rest of the gun (carriage, rigging, elevation rig, etc.) are left to the imagination. The long gun carriages in this kit are nice although most are hidden and won't be seen anyway. But the carronades are up and proud on the bow and I thought a little upgrade would be nice. The carronade kit is hardwood and complete with lots of solid metal parts as well. A fine addition to this project I think.

The question I have is this: Should I leave these guns in their brass condition or should I paint them black like the long guns? Thoughts?

fgdhfghb.jpgsdfsdfd.jpg
 
Planking came out great, nice and clean. As for brass cannon I think they always look better and more realistic with paint or chemical stain.

I always just paint black, spray paint. It's even and clean and...well, black. Besides Brass Black which I use to darken all my eyebolts, what can be used to reliably darken something made of brass?
 
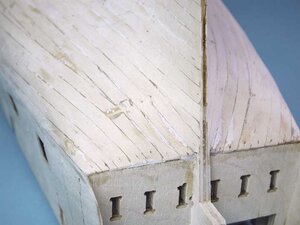
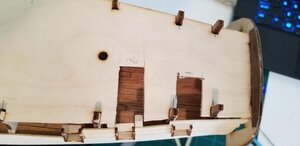
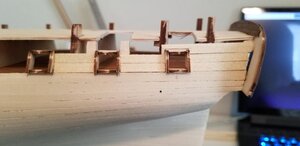
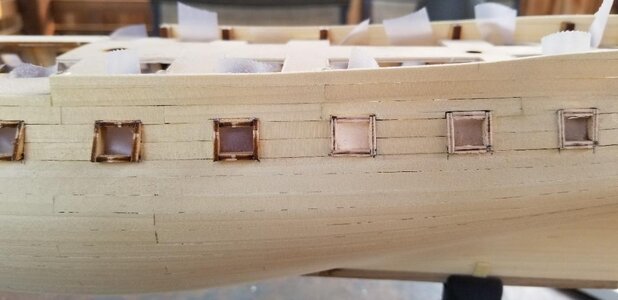
Final sanding for the upper hull (first planking) and flushing the gun ports. I ended up placing some sticky tape on the inside of each gun port and that caught most of the sawdust, what ended up on the gun deck I blew away with compressed air. Problem solved. Two of the gun ports to my eye are looking a bit crooked and I can't tell if that's just my Covid talking (just kidding) or what I don't know. I'm confident I can solve this problem with some shaving of the gun port frames and with the final planking.

The left of the first pic shows the gun port before sanding, the right side shows after sanding flush. Bear in mind the hardwood second planking will be flush with each gun port frame on all four sides and no part of the frames showing out will be seen, and the inner frames will be painted red.
kjshfdk.jpgkjsdhfk.jpg
 
Back
Top