HMS Surprise by Mamoli

What an incredibly interesting exchange!

I've never built a ship model, but I used to build various models with TKAM and his brothers when they were growing up. Now, I'm enjoying the experience of TKAM building his ships! :)
I guess, we have to thank you Mom @Mom Nolley, and other parents who introduced the hobby to their kids at an earlier age. Those days we have seen not too many parents have an interest in teaching their kids any hobby. The computer and phone take precedence...unfortunately.

Bravo Mom Nolley!! Thumbs-Up
 
Thank you for the kind words! :)

We also learned computers together in the late 70s and 80s ... we had the first Star Trek game that was all text-oriented. The best was the original Fool's Errand, which all 3 of my sons worked on when they were around. Such a thrill to finally see the Epilog!

But, models were always fun and reading wonderful stories together. I learned many things with my boys!
 
I use the mo
This the Kolderstok plank bender. Heat it (I leave it plugged in for about 15 minutes), run the plank under cold water until it is properly wet (do not soak it), and simply bend it.

View attachment 185441

Obviously no plank bender in the world can edge bend a plank.

For that, wet the plank thoroughly, (soak if need be), place it on a completely flat surface, clamp the one end (proper clamps) and start bending it into the desired curvature, At the apex of each curve secure with another clamp. Leave it to dry (at least 4 hours - I prefer 8). Do not apply heat to the plank - let it dry naturally.

View attachment 185442
I use the Model Expo plank bender, works great but I do soak my planks sometimes overnight and do not really seem to have a problem with walnut or mahogany splitting.
 
What an incredibly interesting exchange!

I've never built a ship model, but I used to build various models with TKAM and his brothers when they were growing up. Now, I'm enjoying the experience of TKAM building his ships! :)

Yep. That's where most of my allowance money went to: plastic models, paints, and glue. I would sometimes skip school just to work on a model. Bet you didn't know that Mom Nolley!
 
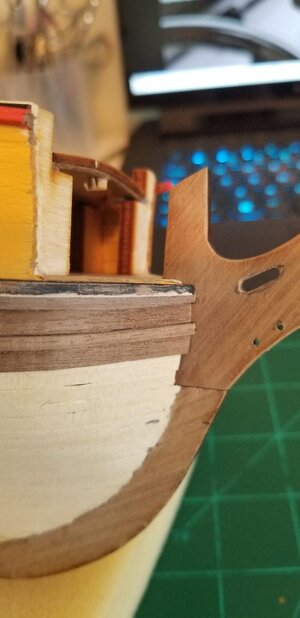
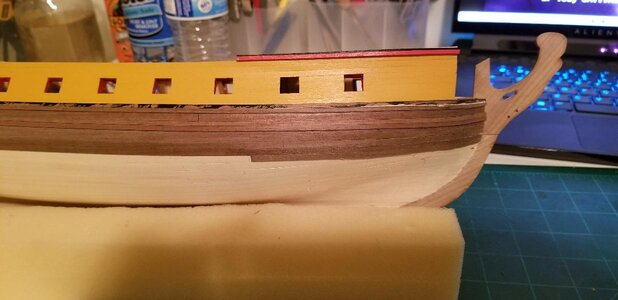
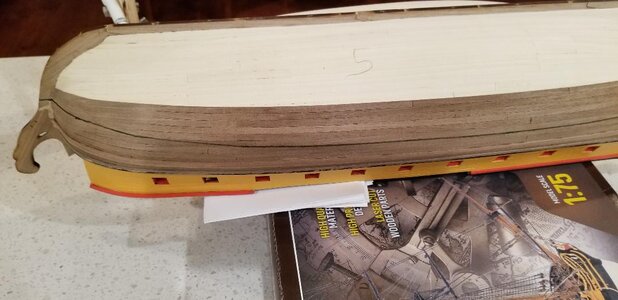
Well I'm almost to the waterline (tiny tic mark at the bow stem) where copper sheathing will take over after finishing the hull planking down to the keel. I'm actually quite surprised that there have been no hitches yet and my edge bending has worked beyond my fears.

One additional question for all you experts: After planking to the waterline, essentially where the copper plates will take over, is there a good method to stop the rest of the 2nd planking and just cover the hull with the copper? Or should I just keep planking away even though it'll be covered up by copper anyway? Asking for a friend.

zsdfgcfgf.jpgdghfgdf.jpg
 
I would commence the copper plating and not bother to adhere any more planks.
Make sure the transition from the second planking to the copper tiles is sanded smooth on the lower edge. You want to avoid a thick edge if you follow my meaning.
 
I would commence the copper plating and not bother to adhere any more planks.
Make sure the transition from the second planking to the copper tiles is sanded smooth on the lower edge. You want to avoid a thick edge if you follow my meaning.

That's the key I'm thinking, any sudden change in...altitude will be noticeable. Maybe two more runs tapering down progressively. I'm gonna experiment to see if it's feasible. Anyway, I'm off to "work" and my other residence and I'll continue my work on Rattlesnake for the next three weeks.
 
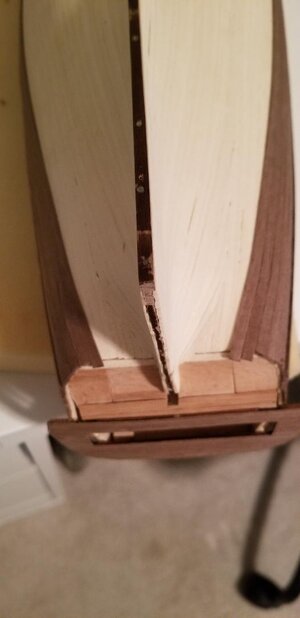
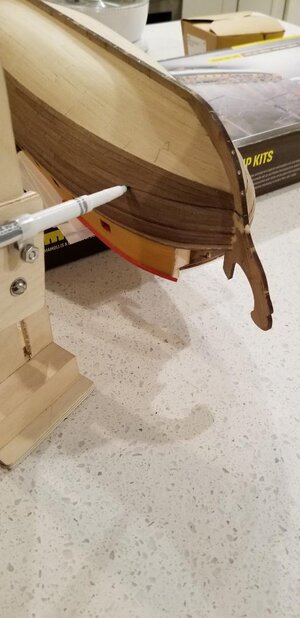
OK another stupid question. Although the planks above the waterline will be painted black you'll still be able to see the divisions between planks, rather than fill and sand completely smooth I'd to have that effect. So, first, is that normal or is completely smooth better? Next: If plank divisions should be shown barely under the black paint, should the planks be exactly parallel to the keel? I'm following the line started at the wales and am getting a really nice turnout with the planks parallel to the ANGLE where the hull turns from horizontal to vertical. Follow? Look at the pic and see the planks turning inwards. Should they be exactly perpendicular to the stern counter?

hvgcfsvxc.jpg
 
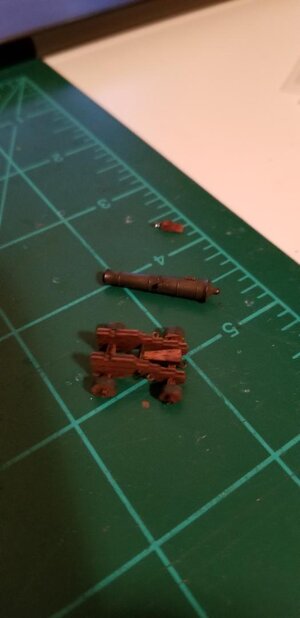
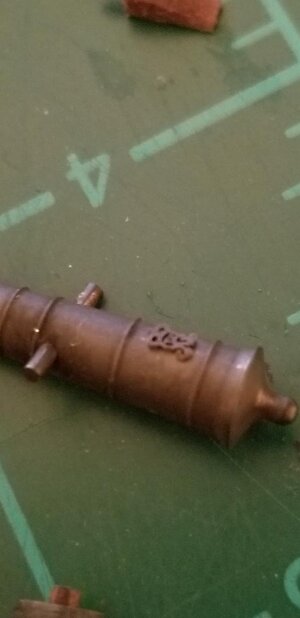
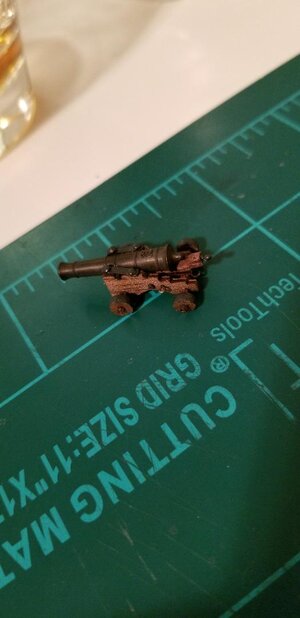
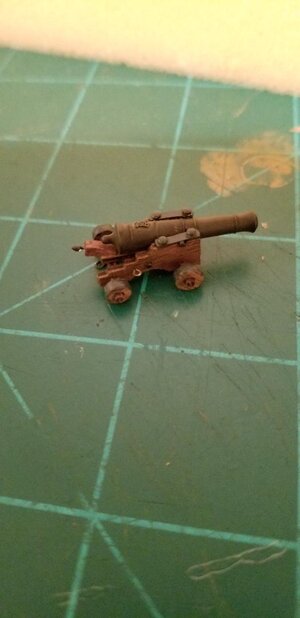
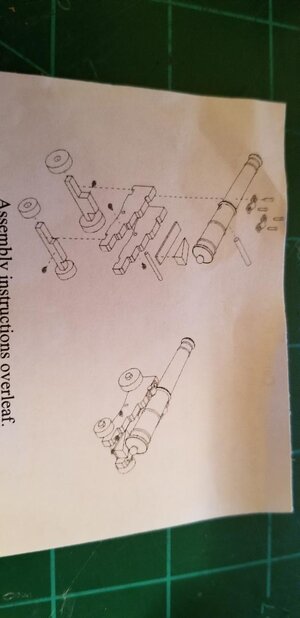
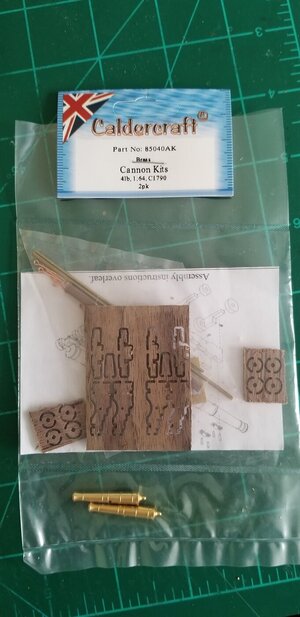
Back to Surprise for the next two weeks. Before I launch back into the 2nd planking (one more row until I hit the waterline) I thought I'd put together one of the high quality cannon kits I ordered from Caldercraft. There are six cannon and two carronade bow chasers on the weather deck where the rigging can be shown. All other cannon on the gun deck (with the exception of a handful where in-haul lines can be seen) will only ever show the cannon barrels sticking out of the gun port so every cannon on the gun deck I'm sticking with kit provided materials.

The kits come with materials for two cannon, same for the Carronade kits. I also ordered British cannon monograms from Chuck Passaro. Will anyone ever see the difference in details between these high quality kits and the white metal cast cannon and sleds provided in the kit? Nope. Will anyone ever see the monogram on the barrel of the cannon? Nope, not unless they are wearing magnifying specs. But I thought a little extra expense and effort worth it. And boy do these kits show off the details. 1:64 scale is small but the detail is there.

jhgfjhgnb.jpggfdgfdc.jpgfdgbnv.jpghgfgjyh.jpghgfhg.jpg
 
Last edited:
The kits come with materials for two cannon, same for the Carronade kits. I also ordered British cannon monograms from Chuck Passaro. Will anyone ever see the difference in details between these high quality kits and the white metal cast cannon and sleds provided in the kit? Nope. Will anyone ever see the monogram on the barrel of the cannon? Nope, not unless they are wearing magnifying specs. But I thought a little extra expense and effort worth it. And boy do these kits show off the details. 1:64 scale is small but the detail is there.
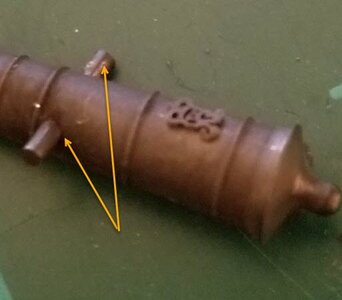
You are doing a great job, my friend! Obviously, if you don't mind, I want to tell you how you make some of the improvements if may consider it. The barrels are definitely a game-changer but...I am afraid, you put the monogram on the bottom of the barrel. The trunnions (yellow arrows) are in a low position. They are always 'off-center' and the lower part goes to the carriage. I think it should be easy to fix.

gfdgfdc.jpg

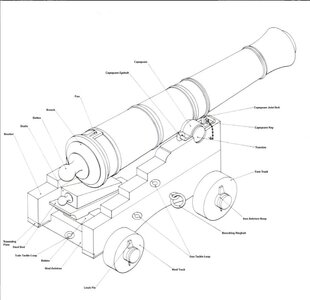
Another improvement or modification you may consider for the Capsquare part. It must follow the shape\size of the trunnion. Check this image below. I found this image of great help to identify parts and visual learning. Hope I didn't offend you as I was trying to help. :cool:

cannon.JPG
 
You are doing a great job, my friend! Obviously, if you don't mind, I want to tell how you some of the improvements you may consider. The barrels are definitely a game-changer but...I am afraid, you put the monogram on the bottom of the barrel. The trunnions (yellow arrows) are in a low position. They are always 'off-center' and the lower part goes to the carriage. I think it should be easy to fix.

View attachment 191798

Another improvement or modification you may consider for the Capsquare part. It must follow the shape\size of the trunnion. Check this image below. I found this image of great help to identify parts and visual learning. Hope I didn't offend you as I was trying to help. :cool:

View attachment 191799


No not at all Jimski. Maybe it's just the angle of the photo but the low part (more "meat" hanging down) is faced down with the monogram on top, on the shallow side.

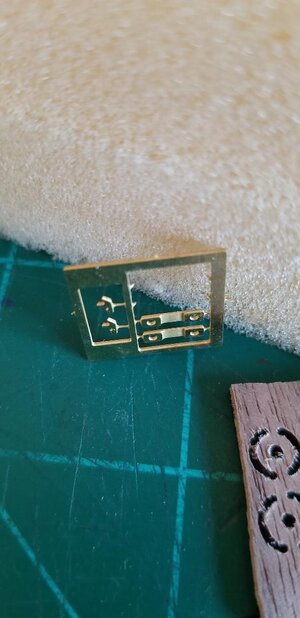
The capsquare indeed needs to be formed a little bit better so that it humps up a bit. See the attached pic of the brass parts representing the capsquare, they have a portion in the center where it's dug out just a bit. When I dry fitted them it looked alright but I agree they need to formed just a bit. Not sure if I'm going to change this first experimental cannon or not, I can't tell at all unless I'm wearing magnifying specs.


,khjgjgfv.jpg
 
You are doing a great job, my friend! Obviously, if you don't mind, I want to tell how you some of the improvements you may consider. The barrels are definitely a game-changer but...I am afraid, you put the monogram on the bottom of the barrel. The trunnions (yellow arrows) are in a low position. They are always 'off-center' and the lower part goes to the carriage. I think it should be easy to fix.

View attachment 191798

Another improvement or modification you may consider for the Capsquare part. It must follow the shape\size of the trunnion. Check this image below. I found this image of great help to identify parts and visual learning. Hope I didn't offend you as I was trying to help. :cool:

View attachment 191799
It seems when ever I put something together,,, whether it has one, two, or three different ways, I always manage to find the WRONG one.
 
The capsquare indeed needs to be formed a little bit better so that it humps up a bit. See the attached pic of the brass parts representing the capsquare, they have a portion in the center where it's dug out just a bit. When I dry fitted them it looked alright but I agree they need to formed just a bit. Not sure if I'm going to change this first experimental cannon or not, I can't tell at all unless I'm wearing magnifying specs.
These are very nice capsquare, they even come with capsquare key. What is the scale, and the source of those?
 
Yep. That's where most of my allowance money went to: plastic models, paints, and glue. I would sometimes skip school just to work on a model. Bet you didn't know that Mom Nolley!
No, I didn't ... so, where were you hiding, Mr? That's a big "Okie dokie!" ;)
 
Heck, Even if only ONE way to put it together,,,,,, I STILL find the wrong way
No worries...we are on an alert... Oh, boy, did I said alert? I lost my sleep because of Alert (the kit), cannot stop building...:cool:
 
These are very nice capsquare, they even come with capsquare key. What is the scale, and the source of those?

The hardwood carriages included in the kit are laser cut and pretty nice actually, it's just that with white metal ya gotta paint and paint is paint. Now the carronade sleds were without any detail whatsover, real boring. I asked Chuck Passaro about where to go and he said Caldercraft. Voilá!

The caronade kits have great detail and I figured if I was going to upgrade the caronades I should do the cannon on the weather decks as well. 1:64 scale.

20201109_151956.jpg
 
Well it seems I've already 2nd planked well past the waterline where the copper will take over. Tomorrow I'm going to explore a smooth transition from the 1st planking to the 2nd planking. It that is feasible then I guess I'm done with planking. Any hints on how to do that properly would be most helpful.

sargersfd.jpgjghfgdfvd.jpg
 
Back
Top