Rattlesnake by MS

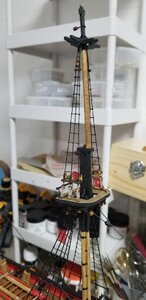
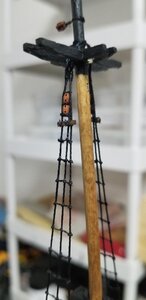
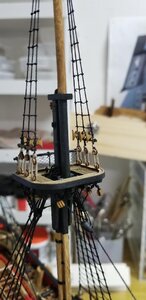
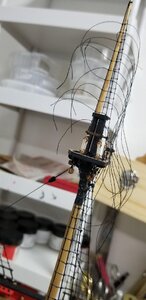
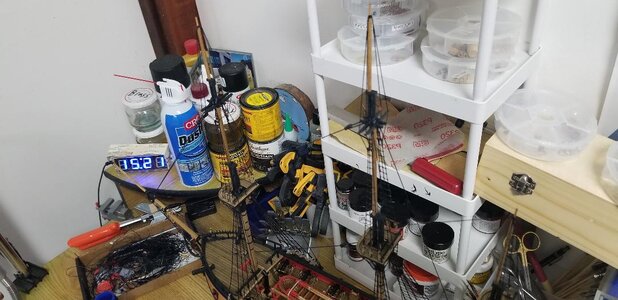
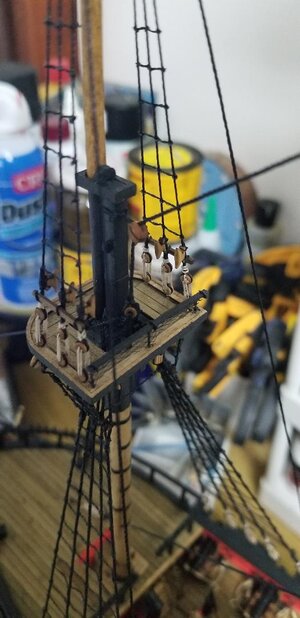
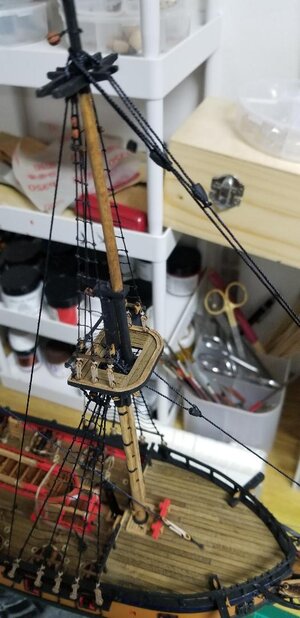
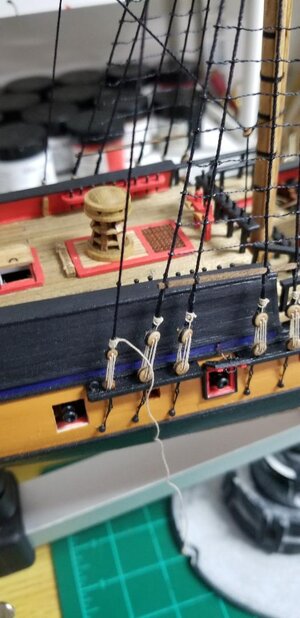
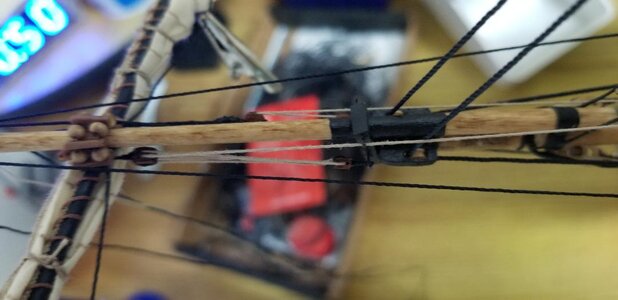
Fore top mast ratted up. Sister blocks for the upper topmast shroud. Cleats for the lower topmast shroud. I've chucked all the white metal cast cleats and am using modified Chuck Passaro 5mm wooden cleats. Chuck sells wooden cleats specifically for shrouds but I just couldn't wait for the mail, so I modified the normal 5mm cleats by gluing a tiny piece of wood on the bottom of each cleat so it could be lashed to the shroud with sewing thread. Came out pretty good.

dfgdgfd.jpgnvbcbv.jpgfsgdfdfg.jpg
 
In my opinion it's quite acceptable to jump ahead with some time consuming tasks while waiting for glue to dry. To have that center keel assembly with keel and stem and stern post really ready to start accepting bulkheads you should wait a minimum of 24 hours. Well, I can't wait here just watching TV so I'm jumping ahead with making the gun carriages. With this kit 8 guns are displayed and so 8 gun carriages must be constructed, but the option to display at least the barrel of a cannon in some of the other gun ports exists. My plan is to complete 10 guns as planned where they'll be fully rigged and then purchase some of those cannon stubs that stick out in gun ports below decks like on HMS Victory. This kit has 12 of the gun ports just closed up but I like the effect of keeping some of those ports open with a gun barrel sticking out. Another note, the supplied gun port covers are britannia metal and I just don't like having to paint them black, it just doesn't look realistic at all. I plan on scratch building all the gun port covers. Pics are of one test of a completed gun carriage, I'm using "Historic Ships" brand walnut stain for the carriages and wheels. The wheels themselves I painted black on the outside of the wheel to simulate the iron banding of such wheels but I like the effect of keeping the inside of the wheel the same walnut color. It's a lot more labor but not boring.

View attachment 102035

View attachment 102036

View attachment 102037

View attachment 102038
So smaaaaalll!
 
A few days have past since last I posted. Lots of time on my hands for model work :)
All masts have been stepped: Mizzen topmast shrouds and ratlines/stay/backstays, main topmast shrouds/stay/backstays, fore topmast shrouds/stay/backstays.

Main and fore topgallant masts stepped, working on the standing rigging for these the last of the masts...well, the bowsprit and jib to go as well.

vbxcv.jpgvbxcv.jpgcbcb.jpgvxvxcvxc.jpgvcbcvxc.jpgzxczdczdc.jpg
 
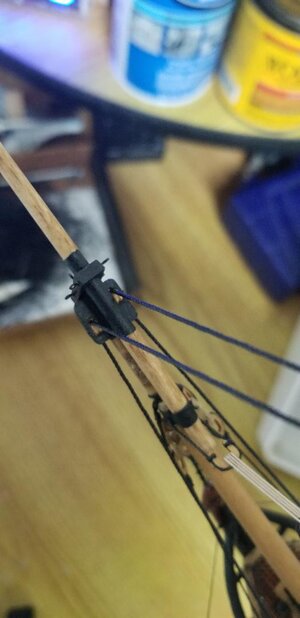
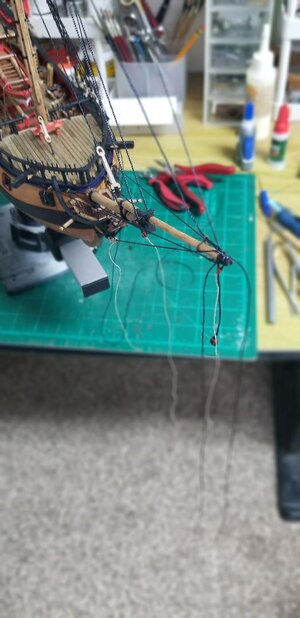
Rigging the bowsprit and jib are extremely complicated. I've got both black and tan rigging hanging all over the place as I work each fixture. It does matter in what order "stuff" is hung over the end of the jib, most of the time I spent today was figuring out the proper order. The second coat of black is drying for the spirit sail and spirit sail topsail. Tomorrow I should have most of it done and that'll be the end of all the standing rigging for Rattlesnake. The spirit sail and spirit sail topsail represent the first of the yards to be fabricated.

fdggdf.jpg
 
Fore top mast ratted up. Sister blocks for the upper topmast shroud. Cleats for the lower topmast shroud. I've chucked all the white metal cast cleats and am using modified Chuck Passaro 5mm wooden cleats. Chuck sells wooden cleats specifically for shrouds but I just couldn't wait for the mail, so I modified the normal 5mm cleats by gluing a tiny piece of wood on the bottom of each cleat so it could be lashed to the shroud with sewing thread. Came out pretty good.

View attachment 181787View attachment 181788View attachment 181789
Nice rigging work going on. Have to confess that every time that I see the Rattlesnake forum and threads the first recollection that comes into my brain is how when growing up in Montana and doing survey work in Nevada I would hunt out rattle snakes to shoot and after stripping fry like fish. They were mostly skinny critters but with searching bigger and fatter ones could be found. Taste like a cross between rabbit and chicken. . . lots of more bones. Probably like lost of frames and rigging knots that you have to work through. Nice build you are producing. PT-2
 
Nice rigging work going on. Have to confess that every time that I see the Rattlesnake forum and threads the first recollection that comes into my brain is how when growing up in Montana and doing survey work in Nevada I would hunt out rattle snakes to shoot and after stripping fry like fish. They were mostly skinny critters but with searching bigger and fatter ones could be found. Taste like a cross between rabbit and chicken. . . lots of more bones. Probably like lost of frames and rigging knots that you have to work through. Nice build you are producing. PT-2

The Bluenose seems to be a popular build. Do you have a blog for that?
 
The Bluenose seems to be a popular build. Do you have a blog for that?
No. I have to confess that I am not as satisfied with what I am doing there and it has been very on and off. I spent a lot of time completing my firing naval cannon and now am doing a sighting-in process at various ranges and combinations of elevation bolsters at the gun range where I am a range safety officer and became acquainted with muzzle loaders. Anyhow, I should put up some phots as I did in the Canoe Group Build for the two that I completed as entry training for planking that was needed in the strip canoes. Hope that pays off but I am challenged in planking the POB Bluenose. I have a book that I purchased on Bluenose II which is essentially the same. My Model Expo kit does have plans that are well documented for their provenance back to the original draughts and later vetted plans which is why I had some questions about the Chinese CAD Bluenose where I believe that they took some of their own artistic license with some details. Speed is not my objective, nor at this late stage of life is the perfection of building that other SoS members have. There are some things that I am satisfied with having to accept with my macular degeneration affecting depth perception and vision in general so I may glue something down and not recognize the problem until too late and not willing to cut enough apart to do it again if it will be covered up in later phases. It mainly gives me something to do in maintaining what I have while I have it.
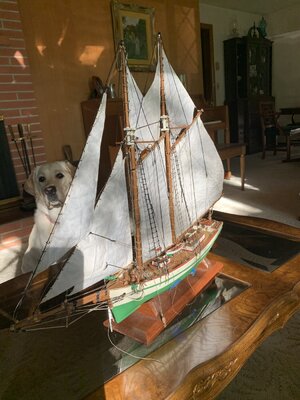
I did post some photos of a Constructo Pilot Boat, schooner rig, for which there was not identified scale. It was started back about 1970 and only taken up again five or six months ago. Here is a crude Pilot Boat to Becky.jpgphoto of it not in a case. I added a number of rigging falls, a couple of boats, one in a cradle and the other partially elevated for going over the side which this port view shows, This was before it was finished and put under the acrylic case. August 8 Status 3.jpg
As you can see it was in progress at the time.
 
No. I have to confess that I am not as satisfied with what I am doing there and it has been very on and off. I spent a lot of time completing my firing naval cannon and now am doing a sighting-in process at various ranges and combinations of elevation bolsters at the gun range where I am a range safety officer and became acquainted with muzzle loaders. Anyhow, I should put up some phots as I did in the Canoe Group Build for the two that I completed as entry training for planking that was needed in the strip canoes. Hope that pays off but I am challenged in planking the POB Bluenose. I have a book that I purchased on Bluenose II which is essentially the same. My Model Expo kit does have plans that are well documented for their provenance back to the original draughts and later vetted plans which is why I had some questions about the Chinese CAD Bluenose where I believe that they took some of their own artistic license with some details. Speed is not my objective, nor at this late stage of life is the perfection of building that other SoS members have. There are some things that I am satisfied with having to accept with my macular degeneration affecting depth perception and vision in general so I may glue something down and not recognize the problem until too late and not willing to cut enough apart to do it again if it will be covered up in later phases. It mainly gives me something to do in maintaining what I have while I have it.
I did post some photos of a Constructo Pilot Boat, schooner rig, for which there was not identified scale. It was started back about 1970 and only taken up again five or six months ago. Here is a crude View attachment 187390photo of it not in a case. I added a number of rigging falls, a couple of boats, one in a cradle and the other partially elevated for going over the side which this port view shows, This was before it was finished and put under the acrylic case. View attachment 187391
As you can see it was in progress at the time.


Looks quite fine to me!

I'm considering picking up a muzzle loader myself, the classic Kentucky long rifle replica. Any specific suggestions?
 
Looks quite fine to me!

I'm considering picking up a muzzle loader myself, the classic Kentucky long rifle replica. Any specific suggestions?
I used to have an old .58 caliber flintlock. It never shot very true, but it packed a pretty good wallop with 120 grains of black powder behind a 750 grain mini. And, PT-2, I can relate to the age thing. But it's still fun, ain't it?
 
I used to have an old .58 caliber flintlock. It never shot very true, but it packed a pretty good wallop with 120 grains of black powder behind a 750 grain mini. And, PT-2, I can relate to the age thing. But it's still fun, ain't it?
We do what we can while we are able and enjoy the moment. PT-2
I used to have an old .58 caliber flintlock. It never shot very true, but it packed a pretty good wallop with 120 grains of black powder behind a 750 grain mini. And, PT-2, I can relate to the age thing. But it's still fun, ain't it
 
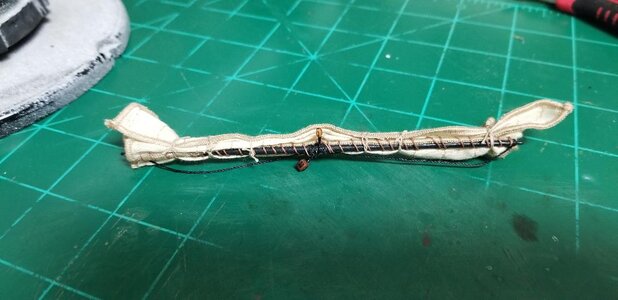
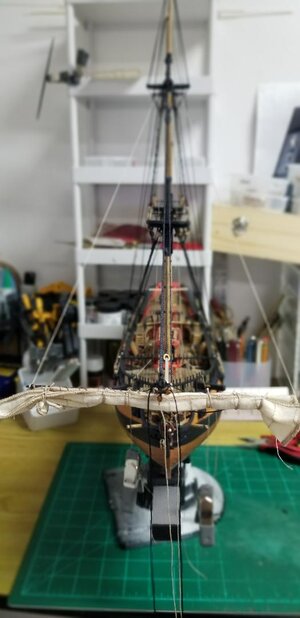
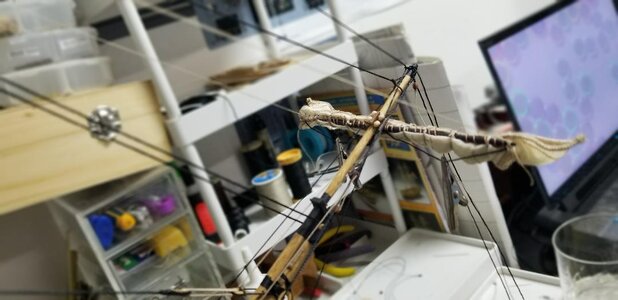
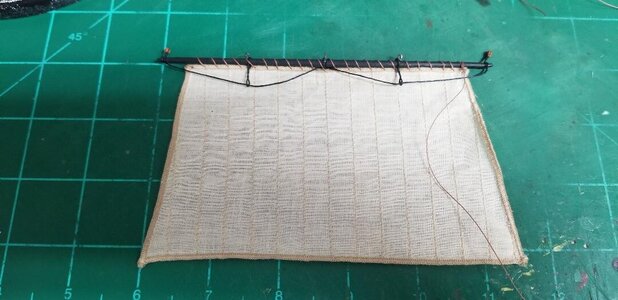
Decided to add sails after all, this is my first try at sails. I purchased a pre-sewn package for a generic three masted ship in 1:64 scale. There are in fact two spirit sails included, one a bit smaller than the other and that's the one I used to experiment with for the spirit sail topsail. So far, so good. I still have to add the clew lines but I think I'll continue with sails for all the yards, some furled and hopefully some unfurled.

sdfghdfgd.jpgdfgfghg.jpghfjghgdf.jpgkjhgfkuhjk.jpg
 
Decided to add sails after all, this is my first try at sails. I purchased a pre-sewn package for a generic three masted ship in 1:64 scale. There are in fact two spirit sails included, one a bit smaller than the other and that's the one I used to experiment with for the spirit sail topsail. So far, so good. I still have to add the clew lines but I think I'll continue with sails for all the yards, some furled and hopefully some unfurled.

View attachment 187529View attachment 187530View attachment 187531View attachment 187532
Upon entering a port/harbor the captain would demand precision in how they were correctly furled showing that his ship and crew were above the other in port. It was a matter of pride and competition. Yours also should be as tightly and uniformly taken in and secured to the yards in the same manner for a good presentation. This can be a challenge given the scale of your sail cloth and trying to get it down to the canvas and compaction on an actual ship. Just a thought that you may want to take some time looking up the manner and lines required to do this. Given the size furled sales are most times cut much shorter than full size to facilitate this type of presentation. PT-2
 
Upon entering a port/harbor the captain would demand precision in how they were correctly furled showing that his ship and crew were above the other in port. It was a matter of pride and competition. Yours also should be as tightly and uniformly taken in and secured to the yards in the same manner for a good presentation. This can be a challenge given the scale of your sail cloth and trying to get it down to the canvas and compaction on an actual ship. Just a thought that you may want to take some time looking up the manner and lines required to do this. Given the size furled sales are most times cut much shorter than full size to facilitate this type of presentation. PT-2

Yeah the practicum for all its faults suggests taking a completed sail and halving it if it's to be furled. I'm afraid it's too late to do that with the spirit sail topsail, with the footropes installed and the truck/parrel and and, etc.

I'm making my way through Patrick O'Brian's 3rd book "HMS Surprise" and finding that very very rarely did ships actually carry all their sale at one time, especially top gallants and royals except in the lightest of breezes. I'll try to have at least the courses unfurled and probably the spanker as well.

In your opinion does the sail I have installed (furled) look out of scale? Bear in mind I still have to add the clew lines and that will cinch up the triangle of sail peaking out from either end.
I am not an historian but have had some interesting reading sent my way from others who have done a lot of research from highly credible sources and works as well as the book Two Years Before the Mast by Dana where this need for precise furling recurs. If you are able to re-furl the cloth more smoothly and uniformly with more lines of smaller scale I think that they will be better presented. Easy for me to speculate from afar and not with my fingers on the work. If you are satisfied with what you have or can do I think that is the main goal and let sideliners opinions go by in the wind. We all have things that we wish we did not have in our work but that carries forward to the next project. Just thoughts for consideration. PT-2
 
I am not an historian but have had some interesting reading sent my way from others who have done a lot of research from highly credible sources and works as well as the book Two Years Before the Mast by Dana where this need for precise furling recurs. If you are able to re-furl the cloth more smoothly and uniformly with more lines of smaller scale I think that they will be better presented. Easy for me to speculate from afar and not with my fingers on the work. If you are satisfied with what you have or can do I think that is the main goal and let sideliners opinions go by in the wind. We all have things that we wish we did not have in our work but that carries forward to the next project. Just thoughts for consideration. PT-2
I didn't answer your direct question but yes they look out of scale and distracting. Once worked in I think that you need smaller lines around the yard and much smaller knots as those in scale would be more than a foot across I am guessing. PT-2
 
Back
Top