Looking great! Keep up the good work!
-

Win a Free Custom Engraved Brass Coin!!!
As a way to introduce our brass coins to the community, we will raffle off a free coin during the month of August. Follow link ABOVE for instructions for entering.
-

PRE-ORDER SHIPS IN SCALE TODAY!
The beloved Ships in Scale Magazine is back and charting a new course for 2026!
Discover new skills, new techniques, and new inspirations in every issue.
NOTE THAT OUR FIRST ISSUE WILL BE JAN/FEB 2026
You are using an out of date browser. It may not display this or other websites correctly.
You should upgrade or use an alternative browser.
You should upgrade or use an alternative browser.
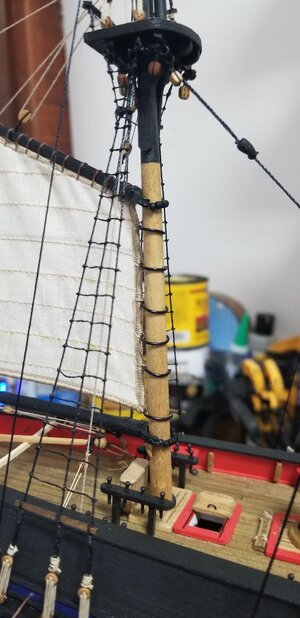
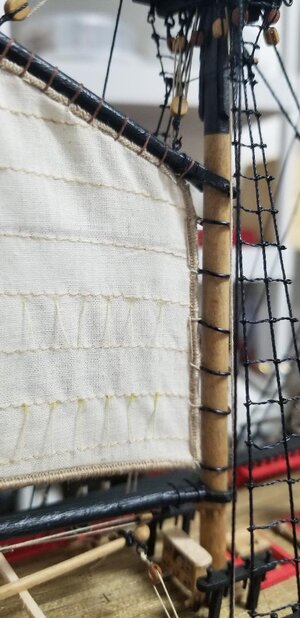
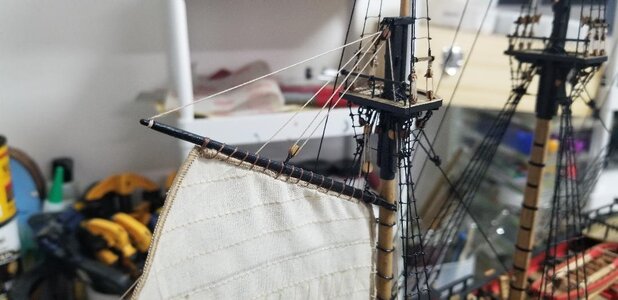
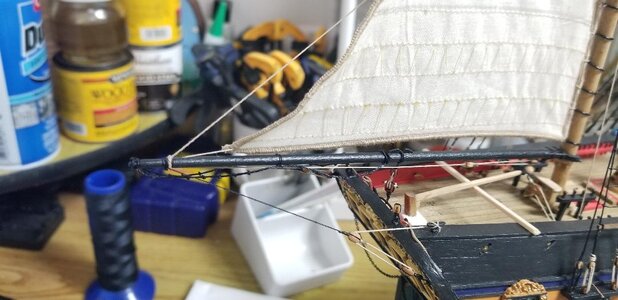
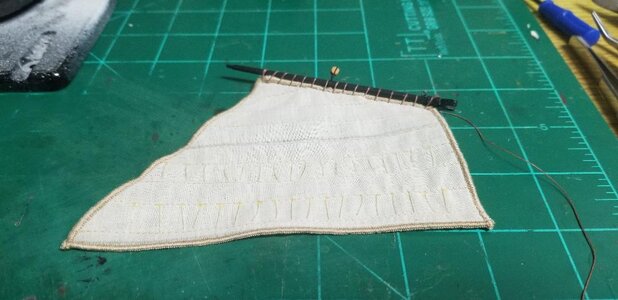
Working on the boom, gaff, and spanker sail. Last pic is of the mast hoops for the spanker. Just 20 gauge wire fashioned in a circle but I haven't figured out just yet how to secure them to the sail. This forum has lots of good leads though. The ties I added to the pre-sewn sails....the thread I used is exactly the same hue as the sail itself and I can barely make them out. I don't know if that's a good thing or not. Should they be diminutive or stand out just a bit with a slightly different color thread? I'm still mulling that over.
View attachment 188626View attachment 188627View attachment 188628Mast hoops are traditionally tied on to the sail bolt rope and again around the hoop in a balanced manner. I used two needles from opposite sides of the sail to take a line back around the hoop and tie it off. Tedious work if the mast is stepped so I used a temporary dowel to tie mine on the bench and then thread them off and onto the final mast before it was stepped. It is easier with fore/aft sails than if you have square rigged along the journey. If you google up Bluenose II you may find photos close up showing the mast hoops and how they were tied on that schooner. I assume that the same configuration of lines may apply to your ship. PT-2
- Joined
- Mar 27, 2019
- Messages
- 823
- Points
- 403

Yes this board has a plethora of examples of mast hoops and book illustrations of the "proper" way to rig. I have a pretty good idea how I'm going to do it adhering as much as I can to the book illustrations. It'll be an approximation to be sure but it sure won't be a simple square knot for each hoop.
From your prior photos and the shrouds and ratlines in place, to work around and behind, it is going to be challenging and tedious to tie off the mast hoops. Hope all goes well as it will go in any event. Have you thought about the actual size that the hoops were with the mast diameter of the actual ship? Those of the Bluenose, much smaller diameter, in an illustration with two children look like hoola-loops or is it hoola-hoops. . . . that they are holding up in front of them. My mind keeps bouncing back and forth between the scaled down model and the size of the actual ship and components. Your work will be time well spent and visible for years. . . barring unforeseen calamaties. PT-2Yes this board has a plethora of examples of mast hoops and book illustrations of the "proper" way to rig. I have a pretty good idea how I'm going to do it adhering as much as I can to the book illustrations. It'll be an approximation to be sure but it sure won't be a simple square knot for each hoop.
- Joined
- Mar 27, 2019
- Messages
- 823
- Points
- 403

From your prior photos and the shrouds and ratlines in place, to work around and behind, it is going to be challenging and tedious to tie off the mast hoops. Hope all goes well as it will go in any event. Have you thought about the actual size that the hoops were with the mast diameter of the actual ship? Those of the Bluenose, much smaller diameter, in an illustration with two children look like hoola-loops or is it hoola-hoops. . . . that they are holding up in front of them. My mind keeps bouncing back and forth between the scaled down model and the size of the actual ship and components. Your work will be time well spent and visible for years. . . barring unforeseen calamaties. PT-2
Most of the illustrations I've seen as well as other models have the hoops just a tad bit wider than the mast itself. The main thing I've been wrestling with regarding the circumference of the mast hoops is: should they be the same relative circumference as they progress up the mast, bearing in mind the mast is tapered narrower as it goes up. I decided not to get that sophisticated and all the hoops are of the same circumference, as I used one single dowel to shape them.
- Joined
- Mar 27, 2019
- Messages
- 823
- Points
- 403

From your prior photos and the shrouds and ratlines in place, to work around and behind, it is going to be challenging and tedious to tie off the mast hoops. Hope all goes well as it will go in any event. Have you thought about the actual size that the hoops were with the mast diameter of the actual ship? Those of the Bluenose, much smaller diameter, in an illustration with two children look like hoola-loops or is it hoola-hoops. . . . that they are holding up in front of them. My mind keeps bouncing back and forth between the scaled down model and the size of the actual ship and components. Your work will be time well spent and visible for years. . . barring unforeseen calamaties. PT-2
It certainly will be difficult to rig the hoops. When I stepped the mast I still had not decided to add sails. Next build, I'll do things in a different order.
Single circumference for a mast is correct I believe. It the upper, top mast, is smaller then the hoops are correspondingly smaller diameter. I will have to do some research to find a common ratio between mast diameter and hoop diameter rather than just bigger. In going through my Bluenose II book which has information on both schooners I found:Most of the illustrations I've seen as well as other models have the hoops just a tad bit wider than the mast itself. The main thing I've been wrestling with regarding the circumference of the mast hoops is: should they be the same relative circumference as they progress up the mast, bearing in mind the mast is tapered narrower as it goes up. I decided not to get that sophisticated and all the hoops are of the same circumference, as I used one single dowel to shape them.
Main Mast lower diameter 22 inches, and 12" at top 96/-2" above; hoops 25 inches I.D., 1" thick, 3 inches wide outside, 1 inch wide inside, Main top mast 11 inch base diameter with 7 inch diameter at top 32'-5" above.
There is only reference to hoops in general which seem to be for the main mast and don't say if smaller as the mast tapers down but if we keep the 25 inch I.D. on the 22 inch lower mast portion the 1 inch clearance all around could provide a method of reducing the hoops sizes. They were made of ash wrapped over itself for about half the circumference and secured with copper rivets which provides a means to replace any on them on the mast.
I am not sure but I think in the large ships of war, the mast diameters were fairly consistent for the height that they were designed to extend. I assume that your kit masts, like my Bluenose are the same diameter full length for the individual sections. I will learn more about that as I progress to masting and may taper those in the model accordingly.
PT-2 (Rich)
- Joined
- Mar 27, 2019
- Messages
- 823
- Points
- 403

Single circumference for a mast is correct I believe. It the upper, top mast, is smaller then the hoops are correspondingly smaller diameter. I will have to do some research to find a common ratio between mast diameter and hoop diameter rather than just bigger. In going through my Bluenose II book which has information on both schooners I found:
Main Mast lower diameter 22 inches, and 12" at top 96/-2" above; hoops 25 inches I.D., 1" thick, 3 inches wide outside, 1 inch wide inside, Main top mast 11 inch base diameter with 7 inch diameter at top 32'-5" above.
There is only reference to hoops in general which seem to be for the main mast and don't say if smaller as the mast tapers down but if we keep the 25 inch I.D. on the 22 inch lower mast portion the 1 inch clearance all around could provide a method of reducing the hoops sizes. They were made of ash wrapped over itself for about half the circumference and secured with copper rivets which provides a means to replace any on them on the mast.
I am not sure but I think in the large ships of war, the mast diameters were fairly consistent for the height that they were designed to extend. I assume that your kit masts, like my Bluenose are the same diameter full length for the individual sections. I will learn more about that as I progress to masting and may taper those in the model accordingly.
PT-2 (Rich)
Well I'm just going by the directions (starting with Chuck Passaro's excellent practicum for Syren) and how each mast is to be tapered. I think this would make sense in the real physical world, right? As a mast goes up for 10s and 10s of feet a smaller diameter and corresponding weight would reduce mast sway on that longer arm. Of course it also makes the mast weaker as it goes up and up, but tapering is normal I believe.
It makes sense and added work if the kit provided only constant diameter dowels to work down. All part of a good build. I have tried putting dowels into my hand drill and using various rasps, files, and sandpaper tried that but the grain direction and some wobble with the drill chuck for the longer dowel have not produced nicely tapered round results. All in what we have and want to attain. Let me know how that goes but I think that you are past that stage for stepped masts and hoops to be applied. . . . still leaving the manner of tying them on remaining. PT-2 (Rich)Well I'm just going by the directions (starting with Chuck Passaro's excellent practicum for Syren) and how each mast is to be tapered. I think this would make sense in the real physical world, right? As a mast goes up for 10s and 10s of feet a smaller diameter and corresponding weight would reduce mast sway on that longer arm. Of course it also makes the mast weaker as it goes up and up, but tapering is normal I believe.
- Joined
- Mar 27, 2019
- Messages
- 823
- Points
- 403

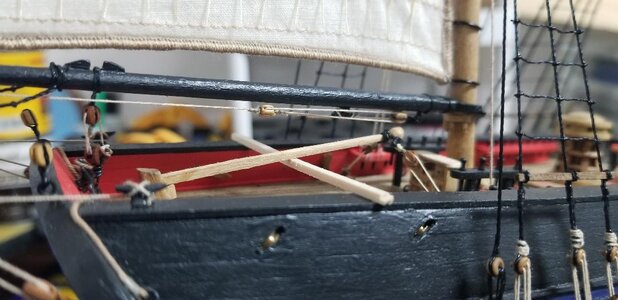
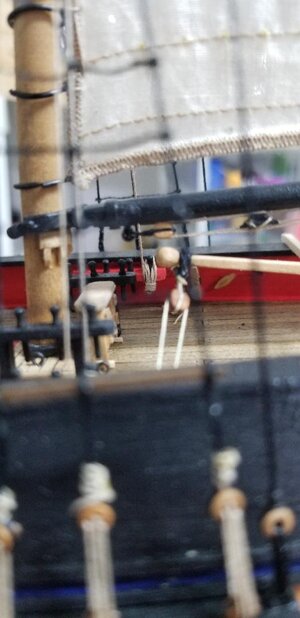
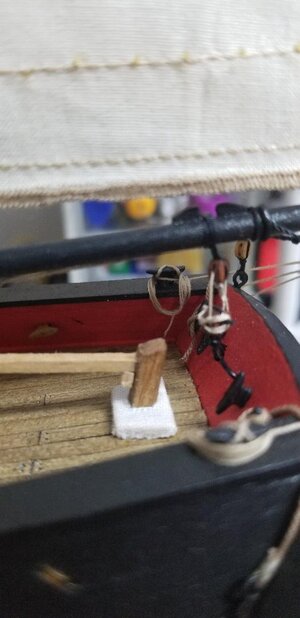
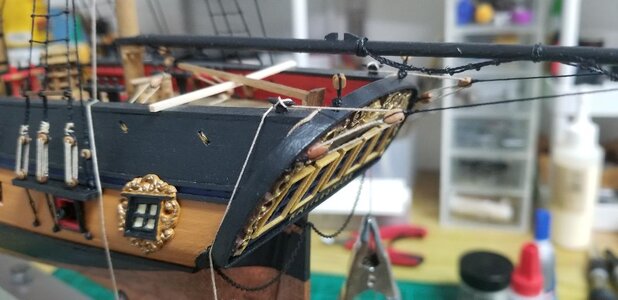
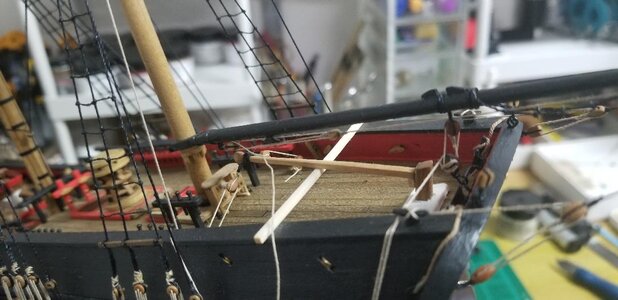
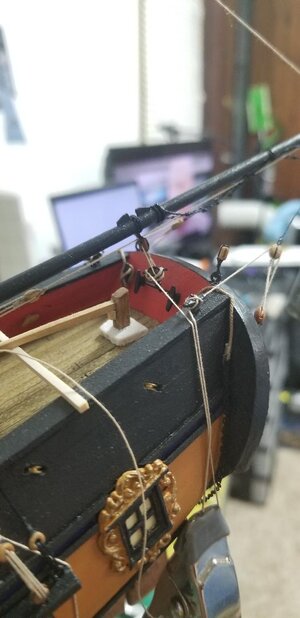
Still working on the stern: boom, gaff, and spanker sail. With the bow complete this is sort of bookending the ship. I have no reason for doing things in this order, only that my very first build "Syren" taught me a lot via Chuck Passaro's absolutely fantastic practicum, and this is the order I built Syren.
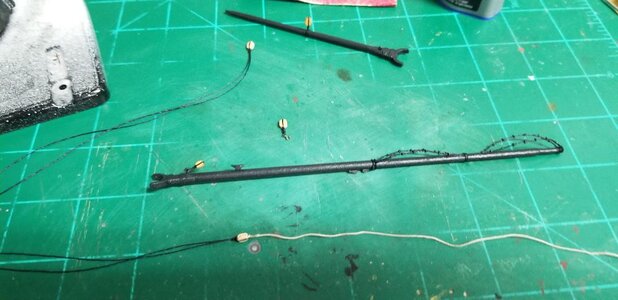
Boom and Gaff with all the pre-installed rigging I could do prior to mounting.
Boom mounted. Guy pendants port and starboard.
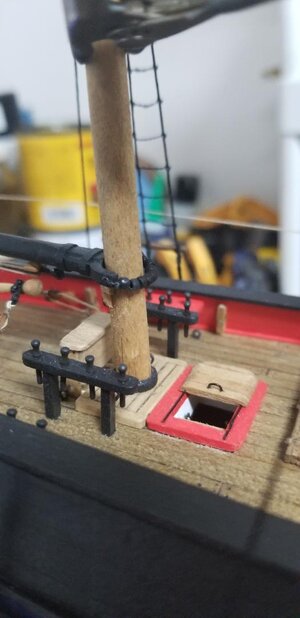
Boom topping lift block up on the top mast.
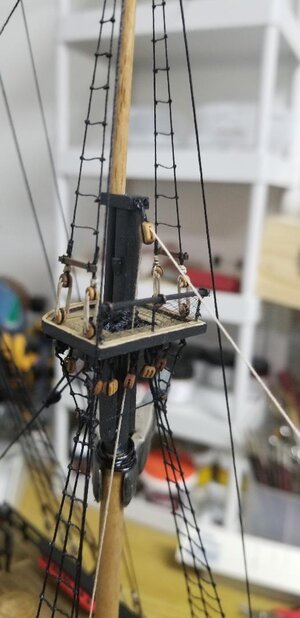
Boom sheet rigging. The bottom block is a double 5/32" (10" actual size) with a belaying pin inserted laterally, and belayed onto itself. I'm pretty sure this is the only block on the entire ship where a block has a belaying pin integral. The bottom of the block has a thimble attached to the iron horse. This is the only block I plan on seizing with 26 gauge wire rather than thread.
Spanker attached to the gaff.
Boom and Gaff with all the pre-installed rigging I could do prior to mounting.

Boom mounted. Guy pendants port and starboard.


Boom topping lift block up on the top mast.

Boom sheet rigging. The bottom block is a double 5/32" (10" actual size) with a belaying pin inserted laterally, and belayed onto itself. I'm pretty sure this is the only block on the entire ship where a block has a belaying pin integral. The bottom of the block has a thimble attached to the iron horse. This is the only block I plan on seizing with 26 gauge wire rather than thread.

Spanker attached to the gaff.

- Joined
- Mar 27, 2019
- Messages
- 823
- Points
- 403

It makes sense and added work if the kit provided only constant diameter dowels to work down. All part of a good build. I have tried putting dowels into my hand drill and using various rasps, files, and sandpaper tried that but the grain direction and some wobble with the drill chuck for the longer dowel have not produced nicely tapered round results. All in what we have and want to attain. Let me know how that goes but I think that you are past that stage for stepped masts and hoops to be applied. . . . still leaving the manner of tying them on remaining. PT-2 (Rich)
Yeah, hopelessly stepped now and I can't go back. I mean, I spent the last 2 hours stitching the spanker to the gaff and was happy for it. I just zoned in and got it done and the happiness of the finished part is payment for the time spent. I figure I'll be spending hours attaching the spanker to the mast hoops.
I have a much more manual way to taper masts and yards. I just have a flat work space and roll the dowel back and forth while sanding up and down. It takes time but I've found pretty good results.
Dedicated time and patience can do many things! In my space it will become a question of how much sawdust I can create before knowing that I have to relocate to the unheated work space in the garage. PT-2Yeah, hopelessly stepped now and I can't go back. I mean, I spent the last 2 hours stitching the spanker to the gaff and was happy for it. I just zoned in and got it done and the happiness of the finished part is payment for the time spent. I figure I'll be spending hours attaching the spanker to the mast hoops.
I have a much more manual way to taper masts and yards. I just have a flat work space and roll the dowel back and forth while sanding up and down. It takes time but I've found pretty good results.
Oh, the black ones at the bottom of the mast. Took me a few minutes to find them as I was looking for wood not simulated iron. With wood I was thinking tan securement to the sails but with the black it becomes totally your own choice. Good luck in the tying. PT-2Working on the boom, gaff, and spanker sail. Last pic is of the mast hoops for the spanker. Just 20 gauge wire fashioned in a circle but I haven't figured out just yet how to secure them to the sail. This forum has lots of good leads though. The ties I added to the pre-sewn sails....the thread I used is exactly the same hue as the sail itself and I can barely make them out. I don't know if that's a good thing or not. Should they be diminutive or stand out just a bit with a slightly different color thread? I'm still mulling that over.
View attachment 188626View attachment 188627View attachment 188628
- Joined
- Mar 27, 2019
- Messages
- 823
- Points
- 403

Dedicated time and patience can do many things! In my space it will become a question of how much sawdust I can create before knowing that I have to relocate to the unheated work space in the garage. PT-2
Yeah with that much sawdust my wife would have my hide if I tapered indoors. Thankfully where I am it's warm enough and no snow. lol
- Joined
- Mar 27, 2019
- Messages
- 823
- Points
- 403

Oh, the black ones at the bottom of the mast. Took me a few minutes to find them as I was looking for wood not simulated iron. With wood I was thinking tan securement to the sails but with the black it becomes totally your own choice. Good luck in the tying. PT-2
Yep those are them. My next build I will attempt wooden mast hoops. This time I'm going with iron.
- Joined
- Apr 21, 2018
- Messages
- 881
- Points
- 353

As I understand it, the lower masts were built-up. Upper masts were single 'sticks'.Well I'm just going by the directions (starting with Chuck Passaro's excellent practicum for Syren) and how each mast is to be tapered. I think this would make sense in the real physical world, right? As a mast goes up for 10s and 10s of feet a smaller diameter and corresponding weight would reduce mast sway on that longer arm. Of course it also makes the mast weaker as it goes up and up, but tapering is normal I believe.
Ship builders preferred the strength of 'single sticks' which were complete tree trunks, with their inherent concentric growth rings and grain. Don't know of many trees which don't taper. Even the lower masts would be a single tree trunk if it could be found, big enough.
The NMM used to display a section of 'Victory's' fore top mast with a cannon ball embedded. It was obvious it was a 'single stick'...a tree trunk, with the bark removed; even the branch stubs weren't cut completely flush. A far cry from the smooth dowels used on models.
- Joined
- Mar 27, 2019
- Messages
- 823
- Points
- 403

As I understand it, the lower masts were built-up. Upper masts were single 'sticks'.
Ship builders preferred the strength of 'single sticks' which were complete tree trunks, with their inherent concentric growth rings and grain. Don't know of many trees which don't taper. Even the lower masts would be a single tree trunk if it could be found, big enough.
The NMM used to display a section of 'Victory's' fore top mast with a cannon ball embedded. It was obvious it was a 'single stick'...a tree trunk, with the bark removed; even the branch stubs weren't cut completely flush. A far cry from the smooth dowels used on models.
Now THAT makes sense why masts are tapered on a model, a single piece mast would naturally be tapered wouldn't it! Mystery solved I think.
- Joined
- Aug 16, 2019
- Messages
- 870
- Points
- 343

I like the size of that model and you are doing justice to it good work


