HMS Surprise by Mamoli

Joined
Mar 27, 2019
Messages
817
Points
403

And so it begins. After doing some chores around the house to get on my better sides's good side I started Surprise. It's a Mamoli kit so it's packed with lots of hardwood including all the gun carriages, capstain, ship's wheel and more. The first layer of planking looks like limewood, other than that everything is hardwood.

From the Modeler's Central description:

Originally a French corvette named L'Unite and armed with 24 nine pound long guns, she was designed by M. Forfait and was built at Le Havre. Captured in 1796 by HMS Inconstant, L'Unite was rechristened HMS Surprise and converted by the British into a 28-gun sixth-rate, carrying 24 32-pound carronades on her main deck, eight more of the same on her quarter deck and forecastle, as well as 4 six-pound long guns as chasers.

She gained fame for the cutting-out expedition in 1799 of HMS Hermione Hermione's crew had mutinied, and had sailed her into Spanish possession in Puerto Cabello. Captain Edward Hamilton of the Surprise led a boarding party to retake the Hermione from the mutineers and, after a sharp action, sailed her out of danger under Spanish gunfire back into British control. She was sold out of the Service in 1802.

She does bear a superficial resemblance to the ship in Master and Commander and I have loads of pictures of that ship which is tied up at the maritime museum in San Diego. She is a seaworthy ship and so all her rigging is genuine, I plan on staying true to the rigging of the actual ship.
 
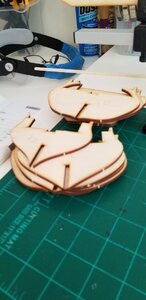
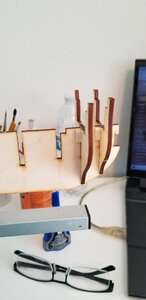
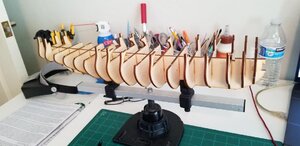
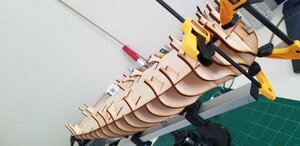
All bulkheads installed and square. I stock piece of square basswood on either side of each bulkhead glued with CA after sliding the bulkheads into place with carpenter's glue will ensure the squareness. Good quality plywood nice and thick.

asdff.jpgasdfsdf.jpgasdfgsfd.jpg
 
False deck installed for the gun deck. There will be another false deck for the quarterdeck and one for the forecastle as well. These laser cut basswood plywood false decks are cut almost perfect. Just a little trimming around a few of the bulkheads. Now that it's installed the whole structure feels very solid. I used carpenter's glue and some small nails driven halfway in at strategic locations. Now that the glue is dry they nails came right out. Next step, believe it or not, according to the plans is to install deck planks for the gun deck.

thumbnail.jpg
 
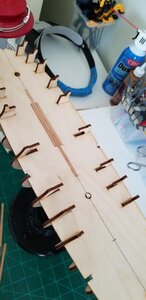
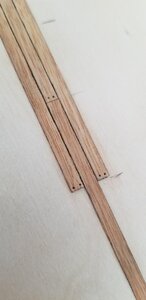
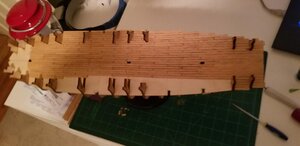
Most of the gun deck planking is complete. I must confess that deck planking is one of my favorite parts of building a model ship. Of course there is effort involved but the payoff in the finished product is huge compared to the effort expended. There is of course huge satisfaction on fabricating something difficult that takes much time and effort that pays off, that's not what I'm talking about. This is at the other end of the spectrum of time consuming fabrication and as important it isn't something that just requires days and weeks on end of repetition (like rat lining - yuch!).

I went ahead and planked the entire gun deck despite only about 1/3 will ever be seen. An additional tiny peek might, and I stress the word "might", be seen by someone peeking into the gun port, especially if I choose not to install electric lighting. But just the knowledge of the decking being from stem to stern is warm and fuzzy. I did not however go overboard and space out planks and blacken the edges and simulate tree nails of all those planks under deck. I will of course have to obtain more of the lathes from either Mamoli or MS because I've used almost half the provided supply to plank all that decking that will never be viewed.

sdasd.jpgzdfczc.jpgzdczdzdc.jpgadfczdas.jpg
 
The Surprise is on my bucket list so I will follow this with great interest. Thanks for posting. I am confused though as you said you did not blacken edges and simulate trennals but they seem to show on your deck planking?

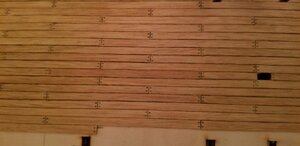
Hi Vint. What I meant was all the deck planking on the gun deck that will actually be covered up by the forecastle and quarterdeck. The false deck for the gun deck runs the entire length of the ship but only 1/4 to 1/3 of the entire gun deck (see earlier post where I had just installed the false deck) will ever be seen. I choose to plank the entire false deck, but most of the areas that won't be seen I didn't bother putting in those extra details. a
 
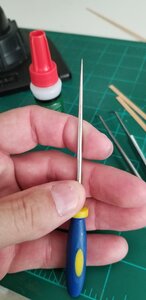
Pretty simple really, I use a nice sharp punch to make an indentation and it actually looks fine just like that with one step. But a real sharp #2 pencil inserted into the hole and twisted about a couple of times makes the look even better. Staining makes it better still. I'm keeping with a clear stain for Surprise. I want to bring more of the grain out but don't want to change the hue of these beautiful thin lathes provided in the kit for the deck planking.

xdfgzdgzfx.jpg
 
Pretty simple really, I use a nice sharp punch to make an indentation and it actually looks fine just like that with one step. But a real sharp #2 pencil inserted into the hole and twisted about a couple of times makes the look even better. Staining makes it better still. I'm keeping with a clear stain for Surprise. I want to bring more of the grain out but don't want to change the hue of these beautiful thin lathes provided in the kit for the deck planking.

View attachment 169834
Thanks again TKAM. The trennals looked so uniform I thought maybe they were factory done or with some sort of jig. And I have to agree with you there is nice wood grain on your planking. I will use your technique on my Bounty when I start deck as soon as I finish second planking.
 
Thanks again TKAM. The trennals looked so uniform I thought maybe they were factory done or with some sort of jig. And I have to agree with you there is nice wood grain on your planking. I will use your technique on my Bounty when I start deck as soon as I finish second planking.


Bounty was my first model ever so I have a special place in my heart for her.
 
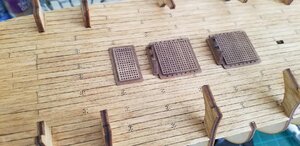
I finished up the three gratings that go on the gun deck underneath the longboat as well at the longboat cradle. All these pieces are made from Walnut so even with a neutral clear stain they are of a very dark hue. When placed on top of the gun deck the starkness in colors between the deck planking and the gratings was extreme and I didn't like it one bit. So I "watered down" some Minwax Golden Oak and applied another coat on the deck planking. I sure Forrest Gumped my way through this part of the project, the end result I really like. I also added some shot racks along the side of each large grating, this feature is not on the plans. I'll install the cannon balls after planking the hull and Surprise is right side up again.

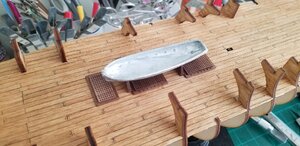
The second picture is the kit provided cast longboat which I won't use. I just ordered another Falconet longboat that I just finished for my Rattlesnake build, this is picture three. It's 5mm longer than the kit provided boat but it'll fit just perfect in the longboat cradle.

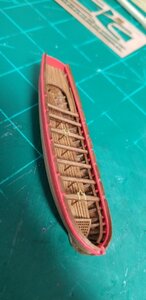
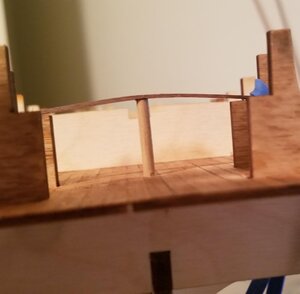
The last picture is an example of the supports for the deck immediately above the gundeck, forecastle up front and quarterdeck in the rear, notice the camber that the false deck and then deck planks will follow. The plans call for the center pillar being 21.5mm long. I found the camber to be very pronounced and so I shaved a bit off that central pillar, it's more like 20mm long now.

dzafxdvsdfvczx.jpgxczfxgzdfgs.jpgxcccghgf.jpgxfvzxcvf.jpg
 
I finished up the three gratings that go on the gun deck underneath the longboat as well at the longboat cradle. All these pieces are made from Walnut so even with a neutral clear stain they are of a very dark hue. When placed on top of the gun deck the starkness in colors between the deck planking and the gratings was extreme and I didn't like it one bit. So I "watered down" some Minwax Golden Oak and applied another coat on the deck planking. I sure Forrest Gumped my way through this part of the project, the end result I really like. I also added some shot racks along the side of each large grating, this feature is not on the plans. I'll install the cannon balls after planking the hull and Surprise is right side up again.

The second picture is the kit provided cast longboat which I won't use. I just ordered another Falconet longboat that I just finished for my Rattlesnake build, this is picture three. It's 5mm longer than the kit provided boat but it'll fit just perfect in the longboat cradle.

The last picture is an example of the supports for the deck immediately above the gundeck, forecastle up front and quarterdeck in the rear, notice the camber that the false deck and then deck planks will follow. The plans call for the center pillar being 21.5mm long. I found the camber to be very pronounced and so I shaved a bit off that central pillar, it's more like 20mm long now.

View attachment 170088View attachment 170089View attachment 170091View attachment 170092
The result looks really beautiful, and there is no doubt that the boat you created is more suitable and beautiful. Well done, I will continue to follow with great interest
 
The result looks really beautiful, and there is no doubt that the boat you created is more suitable and beautiful. Well done, I will continue to follow with great interest

Thank you Shota-san. Do you have any build blogs I can take a peak at?
 
Back
Top