HMS Surprise by Mamoli

got sidetracked by a San Francisco cable car I'm making for my dad. I'll get back to it.
sounds very interesting.....

you know, that we have also an area for model projects which are no ships?

 
sounds very interesting.....

you know, that we have also an area for model projects which are no ships?

I saw that, and I do believe there's a thread on the very kit I'm working on. I am recording the build, I just have to put in the effort to upload the pics.
 
Very cool! I will be following, as usual.

And, I am thoroughly enjoying the longboat, which I can see from my desk chair! So happy I was the lucky recipient! :)
 
Welp, I finished Rattlesnake and my SF cable car projects so it's time to go back to HMS Surprise. Safe in its case for these many months she was in fine shape.

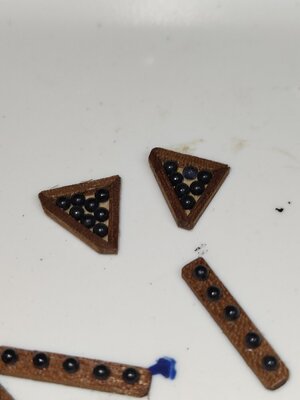
I started off small, redoing the crummy white metal shot triangles with shot racks, and fabricating new shot triangles from scratch. Now all the cannon have the same shot racks and the two carronades have shot triangles.

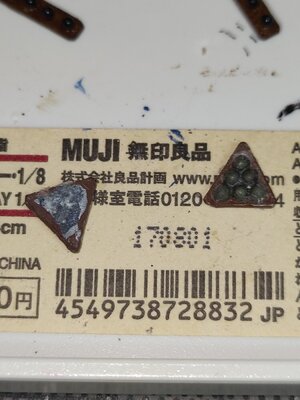
The second pic shows how the white metal blackened with pewter black just doesn't stand up to the test of time.

IMG20220716170759.jpgIMG20220716170811.jpg
 
Welp, I finished Rattlesnake and my SF cable car projects so it's time to go back to HMS Surprise. Safe in its case for these many months she was in fine shape.

I started off small, redoing the crummy white metal shot triangles with shot racks, and fabricating new shot triangles from scratch. Now all the cannon have the same shot racks and the two carronades have shot triangles.

The second pic shows how the white metal blackened with pewter black just doesn't stand up to the test of time.

View attachment 319036View attachment 319037
HI Tkam,
Glad you are back to finish HMS Surprise, I really loved your log and used it as a great reference when I was building La' Amazone which is really La Glorie which is the same as Surprise only a different stated scale but still the same parts! Look forward to your posts. Cheers JJ.
 
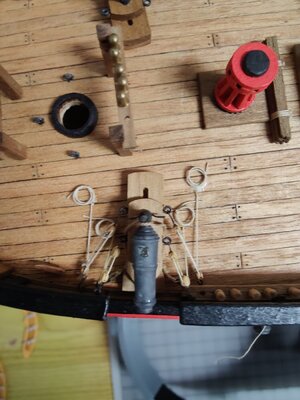
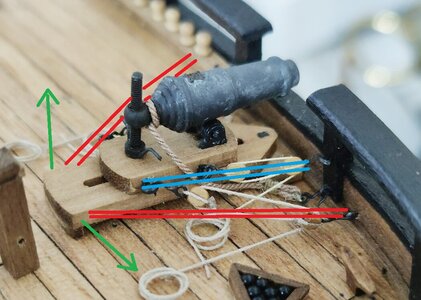
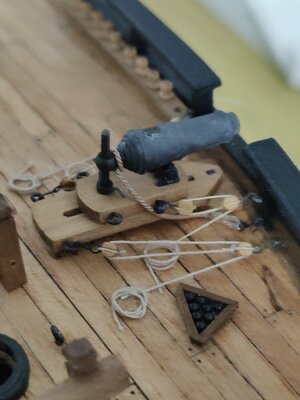
Looking good - only the tackles of the carronade are technically not correct installed (I think)
Before you go further, maybe you have time to check it once more

IMG20220719224323.jpg

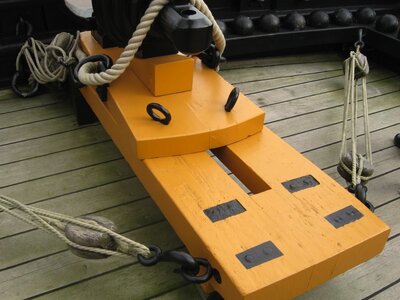
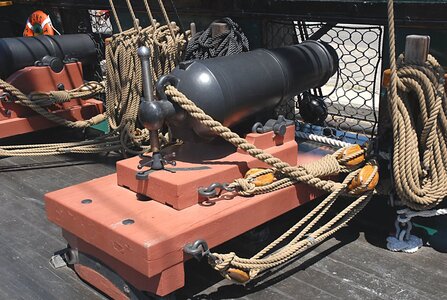
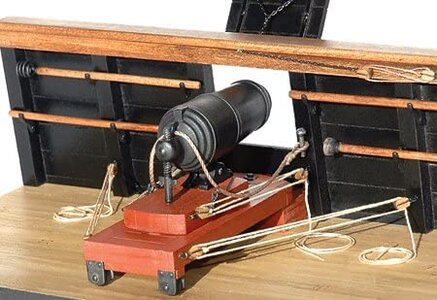
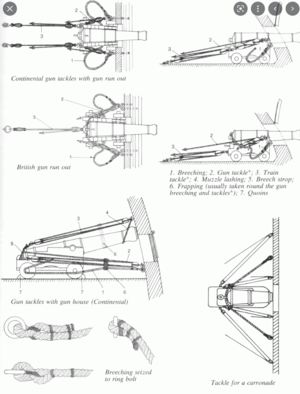
your both tackles are fixed to ringbolts only on the top part of the carriage (which is able to go forwards and for loading backwards) - here you need only one tackle (blue lines)
The red lines are showing the tackles for changing the angle (green arrows) of the complete carronade, these tackles have to be connected on the bottom part of the carriage

post-182-0-03751500-1427045869.jpg 5b1dc6c951234_072carronade.jpg.005740152ade060420f38b20a59a6e1c.jpg

515NfHLqjBL._AC_.jpg
 
Looking good - only the tackles of the carronade are technically not correct installed (I think)
Before you go further, maybe you have time to check it once more

View attachment 319389

your both tackles are fixed to ringbolts only on the top part of the carriage (which is able to go forwards and for loading backwards) - here you need only one tackle (blue lines)
The red lines are showing the tackles for changing the angle (green arrows) of the complete carronade, these tackles have to be connected on the bottom part of the carriage

View attachment 319386 View attachment 319387

View attachment 319388

Ya, I agree 100%. I thought it odd when I put the carriages together in the first place. Goes to show you blind obedience to the "directions" can bite you in the buttocks sometimes. Unfortunately, taking those carriages off the deck at this point to drill the proper holes for the ringbolts is while not impossible would be..... I gotta noodle this through for awhile. The good news is that I have time. I still have to fabricate and install the bowsprit before I get to any other masting, that's always the order I've done things and it has worked out for me in the past. So, time to think about whether I want it accurate or just to look good.
 
Ya, I agree 100%. I thought it odd when I put the carriages together in the first place. Goes to show you blind obedience to the "directions" can bite you in the buttocks sometimes. Unfortunately, taking those carriages off the deck at this point to drill the proper holes for the ringbolts is while not impossible would be..... I gotta noodle this through for awhile. The good news is that I have time. I still have to fabricate and install the bowsprit before I get to any other masting, that's always the order I've done things and it has worked out for me in the past. So, time to think about whether I want it accurate or just to look good.
It does look good. And I totally get it. I’ve redone some things on mine after finding out the correct way. On other things, no one in my family will know the difference. We’re doing the best we can in the time we have.
 
It does look good. And I totally get it. I’ve redone some things on mine after finding out the correct way. On other things, no one in my family will know the difference. We’re doing the best we can in the time we have.

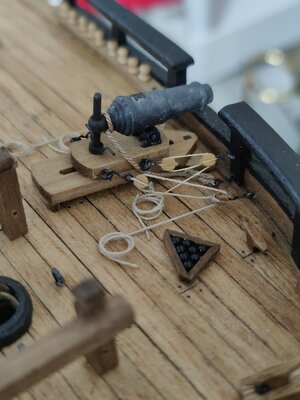
It turned out making the carronade rigging accurate was easier than I thought. I was able to sneak a pin vise in and drill holes for the eyebolts negating the need to completely remove the sleds. Job done.

IMG20220720193242.jpg
 
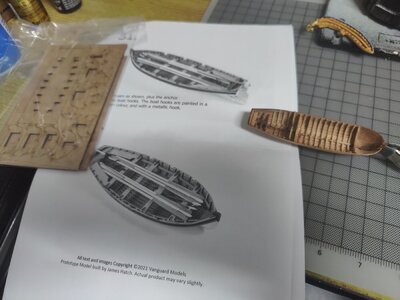
This will be the last of the hull work, fabbing and installing the ship's boats. Almost done with the 28' longboat, it's the same mini kit I used for Rattlesnake. Great quality and details. On top of that I'll fab the 20' cutter mini kit.

IMG20220723193349.jpg
 
This will be the last of the hull work, fabbing and installing the ship's boats. Almost done with the 28' longboat, it's the same mini kit I used for Rattlesnake. Great quality and details. On top of that I'll fab the 20' cutter mini kit.

View attachment 319920
Oh, the little ones! It’s like a complete build, only smaller and harder.
 
Back
Top