That sounds pretty bad. But, at least you don't have CATS. . .Disaster struck yesterday after originally posting that last pic. I was working with the ship on my knees, had a sneezing fit and it dropped onto the tiled floor. It landed on the top edge of the transom, splitting the transom horizontally and smashing the bulwarks on the poop deck.
Repairs now in progress.
-

Win a Free Custom Engraved Brass Coin!!!
As a way to introduce our brass coins to the community, we will raffle off a free coin during the month of August. Follow link ABOVE for instructions for entering.
-

PRE-ORDER SHIPS IN SCALE TODAY!
The beloved Ships in Scale Magazine is back and charting a new course for 2026!
Discover new skills, new techniques, and new inspirations in every issue.
NOTE THAT OUR FIRST ISSUE WILL BE JAN/FEB 2026
You are using an out of date browser. It may not display this or other websites correctly.
You should upgrade or use an alternative browser.
You should upgrade or use an alternative browser.
HMS Victory - 1:98 scale. Mantua Model
CATS!!!! AAARRRRGGHHH. I did have cats once. Grrr.... I had my Hi-Fi speakers on top of a wall unit. I had been doing a jigsaw puzzle and didn't want the cats getting at it during the night, so put the board on top of one of those speakers.That sounds pretty bad. But, at least you don't have CATS. . .
Middle of the night, almighty crash from downstairs. I went to investigate and found one of the cats on top of the wall unit, but the jigsaw board had been knocked off the speaker and had crashed down on the glass top of the Hi-Fi unit, smashing the glass cover and the record deck arm underneath it.
So I can understand what you mean.
- Joined
- Sep 3, 2021
- Messages
- 5,190
- Points
- 738

But, at least you don't have CATS. . .

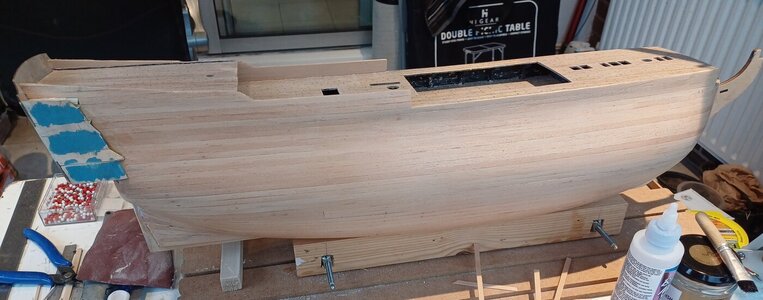
About half way down the hull with the 2nd stage planking. Pretty soon it's going to be the nightmare of fillets as the shape changes towards the keel.
On another note, today, I discovered a box that I had long forgotton about. A Mantua 1:200 scale HMS Victory, still in the UPS box that it arrived in. I have no intention of building that one after this current build, so I will be putting it up for grabs.
On another note, today, I discovered a box that I had long forgotton about. A Mantua 1:200 scale HMS Victory, still in the UPS box that it arrived in. I have no intention of building that one after this current build, so I will be putting it up for grabs.
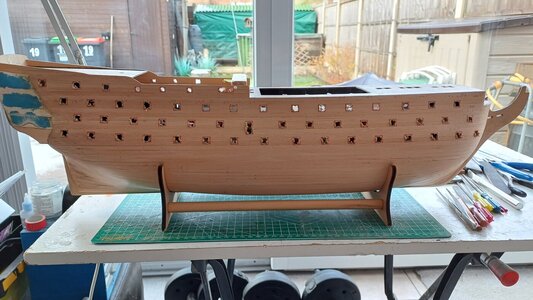
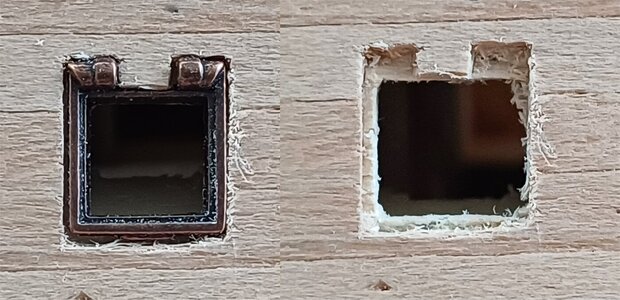
Finally finished cutting out the gun ports. Big problem now though. The kit supplied a template for marking and cutting out the ports, which I followed. They provide these horrid things to dress the gun ports and the hatches attach to them. The problem is, the ship does not have these sort of fixings. Just plain holes with hatches that fit flush. I will have to work out how to resolve this now as the supplied parts make both the holes and the hatches wrong. 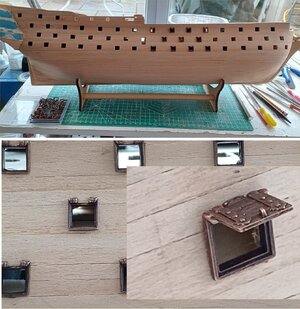 As the hatches are going to be open anyway, I can probably get away with leaving them as they are, but I will try and file the frames so that they are flush with the hull, then when it's painted, it should not be noticed.
 As the hatches are going to be open anyway, I can probably get away with leaving them as they are, but I will try and file the frames so that they are flush with the hull, then when it's painted, it should not be noticed.
It's no problem making gun port lids from wood using strips in two layers. You will have to make some wood strips from scrap or buy some. If you want to get super detailed, match the planking seams on each lid to the surrounding hull planking. If the lids are displayed open, you won't see if the planking doesn't line up.Finally finished cutting out the gun ports. Big problem now though. The kit supplied a template for marking and cutting out the ports, which I followed. They provide these horrid things to dress the gun ports and the hatches attach to them. The problem is, the ship does not have these sort of fixings. Just plain holes with hatches that fit flush. I will have to work out how to resolve this now as the supplied parts make both the holes and the hatches wrong. View attachment 413826As the hatches are going to be open anyway, I can probably get away with leaving them as they are, but I will try and file the frames so that they are flush with the hull, then when it's painted, it should not be noticed.
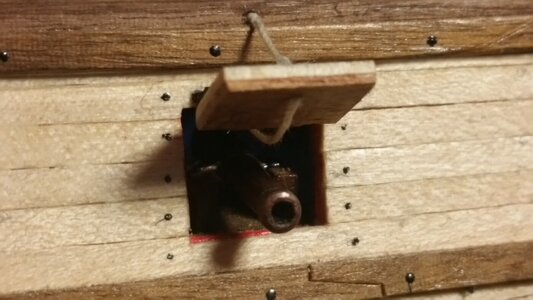
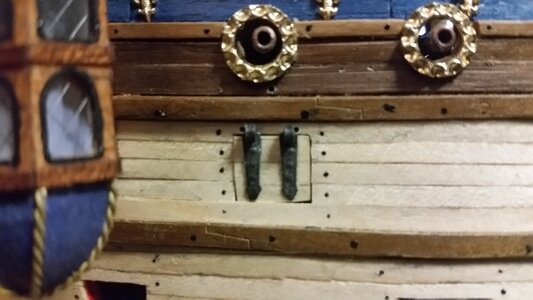
Nonfunctional hinges for the lids appear more realistic to scale. These hinges come with Corel model kits and are functional, rotating on bent brass pins normally used for holding planks to frames.
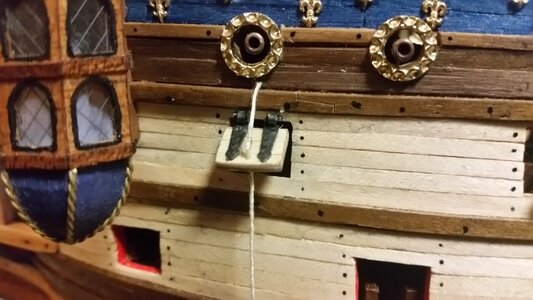
Test fit of a gun port lid. All the gaps and misalignments in the lid and planking show up under close photography, but this ship is small at 1:100 scale, so every flaw is evident when you get this close.
Kurt Konrath
Kurt Konrath
Those look just like the cheap metal ones my OcCre kit came with for ST cross section.Finally finished cutting out the gun ports. Big problem now though. The kit supplied a template for marking and cutting out the ports, which I followed. They provide these horrid things to dress the gun ports and the hatches attach to them. The problem is, the ship does not have these sort of fixings. Just plain holes with hatches that fit flush. I will have to work out how to resolve this now as the supplied parts make both the holes and the hatches wrong. View attachment 413826As the hatches are going to be open anyway, I can probably get away with leaving them as they are, but I will try and file the frames so that they are flush with the hull, then when it's painted, it should not be noticed.
This is a test run on some scrap wood to give an idea of how the finished thing should look. The hatch frame is fitted flush, fine filler around the edges and sanded smooth. Hand brushing this paint is awful. As far as the hull goes, this needs spraying. These watery acrylics are a nightmare. I'm used to painting models with enamels, that actually cover in one stroke. This hatch looks horrendous when zoomed up like this.
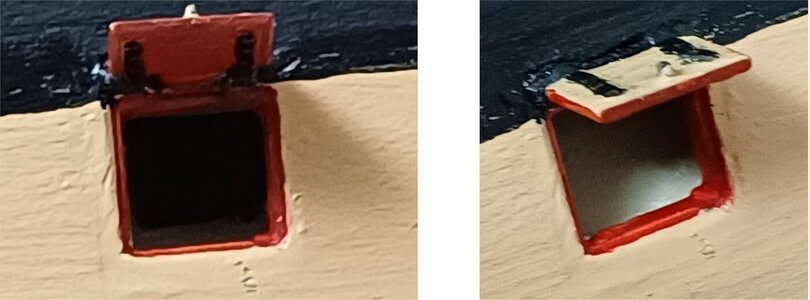

Good morning. Yep those gun port frames and lids from Mantua are an issue. I remember on my Victory they provided brass frames to fit in the “holes” and I regret using them. Your solution is a good one and is a huge improvement. Awesome. Cheers GrantFinally finished cutting out the gun ports. Big problem now though. The kit supplied a template for marking and cutting out the ports, which I followed. They provide these horrid things to dress the gun ports and the hatches attach to them. The problem is, the ship does not have these sort of fixings. Just plain holes with hatches that fit flush. I will have to work out how to resolve this now as the supplied parts make both the holes and the hatches wrong. View attachment 413826As the hatches are going to be open anyway, I can probably get away with leaving them as they are, but I will try and file the frames so that they are flush with the hull, then when it's painted, it should not be noticed.
Very slow progress at one day a week. Gun ports all cut out and frames inserted. Next job there is filler and sanding. The dummy cannon mounts are in the ports ready for the cannons. The window ports are in place at the stern. Of the three in the top row, the centre one has double side opening doors, which I have yet to make. 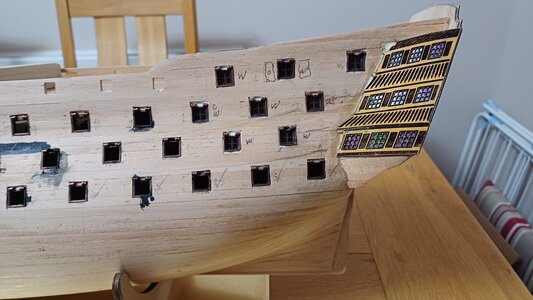

Patrick, did you account for the thickness of the final planking layer when setting the depth of each of the port inserts, such that the hinges for the port lids will function? That's something to watch for. Better to catch it now instead of later. You can temporarily lightly glue some finish plank veneer around a gun port, check the fit of the port lid, then shave off the veneer with a sharp razor knife when done as a test run.Very slow progress at one day a week. Gun ports all cut out and frames inserted. Next job there is filler and sanding. The dummy cannon mounts are in the ports ready for the cannons. The window ports are in place at the stern. Of the three in the top row, the centre one has double side opening doors, which I have yet to make. View attachment 424499
Also, the reason enamel paints look like plastic on a wood model is because they are quite thick, and they fill the wood surface grain instead of follow it with a thin coating. A thinner acrylic paint may let the wood grain texture through more. Something else to try. Even acrylic paint can be so thick as to cover in one coat. The problem with that is that even though you are able to cover in one coat, the texture is totally covered over.
The best result I have had is of course using an air brush, but those are expensive. Mine was and old Badger air brush and compressor donated to me from a friend.
Last edited:
Yes, the port lids work fine. There is a limited range of movement on these that Mantua supplied. I checked that out before fitting anything. Straight out of the box, the port lids do not close. The top of the frame prevents the lid from getting anywhere near closed. To enable that, I would have to bend the frame hinges forward, but that results in snapping them off, so on my model, they will be held open by steel cable as on the real Victory.
As for paints, I have those supplied with the kit, but I will be using Tamiya acrylics with my air brush.
Another Mantua problem that I am working on, is the cannons. All the same diameter. Only two lengths provided for the quarter deck, poop deck and forecastle, whereas when I walked around the decks on board Victory, there are three lengths for the 12 pounders there. I'm reducing the diameters/shapes for the 12 and 24 pounders on my lathe. The 30 pounders for the lower deck can stay as they are.
On both of my man of war models, different sizes of gun barrels had to be purchased. There is a noticeable difference in the barrel length and diameter of the guns among the three decks when the model is finished. Details like this set your model apart from straight up kit builds, but they are usually only noticed by those people who know something about ships. The person you need to impress most is yourself. If you put a lot more time into the details and make changes for accuracy, the amount of pride you have in the model grows immensely.Yes, the port lids work fine. There is a limited range of movement on these that Mantua supplied. I checked that out before fitting anything. Straight out of the box, the port lids do not close. The top of the frame prevents the lid from getting anywhere near closed. To enable that, I would have to bend the frame hinges forward, but that results in snapping them off, so on my model, they will be held open by steel cable as on the real Victory.
As for paints, I have those supplied with the kit, but I will be using Tamiya acrylics with my air brush.
Another Mantua problem that I am working on, is the cannons. All the same diameter. Only two lengths provided for the quarter deck, poop deck and forecastle, whereas when I walked around the decks on board Victory, there are three lengths for the 12 pounders there. I'm reducing the diameters/shapes for the 12 and 24 pounders on my lathe. The 30 pounders for the lower deck can stay as they are.
That is so true. When I am building a scale model, I want it to be as exact a replica as I can get it. In the case of the Victory, I want her to look exactly like what I've seen and touched whilst on board.On both of my man of war models, different sizes of gun barrels had to be purchased. There is a noticeable difference in the barrel length and diameter of the guns among the three decks when the model is finished. Details like this set your model apart from straight up kit builds, but they are usually only noticed by those people who know something about ships. The person you need to impress most is yourself. If you put a lot more time into the details and make changes for accuracy, the amount of pride you have in the model grows immensely.
I am hoping to get in another visit to her this year and get some more and up to date photos.
There is a Web site that I found yesterday, that sells scale parts for many ships. The full set of cannons for the Victory would set me back over £500, so I will be doing my own mods.


