- Joined
- Apr 11, 2019
- Messages
- 71
- Points
- 113

Hello all, it's time to begin my first build log, of HMS Victory in 1:200 scale. This will be the 3rd sailing vessel I have built, though my previous 2 were Revel Plastic kits of the Cutty Sark and the CSS Alabama, and both were several decades ago while I was in high school.
I've been lurking here in SOS for a couple months now once I decided I wanted to pick up the hobby again and wanted to build in wood this time, and have been dropping hints to the Admiral that all along. So last week for Christmas she presented me with this kit, proud as can be. I just wish she had taken a closer look to my wish list on Amazon instead! But as a fist time kit to learn new skills and techniques on, I can't complain.
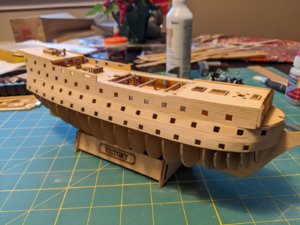
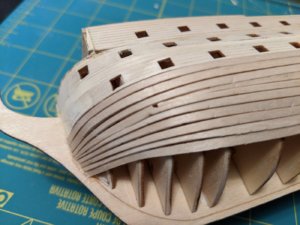
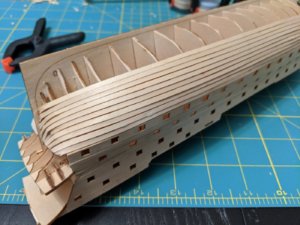
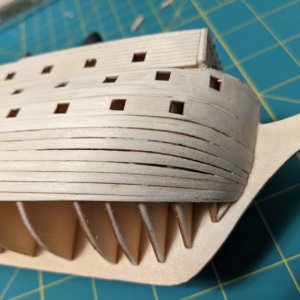
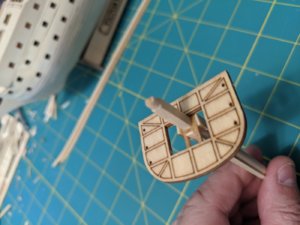
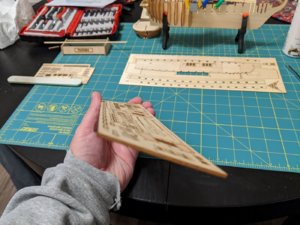
To start off, I am not sure who makes this kit, it came from Amazon from a seller called TWOBOYS and as far as I can tell the manufacturer is Western Wooden Sailboat. The parts sheets are die cut, I think, as I don't see any char on the cut edges, but as you can see in some of the pics below, of the stern windows and deck grates, the detail is pretty good at this scale
.![IMG_20191230_184633[1].jpg IMG_20191230_184633[1].jpg](https://shipsofscale.com/sosforums/data/attachments/111/111280-3267d7970d168a2d1a1f0948627b0ea7.jpg?hash=MmfXlw0Wii)
![IMG_20191230_184619[1].jpg IMG_20191230_184619[1].jpg](https://shipsofscale.com/sosforums/data/attachments/111/111281-e132a314033f934ea82ecaa3bbb87b31.jpg?hash=4TKjFAM_k0)
![IMG_20191230_184440[1].jpg IMG_20191230_184440[1].jpg](https://shipsofscale.com/sosforums/data/attachments/111/111282-f0d82df0dc5320f1992145caa2250033.jpg?hash=8Ngt8NxTIP)
![IMG_20191230_184515[1].jpg IMG_20191230_184515[1].jpg](https://shipsofscale.com/sosforums/data/attachments/111/111283-1d8544d847bc23cf79b78b175f9e1e5f.jpg?hash=HYVE2Ee8I8)
Sadly, the plans and instructions are seriously lacking. I have basically 4 8.5x11 pages of very basic plans and directions to work from. I have tried searching online for the MFG, but have had no luck locating anything with greater detail. Luckily I have YOU here at SOS to lend a hand and a few tips and tricks when I run into a road block, and a number of Victory build logs that I can review also. What I do not have at all is a rigging and sail plan, but I think I can work this out, at least well enough for this first attempt.
![IMG_20191230_184244[1].jpg IMG_20191230_184244[1].jpg](https://shipsofscale.com/sosforums/data/attachments/111/111287-03370565a6c0b5d3ad59e7c0ef074747.jpg?hash=AzcFZabAtd)
![IMG_20191230_184250[1].jpg IMG_20191230_184250[1].jpg](https://shipsofscale.com/sosforums/data/attachments/111/111288-953773c8aeca751685d3f6cf1a804f5c.jpg?hash=lTdzyK7KdR)
![IMG_20191230_184258[1].jpg IMG_20191230_184258[1].jpg](https://shipsofscale.com/sosforums/data/attachments/111/111289-2c29126b1787dfd62a55072101e37d10.jpg?hash=LCkSaxeH39)
![IMG_20191230_184306[1].jpg IMG_20191230_184306[1].jpg](https://shipsofscale.com/sosforums/data/attachments/111/111291-0a1b8d435c2ac72c2d8fe67a96f7d8d3.jpg?hash=ChuNQ1wqxy)
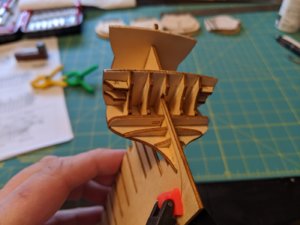
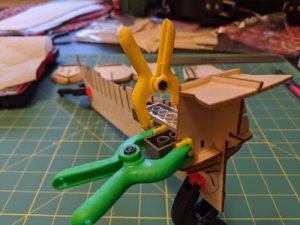
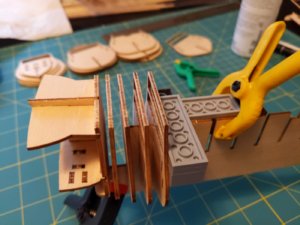
So, after checking each parts sheet for missing parts or damage, I popped the false keel out, and starting to dry fit the bulkheads. The fit and finish it pretty good with most of the bulkheads fitting snugly, but not to tight that I have to sand anything to make it fit. I want to head off to the hardware store tomorrow and get a few things to build a jig to hold the keel straight while I fit the bulkheads and gun port backing/supports, along with some filler blocks between bulkheads to stiffen the whole structure.
![IMG_20191230_191003[1].jpg IMG_20191230_191003[1].jpg](https://shipsofscale.com/sosforums/data/attachments/111/111293-6a22cbe2ce04f0fc9dd9583e3e176fbd.jpg?hash=aiLL4s4E8P)
![IMG_20191230_190949[1].jpg IMG_20191230_190949[1].jpg](https://shipsofscale.com/sosforums/data/attachments/111/111294-ec059ed45e4a058d2c916013f1d289b8.jpg?hash=7AWe1F5KBY)
Thank you, and wish me luck as I dive into this kit and see what I can make of it.
Thanks
Brian
I've been lurking here in SOS for a couple months now once I decided I wanted to pick up the hobby again and wanted to build in wood this time, and have been dropping hints to the Admiral that all along. So last week for Christmas she presented me with this kit, proud as can be. I just wish she had taken a closer look to my wish list on Amazon instead! But as a fist time kit to learn new skills and techniques on, I can't complain.
To start off, I am not sure who makes this kit, it came from Amazon from a seller called TWOBOYS and as far as I can tell the manufacturer is Western Wooden Sailboat. The parts sheets are die cut, I think, as I don't see any char on the cut edges, but as you can see in some of the pics below, of the stern windows and deck grates, the detail is pretty good at this scale
.
![IMG_20191230_184633[1].jpg IMG_20191230_184633[1].jpg](https://shipsofscale.com/sosforums/data/attachments/111/111280-3267d7970d168a2d1a1f0948627b0ea7.jpg?hash=MmfXlw0Wii)
![IMG_20191230_184619[1].jpg IMG_20191230_184619[1].jpg](https://shipsofscale.com/sosforums/data/attachments/111/111281-e132a314033f934ea82ecaa3bbb87b31.jpg?hash=4TKjFAM_k0)
![IMG_20191230_184440[1].jpg IMG_20191230_184440[1].jpg](https://shipsofscale.com/sosforums/data/attachments/111/111282-f0d82df0dc5320f1992145caa2250033.jpg?hash=8Ngt8NxTIP)
![IMG_20191230_184515[1].jpg IMG_20191230_184515[1].jpg](https://shipsofscale.com/sosforums/data/attachments/111/111283-1d8544d847bc23cf79b78b175f9e1e5f.jpg?hash=HYVE2Ee8I8)
Sadly, the plans and instructions are seriously lacking. I have basically 4 8.5x11 pages of very basic plans and directions to work from. I have tried searching online for the MFG, but have had no luck locating anything with greater detail. Luckily I have YOU here at SOS to lend a hand and a few tips and tricks when I run into a road block, and a number of Victory build logs that I can review also. What I do not have at all is a rigging and sail plan, but I think I can work this out, at least well enough for this first attempt.
![IMG_20191230_184244[1].jpg IMG_20191230_184244[1].jpg](https://shipsofscale.com/sosforums/data/attachments/111/111287-03370565a6c0b5d3ad59e7c0ef074747.jpg?hash=AzcFZabAtd)
![IMG_20191230_184250[1].jpg IMG_20191230_184250[1].jpg](https://shipsofscale.com/sosforums/data/attachments/111/111288-953773c8aeca751685d3f6cf1a804f5c.jpg?hash=lTdzyK7KdR)
![IMG_20191230_184258[1].jpg IMG_20191230_184258[1].jpg](https://shipsofscale.com/sosforums/data/attachments/111/111289-2c29126b1787dfd62a55072101e37d10.jpg?hash=LCkSaxeH39)
![IMG_20191230_184306[1].jpg IMG_20191230_184306[1].jpg](https://shipsofscale.com/sosforums/data/attachments/111/111291-0a1b8d435c2ac72c2d8fe67a96f7d8d3.jpg?hash=ChuNQ1wqxy)
So, after checking each parts sheet for missing parts or damage, I popped the false keel out, and starting to dry fit the bulkheads. The fit and finish it pretty good with most of the bulkheads fitting snugly, but not to tight that I have to sand anything to make it fit. I want to head off to the hardware store tomorrow and get a few things to build a jig to hold the keel straight while I fit the bulkheads and gun port backing/supports, along with some filler blocks between bulkheads to stiffen the whole structure.
![IMG_20191230_191003[1].jpg IMG_20191230_191003[1].jpg](https://shipsofscale.com/sosforums/data/attachments/111/111293-6a22cbe2ce04f0fc9dd9583e3e176fbd.jpg?hash=aiLL4s4E8P)
![IMG_20191230_190949[1].jpg IMG_20191230_190949[1].jpg](https://shipsofscale.com/sosforums/data/attachments/111/111294-ec059ed45e4a058d2c916013f1d289b8.jpg?hash=7AWe1F5KBY)
Thank you, and wish me luck as I dive into this kit and see what I can make of it.
Thanks
Brian
Last edited:


![IMG_20200101_100740[1].jpg IMG_20200101_100740[1].jpg](https://shipsofscale.com/sosforums/data/attachments/111/111964-dd5e3622f125ef5fb8b62f2dbfbadaa2.jpg?hash=3V42IvEl71)
![IMG_20191231_200720[1].jpg IMG_20191231_200720[1].jpg](https://shipsofscale.com/sosforums/data/attachments/111/111965-346b02570dc42a1ba3f93712c38e6ec8.jpg?hash=NGsCVw3EKh)
![IMG_20200101_101013[1].jpg IMG_20200101_101013[1].jpg](https://shipsofscale.com/sosforums/data/attachments/111/111966-5838d9863bedd00e0cf495345f80fd71.jpg?hash=WDjZhjvt0A)
![IMG_20200101_111359[1].jpg IMG_20200101_111359[1].jpg](https://shipsofscale.com/sosforums/data/attachments/111/111967-6fc9708e04ee2fa39318643261b469d4.jpg?hash=b8lwjgTuL6)
![IMG_20200101_135433[1].jpg IMG_20200101_135433[1].jpg](https://shipsofscale.com/sosforums/data/attachments/111/111968-8ce1c7cb1cd5db054a818a89d5d5f89e.jpg?hash=jOHHyxzV2w)
![IMG_20200101_135449[1].jpg IMG_20200101_135449[1].jpg](https://shipsofscale.com/sosforums/data/attachments/111/111969-e4d10d8d62b72c18ac59b0e72ff682b8.jpg?hash=5NENjWK3LB)
![IMG_20200102_190105[1].jpg IMG_20200102_190105[1].jpg](https://shipsofscale.com/sosforums/data/attachments/112/112435-ee676eb62b0e7203f0ed2d986ad92cad.jpg?hash=7mdutisOcg)
![IMG_20200103_182926[1].jpg IMG_20200103_182926[1].jpg](https://shipsofscale.com/sosforums/data/attachments/112/112436-c87ef4e8c45746c60f1c02f900ef4733.jpg?hash=yH706MRXRs)
![IMG_20200103_182939[1].jpg IMG_20200103_182939[1].jpg](https://shipsofscale.com/sosforums/data/attachments/112/112437-47fc458433439ca8eb588ee9b0c1a470.jpg?hash=R_xFhDNDnK)

