• Beginning at 5:00AM PST (13:00 UTC) on Friday February 14th, all services in the Los Angeles, California, USA Data Center will be offline to perform a Data Center Migration. Due to the nature of this migration, we anticipate up to 24 hours of downtime to safely complete this work. Please be patient during this time and thank you for being a valuable member of our community.

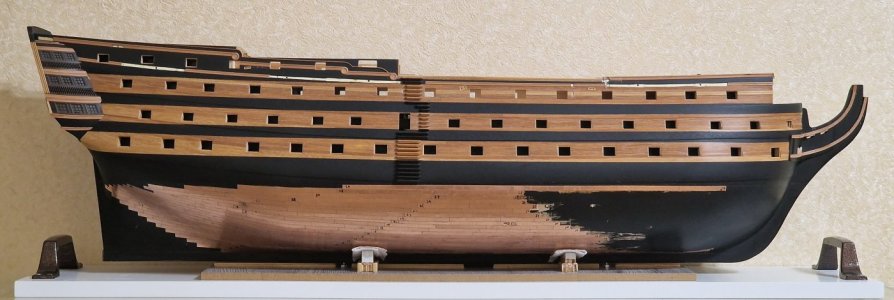
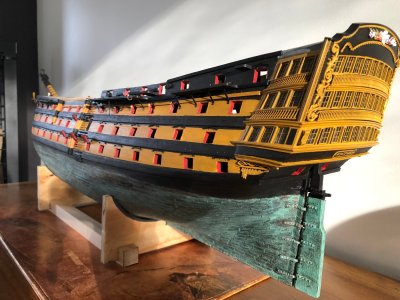
HMS Victory [1805] 1:79 by serikoff. Started with Mantua -> Upgraded with John McKay's Anatomy.

Phew, thank God I'm not the only one like this)))))


Thank you for your support. Ukraine would definitely not have survived if it were not for the help of the entire civilized world. I will be glad to help with the construction. Unfortunately, I am far from doing everything with complete precision (this project is not about that), but I will be glad to help in any way I can, since I know a lot about this ship))))
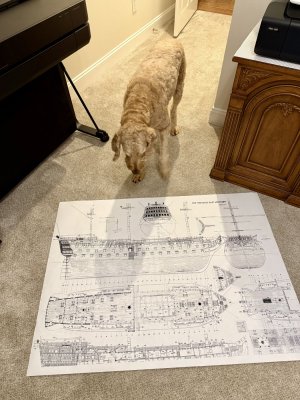
The full-scale drawings that you posted were superb, and I could print them full size (ARCH E (36" x 48")) on my Blueprint Plotter. It is impressive the amount of detail present. My 90-pound dog for size reference...
IMG_0074.jpeg
 
The full-scale drawings that you posted were superb, and I could print them full size (ARCH E (36" x 48")) on my Blueprint Plotter. It is impressive the amount of detail present. My 90-pound dog for size reference...
View attachment 493615
I am very glad that I helped someone with my drawings. It is a pity that I did not start with them, I could have done it correctly, but my case is far from the original)) but no one will notice)) Such a good friend of man. Stands, examines something there, looks for mistakes or maybe wants to help the owner, suggest something.
 
I am very glad that I helped someone with my drawings. It is a pity that I did not start with them, I could have done it correctly, but my case is far from the original)) but no one will notice)) Such a good friend of man. Stands, examines something there, looks for mistakes or maybe wants to help the owner, suggest something.
Noah has been my hearing, mobility, and PTSD Service Dog for 6 years now. He is my lifesaver in more ways than one. He is never far ...
 
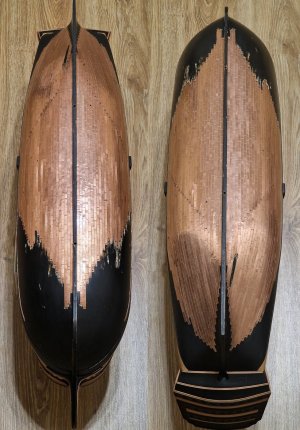
Today I symmetrically made the result that I showed last time. And what it means is that the view from the stern will be absolutely mirrored (right and left sides). The ship is becoming more and more covered with copper. It remains to finish a little in the stern, to sheathe the rudder naturally and then a large part on the bow of the ship... eh..

HMS Victory 747.jpg
HMS Victory 748.jpg

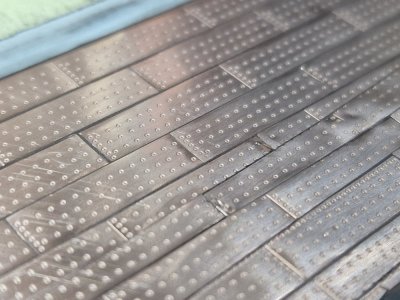
And what's more important, I've finally started to get something with copper patination samples... I don't want to make any predictions yet, I need to wait at least a week to understand the result, but what I see - I really like it, hurray! One thing, to achieve the predicted result, you need to create the same thin film of liquid on the copper surface. So that there is no long time difference between the dried areas and those that are still wet. Otherwise, the patination will be very patchy. But I have a solution.. and after all the tests, I will show it to you... patience ;)
 
I started like you by the edge of the keel to go up in a pyramid with 28 rows and make the two strips along the waterline.
FWIW, on the actual ships the plating overlapped and went on from the top down, not from the keel up. Regardless, it is great to see you made it possible to add the false keel after the coppering as plates were never to go over the false keel.
From a typical contract:
The Sides and Bottom to be filled or sheathed with Copper and to have thin Copper put between the Main and False Keels all Fore and Aft properly tuned up and fastened, and sufficiently fastened with Nails & Staples.
This keeps the false keel bare and exposed so it could do its job to tear away if the ship grounds or otherwise scrapes bottom without tearing out the sheathing or hurting the keel itself. Then again, the false keel was called out in some contracts to be sheathed separately such as the one below for the Curacoa 1808.
Allan
The False Keel to be of one Thickness 6 inches thick, to make the Main and False Keels together 1 feet 5 inches below the Rabbit, to give Scarph to the Scarphs of the Main Keel to be laid with Tar and Hair, and sufficiently fastened with Nails and Staples. The Sides and Bottom to be filled or sheathed with Copper and to have thin Copper put between the Main and False Keels all Fore and Aft properly tuned up and fastened, the labour to be done by the contractor.
 
Last edited:
Hello Serikoff, I am constructing on commission my second Victory using of course all the books photos available out there. You are doing a fantastic model. One thing that I discover recently from a video made in 2019 by a visitor of the Victory is that at the quarter deck main mast bottom there are not openings for the grids at each side of the mast as in the plans illustrated in the John Mckay book...So I dont know what to make of it....
Massimo
 
02.2024

So, the grates have been sanded, and it’s time to fit them to the hull.
The sanding is not final yet. I still need to round off the corners and perfect them.
Plus, I still need to make the bases for the cannonballs, which were placed around the entire perimeter of the grates.

View attachment 479541
View attachment 479546
View attachment 479547

The far ladder will barely be visible, but I decided to make it not as a simple imitation but with an actual staircase, for which I had to create an opening.
View attachment 479549
View attachment 479550

Since there is no deck below, the bottom part of the ladder will be suspended in the air. However, none of this will be visible. Only the upper part will be slightly visible. The other two ladders rest on the false lower deck, which I painted black, and it will also not be visible.
View attachment 479551

And after the final finishing, the gratings will look like this. All that remains is to add the stands for the cannonballs.
So, what do you think of the finished gratings?

View attachment 479552
View attachment 479553
Serikoff, why is your grating flat? On the Victory it follows the curvature of the deck...you have photos....
 
quarter deck main mast bottom
Ciao Massimo,
Drawings in Longridge's The Anatomy of Nelson's Ships, which were based on research with Sir Arthur Johns at the Admiralty and Mr. Laird Clowes at the Science Museum may be helpful. He shows hatches with gratings on each side of the main mast in the quarter deck drawing.

Allan
 
Serikoff, why is your grating flat? On the Victory it follows the curvature of the deck...you have photos....
Hi. Sorry for not answering right away, I was busy with something else. I already wrote about this somewhere, that when I glue the gratings, I will press them and they will take the rounded shape of the deck a little. But the radius is not very noticeable on such a scale, but it will still be minimal.
 
Hello Serikoff, I am constructing on commission my second Victory using of course all the books photos available out there. You are doing a fantastic model. One thing that I discover recently from a video made in 2019 by a visitor of the Victory is that at the quarter deck main mast bottom there are not openings for the grids at each side of the mast as in the plans illustrated in the John Mckay book...So I dont know what to make of it....
Massimo
Thanks for the praise. This ship, like Frankenstein, has been rebuilt many times. And less and less remains of its original appearance. That's why I would look at the museum photo for reference, and trust the drawings, anatomy and analogies with other ships similar to this one more. Good luck, contact me.
 
FWIW, on the actual ships the plating overlapped and went on from the top down, not from the keel up. Regardless, it is great to see you made it possible to add the false keel after the coppering as plates were never to go over the false keel.
From a typical contract:
The Sides and Bottom to be filled or sheathed with Copper and to have thin Copper put between the Main and False Keels all Fore and Aft properly tuned up and fastened, and sufficiently fastened with Nails & Staples.
This keeps the false keel bare and exposed so it could do its job to tear away if the ship grounds or otherwise scrapes bottom without tearing out the sheathing or hurting the keel itself. Then again, the false keel was called out in some contracts to be sheathed separately such as the one below for the Curacoa 1808.
Allan
The False Keel to be of one Thickness 6 inches thick, to make the Main and False Keels together 1 feet 5 inches below the Rabbit, to give Scarph to the Scarphs of the Main Keel to be laid with Tar and Hair, and sufficiently fastened with Nails and Staples. The Sides and Bottom to be filled or sheathed with Copper and to have thin Copper put between the Main and False Keels all Fore and Aft properly tuned up and fastened, the labour to be done by the contractor.
Thank you for the detailed and comprehensive answer about the keel and grates.
 
Hello Serikoff, I have just begun reading your build log and must complement you on your fantastic work. I read in one of your posts that you show how to build a "rope walk", however I am having difficulty finding that post. Can you direct me to the page that contains such information? I have become displeased with the quality of kit provided rope and am contemplating the construction of a walk to make my own. Thanks
 
Hello Serikoff, I have just begun reading your build log and must complement you on your fantastic work. I read in one of your posts that you show how to build a "rope walk", however I am having difficulty finding that post. Can you direct me to the page that contains such information? I have become displeased with the quality of kit provided rope and am contemplating the construction of a walk to make my own. Thanks
Thank you for your praise. If you mean making a rope making machine, it's here:
And then there are several more posts on this topic.
 
Thank you. That post looks very well done and I will try to make a machine based on your construction. I hope you won't mind if I have a question or two along the way.
 
I haven't posted anything for a few weeks, I've been busy calculating the rigging for Alert, you can read about it on his thread, but for now I want to share my experiments with copper sheathing.

I waited for the results for a whole month and didn't really do any sheathing. And now I can share what I got.

So, I figured out why, I had a problem with the result, although I did everything correctly according to Shevelev's method. It turned out that I used a special copper cleaner before applying the patina. I don't know what its fault is, but after I applied the patina to a clean polished copper (wiped with alcohol), the result became completely different. Let's go in order.

HMS Victory 749.jpg

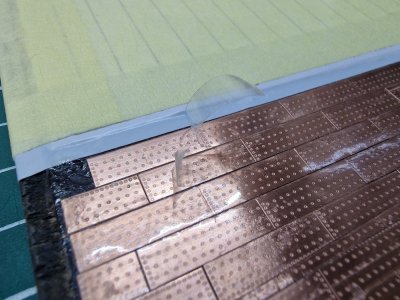
I made a sample from the same copper blank as on the ship, glued it in the same way and removed the protective tape before polishing.

At this stage, I already realized that there would be problems in those places where the sandpaper did not reach well. Glue could remain in these places and prevent the patina from laying down normally, so such places had to be rubbed very carefully, which took a very long time.

HMS Victory 750.jpg

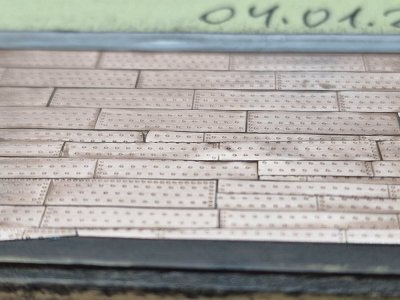
First I processed it with 400 grit sandpaper, then with 1000 grit.

HMS Victory 751.jpg

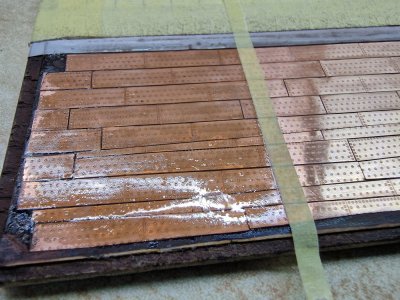
I applied the patina (I'll tell you about it below) with a paper towel, but I realized that this is not the best option (below I'll tell you what is the best way to apply it and how).

HMS Victory 752.jpg

And after drying, the surface turned a little green.

HMS Victory 753.jpg

After that I removed the surface patina with a dry brush like dust. I left a little for an experiment to see what would happen with such a surface.

HMS Victory 754.jpg

The disadvantage was that the surface dried unevenly, and therefore the patina was applied differently, in patches. And that's not the worst thing, some spots were shiny at some angles, and that's not very good.

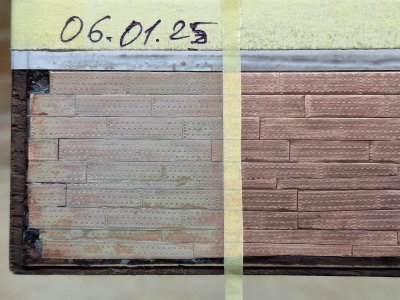
And here's the result a month after application (by the way, I later erased the green patina everywhere).

HMS Victory 755.jpg

Notice how unevenly the copper itself has oxidized (on the right).

HMS Victory 756.jpg
HMS Victory 757.jpg

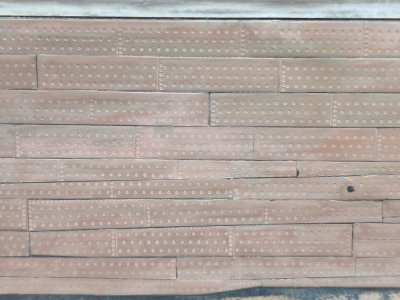
It is very clear that the oxidation occurred differently. In the center it is closer to brown, and along the perimeter - to red. There are greenish areas, and in general I like the result. Yes, it is not ideal, but already almost as I want. Therefore, today I repeated everything again, with minor changes. So:

HMS Victory 758.jpg

I sanded the copper again with 400 and 1000 grit sandpaper (I covered up the previous result). I wiped the surface with alcohol and after drying, I immediately applied Patina-it. I wrote about this product earlier, Dmitry Shevelev uses it and I have been looking for it for many years (but it was discontinued and I accidentally bought it in the USA from an antique dealer).

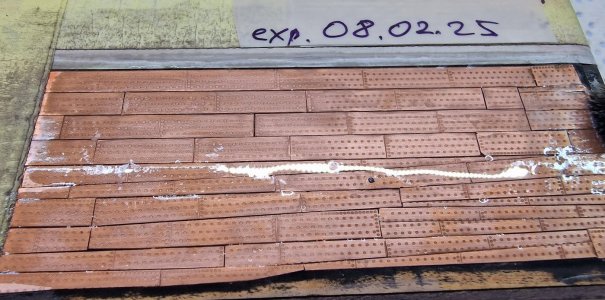
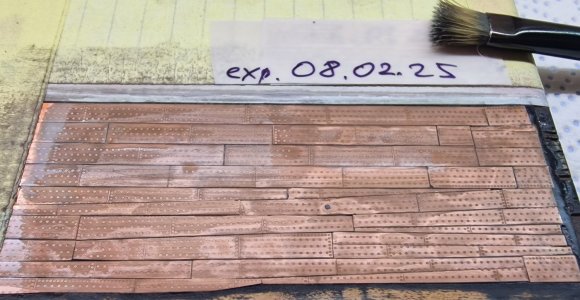
I applied Patina-it with a brush generously, so that there was a lot of liquid on the surface evenly.

HMS Victory 759.jpg

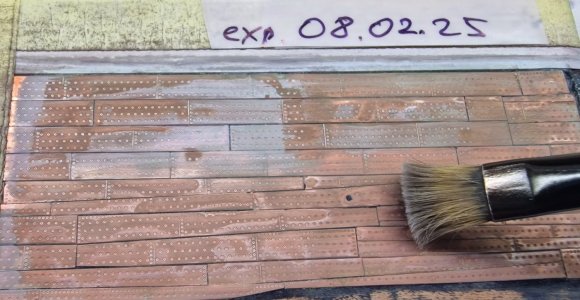
Then I wait a few seconds (10-20) so that the surface does not have time to dry out and with the same brush I wipe the surface, as if collecting excess moisture, wiping the brush with a napkin from time to time. This is necessary so that the surface dries as evenly and simultaneously as possible, otherwise there will be spotting. The result is like this.

HMS Victory 760.jpg

Then we wait until the surface is completely dry and after that I brush off the oxide like dust.

HMS Victory 761.jpg

In some places it is easy to do, in others it requires effort. In the end, this is the result.

HMS Victory 762.jpg
HMS Victory 763.jpg
HMS Victory 764.jpg

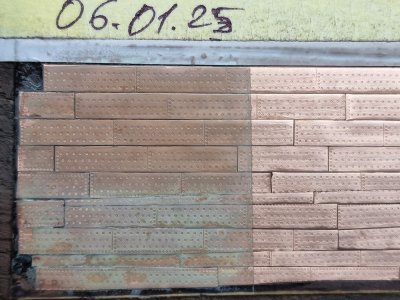
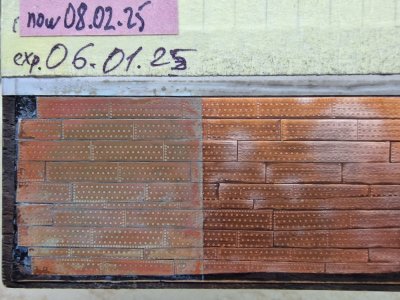
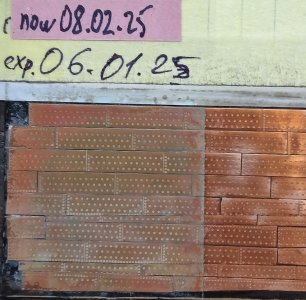
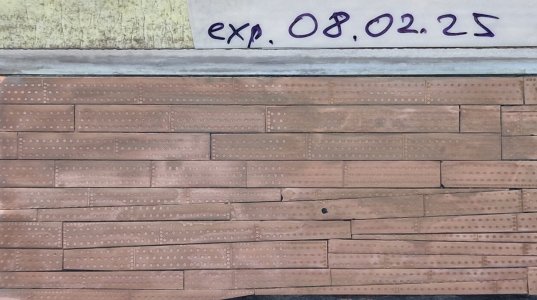
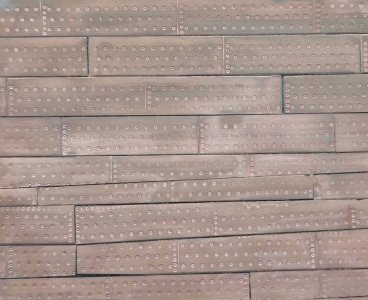
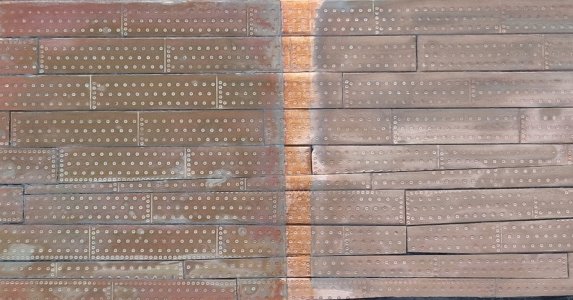
The color changes within a week, and after a month here is the difference: on the right - immediately after drying, on the left - after a month.

HMS Victory 765.jpg

But this time I waited less before rubbing, and accordingly the color saturation may be different, but the spottiness will also be minimal. In a month I will show the difference and the final result. Also, based on Shevelev's practice, I can say for sure that the color becomes even different in a year. More reddish, just the way I want... so let's hope for such a result.

Ship-1
 
Last edited:
Glad to hear from your VICTORY.
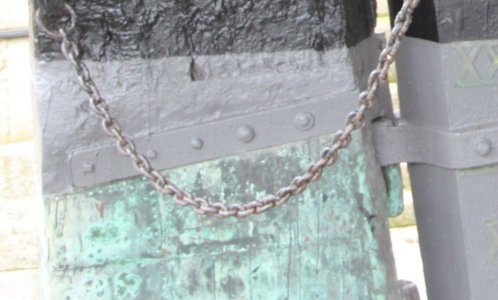
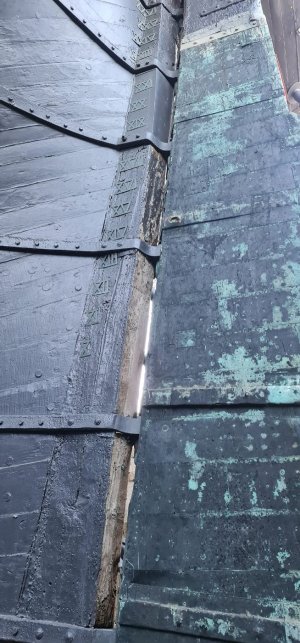
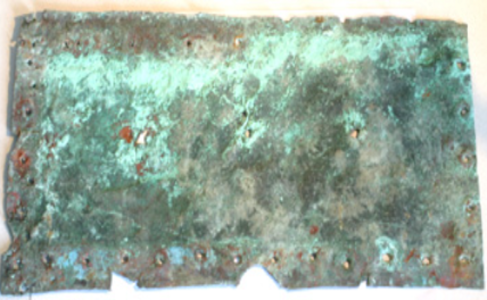
From my point of view, I don't find that the treatment of your copper is satisfactory because it doesn't give at all the expected effect of copper that stays in salt water. The "verdigris" effect is not there at all.
My method to achieve this:
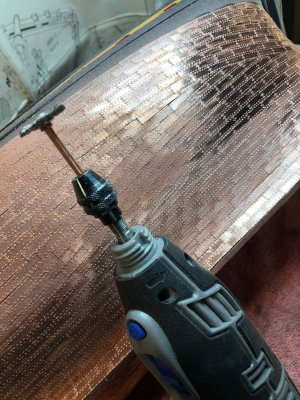
1 - brush the surface well with a small rotating brush to remove the glue residue that is on the surface and between the plates. Nothing should remain otherwise the treatment will not be able to reach the copper and there will be shiny parts between the verdigris that will not be desired. Sandpaper does not allow you to go into the hollows of the plates.
2 - Clean the sanding well with a vacuum cleaner brush.
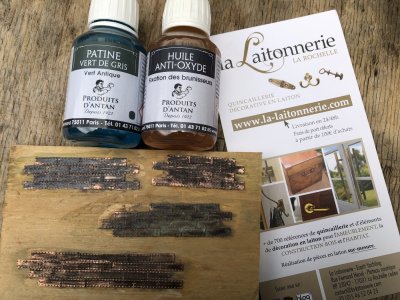
3 - Apply a special copper-bronze antique patina. Many products sold on the internet are not effective in obtaining a clear and total verdigris. The one I bought from an antique product manufacturer has an immediate effect in a few minutes. One application with a brush is enough!
4 - Apply a layer of stabilizer product with a brush once the "verdigris" effect is satisfactory. This stops the oxidation of the copper.
The final effect obtained is bluish with very realistic shades of green, gray, black.

Afterwards, it's a matter of personal taste. But if you want to get close to reality, this is what you need. Especially when you do the big job of installing the 2500 copper plates!.

IMG_1757.JPG

IMG_1722.JPG

IMG_3360.JPG

2021-04-23_203745.jpg

331719687_1269855180409062_1325089790773954959_n.jpg

plaque cuivre VICTORY.png

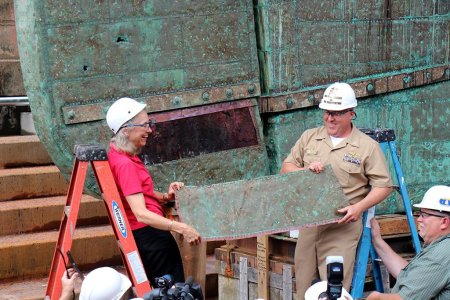
NHHC Detachment Boston Director Richard Moore ceremoniously remove the first piece of copper s...jpg
 
Hello Sergey,

Thank you for the information on how to add create patina. As I will be adding copper plating to my ship, the information will be very helpful.

Bill
Thank you.))

Glad to hear from your VICTORY.
From my point of view, I don't find that the treatment of your copper is satisfactory because it doesn't give at all the expected effect of copper that stays in salt water. The "verdigris" effect is not there at all.
My method to achieve this:
1 - brush the surface well with a small rotating brush to remove the glue residue that is on the surface and between the plates. Nothing should remain otherwise the treatment will not be able to reach the copper and there will be shiny parts between the verdigris that will not be desired. Sandpaper does not allow you to go into the hollows of the plates.
2 - Clean the sanding well with a vacuum cleaner brush.
3 - Apply a special copper-bronze antique patina. Many products sold on the internet are not effective in obtaining a clear and total verdigris. The one I bought from an antique product manufacturer has an immediate effect in a few minutes. One application with a brush is enough!
4 - Apply a layer of stabilizer product with a brush once the "verdigris" effect is satisfactory. This stops the oxidation of the copper.
The final effect obtained is bluish with very realistic shades of green, gray, black.

Afterwards, it's a matter of personal taste. But if you want to get close to reality, this is what you need. Especially when you do the big job of installing the 2500 copper plates!.

View attachment 500263

View attachment 500264

View attachment 500265

View attachment 500266

View attachment 500267

View attachment 500268

View attachment 500269
I'm trying to achieve something different from what you show. I achieved your result very simply. I need another one, exactly as shown in the photo. It's a matter of taste, but I like it exactly like this.
Screenshot_20250209_114839_Gallery.jpg
 
I haven't posted anything for a few weeks, I've been busy calculating the rigging for Alert, you can read about it on his thread, but for now I want to share my experiments with copper sheathing.

I waited for the results for a whole month and didn't really do any sheathing. And now I can share what I got.

So, I figured out why, I had a problem with the result, although I did everything correctly according to Shevelev's method. It turned out that I used a special copper cleaner before applying the patina. I don't know what its fault is, but after I applied the patina to a clean polished copper (wiped with alcohol), the result became completely different. Let's go in order.

View attachment 500194

I made a sample from the same copper blank as on the ship, glued it in the same way and removed the protective tape before polishing.

At this stage, I already realized that there would be problems in those places where the sandpaper did not reach well. Glue could remain in these places and prevent the patina from laying down normally, so such places had to be rubbed very carefully, which took a very long time.

View attachment 500195

First I processed it with 400 grit sandpaper, then with 1000 grit.

View attachment 500196

I applied the patina (I'll tell you about it below) with a paper towel, but I realized that this is not the best option (below I'll tell you what is the best way to apply it and how).

View attachment 500197

And after drying, the surface turned a little green.

View attachment 500198

After that I removed the surface patina with a dry brush like dust. I left a little for an experiment to see what would happen with such a surface.

View attachment 500199

The disadvantage was that the surface dried unevenly, and therefore the patina was applied differently, in patches. And that's not the worst thing, some spots were shiny at some angles, and that's not very good.

And here's the result a month after application (by the way, I later erased the green patina everywhere).

View attachment 500200

Notice how unevenly the copper itself has oxidized (on the right).

View attachment 500201
View attachment 500202

It is very clear that the oxidation occurred differently. In the center it is closer to brown, and along the perimeter - to red. There are greenish areas, and in general I like the result. Yes, it is not ideal, but already almost as I want. Therefore, today I repeated everything again, with minor changes. So:

View attachment 500203

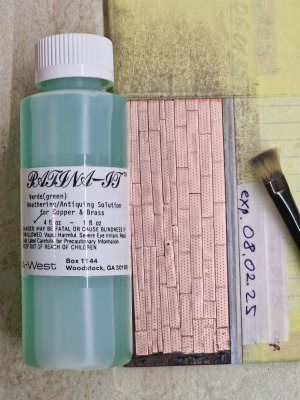
I sanded the copper again with 400 and 1000 grit sandpaper (I covered up the previous result). I wiped the surface with alcohol and after drying, I immediately applied Patina-it. I wrote about this product earlier, Dmitry Shevelev uses it and I have been looking for it for many years (but it was discontinued and I accidentally bought it in the USA from an antique dealer).

I applied Patina-it with a brush generously, so that there was a lot of liquid on the surface evenly.

View attachment 500204

Then I wait a few seconds (10-20) so that the surface does not have time to dry out and with the same brush I wipe the surface, as if collecting excess moisture, wiping the brush with a napkin from time to time. This is necessary so that the surface dries as evenly and simultaneously as possible, otherwise there will be spotting. The result is like this.

View attachment 500205

Then we wait until the surface is completely dry and after that I brush off the oxide like dust.

View attachment 500206

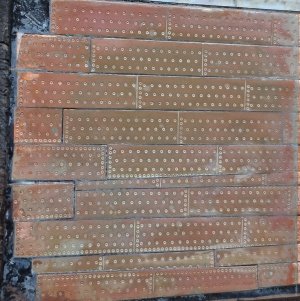
In some places it is easy to do, in others it requires effort. In the end, this is the result.

View attachment 500207
View attachment 500208
View attachment 500209

The color changes within a week, and after a month here is the difference: on the right - immediately after drying, on the left - after a month.

View attachment 500210

But this time I waited less before rubbing, and accordingly the color saturation may be different, but the spottiness will also be minimal. In a month I will show the difference and the final result. Also, based on Shevelev's practice, I can say for sure that the color becomes even different in a year. More reddish, just the way I want... so let's hope for such a result.

Ship-1
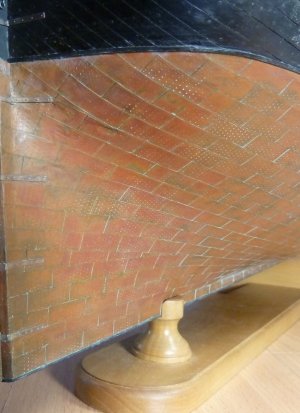
A very interesting experiment, Sergey. Copper is like a chameleon: it’s will change color ever and ever and ……
I think you have to seal it for ‘external influences’ at the moment that the color is how you wanted it.
Regards, Peter
 
Back
Top