HMS Victory [1805] 1:79 by serikoff. Started with Mantua -> Upgraded with John McKay's Anatomy.

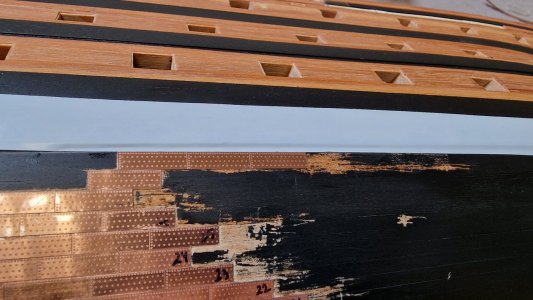
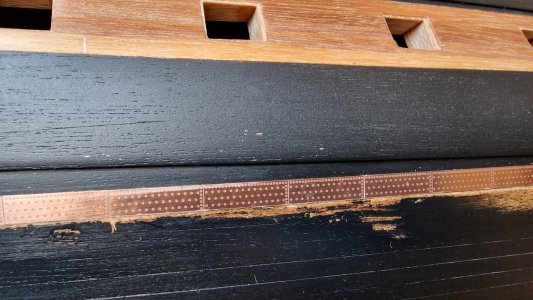
Today, I finally reached the waterline. From the keel to the waterline (WL), there are 29 rows of copper plating. To prevent glue from seeping onto the paint above the plates, I use electrical tape, which I align precisely along the waterline.
HMS Victory 730.jpg

As planned, I started plating from the keel upward, ensuring the rows remained perfectly horizontal to the keel. Upon reaching the waterline, I switched to plating horizontally along the waterline, ensuring the rows align with it. This way, the lower rows naturally taper into these, rather than the other way around.
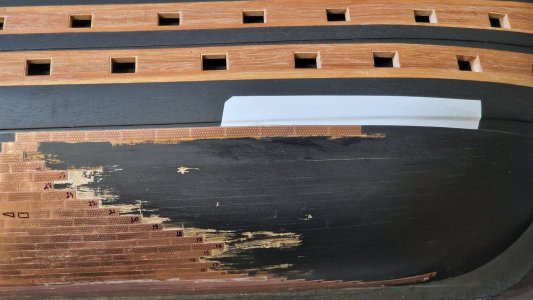
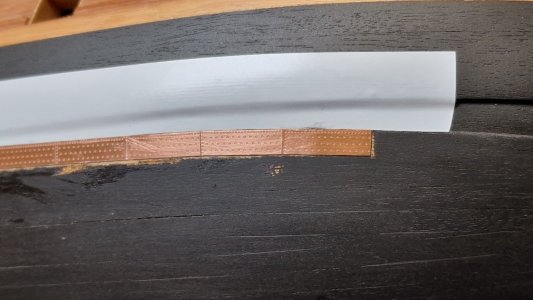
HMS Victory 731.jpg
HMS Victory 732.jpg

At the stern, I'll taper the rows to a point, while at the bow, two rows will follow the waterline.
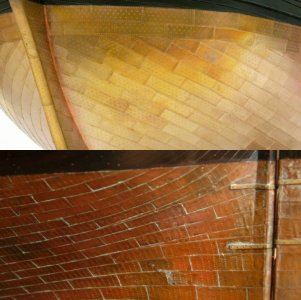
HMS Victory 733.jpg

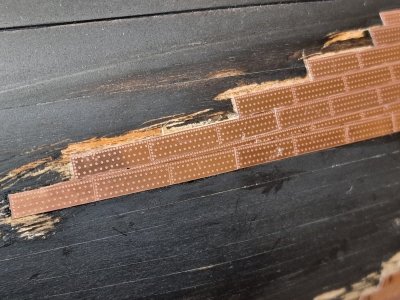
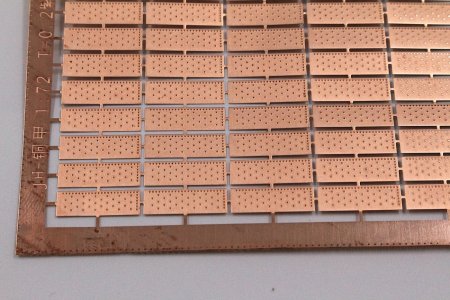
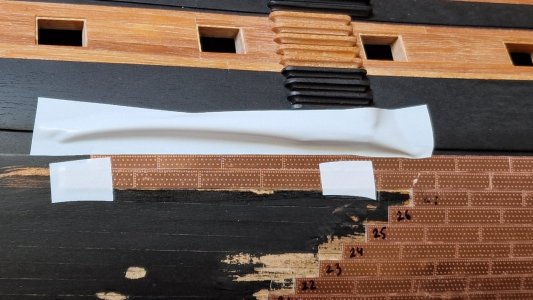
A few words about "tapering" (the rows that narrow to a point): Since the copper plating simulates nails, the upper edge of the plates (where the nail imprints are close together) must always be preserved to maintain this appearance. I first mark the cut line, then, if the section is above the waterline, I cover it with electrical tape before attaching the row. Once the top row is in place, I can proceed with the lower ones.
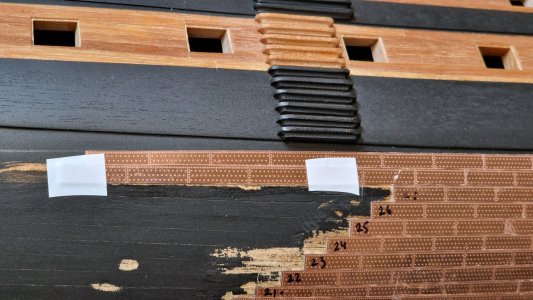
HMS Victory 734.jpg
HMS Victory 735.jpg
HMS Victory 736.jpg

After securing the plates, I completed a full row that tapers to nothing for the first time.

HMS Victory 737.jpg
HMS Victory 738.jpg

On one side, the progress so far looks like this:

HMS Victory 739.jpg

For the other side (I work on both sides simultaneously in portions), I start at the waterline and work downward to meet the lower rows, carefully mirroring the pattern from the first side. Even if something doesn’t align perfectly, I can blend the rows seamlessly because these sections will be lower. And, as expected, slight discrepancies appeared—an excess of about 1.5 mm. I’ll have to find a way to cover this, but since it’s a small area, it should remain unnoticeable.

Another issue has emerged: when removing the protective electrical tape, small fragments of paint come off with it. I’ll likely need to touch up the lower wales to fix these imperfections.

HMS Victory 740.jpg
HMS Victory 741.jpg

The holidays are coming up, which means I’ll have more time to work on the ship. I’m eager to finally finish the copper plating. Honestly… this might be the last time I do it (if I build another model). It’s such a specialized and tedious task!

I would also like to take this opportunity to wish everyone a happy holiday season—whether you celebrate New Year, Christmas, or any other holiday. I wish you all health, kindness, and PEACE! I never thought I’d find myself genuinely wishing for peace, but here we are. Take care of yourselves and your loved ones!

Bottle;)
 
Today, I finally reached the waterline. From the keel to the waterline (WL), there are 29 rows of copper plating. To prevent glue from seeping onto the paint above the plates, I use electrical tape, which I align precisely along the waterline.

View attachment 491544

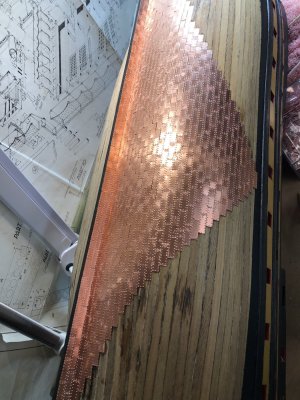
As planned, I started plating from the keel upward, ensuring the rows remained perfectly horizontal to the keel. Upon reaching the waterline, I switched to plating horizontally along the waterline, ensuring the rows align with it. This way, the lower rows naturally taper into these, rather than the other way around.

View attachment 491545
View attachment 491547

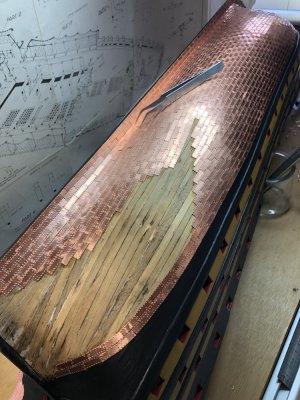
At the stern, I'll taper the rows to a point, while at the bow, two rows will follow the waterline.

View attachment 491548

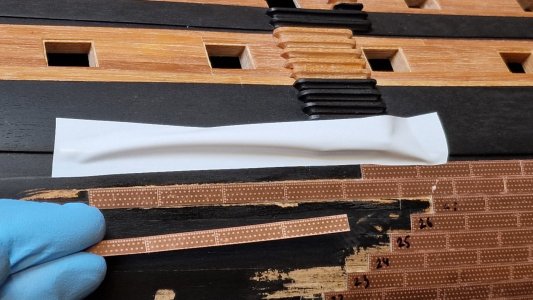
A few words about "tapering" (the rows that narrow to a point): Since the copper plating simulates nails, the upper edge of the plates (where the nail imprints are close together) must always be preserved to maintain this appearance. I first mark the cut line, then, if the section is above the waterline, I cover it with electrical tape before attaching the row. Once the top row is in place, I can proceed with the lower ones.
View attachment 491549
View attachment 491550
View attachment 491551

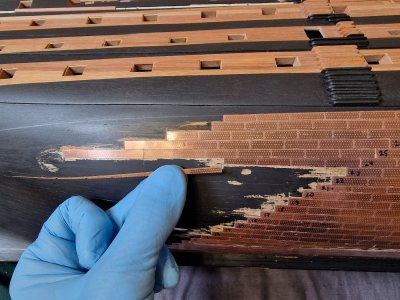
After securing the plates, I completed a full row that tapers to nothing for the first time.
View attachment 491552
View attachment 491553

On one side, the progress so far looks like this:

View attachment 491554

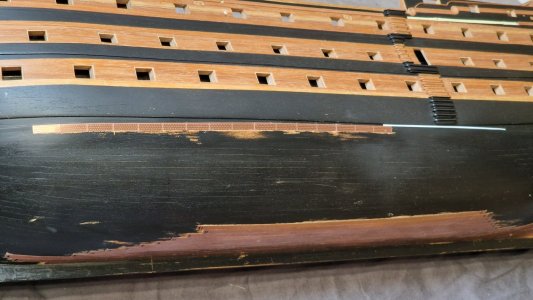
For the other side (I work on both sides simultaneously in portions), I start at the waterline and work downward to meet the lower rows, carefully mirroring the pattern from the first side. Even if something doesn’t align perfectly, I can blend the rows seamlessly because these sections will be lower. And, as expected, slight discrepancies appeared—an excess of about 1.5 mm. I’ll have to find a way to cover this, but since it’s a small area, it should remain unnoticeable.

Another issue has emerged: when removing the protective electrical tape, small fragments of paint come off with it. I’ll likely need to touch up the lower wales to fix these imperfections.
View attachment 491555
View attachment 491556

The holidays are coming up, which means I’ll have more time to work on the ship. I’m eager to finally finish the copper plating. Honestly… this might be the last time I do it (if I build another model). It’s such a specialized and tedious task!

I would also like to take this opportunity to wish everyone a happy holiday season—whether you celebrate New Year, Christmas, or any other holiday. I wish you all health, kindness, and PEACE! I never thought I’d find myself genuinely wishing for peace, but here we are. Take care of yourselves and your loved ones!

Bottle;)
Hi Sergey
Just beautiful
Happy holidays to you and your family

Best wishes
 
I agree with you, it's a long and tedious job!
For mine I used the Mantua plate kit = 2500 plates.
I think the strip plate mode that you use is easier and faster.
I started like you by the edge of the keel to go up in a pyramid with 28 rows and make the two strips along the waterline.

IMG_1682.JPGIMG_1683.JPG
 
And the best wishes of the holiday season to you and your family as well. Indeed...let there be peace on earth.
I wish you and your family a Merry Christmas and that your wish for peace comes true.
Happy holidays to you and your family

Friends, thank you very much for your congratulations and wishes. I am very pleased, I really appreciate it!


I agree with you, it's a long and tedious job!
For mine I used the Mantua plate kit = 2500 plates.
I think the strip plate mode that you use is easier and faster.
I started like you by the edge of the keel to go up in a pyramid with 28 rows and make the two strips along the waterline.

View attachment 491628View attachment 491629
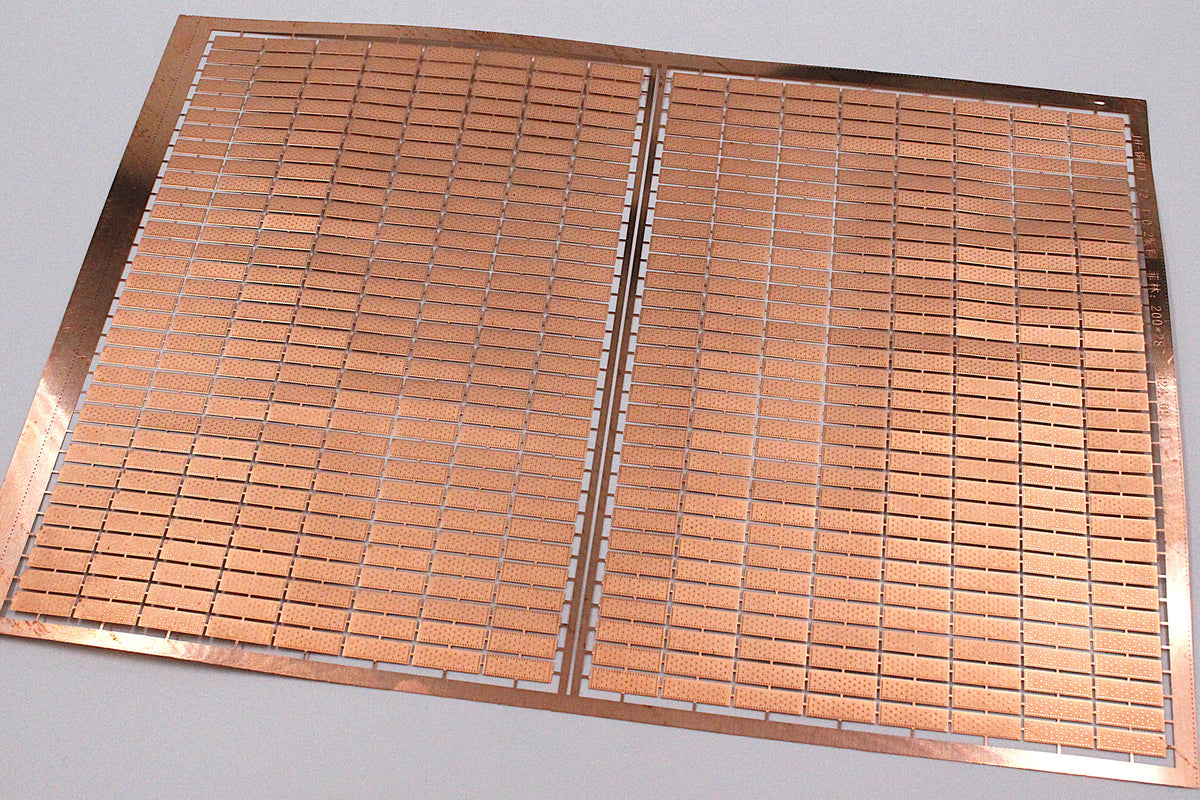
At first I bought 6 sheets of 600 copper plates, and at that time I took the last ones. But as soon as I saw that they were back in stock, I bought 2 more sheets. That's 4800 pieces in total. That should be enough for sure. But you have to take into account that there are triangular fragments, the remains of which cannot be used in layer cases, since there is a special pattern and it must always be on top. Plus, you have to take into account the defects that will definitely be there. I redid the difficult places several times. So 6 sheets would definitely not have been enough for me. At the end, I will calculate the exact amount that I spent on everything.
 
Hi Sergey Wish you and your family a Blessed Chrismas and we pray for peace.
Thank you very much! Likewise!!!

I just found this at DRYDOCK.
The plates are not in strips but the design of the points is well done.
2500 plates = 200€ for our Victory

It all depends on the thickness. Your plates are thicker than mine, so it's a little noticeable. According to the seller, mine is 0.1 mm, but that's still too much for my scale. But it's acceptable. Anything thicker will definitely be visually noticeable.

The copper strips you put are interesting and seem easier with a better result than mine.
Can you put the link of the site where you bought them.
Please.
This is a store in Kyiv and I think it does not work for export, but I can check. Here is the link, but since there is a war now, communication is difficult now.

 
Hello Sergey,

find attached a link to the buildlog of Diana here at SoS. It shows the pattern for coppering very well as far as I know. Antscherl shows the same scheme in Volume 2 of his Swan-Class-Series (pages 34 and 35). On the website of the RMG I found a drawing from 1831 which is showing the same scheme.
So I think that als Victory was coppered in the same manner.
I don't know if I would change such a lot of work you invested, but wanted to share this information, because you are thinking of some more rework.
Thanks for the information. I'm not happy that I started this copper sheathing... It's very difficult to do it overlapping in terms of maintaining parallelism. But I see it as even more difficult to do it butt-jointing because the lines are constantly bending and it's impossible to avoid gaps unless you make a lot of triangles, which is wrong. And here's a vicious circle. I'll finish it as is and rate it with the hope that the overall appearance will be satisfactory. But what I know for sure now is that I'll never do copper sheathing again))
 
A gift to myself

I thought there wouldn’t be any more posts this year, but I just couldn’t resist sharing this with you!
I’m incredibly excited, overwhelmed with emotions, and can now officially announce: I’ve bought a new kit… which means a new project awaits me!
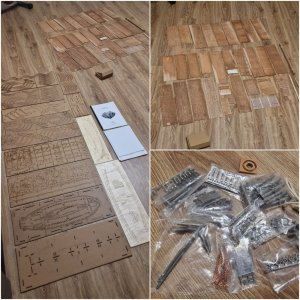
From the photos below, I think many of you have already guessed what kit it is. For those who haven’t, it’s HMS Alert 1777.

I have no idea yet how this will all unfold since I still have my unfinished Victory project. And now I face a choice: Finish the first model entirely; or Work on two projects simultaneously; or Put Victory on hold again and fully switch to the new project.
What do you think? What would you do?

On the one hand, since I’m renting an apartment, transporting a 1.5-meter model will be very challenging. So, I’ve already decided that the current endpoint for Victory will be the hull and all its internal details, but I’ll postpone the masts and rigging for later (especially since the display case I have fits only the hull). Additionally, the copper plating on Victory has been a bit disappointing—the pattern isn’t exactly what I envisioned, and I don’t think I’ll be redoing it. Plus, building this model has felt like a constant battle with adjustments and fixes due to the lack of proper drawings and parameters. In short, I needed a reset.

That’s why I decided to start the new Alert project. However, it won’t just be about building the model—there’s something even more interesting planned (I’ve hinted at this before and will share more details in a new thread).
By the way, a question for the admins: where should I post this thread about building the Alert kit? Should it go in a specific section? I’m asking because I didn’t buy it through the drydockmodelsandparts website but from someone who had purchased it on AliExpress. The kit is the same, although some parts are arranged differently on the sheets, but it’s identical.

In any case, I’m still thinking everything through. I even have an idea to create a video review. There’s a lot to study and plan… Honestly, I feel like a kid right now with all this excitement. Well, time to sort out the chaos in my head!

20241227_232812.jpg
 
Last edited:
Be kind, and start the build log here (click below) ;) Alert is the Group build project, there you will find other build logs and a wealth of information regarding this Group build project.

Build logs


All support documentation


As always...Good luck with the build and have fun! I am taking the chair and will follow along with your build.
Thank you! I have studied this section, so to speak, by heart)) I accidentally found the forum only thanks to this ship... and now I hope to be in the group of people who are building it. I really hope that I will have time to do everything I have planned and in the best possible quality.

Hello Sergey,
If you have the time, I would love to see you build both ships. I know that with everyday commitments, there are only so many hours in a day. Whichever direction you choose, I will look forward to seeing your work.

Bill
Thanks for the support. I, too, to be honest, would like to run 2 projects at the same time, but it takes a lot of time. But sometimes it's good to switch from one to another, so as not to get bored and to add some variety.

I wish you a lot of fun with this kit.
Thank you! I think this set will bring me a lot of pleasure, I really hope so))
 
Congratulations on your future project with the HMS ALERT.
It is a very beautiful kit designed and produced with modern means.
It will change category compared to MANTUA from the 70s-80s.
What is funny is that I also have a project to start in some time on the French frigate LA BELLE POULE 1765 from the same manufacturer ZHL Model.
If it were me, I would finish the VICTORY before starting the ALERT.
As my grandmother used to say, "you should never run after two hares at the same time"! ;)
 
Back
Top