• LUCZORAMA SHIPWRECK SCAVENGER HUNT GIVEAWAY. 4 Weeks of Fun • 1 Legendary Prize ((OcCre’s Fram Ship)) • Global Crew Welcome!
    **VIEW THREAD HERE**

HMS Victory - Mantua 1:78 Build log

Joined
Jun 2, 2025
Messages
41
Points
48

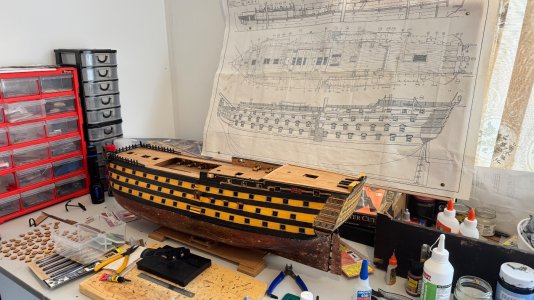
Model Shipbuilding Progress – HMS Victory (Mantua 1:78 Scale) ⚓

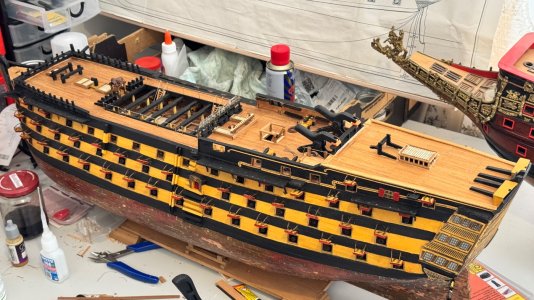
I’ve recently begun work on this stunning Mantua HMS Victory model—a build that was generously gifted to me. It’s a magnificent kit and I’m thoroughly enjoying bringing it to life!

Copper Plating
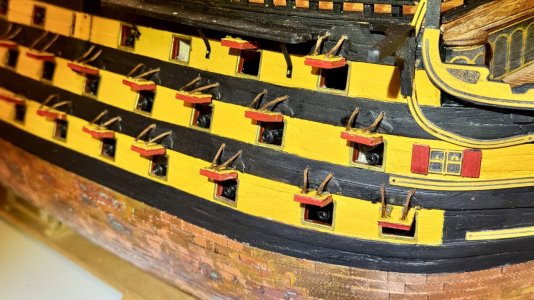
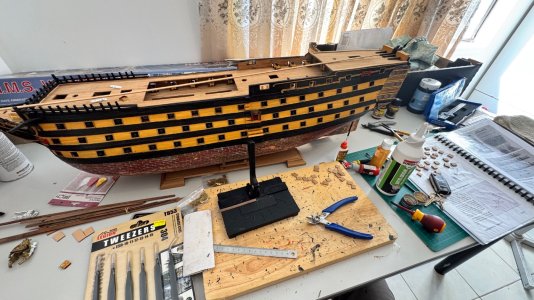
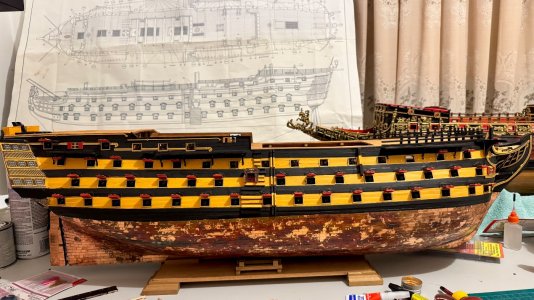
The hull came with quite a bit of tarnish on the copper plates, but instead of stripping it back, I chose to seal and preserve the patina. I love the aged look—it adds realism and gives the impression of a battle-worn ship that’s seen years of service at sea.

Cannon Ports and Ropes
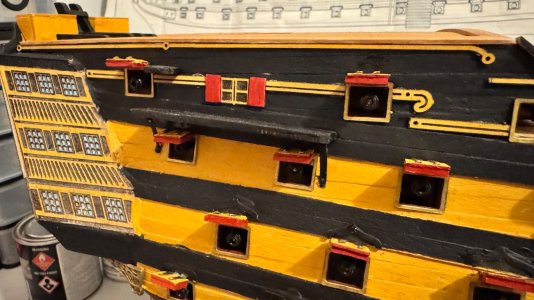
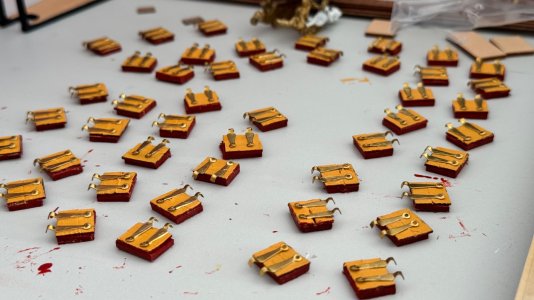
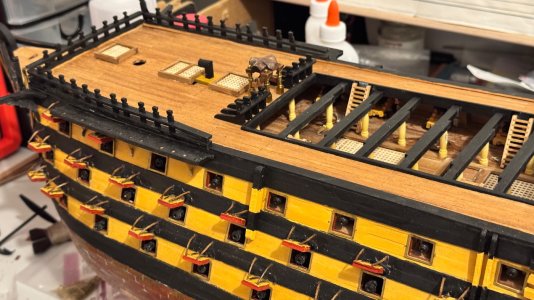
I’ve finished mounting all the cannon doors, and they’re now fitted with opening ropes—each one hand-tied and secured in place. It adds so much character to the sides of the hull, especially with the red and yellow detailing that really makes the gun ports pop.

Deck Work Begins
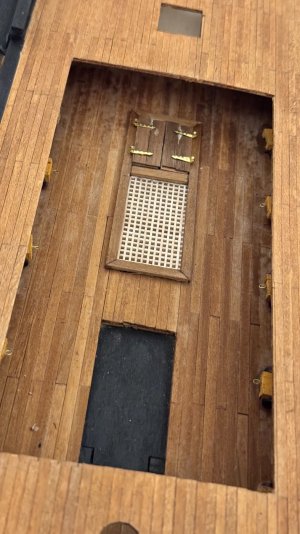
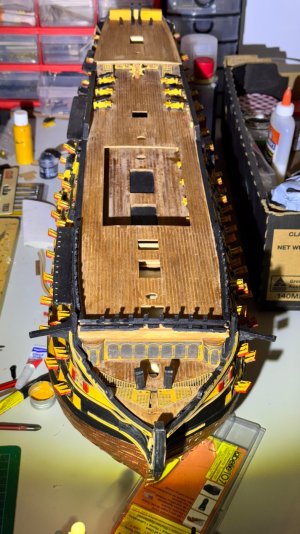
Deck planking has been cleaned and oiled, and I’ve started detailing the internal cannon bays and deck structures. I’m focusing on adding realistic touches like brass hinges on the deck hatches and careful wood staining to bring out the grain and contrast between levels.

This is just the beginning—still lots of rigging, masts, and fittings ahead. But it’s really starting to take shape!

Plans in the background keep me honest.


️ Patience and details make the difference.
IMG_8109.jpeg

IMG_8106.jpeg

IMG_8107.jpeg

IMG_8117.jpeg

IMG_8132.jpeg


IMG_8096.jpeg

IMG_7972.jpeg

IMG_7957.jpeg

IMG_7954.jpeg


IMG_8134_jpg.jpeg

IMG_8134.jpeg
 
Last edited:
⚓ Model Ship Update – HMS Victory (Mantua 1:78 Scale Build) ⚓

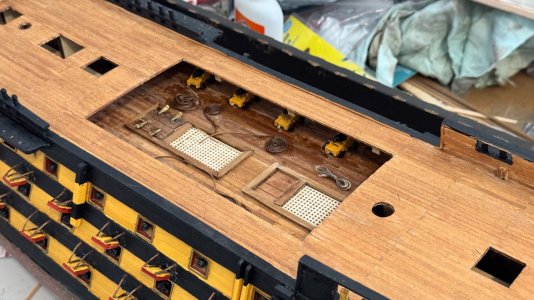
Another milestone ticked off on my HMS Victory build! I’ve now detailed the lower section of the upper deck, bringing even more life and historical character to this majestic ship.

Newly added elements:
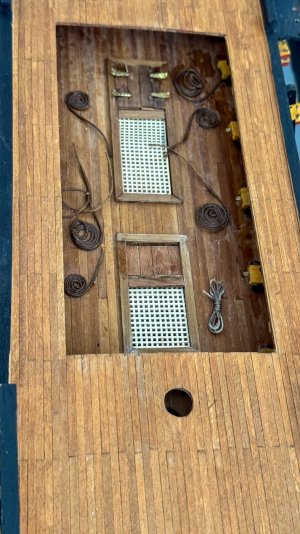
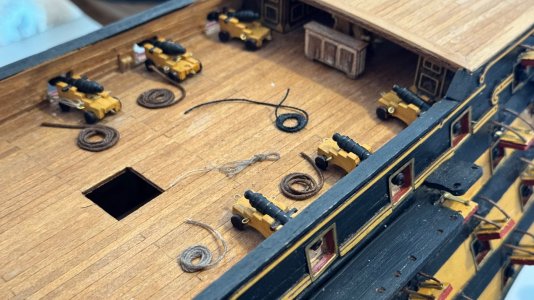
Cannon ropes have now been fitted, complete with realistic coiled lines and belaying details. These ropes add not only function but also a strong sense of authenticity, as if the gun crew just finished securing the deck.
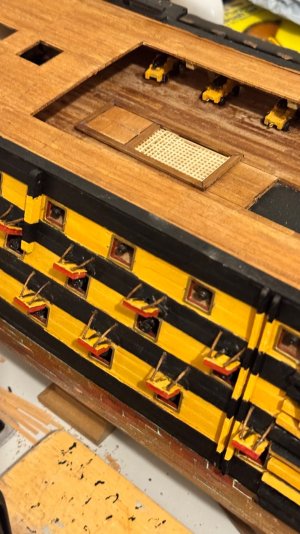
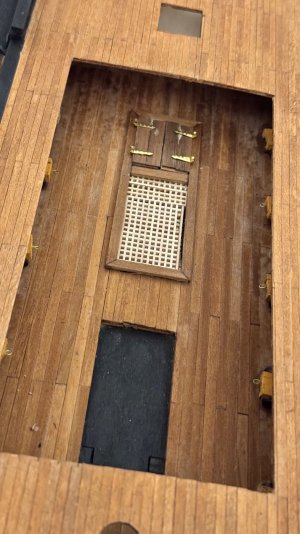
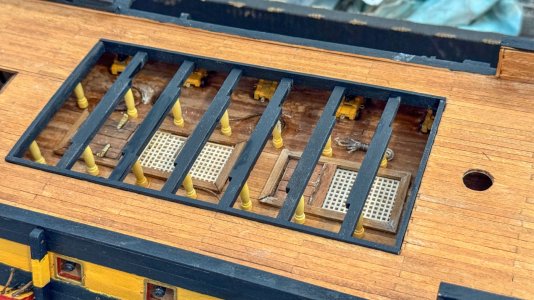
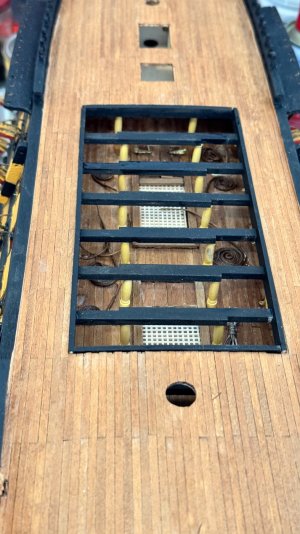
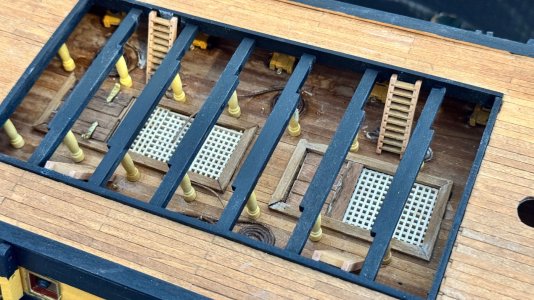
  • I’ve carefully installed two open deck gratings, framed and placed over the deck hatches – allowing light and air to pass to the decks below, just as they did aboard the real Victory.
  • A set of deck hatches have also been added with subtle weathering to enhance realism.
  • Small stowage details and rope coils now dot the deck, echoing the bustle of a ship ready for action.
The surrounding gun ports with yellow cannon carriages are now tucked neatly under the upper deck, and I’m really pleased with how the contrasts between the timber decking, black-and-yellow hull, and coiled rigging are coming together.

Each detail adds another layer of realism and tells a bit more of the story of this legendary warship. Still a long way to go, but it’s immensely satisfying to see this deck come alive!

Stay tuned as I move upward through the ship’s decks and start preparing the next stage of the rigging and fittings.

IMG_8140_jpg.jpeg

IMG_8141_jpg.jpeg
 
Lower Upper Deck Nearly Done on My HMS Victory Build! ⚓⛵

Progress continues on my Mantua HMS Victory model and I’m excited to share the latest stage— the lower upper deck is now nearly complete!

This section has really brought the interior to life with:

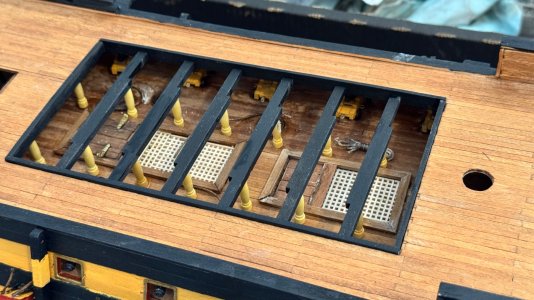
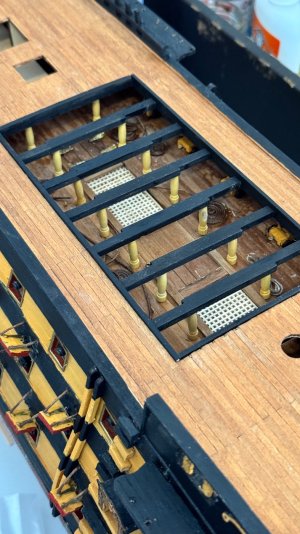
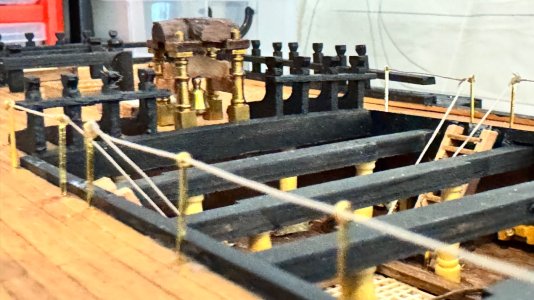
Detailed yellow deck supports

⚫️ Black-painted deck beams

⚓️ Cannon carriages mounted with rope coils and tie-downs

Beautifully planked deck with authentic wear and texture

Two staircases still to be added to finish off access between decks


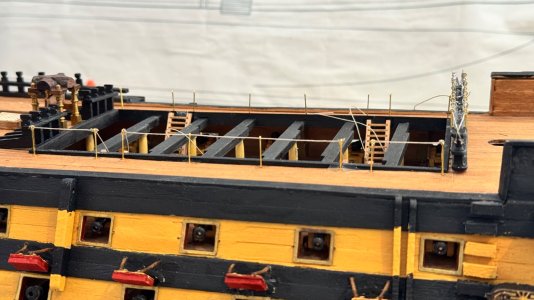
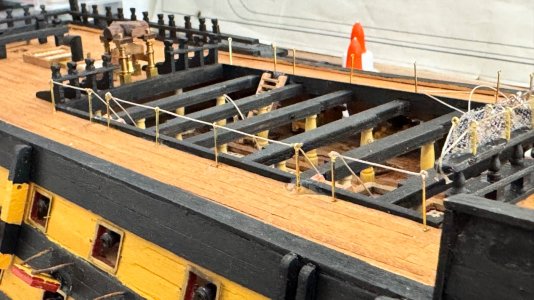
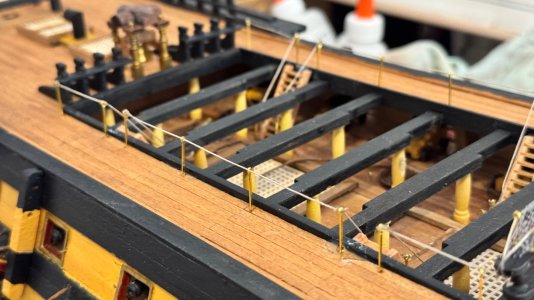
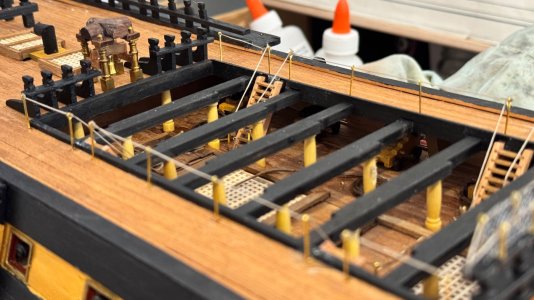
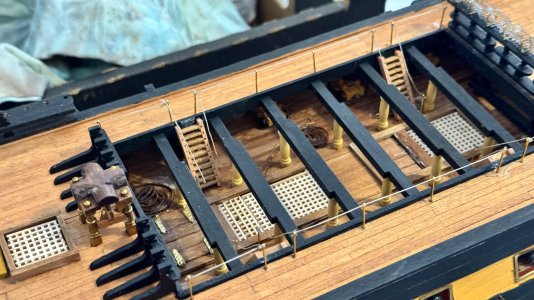
I’ve also added finely detailed grates and hatch covers, giving a glimpse down into the inner workings of the ship. Once the stairs are installed, this deck will be topped off with four lifeboats which will rest neatly across those support beams—just like the original!

I’m really pleased with how this is shaping up. The combination of colour, texture, and layout is beginning to capture the feel of the real HMS Victory. Onward to the next step!

IMG_8146.jpeg

IMG_8146_jpg.jpeg

IMG_8145_jpg.jpeg

IMG_8144.jpeg
 
HMS Victory Build Update – Lower Upper Deck Complete! ⚓

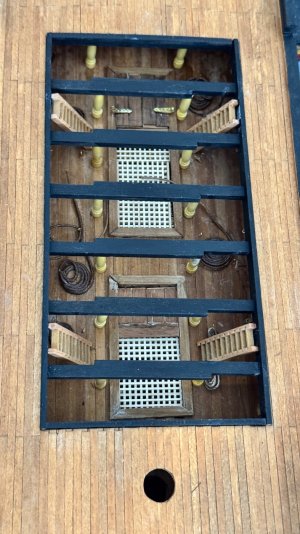
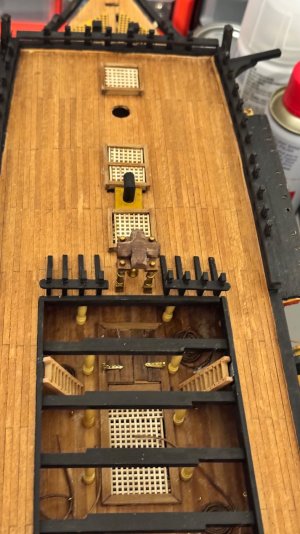
Another milestone ticked off on my Mantua HMS Victory build! I’ve now added the final details to the lower upper exposed deck — with the ladders now fitted, this deck section is officially complete. Really happy with how the deck grates, ladders, and hatch frames have come together. The yellow pillars and support beams add a great structural feel and contrast beautifully with the dark deck beams.

You’ll also spot some of the coiled ropes and finer details being added, which bring more realism and life to the ship’s interior.

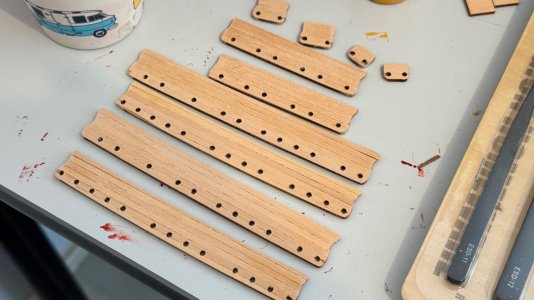
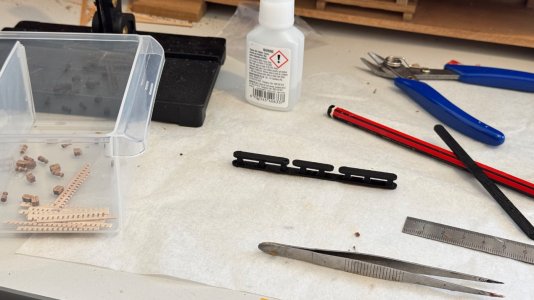
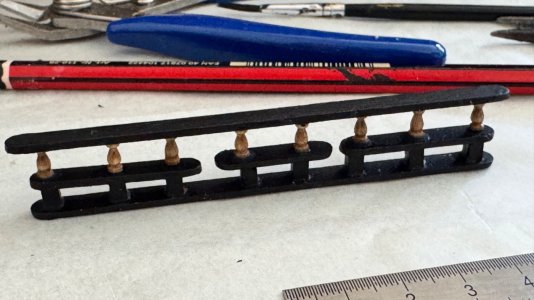
As for what’s next — I’ve begun building components for the next level up. In the last photo, you can see my workbench with the black-painted railing section I’ve started assembling. It’s slow and delicate work, but seeing it all come together is worth every minute.

Stay tuned — more to come as I work my way up the decks! ⛵

IMG_8158.jpeg

IMG_8157.jpeg

IMG_8159.jpeg

IMG_8161.jpeg
 
Model Shipbuilding Progress – HMS Victory Bell Tower & Deck Fittings..⚓

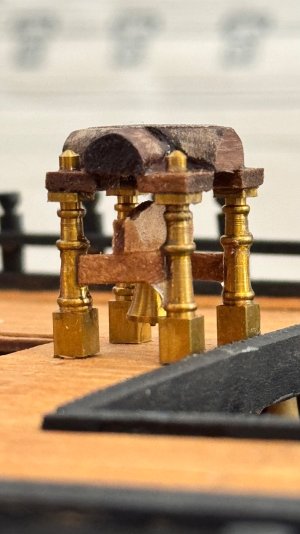
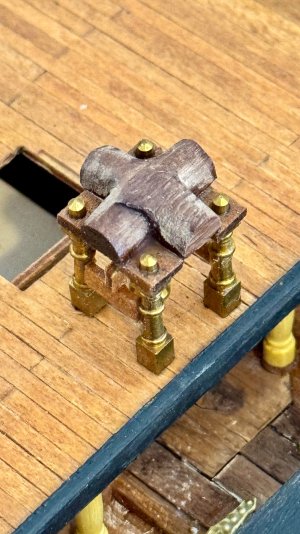
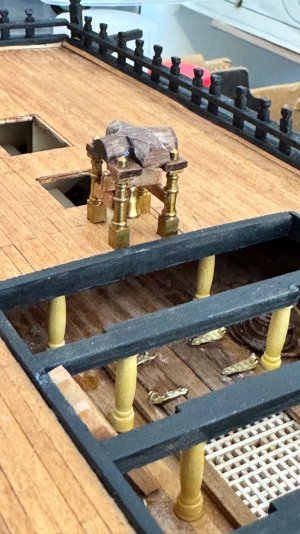
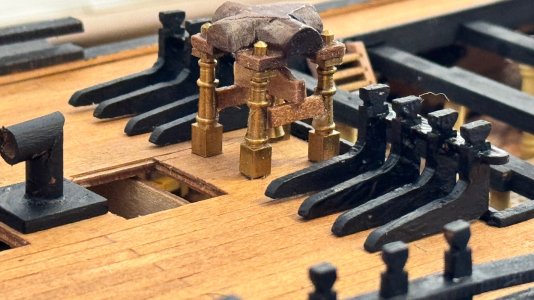
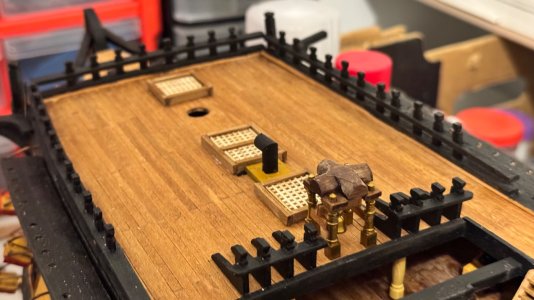
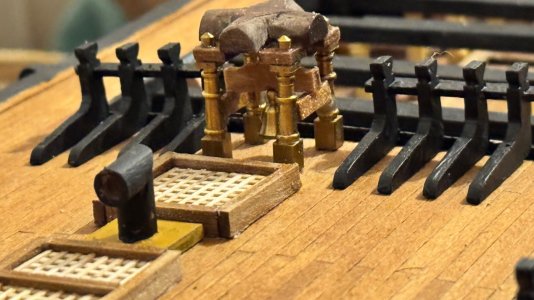
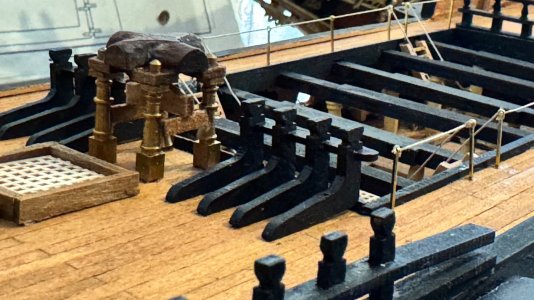
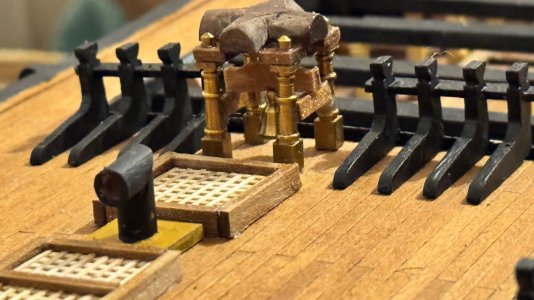
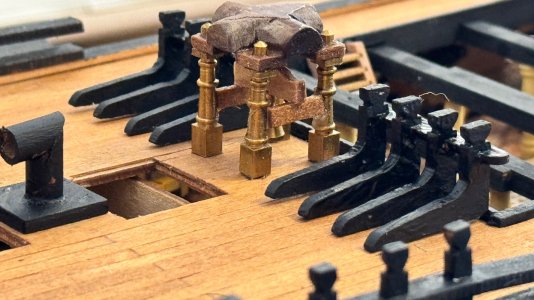
Another milestone ticked off on my Mantua HMS Victory build! Today I completed assembling the bell tower, a beautifully detailed piece that adds real character to the upper deck. It features finely turned brass columns supporting a timber arch with the ship’s bell tucked underneath — a striking focal point now proudly standing on deck.

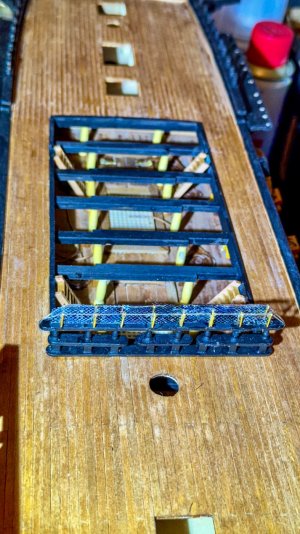
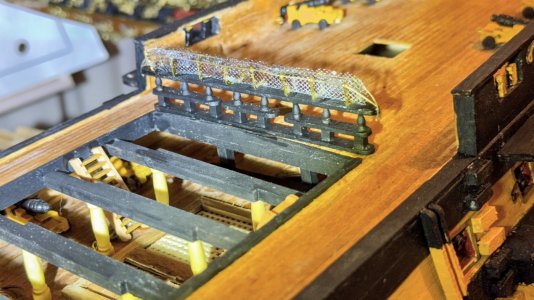
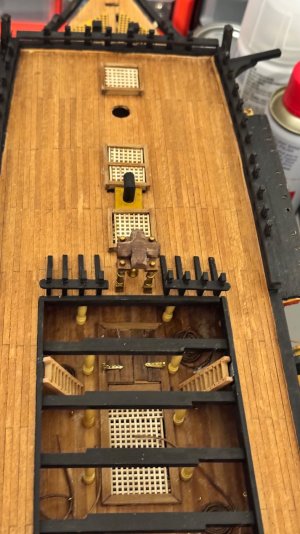
Alongside the bell tower, I also added several additional deck fittings and elements that are really starting to bring this model to life. You’ll notice the newly crafted grates, fine latticework, and timber detail — all carefully aged to reflect the ship’s active service history.

I’m really enjoying the level of intricacy involved in these components. It’s these small builds that make the whole model feel alive and authentic.

Bell tower complete
Additional deck structures added
⚓️ Detailing continues one plank and fitting at a time!

Still a long journey ahead, but I’m thrilled with how she’s coming together.

IMG_8172.jpeg

IMG_8171_jpg.jpeg

IMG_8170.jpeg

IMG_8163_jpg.jpeg

IMG_8166_jpg.jpeg
 
More Progress on the HMS Victory Build! ⚓

Today I focused on completing the forward deck grates and installing additional deck fittings — and I’m really happy with how it’s all coming together.

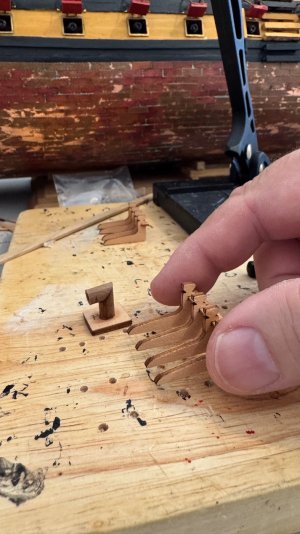
I started by carefully assembling and painting the support brackets for the ship’s bell tower, each one delicately cut and shaped to match the plans. These were then installed around the beautifully crafted bell post structure, which now stands proudly at the front of the deck.

I also installed the black-painted ventilators near the grates, adding more historical detail and function to the upper deck. You’ll also spot the brass posts and timber framing taking shape around the capstan base — each element adding that next layer of realism to the model.

This part of the build really brings the forward section of the ship to life. It’s been a lot of intricate work, but well worth the effort seeing the detail develop step-by-step.

Stay tuned for more updates as the Victory continues to rise!

IMG_8177.jpeg

IMG_8176.jpeg

IMG_8178.jpeg

IMG_8179.jpeg

IMG_8180.jpeg

IMG_8181.jpeg
 
⚓ Mantua HMS Victory Build – Deck Safety & Cannon Prep ⚓

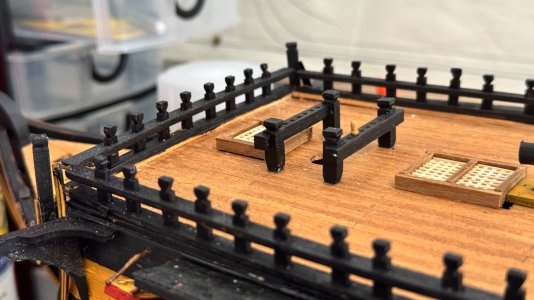
Today’s progress brings an important step in bringing the upper gun deck to life — the balustrades are now in place, adding that essential safety barrier for the crew. These were critical on the real HMS Victory, helping prevent accidents during battle or heavy seas.

I’ve also stored the ropes neatly coiled around the deck — these will be used to lash each cannon securely to the bulwarks during firing. On a ship like Victory, this wasn’t just for show — the recoil from each cannon was massive, and without these ropes, a runaway gun could tear through men and timbers alike.

When fully armed, HMS Victory carried an awe-inspiring 100 cannons, capable of unleashing devastating broadsides in the 17th and 18th centuries. It’s hard to imagine the noise, smoke, and power when this ship went into action!

Bit by bit, the build is evolving into a faithful tribute to this legendary vessel. Next up — more deck fittings and rigging details to bring even more realism.

️ Scale: 1:78
️ Kit: Mantua Panart HMS Victory
⛴️ Era: 1765 – 1805

IMG_8189.jpeg

IMG_8192.jpeg

IMG_8184.jpeg

IMG_8185.jpeg

IMG_8186.jpeg

IMG_8187.jpeg

IMG_8190.jpeg

IMG_8191.jpeg

IMG_8180.jpeg

IMG_8179.jpeg

IMG_8177.jpeg
 
Quick question….

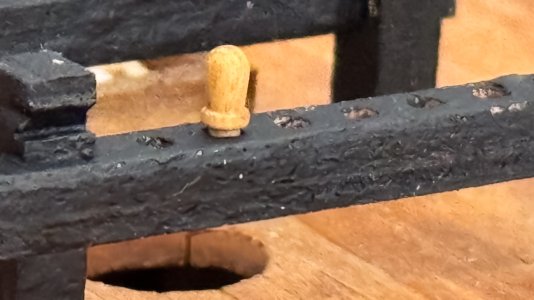
These plugs for the ropes. Are they supposed to be glued in place first? Or do you wrap the rope around at at the base and press in?

View attachment 536640

View attachment 536641
Good morning. Seeing this build brings back some fun memories of my first ship build a few years ago. It is a fun kit and is pretty challenging. Lovely work so far and keep having fun. I really enjoy the look you with your hull coppering. The belay pins are to be glued in place first and then you tie off the rope onto them once you have rigged the respective line. Cheers Grant
 
Good morning. Seeing this build brings back some fun memories of my first ship build a few years ago. It is a fun kit and is pretty challenging. Lovely work so far and keep having fun. I really enjoy the look you with your hull coppering. The belay pins are to be glued in place first and then you tie off the rope onto them once you have rigged the respective line. Cheers Grant
Thanks Grant.
 
Hello, I am just learning about these pins, I used to run the line through the hole first then put the pin in. Today I find out if I thread the line from the bottom instead of the top it is not as noticeable, but apparently this is cheating lol , after you hang a rope coil it not noticeable. I find this method easier than tieing them which can be done , just not by this Neanderthal lol. Hope it helps.
Bobby K ‼️
 
Model Shipbuilding Progress – HMS Victory (Mantua 1:78 Scale) ⚓

I’ve recently begun work on this stunning Mantua HMS Victory model—a build that was generously gifted to me. It’s a magnificent kit and I’m thoroughly enjoying bringing it to life!

Copper Plating
The hull came with quite a bit of tarnish on the copper plates, but instead of stripping it back, I chose to seal and preserve the patina. I love the aged look—it adds realism and gives the impression of a battle-worn ship that’s seen years of service at sea.

Cannon Ports and Ropes
I’ve finished mounting all the cannon doors, and they’re now fitted with opening ropes—each one hand-tied and secured in place. It adds so much character to the sides of the hull, especially with the red and yellow detailing that really makes the gun ports pop.

Deck Work Begins
Deck planking has been cleaned and oiled, and I’ve started detailing the internal cannon bays and deck structures. I’m focusing on adding realistic touches like brass hinges on the deck hatches and careful wood staining to bring out the grain and contrast between levels.

This is just the beginning—still lots of rigging, masts, and fittings ahead. But it’s really starting to take shape!

Plans in the background keep me honest.


️ Patience and details make the difference.
View attachment 536061

View attachment 536062

View attachment 536063

View attachment 536064

View attachment 536065


View attachment 536067

View attachment 536068

View attachment 536069

View attachment 536070


View attachment 536071

View attachment 536066
LOOKING GREAT
The qualit of the wood id great
When you start the rigging
Do he BowSprit and Lower Masts first
Rig Bowsprit to Fore then Main and finally Mizzen
You can get it all lined up
I would have suggested you fix the Gun POrt Lids after Rigging as they get in the way You might be able to cover them as the rigging snags in them
Dont forget the Ratelines on Victory are WHITE
ENJOY
 
Hello, I am just learning about these pins, I used to run the line through the hole first then put the pin in. Today I find out if I thread the line from the bottom instead of the top it is not as noticeable, but apparently this is cheating lol , after you hang a rope coil it not noticeable. I find this method easier than tieing them which can be done , just not by this Neanderthal lol. Hope it helps.
Bobby K ‼️
That’s how I thought it was done. Run the rope through then place the pin to hold in place.
 
LOOKING GREAT
The qualit of the wood id great
When you start the rigging
Do he BowSprit and Lower Masts first
Rig Bowsprit to Fore then Main and finally Mizzen
You can get it all lined up
I would have suggested you fix the Gun POrt Lids after Rigging as they get in the way You might be able to cover them as the rigging snags in them
Dont forget the Ratelines on Victory are WHITE
ENJOY
Thanks.

Almost all the lines supplied in my kit are light coloured. More like white.

There is only a shortish length of black ropes supplied.
 
Mantua HMS Victory – Deck Detailing Progress ⚓

More progress made today as the deck fittings continue to take shape. Several key features have now been installed, adding more life and authenticity to the build.

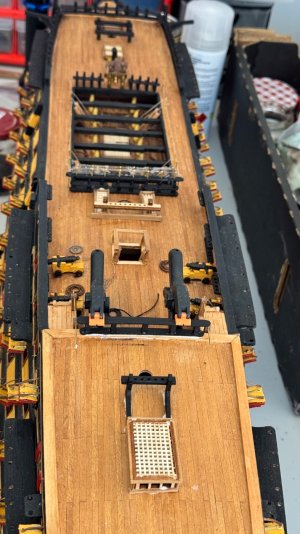
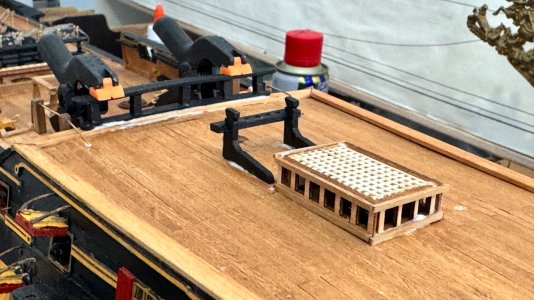
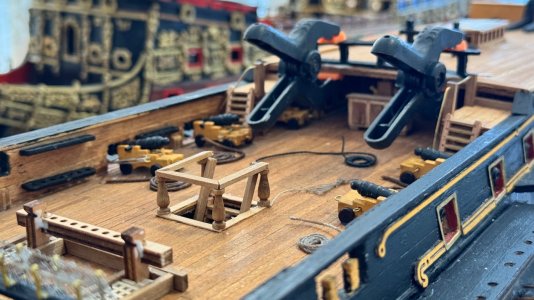
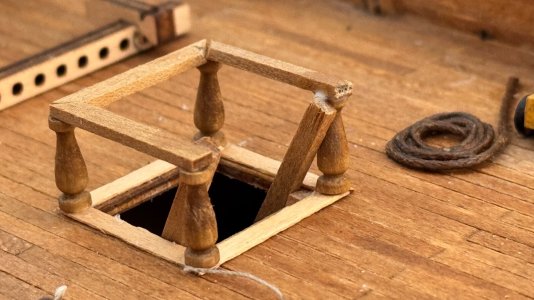
On the upper decks, the cannon stations are now in place, complete with finely crafted carriages and scale rigging preparations. The companionway openings have been framed with elegant turned balusters, giving a refined yet functional look that mirrors the real ship’s design.

Forward, the grated hatches have been added, providing realistic ventilation points for the lower decks. The boat supports are also fixed in position, ready for the ship’s boats to be mounted later in the build.

The stern area has received its railing and decorative framework, giving a true sense of the ship’s commanding presence. Small details like the rope coils, stairs with rail supports, and deck furniture really bring the Victory’s character to life.

Each step now feels like she’s slowly transforming from a bare deck into a fully equipped warship of the line.

Next up – more fittings, more rope work, and the beginning of the intricate rigging stages!

⚓ Scale: 1:78
Kit: Mantua Panart HMS Victory
Build Stage: Deck fittings installation

#HMSVictory

IMG_8209.jpeg

IMG_8208.jpeg

IMG_8207.jpeg

IMG_8206.jpeg

IMG_8205.jpeg

IMG_8198.jpeg

IMG_8195.jpeg
 
Back
Top