INTER-ACTION HOBBIES' PADDLE STEAMER C.R. LAMB 1:48

Joined
Oct 7, 2021
Messages
306
Points
168

Location
Toronto Canada
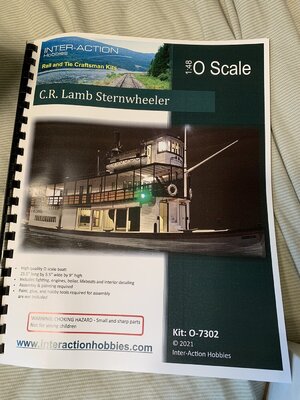
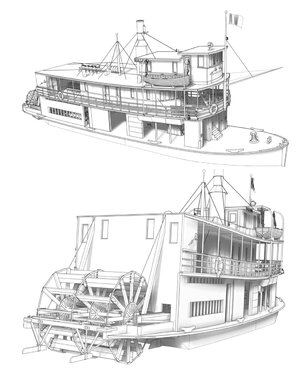
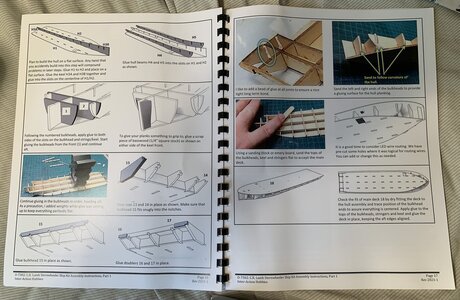
This is the beginning of my build log for the CR Lamb, an early 20th century sternwheeler. I found this kit thanks to a fellow modeller. Inter-Action is a Canadian-based hobby supplier that seems to be focussed on train scenery and diorama items. This is their only ship kit (as far as I know). I was very impressed when I opened the box. The materials seem first-rate in quality and there are 2 cerlox bound binders with detailed descriptions, photos and illustrations.This is the most detailed and comprehensive set of build instructions I have seen in a kit - a sample of a a few pages is included below.Screen Shot 2023-07-04 at 12.14.10 PM.pngIMG_5952.jpgLamb descripotion.jpgCR Lamb descrip 2.jpginstructionsd page sample.jpg
 
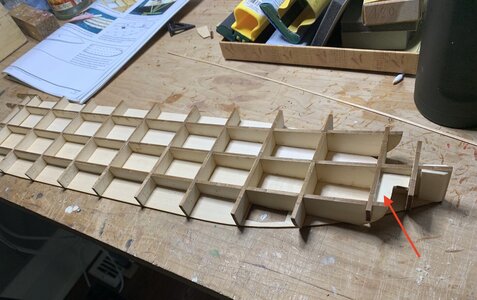
Putting the hull framing together was not complicated. A pleasant surprise is that all the laser pieces are cut very cleanly with only one spot where you need a cutting blade to cut through and release the piece. I did need to file and sand to make the bulwarks fit cleanly into the keel pieces. The fit is quite tight and in trying to push the bulwark onto the keel, I broke a piece off. You can see where I reattached the piece adding a small piece of scrap to reinforce the repair.
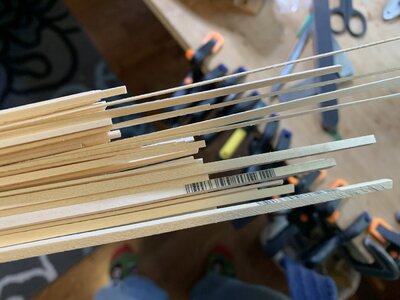
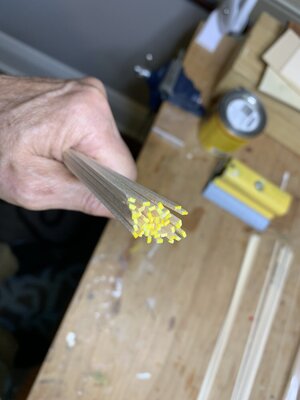
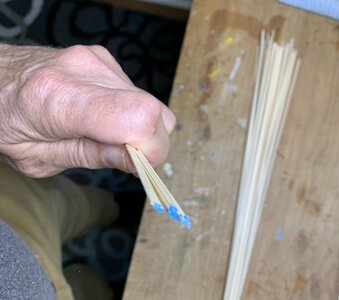
While the wood strips were not packed according to dimensions, each of the sizes are colour-coded, so it wasn't hard to sort them.

IMG_5961.jpg

IMG_5962.jpg

IMG_5964.jpg

IMG_5997.jpg

IMG_5998.jpg
 
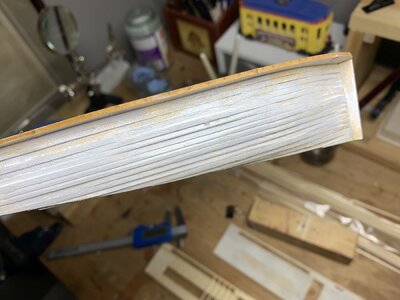
I've been working on the hull and some of the portions of the deck structures. I have decided that this boat has had some hard service and is badly overdue for some repairs and repainting. So I didn't smooth out the hull - in fact the real boat seems to show a slight lapping. Also the hull planks are exactly to scale for the full-size boat. The hull planks are only 2 mm in width and quite thin, so not a lot of leeway for much sanding. For the finish, I am covering the hull and walls with an alcohol/India ink wash, followed by some dry brushing with white paint. Rust spots etc. to follow.
The components of the kit - hull planks, etc. are totally within the actual scale of the real thing. Hull planks are 2 mm wide. The interior wall studs are 1 x 2 mm, which equates to the actual 2" x 4" of the full-size boat. In fact our own house, built over a hundred years ago, also has 2" x 4" studs. The kit's instructions are not in metric, but in Imperial units - inches, etc.. Canada has been metric for over 50 years, but interestingly, some of the trades - carpentry, house-building, etc. still use measurements in feet and inches. Fortunately I have a caliper and rulers that covers both, so this is not much of a problem.

Because the pieces are quite fine, I have to be very careful. it's not hard to break things especially along the grain.

IMG_6008.jpg

IMG_6010.jpg

IMG_6009.jpg
 
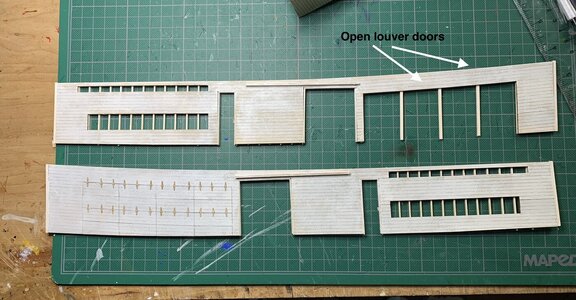
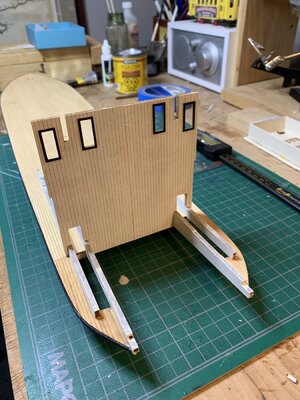
Working on the main deck structure. This is the section that will house the boiler and engines. The instructions suggest that you can leave the louver doors open or closed or partially open or closed. I opted to keep one side completely open. This will give a good view into the engine room. The aging process was not that difficult. I gave the walls a wash of alcohol with a few drops of India ink. This darkened everything, then 2 coats of white paint, but dry-brushed it on.
IMG_6011.jpgIMG_6013.jpgIMG_6015.jpgIMG_6016.jpg
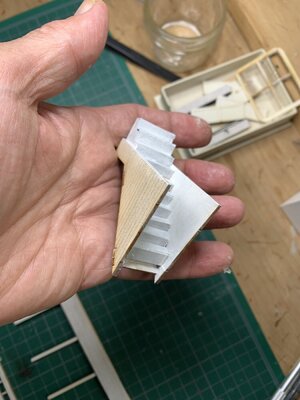
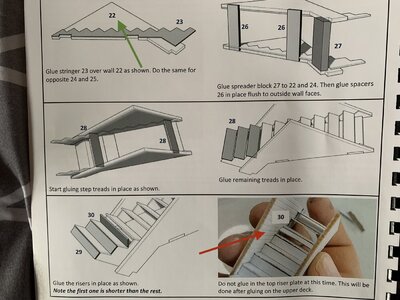
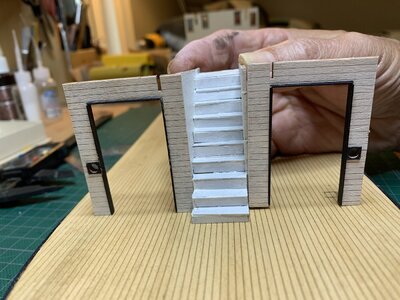
I made a small error building the staircase that goes from the deck to the second level. The staircase walls are scribed planking on one side only. This is the side that should be in the inside of the staircase. As you can see from my arrows, my walls have the scribed planks on the exterior. I should have looked ahead to lower on the page to see the correct configuration (red arrow).

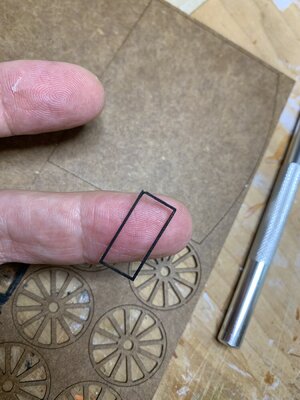
Some of the parts are very small and delicate, so care is needed. To give you an idea, one photo shows a window frame that fits onto the tip of my finger!
 
Working on the main deck structure. This is the section that will house the boiler and engines. The instructions suggest that you can leave the louver doors open or closed or partially open or closed. I opted to keep one side completely open. This will give a good view into the engine room. The aging process was not that difficult. I gave the walls a wash of alcohol with a few drops of India ink. This darkened everything, then 2 coats of white paint, but dry-brushed it on.
View attachment 384409View attachment 384410View attachment 384411View attachment 384412
I made a small error building the staircase that goes from the deck to the second level. The staircase walls are scribed planking on one side only. This is the side that should be in the inside of the staircase. As you can see from my arrows, my walls have the scribed planks on the exterior. I should have looked ahead to lower on the page to see the correct configuration (red arrow).

Some of the parts are very small and delicate, so care is needed. To give you an idea, one photo shows a window frame that fits onto the tip of my finger!
Hi Carl. Just found your build-log of this lovely model. Nice to see the build of another paddle steamer.
It’s looking very promising.
Regards, Peter
 
I just ordered the model. I’ll be following your build. Don’t think I’ll do weathering though. Never did much before on models and don’t want to screw it up.
Hi Submarinerblue. The weathering wasn't that difficult, but I did have some practice on a previous build. When you receive the kit, let me know. There is a simplfiied set of instructions for doing the lighting and wiring, and I can send that to you.
 
Hi Carl. Just found your build-log of this lovely model. Nice to see the build of another paddle steamer.
It’s looking very promising.
Regards, Peter
Hi Peter,
I just had a look at your Robert E. Lee. That is an amazing piece of craftsmanship!! Your faithfulness to the original, the precision and detail is like nothing I have seen before!!!
 
Hi Submarinerblue. The weathering wasn't that difficult, but I did have some practice on a previous build. When you receive the kit, let me know. There is a simplfiied set of instructions for doing the lighting and wiring, and I can send that to you.
Thanks for offering the simplified instructions for wiring. Are those separate from the ones that come with the kit?
What do you mean by “dry-brushing“ the white paint.
My kit is supposed to arrive July 19. Just putting the finishing touches on my HMS Sphinx.
 
Thanks for offering the simplified instructions for wiring. Are those separate from the ones that come with the kit?
What do you mean by “dry-brushing“ the white paint.
My kit is supposed to arrive July 19. Just putting the finishing touches on my HMS Sphinx.
Yes, I emailed Darryl at Inter-Action Hobbies with questions about the lights wiring and he sent me a sheet that is not included in the package.
Dry brushing is not difficult. There are quite e few videos on how to do this. dry, First I darkened the wood by giving it a wash of an alcohol and india ink mix. (A few drops of India ink in about an ounce or so of alcohol. After it dries, you dip a brush in paint, then wipe some of it off, and then drag the brush across the surface you want to paint. I did 2- 3 coats of this. One video how to:
https://finescale.com/how-to/2022/06/how-to-dry-brush-paint-on-a-scale-model
I attached a short video of how I was doing the dry-brushing. First a wash of india ink/alcohol (a few drops of india ink in about an ounce or so of alcohol - the more ink, the darker the wash). Then after it dries, brushing on some white paint. The kit's instructions suggest first dry-brushing a grey colour before dry-brushing the white. However, I am quite happy with just dry-brushing paint white and foregoing the grey.

 
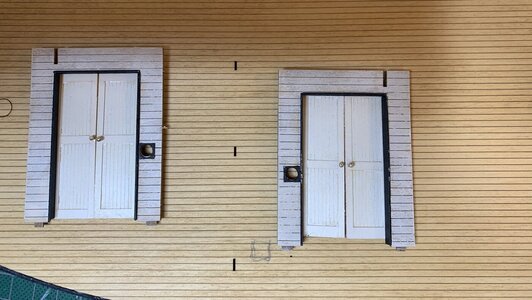
Another 10 days of intermittent work on the kit. I've stained the main deck, added and built the rear wall and the structure that will house the paddle-wheel. Also built the components of the front wall - doors and staircase to the second deck. I accidentally put the staircase walls inside out - the scribed side should be facing the stairs. Too late!!! I don't think it will make as huge difference once everything is assembled.

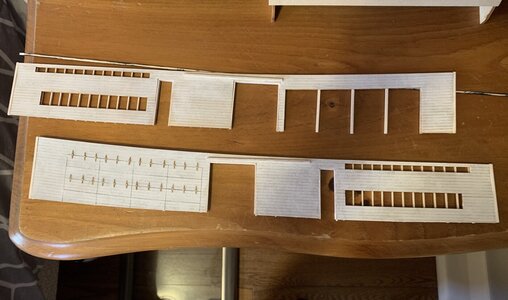
I also built the side walls that will mount on the main deck. I have decided that the various louver doors will be wide open on one side (permitting a view of the boiler), while the other side will have the louvers closed. Theses doors were opened during warm weather and also to permit the loading of wood , etc..

IMG_6057.jpg

IMG_6058.jpg

IMG_6059.jpg

IMG_6060.jpg

IMG_6061.jpg
 
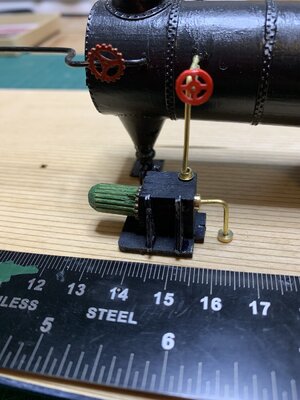
At this point the instructions suggest building out the walls for the main deck. Once the walls are up then it's time to construct and add the engine components- the boiler and steam cylinders, etc. However do not put up the walls until the engine components are built and installed. Once the walls are up it is very difficult to assemble the engine. There is a lot of fiddly stuff in mounting the engine and the walls make it very challenging. You would have to assemble everything from the top. Even the manual's writer mentions this - he had put the walls up first. In addition, some of the components are very, very small (see photo of valves). You need a lot of room and dexterity to get these mounted.
IMG_6064.jpgIMG_6068.jpg
 
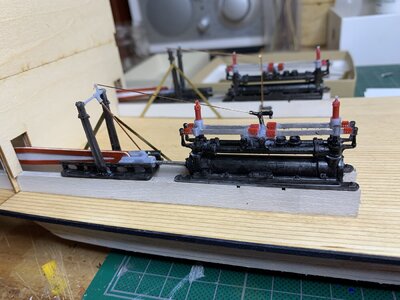
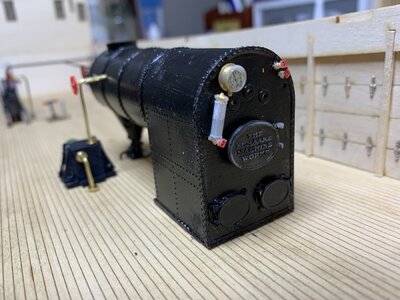
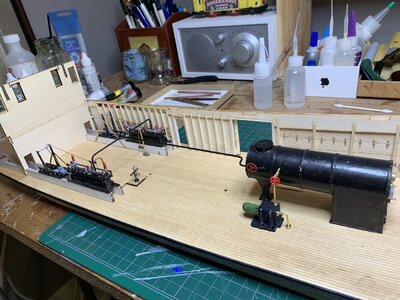
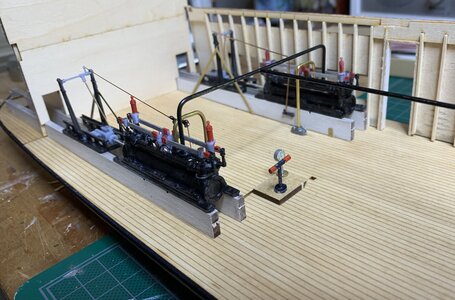
I finished the engine room fittings. The kit does not include any materials for the steam pipes, leaving it up to the builder to fashion their own. I built the pipes from brass 1.5 rods and connected them to the intakes for the cylinders, and also added steam output pipes, leading below deck. Many boats like this - this one was built in 1904 and lasted into the 1930s - had electric lighting so I made a steam-powered electric generator, made from bits and pieces from other projects. I still have to add other things - storage for the firewood, maybe a steam safety valve. But most of the finicky work is done.IMG_6074.jpgIMG_6075.jpg

IMG_6077.jpg

IMG_6078.jpg

IMG_6079.jpg
 
Back
Top