Kurt's Canoe Build 19"

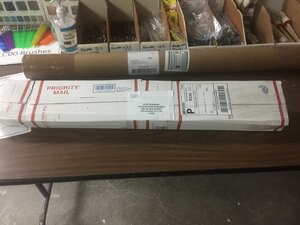
Well small start today.

I pulled out build board base and sanded smooth all edges to make sure I got no splinters.

I figured the nice square board didn’t need much but to be safe with all the handling it will get in future.

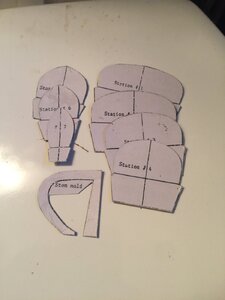
Next is to reprint bulkhead molds out at new correct size as listed in other build log.

Enough for one night!
 
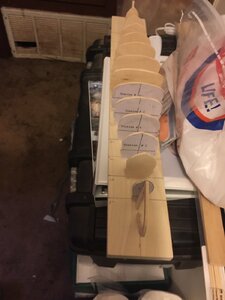
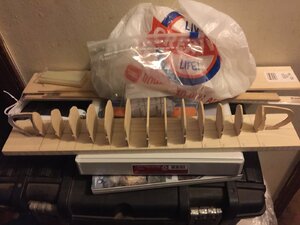
I have gotten my build board remarked with 1 1/4" spacing and started cutting out station molds.

I am trying to do this all by hand, but I am much better on scroll saw then hand coping saw in following the lines.

I am working on sanding all station molds now to make them even for both ends and from side to side, done with Sta # 1 & 2 so far.

Should have them mounted on build board next week, more photos to come, as mine look like most others in Gilles guides.
 
soon..., it will be a canoe fleet! Well, it will be 17" and 19" fleets to be precise! :) Good start, Kurt!
 
Well after a bit of vacation to go play Trains for first time in months, I am back on the canoe again

I died a few strips in raw umber wood stain, letting them soak all the way thru the wood strip so it would stay the same while sanding takes place later.

These are my fifth row down. I now have nine rows done am started the turn from sides towards bottom of the canoe. Looking more like it should with each row added. Hope to keep a slow pace with several rows a day to get hull basic assembly done in a week!

A2D0EE3F-B4EF-4DBF-B0A6-BA5A1594B721.jpeg
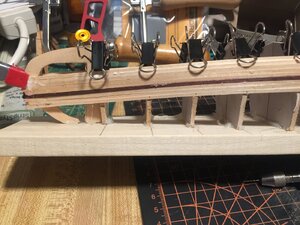
Close up of stained accent strip installed

4E971B5E-9356-4670-86CB-EAC6715CD4F1.jpeg
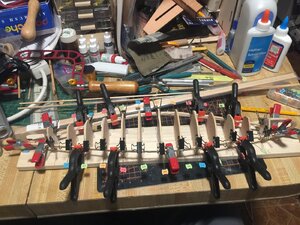
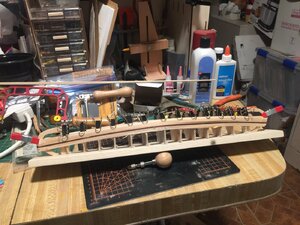
Wide view of build so far. Now to let glue dry for a few hours!
 
Looking good Kurt.
Just a bit of advice: try to remove the excess glue as you go along inside and out.
For the outside, You can either wipe it off right away or wait a bit until it sets, and scrape / cut it off with a sharp blade. Personally, I wipe it off if there is just a little bit: if there is a lot I wait a few minutes and run a blade to take it away before it is completely dry, this way it come right off without spreading it further.
For the inside, run your finger along the joint to avoid ending up with large drops or runs: these may be a pain to sand off: they are with the glue I use.
To avoid excess glue oozing in the inside, I concentrate on applying the glue to the strip closer to the outside edge of the hull. When the strip is laid the glue should spread towards the inside when you lightly press on the strip.

Applying small amount of glue along the strip is possible using a toothpick or small applicator.

G.
 
Thanks for advice, will try to do that for rest of strips.

Kurt
It looks like from your last photo you are about five strips ahead of my own start. I had problems with the form stations coming loose and had to go to Titebond (probably bad choice) as a couple were pivoting on the pins like cat entry doors. Same adhesive for the strips but I am going slow to be sure that the last application is solid before going to the next strip. Maybe too cautious but I would rather have things in place than sliding around. Not all stations are smooth lines even though the centerlines are correctly placed. . . my cutting and sanding to shape variances which I didn't see from the paper templates but only after the second strip was laid. Using more lateral pressure now to better follow the curves as the planks progress upwards (down to the keel). Probably last guy to the beach but I can live with that. Early arrivals can catch all of the mosquitoes!!! PT-2
 
Hi Kurt.
A question came up
"Where did I get my hand drill from?"

Since the one you use is identical to the one I use and I have no idea what brand it is (the one with the wooden ball-handle) .... Where did you get yours from? Online?
Thank you.
G.
 
My stations started wiggling and twisting also.

I stopped by Hobby Lobby and got a length of 1” x 1/4” balsa and cut fillers to glue between stations, just make sure they are far enough down not to interfere with planking. Cost about $2.50 for 24” strip!

Helped out a lot!

Next hardback build will have them from start.

Gilles mentioned this in one of his posts, so not my idea.
 
Hi Kurt.
A question came up
"Where did I get my hand drill from?"

Since the one you use is identical to the one I use and I have no idea what brand it is (the one with the wooden ball-handle) .... Where did you get yours from? Online?
Thank you.
G.
Let me check where I think I got it! If old memories are correct it was Fast Track in CA sold online in tools section!

Easy buy for you guys really up north!

Kurt
 
Back
Top