Lady Nelson - Amati 1:64

Thanks @donfarr. As @Clair G and @Heinrich have mentioned the heat method is an extremely good method to use with those thin planks. Do check out @Heinrich's build log(the last two pages I think) he shows an excellent tutorial of building his longboat, which is using the exact same planks.
I too have the Leudo kit which I am looking forward to starting soon.
@shota70 Thanks, nice to have you stop by
 
Hello all, how are things today? Hopefully all is good and you are all enjoying a good day of modelling.
A little update for you:
IMG_3362.jpg
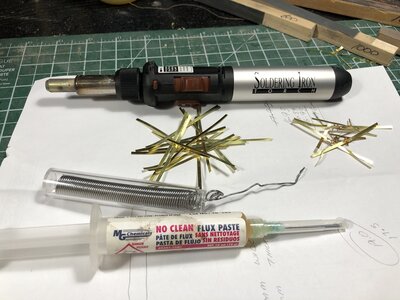
Making some pintles and gudgeons. Simple procedure using a small torch, flux and solder. The brass strips are cut from a roll of .005" brass using a guillotine type paper cutter. I had a picture of this process but seemed to have misplaced it! o_O
IMG_3384.jpgIMG_3385.jpg
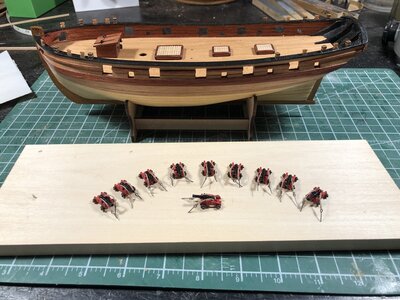
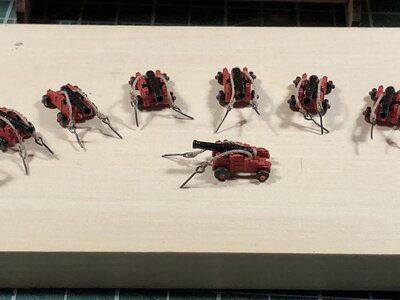
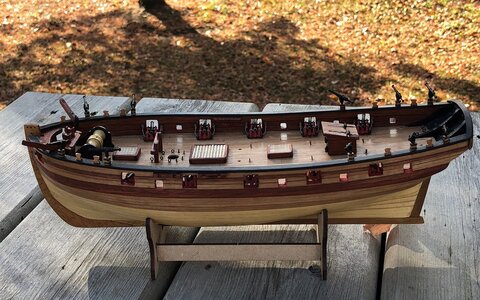
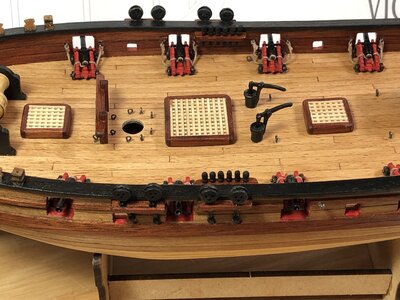
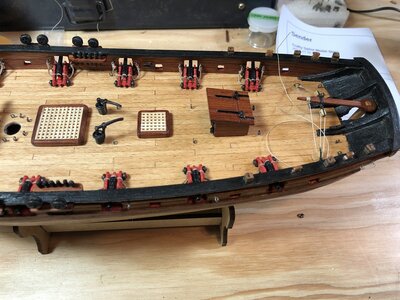
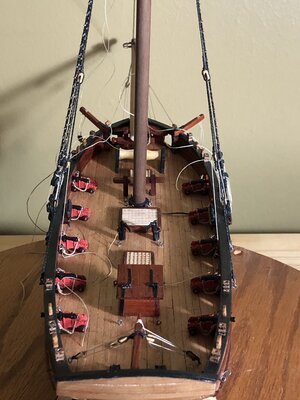
Guns are painted and rigged. The carriages are tiny little metal things so no further rigging will be done

IMG_3386.jpg
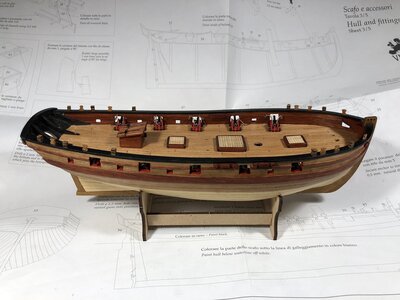
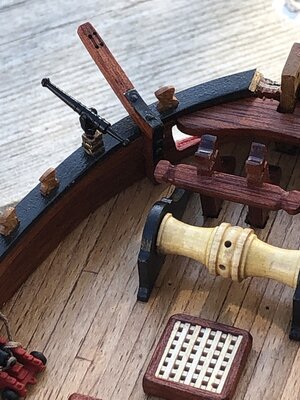
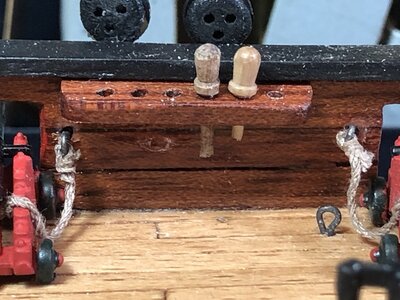
Guns temporarily in place. Posts for swivel guns installed and the timberheads both made from cherry. The swivel posts have two bands of blackened brass on them. Again I had pictures.....maybe I should be updating more often so I don't lose so many pictures!! DAH

IMG_3391.jpgIMG_3392.jpg
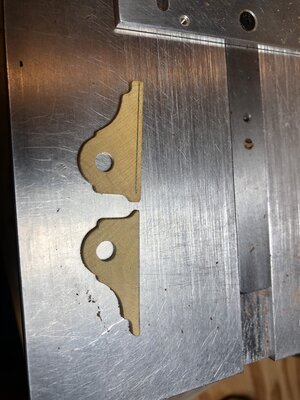
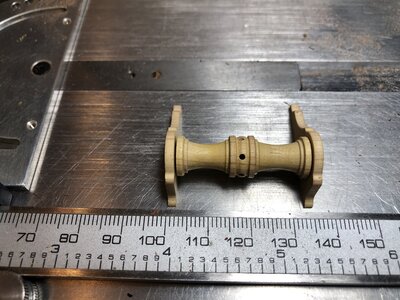
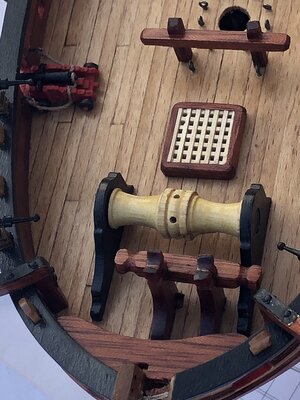
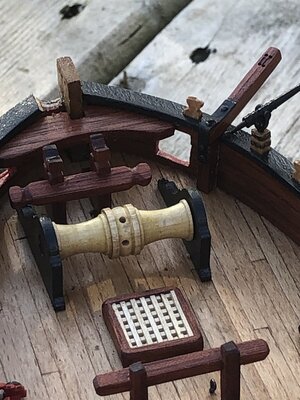
The windlass was much too large for my liking so I decreased it in height and in width. These pictures are showing how much I decreased the height. I wanted to save the windless as it seems like it is made of boxwood.

IMG_3398.jpgIMG_3401.jpg
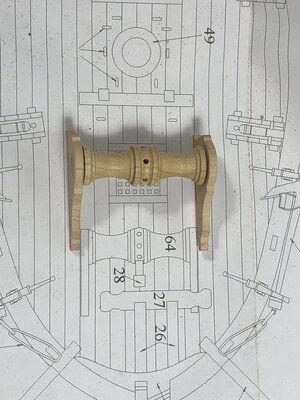
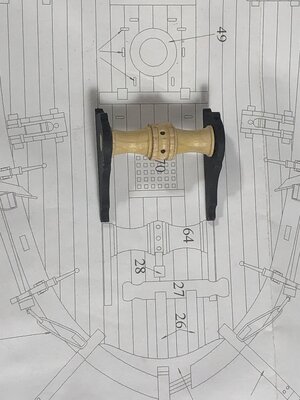
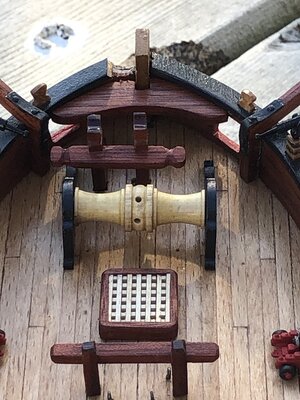
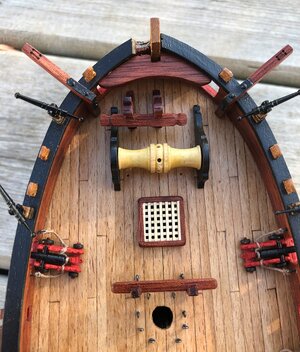
And here I have decreased the width. As you can see it did not originally even match the plans. Part 28 I have omitted completely for two reasons, one a pawl would not be used with this style of windless and two it is already crowded at the bow no need for it to be cluttered up with something that is useless.

IMG_3395.jpg
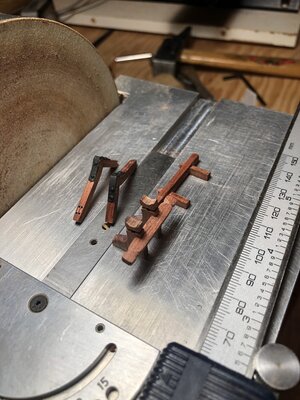
Here I have remade the catheads, bowsprit bitts and the main mast bitts out of blood wood. I should mention that the kit made bowsprit bitts(27) were way to tall and need to be shortened otherwise the bowsprit will be pointing down. I saying this if I were to do it again I would not carve out the square holes in the deck but just plank over them. The reason for this is the kit supplied bitts have little square pegs on the bottom that will need to be sanded off thereby rendering the holes in the deck useless.

IMG_3418.jpg
The windless is not glued into place yet, it is still awaiting a sanding and some wipe on poly.

IMG_3422.jpgIMG_3423.jpgIMG_3424.jpgIMG_3427.jpgIMG_3429.jpg

Thanks for stopping in and checking things out

Later
 
This will be my build log for the Lady Nelson. My plan is to finish in short time as it is going to be a gift so hopefully I don't burn out and I do get it done on time. There will be some bashing done, mainly changing some of the kit wood to try and avoid some of the painting.
I started this yesterday so what you see today is what I have completed as of today. Total of seven hours worked so far including reading instructions and going over plans
I hope you enjoy and thanks for watching.
View attachment 170553View attachment 170554View attachment 170555View attachment 170556
The grand box opening. As you can see there is not much so I do not anticipate this taking too long. They do include running and standing rigging, however, there are some sizes you need to blacken yourself. This will be part of the bashing :p. There are no markings on the billets so you need to use their plans to find the right pieces. So far they have had two of the bulkheads and the bow and stern filler pieces marked wrong in the plans. The wood strips are decent enough but I will most likely be replacing some of the outer layer of planking. They call the limewood strips 5 mm wide but they are actually 6.5 mm, more for your money I guess! The rest all looks good for a kit such as this.

View attachment 170557
The bulkheads all fit and there were no problems, they were a little loose so one has to be careful keeping them square.
For all you haters of mdf board this kit is not for you. Myself I love this stuff it is always straight and makes fairing the hull so much easier.
A word of caution, though, is to not get it wet as it will come apart. REALLY!! I am just so thankful my work area is not the bathtub or the public swimming poolo_OROTF
So be careful and do not get it wet, place your beer or beverage far enough away as not to cause a hazard.

View attachment 170558
Getting ready to bend the gunport strips. I give them a quick dip in water and then run them over the curling iron. In less than a minute they are done.

View attachment 170559
View attachment 170560
And here they are ready to apply

View attachment 170561
I forgot to take a picture but the false floor has been installed, it went in very easy with no alterations required.
The gunport sides have been glued in place. The upper parts of the bulkheads, above the deck, will be removed later on so minimal glue is used to ease in removal and clean up. Here I am just showing how I ran a bead of glue on the underside of the floor to help secure the gunport sides.

View attachment 170562
As I said I am doing this one fast, so I have started planking while the glue is drying on the gunport pieces. LOL
To save time on edge bending the planks I have soaked the planks. ALL planks are being tapered on both ends. To figure this out I measured the widest bulkhead(#5) and took that measurement and divided by 6.5(the width of the planks) and this came out to eleven, which is the number of planks required to cover the hull. For each other bulkhead I measured, then divided that number by eleven which gives me the width the plank needs to be at that specific bulkhead.
So at bulkhead two, first one at the bow, it measured 45 mm I then divide this by the number of planks required(11) and come out with 4 mm. This tells me the plank needs to be tapered to a width of 4 mm at this bulkhead. In doing this and checking periodically I should not require any stealers.
View attachment 170563
I got ahead of myself on that last picture. The explanation applies to this one

View attachment 170564
And here is where I am at now. Four strakes on both port and starboard sides of the hull. Off to the right you can see some of my calculations for tapering the planks.View attachment 170565
Save final trimming at the stern until planking is completed
View attachment 170566
Here on the bow you can see on the left where I have the planks shaved right down to the bulkhead, this is required to get the second planking to fit properly. on the right hand side it may look rough but it is actually smooth, that is the layers of plywood you are seeing.
That is it for now, I need to get outside and cut about five acres of grass and get my garage cleaned up from building the battle station I just finished.

Take Care and Thanks for looking in
Did you taper the planks at the stern? Also, did you blacken the edge of the deck planks? The video I am following on my build tells me to do both. I am reluctant to use pencil on the plank edge -- it is a small deck to scrape later to clean up.
 
Hello and good day to all. Happy Thanksgiving to all Canadians and anyone else who is celebrating this day.
A very small update to show today:
IMG_3441.JPG
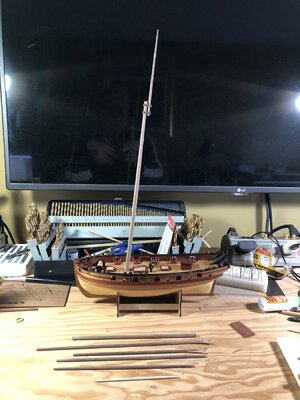
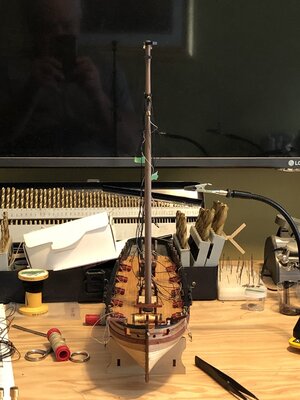
All masts and spars are made. To me they all seem a little too bulky, but they are made according to the plans. They will all be painted black so hopefully that will help somewhat. The mast is not attached just there to test fit, a lot of mast for such a small ship. Painting and attaching blocks and etc, will be next.

IMG_3442.JPGIMG_3443.JPGIMG_3444.JPG
But..... before anymore modelling continues a little cleaning is required first. LOL Then the garage modelling area is next, pictures to follow.

Take Care and easy on the turkey
 
Hello all, thanks for dropping in, also thanks for the likes and comments. Much appreciated
Today's update is not much especially when compared to @shelk Santisma Trinidad latest update. If you haven't already you really should check it out it is truly amazing what he is doing with that kit.
Anyways here is my meagre update:

IMG_3430.jpg
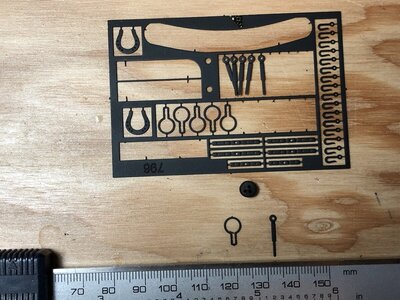
First up is the chainplates.. These photo etched parts may look nice but they are a real bugger to assemble. Getting the one part around the deadeye is a challenge, you need to really stretch and deform them in order to fit. Once you do get them around and squeezed together the narrow end of the second piece then slips through the bottom part of the first piece then bent over to hold it in place. Soldering or gluing is then needed to hold it together, I used ca glue as I pre-painted all the parts. So with all this bending and deforming weak spots are created, I have had one fall off. To repair I re-attached using epoxy, this might be something to consider for those building this kit(install using epoxy).

IMG_3445.jpg
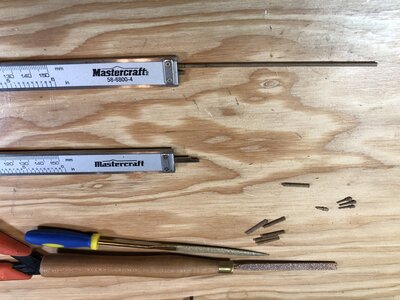
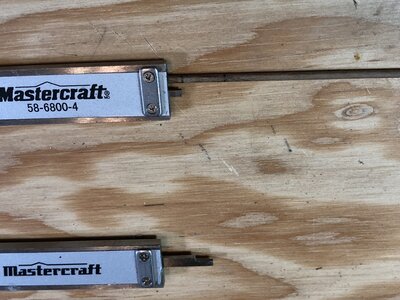
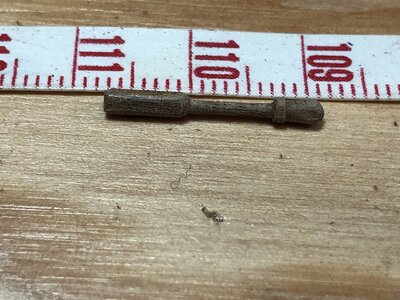
The one thing that bothers me with many kits is the length of the belaying pins, they are always too short making rigging even more difficult. So I decided to replace the kit ones with some homemade pins. Using my rotary tool, some 2 mm dowel(toothpicks would work fine too) and a couple of files I made some new ones. I preset my calipers one for the length of the handle(4 mm) and the other for the length of the pin plus extra to allow for what is inserted in the rotary tool. The files I used are a cheap diamond file and for the shaft I used the flat perma-grit file.

IMG_3446.jpg

Just giving you a better look at my measuring system. This was just to speed things up a little

IMG_3450.jpg

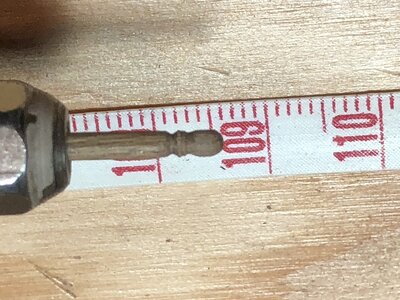
WOW! A real close up o_O So the handle is formed first using the diamond file

IMG_3451.jpg

Then the shaft is formed using the flat perma-grit

IMG_3448.jpg

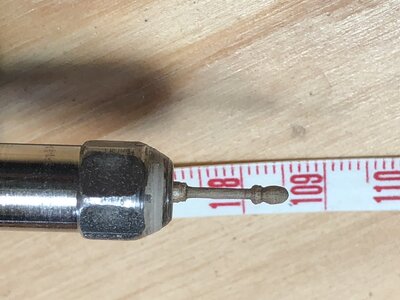
And this how it looks after coming out of the rotary tool

IMG_3449.jpg

Aren't these macro shots useless? This compares the homemade one to the kit supplied one

IMG_3455.jpg

I know, they are hard to see. I gave them a quick bath in India ink and some wipe on poly. I'm happy with how they turned out and I'm sure they will help with the rigging process.
If you look at the deadeye on the right you see a small speck, that is not dust that is the light shining off the epoxy I used to re-attach the deadeye.
Next up is the rigging, which I have already started doing some of the prep work. More to come soon

Thanks again for stopping in and hopefully I did not put you all to sleep!!
 
This will be my build log for the Lady Nelson. My plan is to finish in short time as it is going to be a gift so hopefully I don't burn out and I do get it done on time. There will be some bashing done, mainly changing some of the kit wood to try and avoid some of the painting.
I started this yesterday so what you see today is what I have completed as of today. Total of seven hours worked so far including reading instructions and going over plans
I hope you enjoy and thanks for watching.
View attachment 170553View attachment 170554View attachment 170555View attachment 170556
The grand box opening. As you can see there is not much so I do not anticipate this taking too long. They do include running and standing rigging, however, there are some sizes you need to blacken yourself. This will be part of the bashing :p. There are no markings on the billets so you need to use their plans to find the right pieces. So far they have had two of the bulkheads and the bow and stern filler pieces marked wrong in the plans. The wood strips are decent enough but I will most likely be replacing some of the outer layer of planking. They call the limewood strips 5 mm wide but they are actually 6.5 mm, more for your money I guess! The rest all looks good for a kit such as this.

View attachment 170557
The bulkheads all fit and there were no problems, they were a little loose so one has to be careful keeping them square.
For all you haters of mdf board this kit is not for you. Myself I love this stuff it is always straight and makes fairing the hull so much easier.
A word of caution, though, is to not get it wet as it will come apart. REALLY!! I am just so thankful my work area is not the bathtub or the public swimming poolo_OROTF
So be careful and do not get it wet, place your beer or beverage far enough away as not to cause a hazard.

View attachment 170558
Getting ready to bend the gunport strips. I give them a quick dip in water and then run them over the curling iron. In less than a minute they are done.

View attachment 170559
View attachment 170560
And here they are ready to apply

View attachment 170561
I forgot to take a picture but the false floor has been installed, it went in very easy with no alterations required.
The gunport sides have been glued in place. The upper parts of the bulkheads, above the deck, will be removed later on so minimal glue is used to ease in removal and clean up. Here I am just showing how I ran a bead of glue on the underside of the floor to help secure the gunport sides.

View attachment 170562
As I said I am doing this one fast, so I have started planking while the glue is drying on the gunport pieces. LOL
To save time on edge bending the planks I have soaked the planks. ALL planks are being tapered on both ends. To figure this out I measured the widest bulkhead(#5) and took that measurement and divided by 6.5(the width of the planks) and this came out to eleven, which is the number of planks required to cover the hull. For each other bulkhead I measured, then divided that number by eleven which gives me the width the plank needs to be at that specific bulkhead.
So at bulkhead two, first one at the bow, it measured 45 mm I then divide this by the number of planks required(11) and come out with 4 mm. This tells me the plank needs to be tapered to a width of 4 mm at this bulkhead. In doing this and checking periodically I should not require any stealers.
View attachment 170563
I got ahead of myself on that last picture. The explanation applies to this one

View attachment 170564
And here is where I am at now. Four strakes on both port and starboard sides of the hull. Off to the right you can see some of my calculations for tapering the planks.View attachment 170565
Save final trimming at the stern until planking is completed
View attachment 170566
Here on the bow you can see on the left where I have the planks shaved right down to the bulkhead, this is required to get the second planking to fit properly. on the right hand side it may look rough but it is actually smooth, that is the layers of plywood you are seeing.
That is it for now, I need to get outside and cut about five acres of grass and get my garage cleaned up from building the battle station I just finished.

Take Care and Thanks for looking in
Hallo Don, alias @DonRobinson ,
we wish you all the Best and a HAPPY BIRTHDAY
Enjoy your special day
Birthday-Cake
 
Thanks for all the birthday wishes, really appreciated.
Well the rush is on now to finish this girl so here is an update:

IMG_3383.jpg
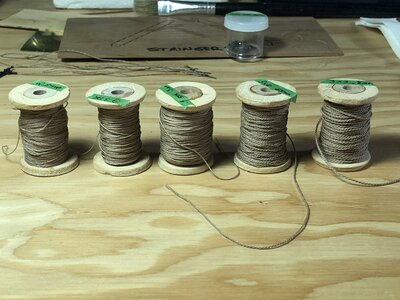
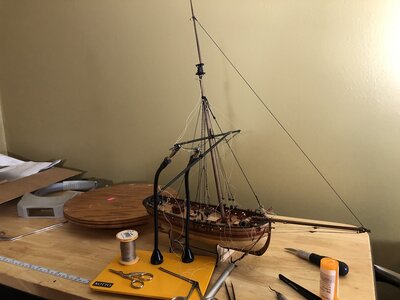
I took some time off the build to make some rigging thread, I use Gutermann thread along with the Domanoff ropewalk to make this.

IMG_3459.jpg
I installed the rigging to the tiller, the plans did not show this but in some of the pictures this can be seen. A note to this is that doing this and some other things ran me short of blocks later on

IMG_3465.jpg
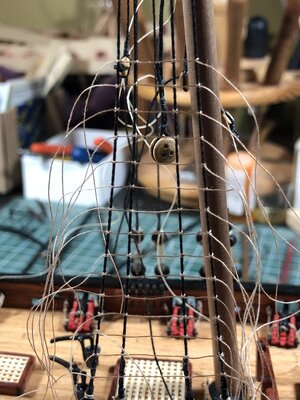
Mast is permanently installed complete with shrouds, backstays, and braces

IMG_3471.jpg
Ratlines being tied

IMG_3475.jpg
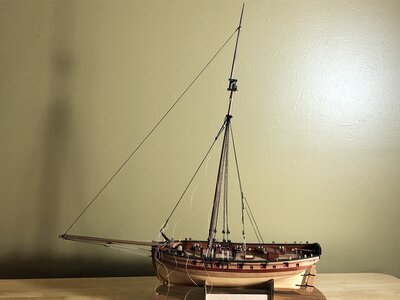
Standing rigging completed

IMG_3479.jpg

IMG_3480.jpg

IMG_3488.jpg
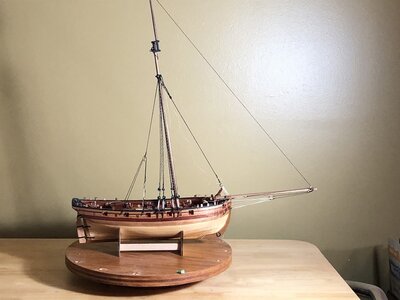
And this is how she looks this morning. First yard is attached complete with braces and lifts, second one is in the process and should be completed this morning.
You can notice on the top mast two blocks, these are for the lifts which are not included in the plans but an addition on my part as are the two braces on the bowsprit.

Thanks for checking this out and I hope to report more in a very short time.
 
Hello Don, Happy Birthday Again, Sorry I just found your build on the Lady Nelson, Just have not been my self this year, loosing our son last Dec. and then this case of Shingles that cut me down last May with so much pain that ship building is all but impossible but I do try to do a bit on the better days.
Just love your choice of wood and there great blending all together they sure do make a nice ship, very pleasing to ones old eyes, Well Did. Your build is coming along nicely, Sorry again that I misted it up to now.
Regards Lawrence
 
Back
Top