Hello all, thanks for dropping in, also thanks for the likes and comments. Much appreciated
Today's update is not much especially when compared to
@shelk Santisma Trinidad latest update. If you haven't already you really should check it out it is truly amazing what he is doing with that kit.
Anyways here is my meagre update:
View attachment 185370
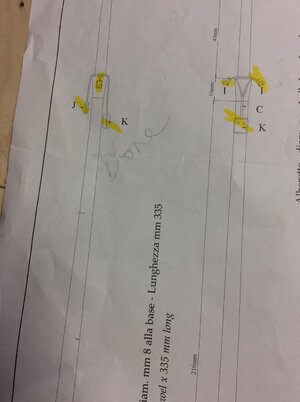
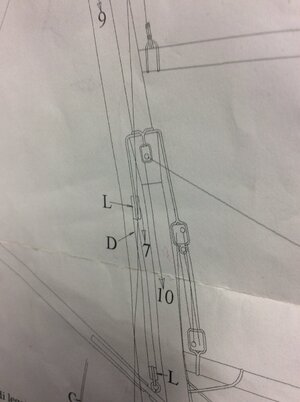
First up is the chainplates.. These photo etched parts may look nice but they are a real bugger to assemble. Getting the one part around the deadeye is a challenge, you need to really stretch and deform them in order to fit. Once you do get them around and squeezed together the narrow end of the second piece then slips through the bottom part of the first piece then bent over to hold it in place. Soldering or gluing is then needed to hold it together, I used ca glue as I pre-painted all the parts. So with all this bending and deforming weak spots are created, I have had one fall off. To repair I re-attached using epoxy, this might be something to consider for those building this kit(install using epoxy).
View attachment 185371
The one thing that bothers me with many kits is the length of the belaying pins, they are always too short making rigging even more difficult. So I decided to replace the kit ones with some homemade pins. Using my rotary tool, some 2 mm dowel(toothpicks would work fine too) and a couple of files I made some new ones. I preset my calipers one for the length of the handle(4 mm) and the other for the length of the pin plus extra to allow for what is inserted in the rotary tool. The files I used are a cheap diamond file and for the shaft I used the flat perma-grit file.
View attachment 185372
Just giving you a better look at my measuring system. This was just to speed things up a little
View attachment 185375
WOW! A real close up

So the handle is formed first using the diamond file
View attachment 185376
Then the shaft is formed using the flat perma-grit
View attachment 185373
And this how it looks after coming out of the rotary tool
View attachment 185374
Aren't these macro shots useless? This compares the homemade one to the kit supplied one
View attachment 185377
I know, they are hard to see. I gave them a quick bath in India ink and some wipe on poly. I'm happy with how they turned out and I'm sure they will help with the rigging process.
If you look at the deadeye on the right you see a small speck, that is not dust that is the light shining off the epoxy I used to re-attach the deadeye.
Next up is the rigging, which I have already started doing some of the prep work. More to come soon
Thanks again for stopping in and hopefully I did not put you all to sleep!!


![IMG_3974[1].JPG](https://shipsofscale.com/sosforums/data/attachments/195/195328-2547ad0a743e61daca05115b35dc8424.jpg?hash=JUetCnQ-Yd "IMG_3974[1].JPG")
")