• LUCZORAMA SHIPWRECK SCAVENGER HUNT GIVEAWAY. 4 Weeks of Fun • 1 Legendary Prize ((OcCre’s Fram Ship)) • Global Crew Welcome!
    **VIEW THREAD HERE**

Layout for copper plates

Joined
Oct 1, 2023
Messages
1,487
Points
393

I don't know how to lay out for the copper plates. All the models I've seen show the copper plates parallel to the keel and waterlines but following a rounded contour in the middle.
How do I know how many rows to go parallel to the keel before transitioning to the curved rows. How much curve, etc.
Most of the beginner books I purchased don't mention the plates and to one that does says to follow the plating diagram on the plans
Of course, my plans for have this.
Could someone direct me to a source where I can learn how to do the layout
Thank you,
Ted
 
I'm starting to think the plates curve in their own without layout.
That, 'they' do. There are various ways of dealing with the curvature(s) of different styles of hulls. My 'second' video is probably the most common method used. What ship is it that you are modeling? There 'could' be a better way. It depends on the shape of the hull.
 
That, 'they' do. There are various ways of dealing with the curvature(s) of different styles of hulls. My 'second' video is probably the most common method used. What ship is it that you are modeling? There 'could' be a better way. It depends on the shape of the hull.
I'm building the HMS Jalouse. A semi bottle nosed warship. I think I have the general just iff the methods to be used after all these videos. I will just start it and resort to rework if needed.

Thank you all for your assistance
Trd
 
Whatever you do should look just fine. It's really hard to use an improper layout for coppering. Put your 'artistic' glasses on and keep an eye on the curves and lines. If something looks like it is going to wind up curving too much, if you continue with your current lines, just cut the plates level to begin another new waterline and keep going. ;) Also, you might want to think twice about 'overlapping' your plates as they would have been on the full-sized ship. Our models are too small and those overlapping plates just look bad and totally out of place. Butt them together for better effect at modeling scale. ;)
 
Whatever you do should look just fine. It's really hard to use an improper layout for coppering. Put your 'artistic' glasses on and keep an eye on the curves and lines. If something looks like it is going to wind up curving too much, if you continue with your current lines, just cut the plates level to begin another new waterline and keep going. ;) Also, you might want to think twice about 'overlapping' your plates as they would have been on the full-sized ship. Our models are too small and those overlapping plates just look bad and totally out of place. Butt them together for better effect at modeling scale. ;)
I think MThomas is correct there is no need to overlap the plates. Some articles I have read about coppering suggests filling the curve and then when it gets too much several rows of "belts" parallel to the waterline then continue.

Rob
 
Whatever you do should look just fine. It's really hard to use an improper layout for coppering. Put your 'artistic' glasses on and keep an eye on the curves and lines. If something looks like it is going to wind up curving too much, if you continue with your current lines, just cut the plates level to begin another new waterline and keep going. ;) Also, you might want to think twice about 'overlapping' your plates as they would have been on the full-sized ship. Our models are too small and those overlapping plates just look bad and totally out of place. Butt them together for better effect at modeling scale. ;)
Thanks for the advice on the overlapping and using a level line if it looks out of order. I'm looking forward to starting toe coppering
 
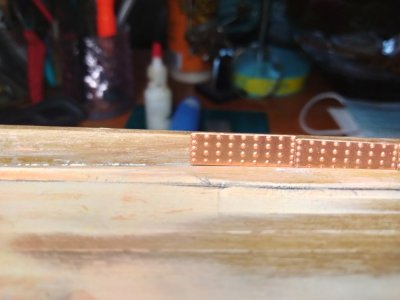
The small variance of the d pth of the keel is leaving the copper plates high
Should I cut it off the bottom as the plate to the right or should I cut the top (bottom of the keel location)?
Should it be cut before glued up or filed afterwards?IMG20250610184019.jpg
 
If the rest of your planking will not involve ovelapped plates, then I would trim it. When you plank the bottom of the keel, the edges of those planks can fold over the edge so that you get a consistent line of riveting along the whole length. Perhaps not the most historically accurate approach, but should effectively camouflage the variance in keel depth. Just my $0.02.
 
Last edited:
If the rest of your planking will not involve ovelapped plates, then I would trim it. When you plank the bottom of the keel, the edges of those planks can fold over the edge so that you get a consistent line of riveting along the whole length. Perhaps not the most historically accurate approach, but should effectively camouflage the variance in feel depth. Just my $0.02.
Thank you, I'll fold it
 
I've been using CA glue for the copper plates. It is surprising how easily they pop off
Should I get something different

A number of things could cause that Ted.

Wrong viscosity. I would use a medium or thick CA, definitely not thin.

Old CA. If your bottle has been open for 3 or 4 months, it may not be curing properly.

Oils/fingerprints on the surface of the plates. I would use acetone or isopropyl alcohol to clean the back side. It might not hurt to make a few passes with some fine sandpaper or steel wool first, then wipe with solvent. You can prepare a bunch at a time, then seal them in a baggie. After that, only handle them with tweezers.

If you are brave and have steady hands, you could mist the hull with a little aerosol CA accelerant prior to placing the plate. You can do a small area at a time, it will last for a few minutes, but just a light misting. Do this only if you have steady hands - once you place the plate, it will kick in about 3 seconds.
 
Back
Top