Le Coureur 1776, CAF model 1:48 by Poul

Joined
May 15, 2020
Messages
763
Points
353

Location
Roskilde Denmark
I'm still waiting for the HMS Alert 1776 kit which I wanted to make my very first build. For now I do not want to build 2 kits simultaneously so it will most likely take a long time before I start on Le Coureur. However, I have been waiting since May and since I received Le Coreur kit from CAF I have struggled daily to keep my hands away from the boxes. Yesterday evening I could no longer resist to at least try to put one of the small accessories together. Thus I started on one of barrels and already there I run into a few questions so I decided to make a premature build log. The sole purpose of also this log will also be to ask questions and receive all the help and guidance I can get so that I and perhaps other rookies can learn and improve. Hence once again, please don't be shy with the criticism and advise. All comments are appreciated.

Coming back to my barrel questions: The instructions calls for 2 layers of staves. I wonder why that is? Was barrels back then made with 2 layers IRL? It is also not clear to me if the outer staves should be located directly on top of the inner staves or should the outer stave overlap the joint between 2 inner staves?
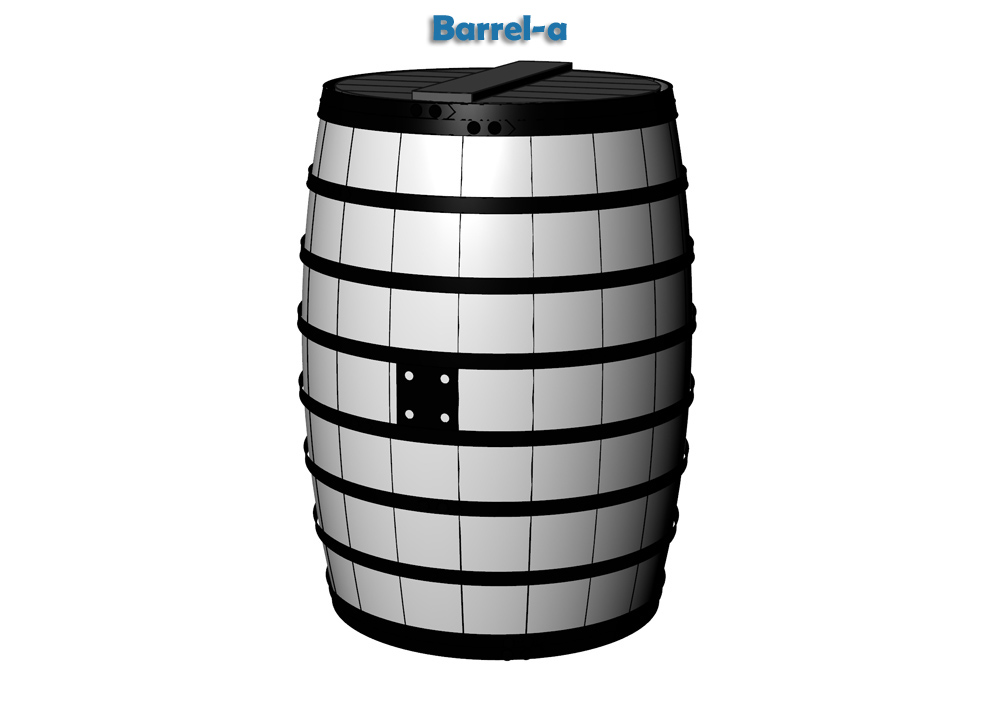
Also, the circumference has now increased by approx. 2.83mm. At least in the center of the barrel 12 staves fitted pretty accurate in the first layer, so should I now leave a gab of 2.83/12 between each of the staves? Or should I have sanded the inner structure much more than I did? (too late for this barrel :D )

As of now it look like this:
IMG_0946.JPG
 
Hallo my friend,
I am very happy, that you also started a building log. Starting with the accessories by yourself will help us later one, when we come to this point (still an very long way.
I do not have the kit with me (in my job office in moment), but I have the photos of the kit review with me.
To summarize my understanding:
Content of the kit are 8 barrels
IMG_60981a.jpg IMG_60991a.jpg
We have 8 wooden sheets of veneer with the kit, so every sheet is one barrel - on every sheet are 24 staves - when you write you added in moment for one closed ring 12 -> than the idea of @CAFmodel seems to be correct interpreted with a double layer....

To your question:
original barrels had only one "layer" of staves - definitely
800px-Unfertiges_Fass_9105.jpg Process-of-shaping-staves-for-an-oak-wine-barrel-toneleria-nacional-chile.jpg


CAF prepared two layers, for me the only explanation is, to get a more or less correct thickness of the staves -> to get a better correctness of the scale
=> but than I would lay the second layer parts exactly on top of the first layer parts.......


BTW: Interesting to see, that CAF is also offering a previous version of the barrels with only one layer of staves:
Here one photo from CAF - the thickness of the stave with only one layer looks too thin
99c1c3118b.jpg

 
I did as suggested by Uwe, placed the outer staves directly on the inner staves. This worked out well. As I predicted the gap between the staves became a little wider but I'll live with that. The iron hoops did not work out quite as well. The cyanoacrylate dissolved the brass blackening, the wood became black, everything sticked to my fingers and it was impossible for me to control an equal distance between the hoops all the way around the barrel . Gee what a mess!!! Well, maybe the peeled black and the dirty wood looks kinda natural, lol. Any good ideas how to get those hoops fixed to the barrels without using CA?

I also tried to make a couple of boxes. The first one using the square veneer frame as per instructions but I did not really fancy the look of the grains in the wrong direction on half of the the planks. Also I think it looked too - as they say in China - polished ROTF . Hence I tried making some planks myself to make it a bit more rustic. Left box is with the kit supplied frames. Is it worth the effort?
IMG_0957.JPG
IMG_0963.JPG
 
Last edited:
Very good results, Poul, I really glad you start the build log! Both boxes are looking great, I do like your self-made better. The nails look a bit bigger, IMHO, or try the diagonal nail pattern...On the kit's supplied 'box' they look smaller.

As for the barrels. Did you assemble the staves using PVA or CA? Use PVA for all the woodwork, Solder the ring hoops, blacken them, and once they dry, sand off inside the hoops and glue with a drop of CA (using thick glue).
 
Your barrel is looking very good - good to know that the second layer shall go over the first layer !
Also your boxes are good - and I agree with Jim, that the one with veneer is better because of the grain.
Searched a little bit - really not bad results
70b16001871c25e438530fbbbd7df2b8.jpg T109GM.jpg
 
I'm a weak person. I have a backbone like a chocolate eclair Thumbsdown I couldn't resist anymore. Keel dry-fit:IMG_0964b.jpg
The drawing I used is slightly out of scale, it is a copy, the original drawing is spot on.

BTW: I don't know if it is this way in all kits but in my case the 2 parts of the jig B1 and B2 " should only be close together at the edge at the top of the picture. At the bottom I had to leave a space, maybe 0.5 mm, between the 2 plates. Wise to check the alignment of the 3 keel slots with a metal ruler.
 
Last edited:
1:The fabrication of keel is very important, especially after installation, it needs to match with the bottom of dock
We give a 1:1 keel drawing, and give the specific size in the specification
In order to polish the carbon black, we have allowance for keel and rib design,
There will be accumulated errors in the assembly of multiple parts, so the grinding degree should be adjusted appropriately according to the drawing when installing multiple components
If multiple keel components are directly installed together, the keel will be lengthened

If you need to buy keel plate, please contact me,It's also part of the service
These parts can be supplemented separately

2:It's easier to make a bucket with two layers of wood chips。It can also better control the gap between wood chips

01.jpg
 
That's great. You can keep making,
Rib is a big challenge, every tooth has to be polished, it is a lot of work
He tests a man's perseverance. It took me a month to finish the ribs
Hi Tom. I indeed anticipate spending a long time on the ribs. I think we have all experimented with different methods sanding, fairing and polishing the ribs and tooth (filing, sanding, machine operated sanding drums and wheels). Any advice or tips on this from you?
 
This is a very good question
File,I use a file.
Of course, I have a lot of power tools, but because these teeth are very small, it is easy to make mistakes when using power tools, so I still use the most common file
If his ribs are smooth (similar to the Enterprise), an electric grinder can be used, which improves efficiency
 
Last edited:
This is a very good question
File,I use a file.
Of course, I have a lot of power tools, but because these teeth are very small, it is easy to make mistakes when using power tools, so I still use the most common filehttps://fanyi.baidu.com/###
If his ribs are smooth (similar to the Enterprise), an electric grinder can be used, which improves efficiency
Thank you Tom. After working on the ribs today I decided to use the files only. The result is much more accurate and fine. Really enjoying the build so far and looking forward seeing all the other builds progressing
 
Don't know if anyone has brought this to Tom's attention, but my plan sheet has two sets of plans for ribs 31, 32 and 33. The second set should be 35, 36, and 37.
 
If you need to buy keel plate, please contact me,It's also part of the service
These parts can be supplemented separately

Hallo Tom,
could you please show us in a photo or sketch, what do you mean with this "keel plate" - maybe it is interesting by the one or other modeler.....
 
Back
Top