Thanks for the oil indication.Thank for the comments. The oil will most likely will use is the same I used at previous built (the Brazzera https://shipsofscale.com/sosforums/threads/brazzera-from-marisstella-build-log-completed-build.10769/post-272237)
It is a commercially available protection for tropic wood.
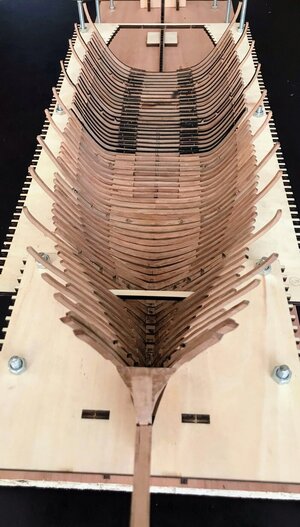
This week, I started with the 'ribs'. The parts need to be glued according to the template and afterwards tapered at both inner and outer side according to a line on the outside of the ribs. The inside of the tapering is adjust to make it parallel to the hull. I hope my pictures clarify it. So far I have finished almost 10 ribs. 'Only' 75 more to go!
View attachment 377872
View attachment 377873
View attachment 377874
View attachment 377875
You are using an out of date browser. It may not display this or other websites correctly.
You should upgrade or use an alternative browser.
You should upgrade or use an alternative browser.
A small update this week: steadily continuing glueing and sanding the ribs. I still did not glue them to the keel, since they will need some fine sanding to avoid thickness variations.
Also, I have been experimenting with coloring/staining the wood. I included a picture of the result. On top is the previously mentioned oil, which is transparent. Below are in principle the same, but with coloring of ‘Royal Teak’ and ‘Mahonie’. The latter is sensitive to the layer thickness and gets more dark with multiple coats. Now I’ll just need to decide, which I will use where.
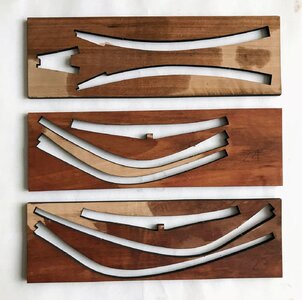
Also, I have been experimenting with coloring/staining the wood. I included a picture of the result. On top is the previously mentioned oil, which is transparent. Below are in principle the same, but with coloring of ‘Royal Teak’ and ‘Mahonie’. The latter is sensitive to the layer thickness and gets more dark with multiple coats. Now I’ll just need to decide, which I will use where.


I like the one in the middle.
I like the one in the middle too. Very similar to the color of oak, already a little aged. Congratulations on the experiments !
I prefer the lighter stain.A small update this week: steadily continuing glueing and sanding the ribs. I still did not glue them to the keel, since they will need some fine sanding to avoid thickness variations.
Also, I have been experimenting with coloring/staining the wood. I included a picture of the result. On top is the previously mentioned oil, which is transparent. Below are in principle the same, but with coloring of ‘Royal Teak’ and ‘Mahonie’. The latter is sensitive to the layer thickness and gets more dark with multiple coats. Now I’ll just need to decide, which I will use where.
View attachment 379248
View attachment 379249
- Joined
- Oct 12, 2022
- Messages
- 11
- Points
- 28

The oil may de-affect you from gluing parts to come
I prefer the lighter as well. Pear has such as subtle grain and rich color in itself, I hate to see it hidden at all. Depending on the adhesive characteristics of the oil you're using, I've had good results with a satin rubbing varnish, like Minwax WIpe-On Poly; looks like oil, no build-up and glues adhere pretty well.I prefer the lighter stain.
Thanks for your suggestion and comments. With respect to glueing: the ’oil’ I’m using is a water based system, containing cobalt bis 2-ethylhexanoate. This makes the oil enter the wood and dry quickly at least in theory. In practice I tried glueing 2 coated pieces and indeed it glues fine.
Good morning. Stunning. She looks “sexy” alreadyFor this week there is no surprising progress. I have been glueing and sanding the ribs. Still all of them are dry fitted, since they will need a second round of sanding to make them fit. I really like the quality and beauty of this ship. More updates next week!
View attachment 380224
View attachment 380225
View attachment 380226
View attachment 380227
The Le Requin is realy a very interesting model - good job
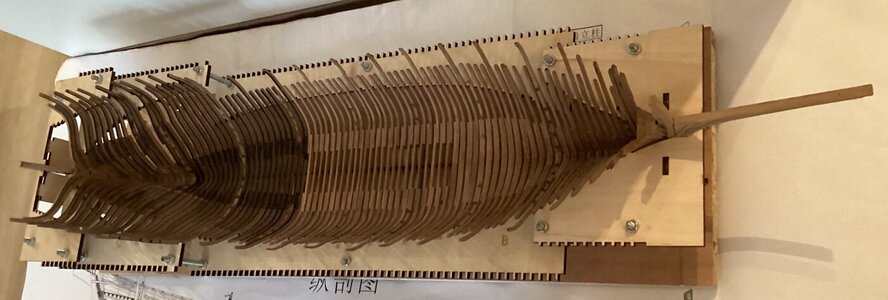
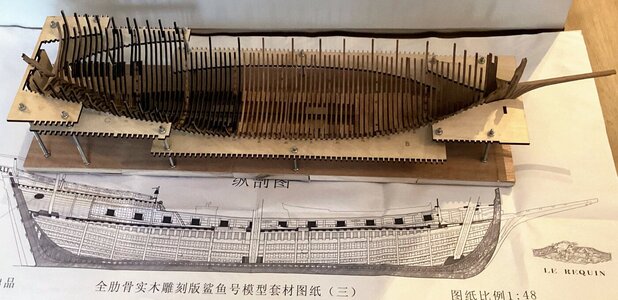
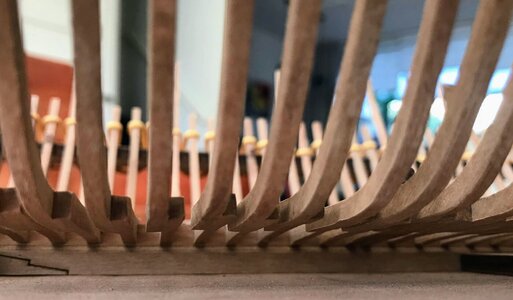
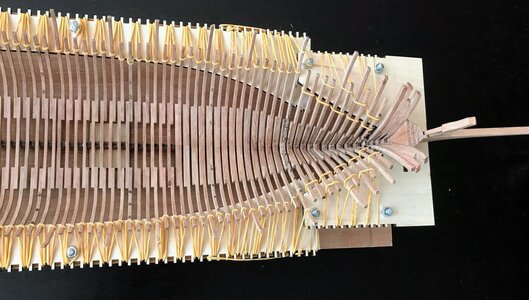
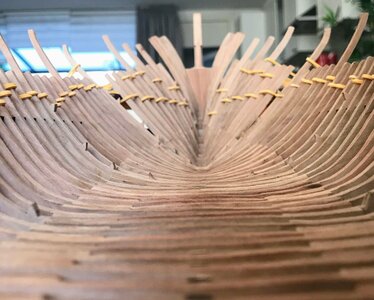
This week, I wanted to finish the sanding of the ribs. Unfortunately, it was too hot to be in my shed. Therefore, I have been checking the next steps. Starting with the elastic bands. They keep the ribs in their place, making it possible to sand the top of the ribs, improving the fitting of the planks. Afterwards, I’ll remove all ribs to stain them including the keel, put back the elastics and glue everything in place. Some fun weeks ahead


- Joined
- Jul 20, 2022
- Messages
- 53
- Points
- 113

- Joined
- Oct 17, 2020
- Messages
- 1,336
- Points
- 393

of course a donkey can never become a track horseno comment :View attachment 382361
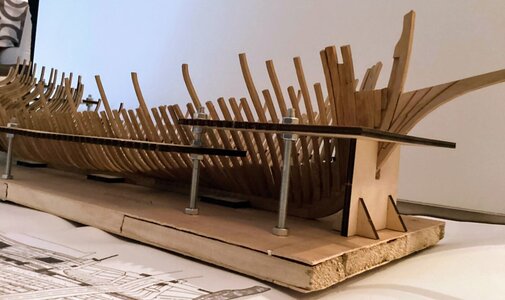
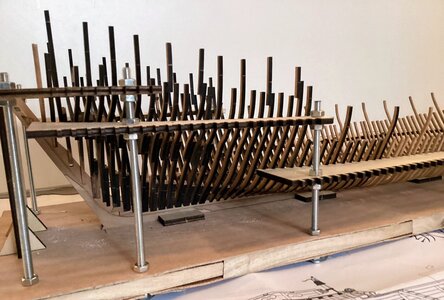
This week I almost finished sanding the ribs. Still a few I did not touch and a few that needs some small adjustments. Getting the curvature on the inside correct needs a few iterations. You can see the pencil lines on ribs that need to more tapering. I hope to start staining next week and make some nice pictures of the result.
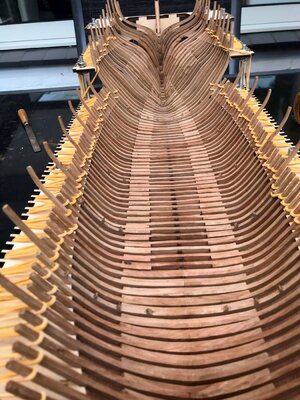
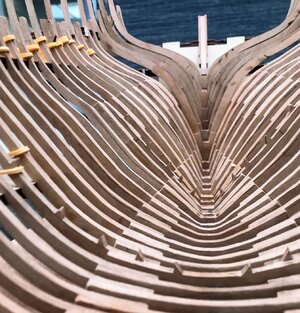
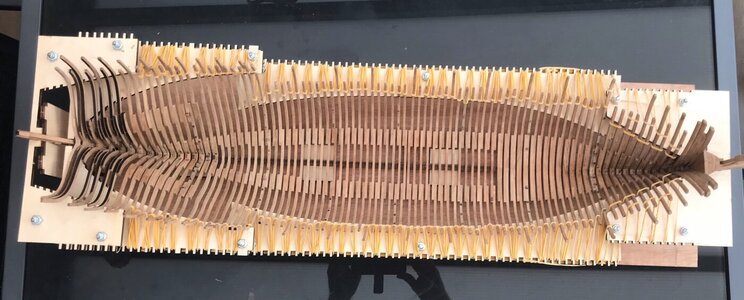


looking good Crypton, I still remember the sore fingers and thumbs sanding those ribs and the swear jar overfilling!!
Good morning. Very impressive. I love the shape and lines. The second photo is so cool. Cheers GrantThis week I almost finished sanding the ribs. Still a few I did not touch and a few that needs some small adjustments. Getting the curvature on the inside correct needs a few iterations. You can see the pencil lines on ribs that need to more tapering. I hope to start staining next week and make some nice pictures of the result.
View attachment 382518
View attachment 382519
View attachment 382520
- Joined
- Oct 12, 2022
- Messages
- 11
- Points
- 28

nice work


