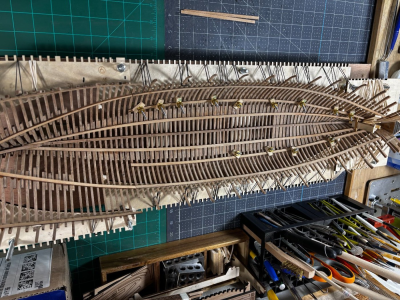
Good afternoon Daniel. From the photo it looks spot on. Deck beams are scary things…..can make or break the symmetry no doubt. You certainly have got these sorted. Cheers GrantHere is a quick how I did it. After setting the upper and lower starboard deck beam supports, I made sure the base support was level in the transverse direction at both ends. Setting the port side beam support was accomplished by leveling over from the starboard side then gluing the strake in place. I'm counting on this method to provide a symmetrical deck once I have it planked out. Check it out.
View attachment 536212
View attachment 536213
As a side note my worktable is just a 4'x2' folding table set up on carpet. During some aspects of my build, I have to level up my jig base board to help insure good symmetry.
Have a good one!
-

Win a Free Custom Engraved Brass Coin!!!
As a way to introduce our brass coins to the community, we will raffle off a free coin during the month of August. Follow link ABOVE for instructions for entering.
-

PRE-ORDER SHIPS IN SCALE TODAY!
The beloved Ships in Scale Magazine is back and charting a new course for 2026!
Discover new skills, new techniques, and new inspirations in every issue.
NOTE THAT OUR FIRST ISSUE WILL BE JAN/FEB 2026
You are using an out of date browser. It may not display this or other websites correctly.
You should upgrade or use an alternative browser.
You should upgrade or use an alternative browser.
Thanks Grant, I now wish the ribs were at least twice as thick. I can sand them down a little but not enough to completely fare the hull as it should be. Not to worry though I intend to do her proud.Good afternoon Daniel. From the photo it looks spot on. Deck beams are scary things…..can make or break the symmetry no doubt. You certainly have got these sorted. Cheers Grant
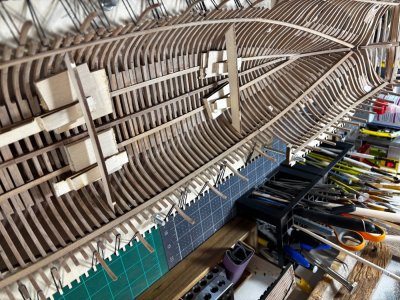
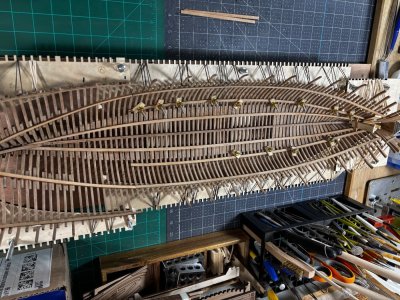
Its Saturday morning in the shipyard, one of my favorite times. I'm starting to pick up a little speed with my progress here. I've been laying in the ships bilge and ceiling strakes below the shelf strakes I started with. The flat area below the frames at the bilge strakes was too narrow to use my thumb screw clamps so I had to block wedge the strakes down until the glue set. Coming up the sides I was able to use my thumb screw clamps.
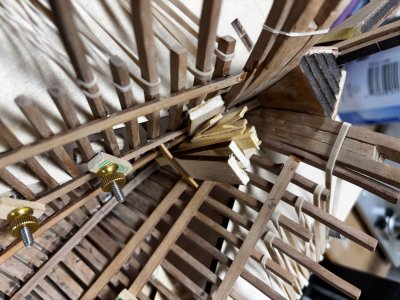
I had to cram a bunch of wedges against a back stop at the bow to hold down the strakes, that a very narrow tight location again precluding the use of thumb screw clamps.
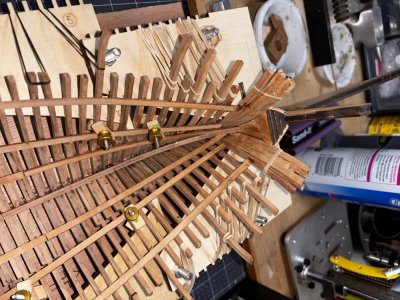
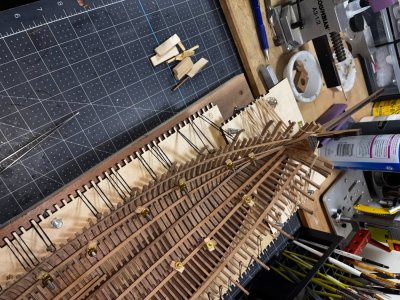
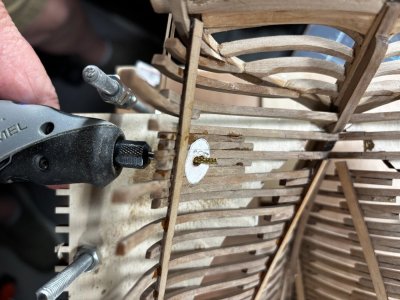
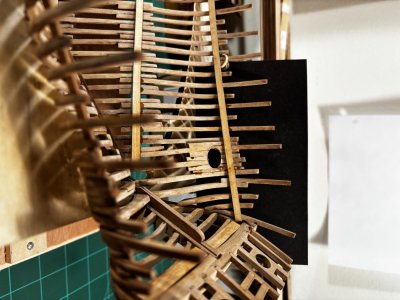
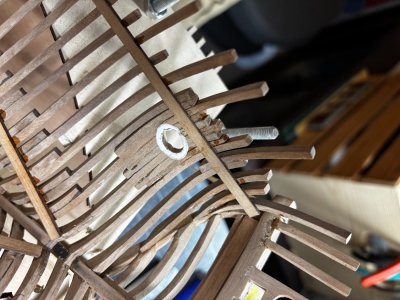
The aft end features a port hole on each side which are oval shaped, I cut out a pattern I traced off the plans, glued them onto the wood frames then drilled and ground out the shape.
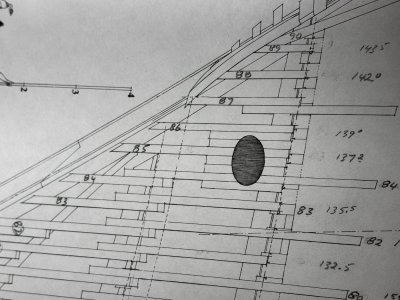
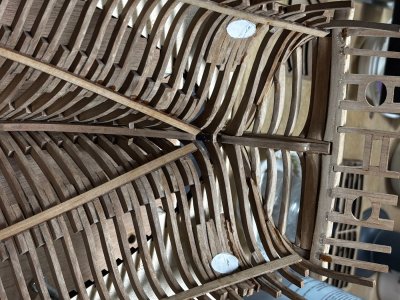
I will not be placing treenails on these strakes as they will never be visible to anyone, but I do plan on using them on the outer hull and deck planks.
I sure thank you all for looking in and have a wonderful weekend.


I had to cram a bunch of wedges against a back stop at the bow to hold down the strakes, that a very narrow tight location again precluding the use of thumb screw clamps.


The aft end features a port hole on each side which are oval shaped, I cut out a pattern I traced off the plans, glued them onto the wood frames then drilled and ground out the shape.


I will not be placing treenails on these strakes as they will never be visible to anyone, but I do plan on using them on the outer hull and deck planks.
I sure thank you all for looking in and have a wonderful weekend.

Beautiful work !
Nice progress, Daniel. I love the ‘bunch of wegdes’.Its Saturday morning in the shipyard, one of my favorite times. I'm starting to pick up a little speed with my progress here. I've been laying in the ships bilge and ceiling strakes below the shelf strakes I started with. The flat area below the frames at the bilge strakes was too narrow to use my thumb screw clamps so I had to block wedge the strakes down until the glue set. Coming up the sides I was able to use my thumb screw clamps.
View attachment 536907View attachment 536908
I had to cram a bunch of wedges against a back stop at the bow to hold down the strakes, that a very narrow tight location again precluding the use of thumb screw clamps.
View attachment 536910View attachment 536911View attachment 536912
The aft end features a port hole on each side which are oval shaped, I cut out a pattern I traced off the plans, glued them onto the wood frames then drilled and ground out the shape.
View attachment 536913View attachment 536914View attachment 536915View attachment 536917
I will not be placing treenails on these strakes as they will never be visible to anyone, but I do plan on using them on the outer hull and deck planks.
I sure thank you all for looking in and have a wonderful weekend.
View attachment 536916
Regards, Peter
- Joined
- Jun 17, 2021
- Messages
- 3,200
- Points
- 588

All of the above! Truely impressive!
Hi Jeff, thank you for the compliment.Beautiful work !
Thanks Peter, I fiddled around for 30 minutes trying to figure out how to hold the that stiff strake down.Nice progress, Daniel. I love the ‘bunch of wegdes’.
Regards, Peter
Thank you Shota!Dear Daniel
such a beautiful progress, the hull looks great, well done my friend
Thank you, Peter!All of the above! Truely impressive!
Good morning Daniel. She is starting to look very impressive. Some ingenuity with the plank layingIts Saturday morning in the shipyard, one of my favorite times. I'm starting to pick up a little speed with my progress here. I've been laying in the ships bilge and ceiling strakes below the shelf strakes I started with. The flat area below the frames at the bilge strakes was too narrow to use my thumb screw clamps so I had to block wedge the strakes down until the glue set. Coming up the sides I was able to use my thumb screw clamps.
View attachment 536907View attachment 536908
I had to cram a bunch of wedges against a back stop at the bow to hold down the strakes, that a very narrow tight location again precluding the use of thumb screw clamps.
View attachment 536910View attachment 536911View attachment 536912
The aft end features a port hole on each side which are oval shaped, I cut out a pattern I traced off the plans, glued them onto the wood frames then drilled and ground out the shape.
View attachment 536913View attachment 536914View attachment 536915View attachment 536917
I will not be placing treenails on these strakes as they will never be visible to anyone, but I do plan on using them on the outer hull and deck planks.
I sure thank you all for looking in and have a wonderful weekend.
View attachment 536916
- Joined
- Dec 3, 2022
- Messages
- 1,547
- Points
- 488

I’ve been indisposed for some time and it’s good to see how you have progressed in the interim. I see woodworking and patient determination that’s as far beyond my capacity as the sun setting across the ocean.
I marvel but I’m very happy to have disposed of my own kit before becoming entangled in what for me, would have been a migraine in timber!
I marvel but I’m very happy to have disposed of my own kit before becoming entangled in what for me, would have been a migraine in timber!
Hey Corporal Smith, I'm glad to know you are still around and very much appreciate your checking in on me. One thing I know for sure is your talent with plastic and painting is second to none. Ill be looking forward to your next airship model, hopefully you will offer up a build log.I’ve been indisposed for some time and it’s good to see how you have progressed in the interim. I see woodworking and patient determination that’s as far beyond my capacity as the sun setting across the ocean.
I marvel but I’m very happy to have disposed of my own kit before becoming entangled in what for me, would have been a migraine in timber!
Daniel,
Builders such as you are so impressive - way beyond my skill set - but so appreciate following along. She will be (is already) awesome.
Cheers,
Builders such as you are so impressive - way beyond my skill set - but so appreciate following along. She will be (is already) awesome.
Cheers,
- Joined
- Dec 3, 2022
- Messages
- 1,547
- Points
- 488

your talent with plastic and painting is second to none. Ill be looking forward to your next airship model, hopefully you will offer up a build log.
You are very kind Daniel.
Thank you for your very kind words John, I see your skill set far superior to mine. The beauty of this forum is we all love to share and learn from each other.Daniel,
Builders such as you are so impressive - way beyond my skill set - but so appreciate following along. She will be (is already) awesome.
Cheers,
Daniel,
Builders such as you are so impressive - way beyond my skill set - but so appreciate following along. She will be (is already) awesome.
Cheers,
Cage match. Otherwise we'll never get to the bottom of who is a better ship modelerThank you for your very kind words John, I see your skill set far superior to mine. The beauty of this forum is we all love to share and learn from each other.
Ha!Cage match. Otherwise we'll never get to the bottom of who is a better ship modeler.
 Not a chance this old man getting in a cage with anyone Paul. John @oldflyer knows how to fly real passenger jet airplanes, he has skills, I however find it a challenge keeping food off the front of my shirt during dinner.


