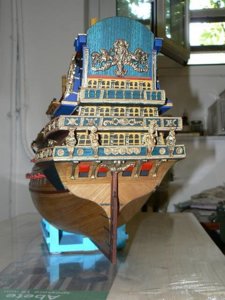
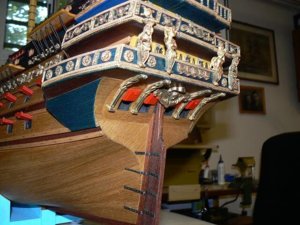
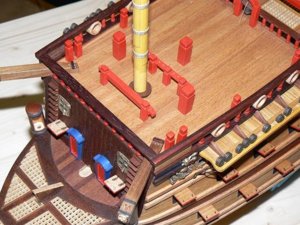
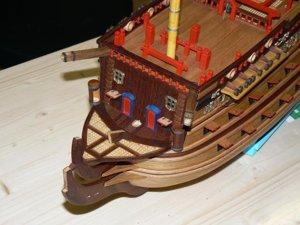
Le Soleil Royal, vaisseau de 104 - De Agostini - by Jack Aubrey

Tuesday, April 22, 2014

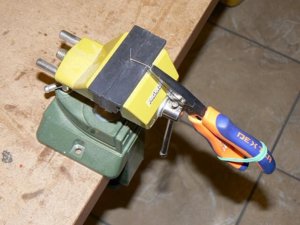
The day is dedicated to building a hundred rings with pin, to simulate the ring bolts on the gun ports, in order to have material enough for the remaining pieces. The photo below shows the procedure I used to build these "ring bolts": 0.25 brass wire with the ends bent and clamped in a tweezers. At this point everything is screwed around a drill bit and run enough revolutions to achieve the right piece . . simple but VERY repetitive, every 10 pieces I was surfing on the internet to change and relax.

01 P1090759.jpg
yJoSa4jZADfSeLw?width=640&height=480&cropmode=none.jpg

Then I browned the whole so that they were ready for final assembly.

Wednesday, April 23, 2014

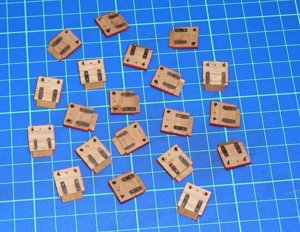
At the last moment I discovered in my personal, old, unused pieces reserve some copper elements that may serve very well to simulate the hinges and I decided to use them. The decision resulted in looking at the gun ports already attached to the hull, where the top is very well visible and therefore this kind of element should improve realism.

I then browned them too and I began to prepare them for installation by cutting them into pieces of appropriate length.

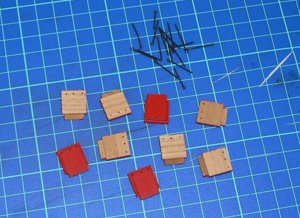
In the first image we see the wooden gun ports ready to start work, pre-drilled to accommodate a group of ring bolts and also the ring bolts burnished.

02 P1090763.jpg
ujXpH3-LyffMSBw?width=640&height=463&cropmode=none.jpg

Below we see the gun ports "finished", that is, ready to be bonded on the hull and then go to the following processes: ropes to open the ports, for their closing and the half-barrel of the gun.

I forgot: after the operation a thin coat of matt transparent paint to even out the color and hide the spots of glue.

03 P1090761.jpg
WnUEqQAMW0qIUdA?width=640&height=494&cropmode=none.jpg

That's all for today, but tomorrow I'll continue with the same activities of today. I hope to finish all the gun ports according to picture 03.
Regards, Jack.
 
Saturday, April 26, 2014

I've finished to setup the gunports. Today I've mounted them to the hull with the usual method (bi-component epoxy glue and cyano-acrylate).
I've also definitely installed the masts on the decks.

Here are the four aft gunports below the galleries . .

01 P1090766.jpg
YRzMtdfM-GiLPWw?width=480&height=640&cropmode=none.jpg

02 P1090770.jpg
a_x5s7JhIkDsWSA?width=640&height=480&cropmode=none.jpg

. . and here are the two (not four as I mistakenly wrote earlier) gunports at the bow . .

03 P1090768.jpg
qQnkjDg2fv3XDMQ?width=640&height=480&cropmode=none.jpg

04 P1090767.jpg
o9WlxpF8x-6S5Dg?width=640&height=480&cropmode=none.jpg

I'll continue soon . .
 
Continuation. .

Now even the starboard side has been "decorated" with the gunports. Here, unlike the left side, the hinges are already present on the ports, or rather the bits of burnished copper that simulate them. I think the aesthetic is much better. Obviously I will have to mount the same details on other gunports on the left side.

Now all gunports are positioned and well bonded. The next step in equipping the ropes to close them. To do this, I'll have to tie a rope on the internal ringbolt, drill the hull inside the port window in proper position, place the head of the rope through the hole and secure it with a some glue. This for sixty times. .

01 P1090765.jpg
y4moRFb0JGTG1XWXScxCXwFWRj6-5hElrdWUi1l0oq7WjkezTLWRO9FvN7U-6tosEeDzBSJKbV9llAectz4Rv9A9o0hEFpajHI2L7CeTkvSJotQrUSvdaQOu5fc7bEAEWZFW9OKkjQkGVhUMy23CAj-TM-t_Q0pKcFRmvF_gi1lZGKpkSS8iT16jHJFREJfxY4g3mkSIyorJYYRLXltdGrMCw


02 P1090771.jpg
y4mcs_zWsdeQy79I0sr0mraDyVVPjf8MKJgH4vBkDVL5jZGGj8x_sb6_2CJGJGwt0tYow97GZwX58ZaUG5Lsjzx3XfjoI4WZr1pEvzuISslNCfKwPKlBncSHbblaYIO_KyX_h6aunhFwSot1cmPFcSkfkENZkkh0Vk-MdXFpILFuYs1n3mKFhsusUkGarM09mt8Fe9OTz0E5Qs117X3ixaMEw


03 P1090773.jpg
y4mApUEovJFbtYDVJW9CL6v4Ox_HftDohZ3j7Gy50oJ4owrDM3wD1nKAhB7nVGMrHr2tqGsODspylKuUdekOQxvpfBIvmBXlIMKJG014DdENmQezfEGDSGId4mdzC5or1o1x8CPECZvFFr4hPXwD0RoaVOJvDbnErQIr-B150Je9Rxrrf7WMxSU7ga-xZrOjSdET3AaCNMmp-_LHH0pdmpvhQ


04 P1090772.jpg
y4m98os4_OfPgdxhL4O0yuAUwTXaqJBOY-fqVyggkRNO2v8KoZmw9WXQi9thMCu-hXBYoWr58EkieZ-HTEsKWFhQBLKYOPWtwvo_obk-1ECdw5yessg1s-RHlO1sD9izu0T6-eybQC-gxGrJZ08aFpCpVjkGGA63Iap5uPzOepzxgyiRZ3Hc8lxKa38PD-qsduycUZ14vVJuukQcw0CXBsZMg


To break the monotony at the same time I'm preparing the structure supporting the boats that you can see (only positioned) in the next photo. The work is still in progress. .

05 P1090769.jpg
y4m86wE48mjlymblL3CC6O-leQ4N00kqY3IK_F80DnWg2ngKUC62ycDfgTVPLChfW1P34epsKEYIrl1ATNX3_Ry-HjyjqGqDcOATGZ7nVm3Sry20KUUByMiY9mA6H7PWfo3Y7YUiXkz5eWg3NKLdszLkTB2qQzDEIfdcBHmoDWnSfA6sEaSlgtdNpJXWC4L3iXhkRoSF3vmEqMWJcBv4YXQag


Cheers, Jack.Aubrey
 
Thursday, May 1, 2014

This afternoon was quite fruitful, at least considering my way of working, notoriously rather slow.
As a diversion about working around the gunports lids, I focused on the preparation of the support structures for the boats.
In the following picture the structure coloured in red was already partially ready, I limited myself to prepare cradles with the shape of the boats hull, fix them and stain in mahogany. Finally some eye bolts to band the boats to the structure with ropes.
The other two in the image, left natural wood, are the ones that will be placed on the basement of the display case and that will support the two larger boats.

01 P1090776.jpg
y4myLmCHnH83rC9XNGG_i_5AQtqVBw9CzLodkhhXje6Bji1hUsmGJInTe7JWVRU_qAgMlq3vJNrekm9ljZskD7wlTfXHz2JsIBQNvIYLJqzkfoaxczaawit3_vlImZ77Rn2VlyrbCfoWCPX48yP2IC_zc9TxVN2yJLGYOy0pS8ceAHGziV2_o_vaLDrNpYU_xOzjU1cUCw8AbgArlNrqeco9Q


Below the boats as they will when installed. They are almost all finished, there are only a few details (oars, rudder, etc.) to add on the "green" boat.

02 P1090777.jpg
y4mU7ccKduBi5KAWVxuNITs2KfQzMjVChsBAKCSTgBCMS4uA3yxyLbXq2yFGHziMgBJhZq_pkj_ieY4lMNO4V-dp9s6txHMcRsCT3LyO0-M-_79Fw2mjwg1Jlme_6Cor3bZRpyh0-74yhsJJuOZFiTW8ddRZ28XQtGJITE7x6UN8XAuHdI2LWe0TD3kpOHfvJJtHHoH3SYvmqbBWYvT5gXOvw


03 P1090780.jpg
y4mCPO-9nuG_EFeAObTqCV4GXdq2SPyvRAyh36A3jEA_36LOyCmn_toz9ErgvLu_ZNkU7yzYCmHeZL5RM48b7kok4QKB0sRnigHHpXkuiXzAW8C05q154vGukV9JP1tzWmL940VNvoK7yWRhZDdD4U_aucxqTdMMrMpHMUN0ZnCW5XFDu5_kqzfvYQY6jSzR5DuizlFwYWOUb5_q3pAskdzAQ


Finally I tried the final fixing of a boat, just to see the final effect. It is one of the two launches which will be fixed on the basement.

04 P1090781.jpg
y4mJnTRmr4pmsGJzgCmhHoKL3IQn4hHbVSgGQGvh4R3M7BbDP1IqCVX6v5ouM6sEYJXoVT7Ya7Z3EIeZIscxCw-txfw56Q38JLEDwswyukz4mmX8fAp2ufHj3Mcgn3wJgjMP_8EgHiaqnKY4ZIFWiYTi1XmCB3Ab17UbdhR9oU-5ZHAj7VRTywVq_6WTiInIMbZKa0H7aFoJuBEQIc5oUVkEw


05 P1090782.jpg
y4mluIofsDXPhYHKtSTmEBTS2xpVVkrCfZO8XVpC96DG-isBjMkI8FoQchx6xiQ34uahi_T9wq0ILwCqSdLGjFFYdZgwNLnDEi6cyQzY0-v4aU5w9UGFpzHzQvvZzoGALb8LQY6dtYhvmJ2mnjiUICoMeefGjIGq6ep83HvdDXLorsCc9bc7JljHKBz9luw5CDqWpjgBAF6vMNGs-WcPjBKCA


That's all for today, tomorrow I should have the afternoon available, maybe I'll continue . . Regards, Jack.Aubrey
 
Sunday, May 11, 2014

Not a very productive week. Apart the short time dedicated to the model, most of the work done on it was to work around the gunport lids to fix the ropes used to close them. Nothing significantly for taking a photo. In the interval between these boring activities I have finished the fourth lauch, the "green" one, and I fixed it to its support together with the "blue" launch.

The two pictures here below show the two boats on its basement . . .

01 P1090793.jpg
y4mvz6CMHlSslwR6_kTbmbaXVRjOAYh36U0Jc38c76mjj5xQ_Xscp4nfKM23gZ3tNdmtlAuS0WR0K3w3vSqPQNn_XfSpdvrYsB183bB8-ddMxAyWYujp5YCZnnYTQGxqf8rqC7nDU8pRt7gzhyL3uaAA7Fk3ZzuOBQ2ZP8sojMfgODK-r65SMK4UAFPNxwy0d21BwMkESGjDZ_2Y5S-m41R1A


02 P1090792.jpg
y4momrwAYb4UjTlV_YW5tkiKXpTAqunyd9sUVFDLLRkoo486tmJro3g88Zy5JnA0M56Pyp-i-dpppsDCIb1yhy1G2oNKgvNTKASy8XLXNpD3Cfvr5M8BpLMGoql756gb8oR024_FYyMdHte3jY264ALVELNNpDUQHJ-JcVqsVGyc7rLa-FX_mxqbEJBKmwHTZ9xo8mptKrfCmU9E1PjxlkdrQ


. . . while the remaining two images show the boats on board of the vessel. They are only positioned, not fixed, because I do not think it is the right time to definitely bond them in place. I'm thinking about a fixing method that uses pins instead of glue so it can be removed if necessary for access to the details installed on the deck . . .

03 P1090791.jpg
y4mMWGEPdDSnYMgJH3YvlOGQilu7WTiwX4Kiu5RdNUJiwAo7NK9pFEnu_190YY4rtgdQJulBZH4kq0BWvak-OGgG-xnqPV9xoJ3xsFw0Xlqb93lZcEGQy2K_xJMeQ0wY5f0zRxSLjYhKzguZlMThmUyPLIRH8IBLXmfoWcpbxcVnjodQhtfPhuN_sGj_pUjGPBAv_do06AraQWj8F3c41FMFw


04 P1090790.jpg
y4mTh_A8H1F2dZ1MlkJ8l-0SFdJsrmn4RPDHqHtpoVQPYqVzCSBl5JXvmT__Gzzpw0PkXl9YEx6y9CNZJ3jH57Z5LmjvRapIkvctNZ_PmCahx7Rtoh4YmIVlsquktHIwBD5nNB3FGnRQZRz5oNsbti0l3B6NA-YOd24AYRLArQAD9SBbUijeAH6cYyQI9pt0SCLg7YV3JdyVbqSo4RGQIsetA


I hope next time I'll be able to show something more interesting. Sincerely, Jack.Aubrey.
 
Wow, did I say Wow:oops:. I am a fan of this French Man of War and you sir have done a most excellent build. I noticed from your track record you have built a few De Agostini kits. I just this past evening, hit the buy button for the Sovereign Of The Seas. I was looking at the Santisima Trinidad and then I saw they were offering another I have been interested in for along time. And they were offering with a special $1.00 1st pack and 25% off each one after. Now that was hard to pass up. As I said, this will be a new way of purchasing for me. I also noticed you have built a Dusek ship. I am @ this time starting to build his Le Cerf French Cutter, 1/72 scale w/brass barrels. It will be my 1st time building a clinker planked hull. Anyhoo, looking forward to more of your craftmanship.
Rick
 
I am @ this time starting to build his Le Cerf French Cutter, 1/72 scale w/brass barrels. It will be my 1st time building a clinker planked hull. Anyhoo, looking forward to more of your craftmanship.
@jack.aubrey sorry for the spam on your thread

@Neophyte Shipwright Hello Rick. Is that means we will have a joy to watch your LeCerf build? I guess it will be a kit from Dusek?
 
@jack.aubrey sorry for the spam on your thread

@Neophyte Shipwright Hello Rick. Is that means we will have a joy to watch your LeCerf build? I guess it will be a kit from Dusek?
Yes sir, it is a Dusek kit. I also went ahead and purchased @ same time the brass barrels. The kit comes w/resin barrels:rolleyes:. The kit is very nice, but I do want to change a few things such as not using the laser printed deck, plank instead w/ pear. Will for the 1st time try my hand @ India Ink (Black) for those areas calling for black and might if I get the courage, try my hand @ carving the figure on the transom. Am prepping the FK now.
Rick:cool:
 
Last edited:
Monday, May 12, 2014

The work proceeds quite slowly. After I've finished installing the ropes to close the gunport lids on both sides now I started to apply the half-barrel guns. . activity much less boring than the previous one. Tomorrow I plan to complete also the right side.

For the installation I built a simple tool that helped me to accurately position the drill to make the hole in the right position into the gumport background. In this hole it's then possible to insert the half-barrel of a gun. . . With this tool it was a mere matter of making holes with the drill of the appropriate diameter.
The bonding of the half barrels was done using the two-component epoxy glue.

01 CAM00180.jpg
y4mL9MWnjwAW10iYd0m0KVWErqiuJZl8XY-Z8mb8vzIpEISd4_Xuw9iKGIlM2pvwfKvnCRBzi1dmtdf5PCj_21sPQ6AZSOIJn4Cb_Mv_rszKBe9vvXQRNu6jbceVF-EgpgVBpP9y_Lgd3ZMrgRRGl6ixlNNXmpEf0vpdTnP8oiB7JhXVCJD3OughLJIYwv4QCPEZ8TlTv_J5QI6pIp2vcCgZQ


02 CAM00177.jpg
y4msGTcChcqTIrqm1p8-xMVVAr4rf0mtMMSn5UrGSRMrl1pMLt4aSqTouvhZ9Dd9va7qvcwRp9JQS31nkBOfy4FB3RstlJ9dLGnZnjJV4zT_cwlPV1gIfJ2ni8FGMx9i9wS0SFCJaYdTQN0sI82qUhldb4WTi4kIlIquyWWakNbJju4mdObrBYW9YuJoxvkXJbVZL3gqbWdv2oUcvo9p5lxjQ


03 CAM00175.jpg
y4m0VxJKL4qzL-rT4Yy6mMp95cW1PUv5s52Ao4xouzAPYUyvaydbegn95whDWIdhljq7tvLY1tN2QpwjetUerCnOoE-Go-KBSmw0k0aa3HVaXHAUz_dqlQfb7EXwj9jT0UKJJPcaHVkemjAkfQm81b5FgF2TSZxOM6aIzjiWurukRcsA6_rrowKgYegKfmpaW9Y57PgMfP9oBykw7uFxNitaQ


04 CAM00170.jpg
y4mVvxYsPMnA1w1XxO5WaLrjho3keECwGos2z3yRbOWzrbyZBR5cNy3_TtJ8fvoPabZ7no84rsrCavhqUrXE0khra_T2-g8GfWnCNXtKjenKUj8pDhjr_MvviuooeeQkUeo9APh-TPYLu7MkrLjwGppgdtF5EXzRAcRzy4_W1KBI9oF5x9SJnyjv6w4ubPTfak_KJ3CWesvtNTdTiPq9DOxqA


05 CAM00171.jpg
y4mEIG3tKiVHQjdOtHMy8UDTeb9VojDVg_0TvWQVKT9BtEmttzBoho9o48THrXgKgPAiV55e67-3Ts2dH8Zoxz8LXf5VCTdZiwMWv41o76nfP1sSZ4yheFe8ivTKgAqmYyPEHo0zbpAOyQ12KzzgP7Lw6LPl4_ncng1cNFE6OqGgxbLHZIxrgpxnH0E4QnGTk6c-ki0T-iYD7XCwKjHPqLUbQ


When I'll have finished installing the guns on the other side I will start the next activity that I think harder and more tedious: the two ropes above the gunport lid needed for its opening. See you soon, Jack.

PS: I've taken these photos with my smartphone: they are significantly better than I did a while ago with the same equipment. Maybe, after so many scribbles, I start to learn.
 
Tuesday, May 13, 2014

Work on the gunport lids is still ongoing . .

Today I fixed the gun half-barrels on the left side, using the same method tried yesterday on the right side.
After this activity, I started to experiment the mounting of the ropes, on the external side of the lids, that serve to raise them. I think this is the most boring part of this group of activities. For today I have limited myself to work on six / seven doors to find the best method in terms of results but also in search of the more practical execution.
I tried a couple of solutions and at the end I found what I prefer. For now I will only show three images of how the gunport lids look like once finished. As soon as I have more time I will describe the procedure in detail.

01 P1090796.jpg
y4mY9SRVxFmv7ypEUPsyJG0r8CtChHJL_PFR9Vz9djROediyUlMPJ6XvSkEW9INvgeyiIcmeY29Fp7u45wfiRfZbR_Owr_P66hNmib5DQLspWND4sn33kgfVRQfyjOfIbNiPW0401IT7goxbgito4ZzTG-SqFo44b0pkj7oZBAAUla1zQ4Z2YiLHMF8J2WfZ7slz7hCp5C4nf5QWHlajPe6TA


02 P1090795.jpg
y4mli7GupxhhqYWpScoYvGhy-2U5bPr1NM_rCdxzrzZfDZtgvnK4wqltqWmeEQGsaQFTH4VK8FiAd18GgKEx8uEZpOVY1Tm9nt-2BSgpxV1wDd5NrbB5aJzmrG5SksDTW3EmIcRtfGymZTPPoDRSjTK808bka01BibdbwRv89ed_7ew9mX7UhwI45QLkrdQ-siV9TMjxdktirWuCxbjTihfaw


03 P1090794.jpg
y4mBDsHbE3l-E0p4U_mGIzHVpR8mnTPFH66BJYy281HmDNsw1ZLbcoScdSE4UZhNY3jqrIPucvlWNd0VwLXp9Lka1547I6fCvXyMq1rU8d1kTU5Kd-8897OA1fvcLuIqi8txI2imxExzj1LEBpsCzIsGXfarqrcOgxzjZcNBYPJ5JuIQ3WxNtKwYf7oBcJ4IVEkCFsYeiizw9VMSEn826PByA


Greetings to all, Jack.Aubrey.
 
Friday, May 16, 2014

Today I continued to work on the gunports and at the end I managed to finish the entire right side. I thought it was a longer work, however, using the "improved" method, it was smoother and faster. Below are some pictures (taken with the smartphone) of the ship side with all the gunport lids opened. The sight on the side seems to me considerably richer and more crowded with the new details . .

Now that a good deal of work has been done and, above all, I optimized the method of working, I'll try in the next post to list all the necessary steps to complete a port lid like the ones shown, starting from the beginning.

Sincerely, Jack.

01 CAM00184.jpg
y4mLs4WDTqOgPrck_TyAYouIxZFnGqmGU79PNh9XYjgpPoImTF_ELQRtHjSpJJTk188g6f0Qwlg56nc_iOPwfWrHXtddsk8qrhQg1Huifueo_xF_ddxnelg2GrGKdtyVske28QbaD2KXsgy4suRnQyE5k52NpoyUsNqePHg71G2BAt96yVzIsQptr_viHC-cDRe-uzZ6ZQz4UPdW9f2Ir7g6A


02 CAM00185.jpg
y4mxs_pDD6z1n3xEPwASCbsvklbKRmrZGNxJGogi2gseT92c1ZhW81nmXdneQzupggUPvBu_9aXfIRyfDYopx2NAO9yKskODM2v9mjbV-R9bYkKVFMlo0aQzQqhFzJY-0FJbQwSe7TG16B5RQXzoPwqhigVn_IKONYrCXDIIkoXLOwGWDLAaFl4OhSWPWz6bqIoGLL04ImCAjAUcqG43LRAXw


03 CAM00186.jpg
y4me_-0SqtWoZXqj_QG9DS2lrj7WreqXZcT8iLZyh4VurJ20Mp8akXE5bLEktDFqYqT-lF_veEU9dLHgWOMmDNyhq1MzLgTCmigFdfQt6_4VZTUWWZo0emG35xn5J7HDhgAk3trYwP9u0YCzL6k3P5RL3XRELgwVMoUY_vU8SpCRj7r2dCZwpf0XiUdGUr5hsbG8blBCNExbJEWz_T626_ohQ


04 CAM00187.jpg
y4mvuLTKnyJ3c5oji1etoyrGYFoC09XtaVC7QHMkoV2j5XMhOrvgnXnUIpsE_uFomzYznSLNzlt3tFb3vWccnrdzj8E8MEb2WB6d7bg7utuRadXhKO9sr7mIFXzxTAwhT3lOA3bppgqkG70_p7-10kH-b2cpCWdhh9Q6xCfec4l8iSnxtGx-KsP89EerdHAwpJizW_MZv6ZKCXqa5HL4OsBXQ
 
Wednesday, May 21, 2014

I finished all the activities for the gunport lids also on the remaining side. To work on the right side I developed a more practical, quick and "rope saving" method then the one used previously . . . it was much, much better. There are no aesthetical differences but the process was better on everything else.

I found also some time to fix the guns, or rather the half-barrels, of the upper deck. These guns are lighter than the same on the underlaying decks and the port lids are here substituted by a golden decoration which defines the outer edge.

I would say that 95% of the guns of the three decks are installed: there are now remaining four guns aft and two hunting. Regarding the sixteen guns located on the forecastle and the quarterdecks it is a totally different matter: these are completed with blocks, ropes and tackles. First problem: I need to use blocks of suitable size, similar to the ones used for the guns on the upper deck below the waist. Those provided by the De Agostini partwork are simply "enormous", totally out of scale. I have to find them. I raised an order to a model shop . .

If these missing pieces will become available in a short time I'll probably start working on these 16 guns. If not I'll start working on the bow: head, figurehead, bowsprit, etc.

We'll see what next. Regards, Jack.

01 CAM00198.jpg
y4m7vsr2ATUt4fU3g4YIIpGnTwhuZfyXsZR_LWc0HePCJFaoMmf-lNx52aNxVWTmDZI41cXaSfobrWlAmKAz5EFWwC4KLCvbrovEiChI6nzu7efyt9lgsh2xg5CMVxaNI1UDdEjsCm79kkfacDrX34ojAeJ1I6SWB15XXivNUxpyuzwJJj-Aj96FfikDYsDdQg3_I-s-rYWLKOzHKwEJy-s4A


02 CAM00197.jpg
y4moXpHW58ExLi3SPNVXyUt5wNCbGMYD7RxUG9VqL69Fsj5IxUEeXXnwlRwGFvGJeSJd_WzlwaPRoHO9U6RjNXSek96sBdCjgXYSTogMGqfnOAMJ-Cijqu312Y8cdGfuT_DXrPNbCg7JHu003SYNISLgB07cFFxhXY8eEYLtBp0zDoNl5dt_jz8XC7lXlp_i4qcM6XWGHamzPXMWz6WbVcR6g


03 CAM00192.jpg
y4mC2trglZoaZCRPVvhMZe_ZntOPHvUaKUohFbZ8JIyx4abGwnqBznWJf7AvLusCCbf2HtA_u2xQGSYTiugtelFwMhB4of0QRsOMcH4C_3C-zcxgjEUuM6frnGE7TPDxgSq6dTNDurTZfDPhZP1lJ2Z8hmj5WCQiR8XtMWlJUEMpIOa4bS5v6AEpNrvahfYE0hut-H-DCwwa4pEcguKXGw54w


04 CAM00196.jpg
y4m2DtevumnM4b9JM2Ycdped-KdYXD0eQPblfk1qmJpTZSiCJvb-KGnavCvIdJXTPvHmpCFbp8AiGd2rfTolTQoxXgvK3Huig1qfNDi8z4A15rYxnJEMRpDHgiqwd5Tx3bHCxsbAjzg_eGMQGdsN1w88ItqvK3NvattpNlANK7qg-0jk4lCp3yMxJjZtPeHcrDY_2xTZYuNCAmcMgNSYniBSg


05 CAM00195.jpg
y4mHjly-nfGdgh0F7vIvauiXeo9CbKL3qypEm3wv8y4haeP_Wl87TBckoRFFqz1C9lvew3M6tibpg28Ilf1-Z0i2aU43iDLLKXaugmFRoLUYLN8YsxEFqcZqjrxjkgSO7MEJieIr39SNpefpUsRJ6bgsmX0rc7S2oggYpIx5-VViJAcp8ByOX_QZGNpPbWFdvPYn2JPVnFmwuU3mfTy-yJCxA
 
Friday, May 23, 2014

Today I finished the installation of the (half barrel) guns . . . Here below the two gunport lids and guns at the beakhead bulkhead.

01 CAM00199.jpg
y4mkz1VOgOcs2ak7M6u4OYwYagSIOjYwBrt3SKpbIeBM0NptVMmCTpxDzww2glQqDwK5zSbYFLhlkb04EXyCCiNELB6WEZMrMRVlIgxMtt8KEDMT5UuO0MOrqhuflAsm2FSiEJZfQ6WO7D4B6FvyOIq19uuhZtfnt_rPGxcw6thaiQs1HDzH7bc4Jha06GSOsnMXBM1cCIZM2fNlRV1WIAY1A


. . and here the four guns aft, installed under the lower gallery. Given their "uncomfortable" position it was more complicated to assemble the whole but after various body contortions it was achieved decently.

02 CAM00200.jpg
y4ml2sBMvOP0daRDYSE973OdfM8JH-m-sd1DKh8YiL1HKVrJAI6nXZUbflgy1IY2eQzD2RnUsDaMQNpAhbTWPCSAureAzY69zilYDmn7ITlzDDNfmtIoxkqCU4ecWeP3DgUNuNqP4FQMbaFK5m1j7IL20TYfWZ7csDabKYKOqAE3aMnLlz6ahtJI2mUZOxv102S-U5O7LeEf9-iKOIbRu5L6A


03 CAM00201.jpg
y4mSZMKnuQ4y8PoFc7L-4m8W7hOph6RbkhRjYDlRJVlpKJDPJsC0_3kAjJWcwgGy3oUmhSZIsGrvA-tMwD9cl2dBK8TwHyx1iAPfW4AHegbcLIXpHYvenpz9uP24v0yNlUJAKNx9zKlgru0RnNCogNSYzPV2XAZqBnskGV-ouWBfY310E0yxz4SGpliJz8X7hoIaAJYETCiwTcqdhACjJIZ-A


Sincerely, Jack.
 
Sunday, May 25, 2014

Closed the guns parenthesis, I shifted my interest on the head and, at the same time, I decided to install at the end of each working session some new decorations. In fact, at this stage there are still many decorative elements missing; but their management requires quite a long time due to the long time needed for the epoxy to harden. So with this strategy every day I will apply something that will be able to harden during the intervals between one sessions and the next one, an average of 20/24 hours.

Pinrails at the mizzen mast. The instructions provide for a different location for the pinrails back of this mast, but honestly, although there was enough space for its placement where indicated, it did not seem to me there was also the possibility of operating it "seriously". So I installed it on the deck immediately above, where its operation should be completely assured.

01 CAM00206.jpg
y4m8pnbDVpNsJqfjO17FSGensYzkvjVirD7u27PDaOMiIxTA9bw2C04N7_DVy-A9DiyQcQFcL1MbrNg4Buh0kaKOMr182_7_wQAazPrRHnjTXr7bFZ9QAIsZlyDR8bWHaZucdX2YKeuHF8ewIaejzKYXQfaj0SAqoQd9d35eheDjSqUZQERC1zvUNBPtZybAiaYCUYAs-AS_2PLG5vRt-5Ufg


Installing the bowsprit, or rather the stump of the bowsprit: also this mast must follow the fate of the other three. I think it is coming quite well. To get to the result seen in the two images, I needed two separate sessions: in the first I focused in creating the conditions for properly fix the mast and, at the end, secure it; in the second finishments, painting and fix the ropes that bind the bowsprit at the stem.

02 CAM00205.jpg
y4mItCqgeq7DIE6VaQefcHXYOmvOszfGM2BCLpsJCPJHvGtsvU4ZZ9Lvfb5gUNUAAIZhllmgZ_oYgO4MDiXRl-FY41kd8dcspj7wbXz4iK0ug4e1mIGvqy7Og7hcnyOBztNue7Wym3912EtxzPtkfPZpU-Wq1FE5MeA8zBtbmgBwd_0ABzFOSw2ogWZOX191BzJM8_xczAe029pmxpn9SNPXQ


03 CAM00202.jpg
y4mFOmkc_hylNQlHzySrzBIaX9YqqUvFda5GI94ZNfvy6h0G7eDd7fR6wcjbM5w-JWAwW5j4yqc4g335mCxRwzoPWZaaK7VGlzs0OciKH0BlV703ZUpog4KWDydusvffkCtjKycu2x5Mq4koJcVZc87RuJ4pkcs-1HH0m0YKrjVZ4vDeRjk2s1E-bt--dnNXoj-9VfeDkgjiTJQX0Q0X1GEGQ


Finally, some new decorations attached to the poop: I leave to more willing and eager of you the task (or pleasure) to locate them: once they have been positioned I cannot not touch the model until the next day . .

04 CAM00204.jpg
y4mlyug60qiw92wgsS4n_QOLSsSp30zTf8Xd4l81FvBP0ZGFqNxtxtJVAL4DjTJ83OGxElWl7IFRcddGlZz7pQhUy-wcswYQuIV7qsLu5egaTaJmal3S8ZvVWZYSiNl5VaNPuz8Zsb2mtrX83BHDFzCsLtjwA4jskePeAuZmbT3U6c9tlQe6b_SKT_WdyqQ_NXZBPbFJi5AVCQ8AJxlNHIbRA


05 CAM00203.jpg
y4my8lv8vHk3C3v7-bvrWnABqvwKzBSjOtH06TdrU5Ao9uNEFro-q5C6-yW5uWaEOzdnsHaZtoCJCwh_K8sA9wb_JMLRP05Q6hqg1BAvuEVeZlJBLNgqeNOVVwoMduApftwdAX5nzbDATacESUqWKFAbdUw6p2VoHD6wdZKACYB7qMOGCvzhWqnCva2cjEz4_V8QbLZY6NjKpqfnSGbUMBldg


See you soon, Jack.Aubrey.
 
Tuesday, May 28, 2014

Tuesday I could not do much more than just sticking some new decorations on the poop. Their position did not allow me to proceed further until glue was dried . . that is, until the next day.

Below the top four support columns, human shaped ? . . I do not know exactly what they represent . . which connect the intermediate gallery with the upper part. The left side has already been completed on Sunday.

01 CAM00210.jpg
y4miGzhuzvk_HqDyl6LhDqySOShqHK0LrxYac_KMTMxWjIuzlw8_DUU6wWOYzWHfaLPItweBoBhpcpfAontY1ZCTaEsTzD2NgwuYT1qxchHmatdVo-qvdxdngkaNcfQD_iS_nCx1RQDyDiW2qxLcgCQDTssTRC04KSTnqTTBOGAXTM1qJxZyqKr8BOj6hb-b8pUvLXEv6T04plHHYoc9VV_fQ


And here two other columns that have the same function between the upper gallery and the intermediate . .

02 CAM00212.jpg
y4mcQR3yTWmrIAgsKgmIT4FSPCmiu7WU01SH3V2lulokfyFeZcxPBthnhrA8N8GbQag6MwGltrgzHSohEn1XZieq8Dd1Fm0RAqI18PQmioGGwiSNT2i_w7FFMJRbUtkLHamW6RGDdsBMBAY4Wix5YCoI6GKRm7DfxVzaY_q31L1tDADl7OIqCjfaj95xkb_VMzFwbpMPaCWldR4wLdgC9Idjw


Finally, while I sat in silence watching the model without being able to touch it, I realized that I glued the two decorations on the transom in reversed order. The horse heads had to be outside while I've fixed just the opposite.
It's a big trouble now because I think it's pretty complicated, perhaps even impossible, to detach them.

Surfing the internet it seems that there is no treatment or solvent that can soften the epoxy glue once polymerized. The only alternative seems to be a mechanical action . . impractical in my case without causing not predictable damage. I'll leave the problem to settle, it will not run away . . within a week or more it will be still in the same place.

03 CAM00211.jpg
y4mcisnfao_LdH-ti9XGxWZ2CrpVvIgbViVDHwZLPpOgz5PcqXSrRklxLjykP9nN5CRs9BaSwkP2WPdZ71y9AqU56XGlsmRwXztXLhNce6UsiMJzGOArLKleH5mKhSGXTlSGDywuZ9rkZ1xaY0weXZ7BZTqHGHh6xYy0YklgTNELvLnl4EkCH3xeeeg9SvQ0tqo2R1LkVuQJQywdcjSdnRLWg


Having nothing else to show and considering now completed the installation of the guns and gunport lids, I feel it's now the right moment to list the steps in the exact sequence used for their assembly.

1) - preparation of the wooden part of the lid; it is a work described some time ago; here it is useful to remember that on these pieces, reproduced in image http://forum.model-space.co.uk/default.aspx?g=posts&t=11962&p=8 October 13, 2012 - Gun port lids", I applied the two small copper bars simulating the hinges with some cyan gel glue;
2) - drill the three holes required to insert the eyebolts;
3) - bond eyebolts with liquid cyan glue; the outer two on the upper face and the center one on the bottom;
4) - glue the gunport lid on the hull; glue used: epoxy for robustness and cyan (gel) for fast fixing;
5) - drill the upper left or right side of the inner wall of the hull inside the gunport with 0.5 mm drill to insert and lock a rope head;
6) - put the rope through the hole and let scroll it into for one cm. or more; then place a thin brass nail into the same hole; leave a small drop of cyan on the nail head and push it fully into the hole so that the glue holds the nail and the rope together; with a round brush touch up the tip of the nail head in black.
7) - fix the other end of the rope to the center bottom eyebolt, leaving the rope rather abundant; fix the knot with a dash of liquid cyan;
8) - drill the hole for the half barrel guns; to make the hole in every gun-port in the same place I have prepared a template that helps positioning; glue the half barrel, aged earlier, with liquid cyan glue;
9) - now it's the moment of the two ropes that are used to open the lid; first drill two holes of 0.5 mm where insert the rope;
10) - put the rope as in step 6, and then the brass nail, etc; connect the other end of the rope to the eyebolt and run a knot holding the rope taut; consolidate the knot with a drop of liquid cyan and step on the second rope of the lid in the same way.

All this for about 70 times . . I must also say that in order to develop this apparently simple approach I have tried different alternatives but the one here described, in my opinion, is the best.

Sincerely, Jack.
 
Saturday, June 7, 2014

Since last Saturday I was engaged by homeworks: installation of an air conditioning system and subsequent wall painting of the three "air-conditioned" rooms. Obviously I was not the "main protagonist", it is not my field of expertise, but it was enough to distract me for almost the whole week from any work on the Soleil Royal.

I'm currently working on the preparation of what in italy we call "serpi". Unfortunately I do not know the right english term but I hope the images will help. Shortly I'm writing of two pre-cut pieces of plywood of 1.5 mm. thickness. The preparation is trivial, but their installation at first sight has caused me a lot of doubts: the instructions recommend to well soak these pieces and then paste them. Undoubtedly the main problem is "weakness". In addition, you will have later to work for painting and applying golden decoration on the pieces: basically a "hard work". . with several difficulties. .
I think it would be better to work on the piece not mounted on the hull, apply all the decorations, paint the whole and only at this point apply the resulting, finished piece.

In order to use this method I decided to reinforce the precut plywood (of not very high quality wood) pasting with glue a fine fabric on the inside. The idea is to avoid breaking when bending during the final bonding.

In the two photos you can see to the two "serpi", the one on the right is the outer part, the left shows the inner part treated with the fabric. On the whole a couple of coats of diluted vinyl and finally a coat of primer: the objective is to harden the wood as much as possible. Will it work ? I hope . .

01 CAM00217.jpg
y4mfjTHYhlWwz4cbypyTbGEMSLenSOpukQgx0AqBoUyU2WrMIxnL1JulENST5_pDffm7HN3uao4ct4ppdBb0qm4vcjjI5rSqtuLk9KwWtsRWwvQAtnUYfbv6ltcVI9gJa1co-UMNB8z2xdRWFTnFXkRhyxguH2u0OnfK_JNuc_B6q4Kg0R6zvkdbAKdwEqoKHc0XjghWAauXNhe_hAiZjIx-g


02 CAM00218.jpg
y4mmgYRuJMpqZiC4frmHfixJRAstOW1K2wOBkfNkgVx2CyeFWMDiXva7vv6RkaASc7blxaoOSjVYdHXSjCz6qubzfuIBF8scZcXFwUtuaBeA3ngXUK41pXwUXTtrtyo4LNDivWiKtGIsofyvCpRQAe44tVVSWXMnxGrqFa8TntoWnoxX3wbVCzvUxyZqy70XQ9g2pDN0MvI_DXJKSVzi8QSkA


Finally, I worked on a "custom" version of two decorations located below the poop lower gallery. The decorations supplied by De Agostini are made to be mounted on a flat surface. On my model, unfortunately, this surface is absolutely not flat, so the piece does not fit at all. It seems that the problem is not only mine but many other modellers encountered the same. At the time I evaluated several solutions, which I have already discusse time ago and I don't want to repeat, but today I tried another solution. You can see it in the picture below.

03 CAM00219.jpg
y4maqfnjQ75GntiURKZO8cejA7c2TqdrZbC6YVp--u5pbJ8FmJoPTSsZxsTVizDBTF1IucNucKERwjJCScTkV_AaqqAxmg2Y7z8qzzhKF7_JsCQkGiXK1BY0JY7-sUWDD97hh2Z5hmGzJlQzg3LCdswYjT8QqvBIyIHAdOwiD3VedAz2WB5sJTTBHUbboMZaTXURvGT6OaWf7scJFDGmV4ysw


Unlike the original pieces, in the image pointed by link 04 marked with (2), this is in copper wire twisted and welded which can be modeled on the shape of the surface, and then adapted perfectly. It is aesthetically much more simpler . .

All for today, it seems quite nothing but it needed a lot of time and efforts . . really. Regards, Jack.Aubrey.
 
Thursday, June 12, 2014

While I'm working on the preparation of the "serpi", that I decided to finish before mounting them on the hull (could prove a risky decision but so I decided ..) I work also on other tasks: at the moment I'm finishing the installation of the stern decorations. It is an activity that involves a lot of downtime because the epoxy glue. In fact, only for a few decorations I've been able to use the trick of using a small amount of cyano-acrylate together the epoxy . . for many this was not possible.

Here is a roundup from right to left of the stern, almost finished: the poop three lanterns and some other minor details are still missing. Only at the very end I will apply a light coating of oil or transparent paint to hide some few spots of glue that could not be, despite all my attention, avoided.

The two statues that sit on either side of the upper balcony should be treated with bitumen of Judea to age their color.

01 P1090815.jpg
y4m6QptbL_PTUF4WZtcA_7cmwFZt6uHyqVb9WI9N4VicsXdi4wiROC3fmSX_C29YmMopAJPgoxibnpUS6-1Qr20ejVjNUdXf_2CpZafGsLuPYd0dL_KcteCykkji6iSsIMMnPnPuFuGllzNi5wYqJFlB4DxROyB-yQg02RMfNB8PrkWcP7gtDxa0rIf_G7EUvTPLbFKyZIDCyswngdW06LRnA


02 P1090816.jpg
y4my34bcLS4NG31nsCHWQoifu6iYZVMbehuHygoJt7kxSMoaxGeXxsIE9QJr1C_U05EMGiJE9rP84xqmMGgHuLjgV4PK_SBN8dNeyVu9xtPtSJ0X40Afb9eNJy01TDF1naB__NSdNIenMbpZLFnighUWOKC7yi7rOVuMN1xDK306mESPc_25lA6BSXtP62DjM4-N9Q0MANvROkSP3rjcop4hw


03 P1090817.jpg
y4mhKlPDs5-V2hJAWG4IZNrfWTqOLSnJDSBnr34As56l-LLsq0GHkD2ELThxJPSLCp2-QNQilujY0FDcvt1RZ7iLixngzgdVOe1I9xDx3H7rSYOwkIDr_CtLEVxyvLhpzOeJrpQ8WDg84Eu6YM8C4bG4uMe6yIiu2E9wgnQIlbgSE-90oUrFh5jL_gnzIesAOmJWhzZfzr0ITbO5lx-nm1JWw


04 P1090818.jpg
y4mF1ewpcr1dn3Uql_bnshotQLNl6Hqr6lpFVLtVW8GfRoqovgj7d1NnSkTZ2TCB8gPvAHue2zR8BdLTR_93ZG7YRDsTS6PocJfv_hL1HG67vAw-ctXQ2MevwBCJjlIdAGzxhU41WKA4INQyvbdtPTvRg2GZHXRW_z5iuQsRWb9WUby5lqhdRvOtom0Ewjf7apqQVjzc4A4GFWnykrbjXyDhQ


05 P1090819.jpg
y4m9vSDYc8zO3uX3fy0gu2IjJtWIGgVIOXy9u74gajulUogLxl636EbFRSsSsJCx_xMEVM8NxPv-R2gFP95Zm1153kvtAJL-jvPMCPMWdo8wM0diWeGf9yEe6ndKBWG9VyHebjpSjkHgx4AydCML31TyrAbslnbcHJgWRtw7iH-WR5jHWH_n9v0EH6r7-bNVavN-uy30Tr1D-txy9ebViLUjw


See you soon, Jack.
 
The SR is one of my favourite ship
Build the Heller version some 45y ago
The publication De Agostini or Altaya are not available here so………
I am following the build of 5 SR in a French forum
1 scrach
2 Altaya publication
1 Sergal (Mantua)
1 Heller (plastic)
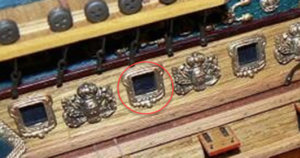
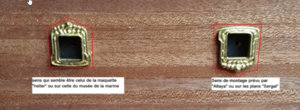
It was question of the orientation for the decoration for the gun on the first deck
It look like that Mantua Altaya and look like De Agostini did not follow the Musé de la marine model
Just to let you know
Yours
2019-08-18_12-10-33.jpg
the discution in the French Forum
2019-08-18_14-47-20.jpg

And no consensus on the issue
 
Back
Top