
hi Jack, The colored stain can we order them for delivery in the USA, very interested in thes do you have a link to the company. THANKS Don

-

SUBSCRIBE TO SHIPS IN SCALE TODAY!
The beloved Ships in Scale Magazine is back and charting a new course for 2026!
Discover new skills, new techniques, and new inspirations in every issue.
NOTE THAT OUR NEXT ISSUE WILL BE MARCH/APRIL 2026 -

Win a Free Custom Engraved Brass Coin!!!
As a way to introduce our brass coins to the community, we will raffle off a free coin during the month of August. Follow link ABOVE for instructions for entering.
You are using an out of date browser. It may not display this or other websites correctly.
You should upgrade or use an alternative browser.
You should upgrade or use an alternative browser.
Le Soleil Royal, vaisseau de 104 - De Agostini - by Jack Aubrey
- Thread starter jack.aubrey
- Start date
- Watchers 15

Sunday March 4th, 2012 . . "Pazienze" and "Cavigliere" (until I'll find the proper english term)
The building of the "pazienze" and the "cavigliere" raise another interesting matter. Infact, the vertical elements of these details, in this case a 5x5mm wood strip, must be "carved" to receive another 5x5 or 2x5 strip. The achievement of these notches is not difficult to do manually, it needs only some patience, but this time I wanted to find a different path to obtain the final result.
I'm slowly but relentlessy discovering new ways to use my Proxxon table saw and, for this task, I found another way to use it just to realise these notches.
The next image shows a trial made to achieve this result: I positioned the height of the saw in order to protrude only for few millemeters and, by passing the table above I made what you see in the image. Obviously I made several tests until I learnt totally the lesson, with some waste of wood.
01 P1080063.jpg

At this point of the test, I went forward to the next step: cutting the 5 x 5 square strip. But this is a normal use of the saw . .
02 P1080064.jpg

After these preliminary and successful tests I started to do the real work with the proper wood and the result can be seen in the next two images, the first with the wide notch for the "pazienze" and the second with the narrow one for the "cavigliere".
03 P1080065.jpg

04 P1080066.jpg

Obviously they are not finished at all, I have to carve the head in accordance with my last message and cut then to the right length.
But, again, I'm very satisfied because I made a new experience with the table saw . . experience to achieve step by step, error after error, until the final, successful way was found . . next time this experience will be ready for reuse in my mind.
At this point someone will probably asks by himself: and the guns ? They are still in the process but, having in mind the same experience with another model, I know it is a boring task and so I mix the work on them with other more interesting activities like the one described in this message.
See you next time, Jack.Aubrey
The building of the "pazienze" and the "cavigliere" raise another interesting matter. Infact, the vertical elements of these details, in this case a 5x5mm wood strip, must be "carved" to receive another 5x5 or 2x5 strip. The achievement of these notches is not difficult to do manually, it needs only some patience, but this time I wanted to find a different path to obtain the final result.
I'm slowly but relentlessy discovering new ways to use my Proxxon table saw and, for this task, I found another way to use it just to realise these notches.
The next image shows a trial made to achieve this result: I positioned the height of the saw in order to protrude only for few millemeters and, by passing the table above I made what you see in the image. Obviously I made several tests until I learnt totally the lesson, with some waste of wood.
01 P1080063.jpg
At this point of the test, I went forward to the next step: cutting the 5 x 5 square strip. But this is a normal use of the saw . .
02 P1080064.jpg
After these preliminary and successful tests I started to do the real work with the proper wood and the result can be seen in the next two images, the first with the wide notch for the "pazienze" and the second with the narrow one for the "cavigliere".
03 P1080065.jpg
04 P1080066.jpg
Obviously they are not finished at all, I have to carve the head in accordance with my last message and cut then to the right length.
But, again, I'm very satisfied because I made a new experience with the table saw . . experience to achieve step by step, error after error, until the final, successful way was found . . next time this experience will be ready for reuse in my mind.
At this point someone will probably asks by himself: and the guns ? They are still in the process but, having in mind the same experience with another model, I know it is a boring task and so I mix the work on them with other more interesting activities like the one described in this message.
See you next time, Jack.Aubrey
Hi donfarr,hi Jack, The colored stain can we order them for delivery in the USA, very interested in thes do you have a link to the company. THANKS Don
I bought that stain many years ago and I do not remember where I found it.
Anyway it is a product that is sold by an Italian company and it is also sold on Amazon.it. Probably you can find the same on Amazon.com or somewhere else.
It is a very common product, with a very low price and there is a water version and an alcool version. If available, the second should be the preferred choice.
Here a link on Amazon.it : https://www.amazon.it/s?k=mordente+...vqmt=b&tag=amamitsp-21&ref=pd_sl_6kept0afjw_b
Hope helping you, Jack.
Thank You Jack. Don
Monday, March 5th, 2012 . .
Today I built a "strange" structure (never seen on the naval achitecture books neither french nor english . . ) that has the role to support the ship boats. It will be located on the upper deck, just over the gratings of this deck. I had to built this element because, without positioning it over the deck, I can't identify the right place to install the ringbolts for some of the 12 guns. In fact this strucure interferes with them . .
Here below you can see the boats supporting structure: it is built with 5 x 5mm wood. Again my Proxxon table saw had a key role in cutting the single pieces, giving the warranty of perfect cuts at 90° that helps very much their assembly.
01 P1080067.jpg

02 P1080068.jpg

Later I passed to the gun's trucks by painting them with red polyurethane enamel. I used a double adhesive tape to hold the trucks in order to paint them in a more comfortable way.
03 P1080070.jpg

Here below the trucks after the first coat of paint. It is surely necessary a second coat, may be a third. I'm seriously considering the purchase of an air brush. I already have the air compressor. With an air brush these tasks will be surely faster. I will see on the market . .
04 P1080071.jpg

Kind regards, Jack.Aubrey.
Today I built a "strange" structure (never seen on the naval achitecture books neither french nor english . . ) that has the role to support the ship boats. It will be located on the upper deck, just over the gratings of this deck. I had to built this element because, without positioning it over the deck, I can't identify the right place to install the ringbolts for some of the 12 guns. In fact this strucure interferes with them . .
Here below you can see the boats supporting structure: it is built with 5 x 5mm wood. Again my Proxxon table saw had a key role in cutting the single pieces, giving the warranty of perfect cuts at 90° that helps very much their assembly.
01 P1080067.jpg
02 P1080068.jpg
Later I passed to the gun's trucks by painting them with red polyurethane enamel. I used a double adhesive tape to hold the trucks in order to paint them in a more comfortable way.
03 P1080070.jpg
Here below the trucks after the first coat of paint. It is surely necessary a second coat, may be a third. I'm seriously considering the purchase of an air brush. I already have the air compressor. With an air brush these tasks will be surely faster. I will see on the market . .
04 P1080071.jpg
Kind regards, Jack.Aubrey.
Tuesday March 6th 2012 . .
A preview of how the guns will appear on the trucks; the wheels are not yet painted.
01 P1080076.jpg

02 P1080077.jpg

Friday March 8th, 2012 . .
A quick update of the work done in these last days. First three images show the boats support structure, the pin-rails and the "pazienze" (I hope now that you can see them you can also name them corretly) after they are painted with red colour. They needed a total of three coats of paint to achieve a good result, So, just to paint then I took three days . .
01 P1080083.jpg

02 P1080080.jpg

03 P1080081.jpg

The pivots that come out from the bottom of these elements are the protruding part of brass nails fixed into the wood. They will be inserted in holes on the decks to increase the strength of the glue.
What do you think about the two decker shown on the cover of the book used as background ? It is a very interesting book about the plans, contruction and history of a 3rd rate vessel of 1678 named Lenox. It contains plans that would allow to build a 1:72 model . . The problem for me is that I have a lot of shipyards open and I cannot open another one !!
04 P1080082.jpg

Kind regards, Jack.Aubrey
A preview of how the guns will appear on the trucks; the wheels are not yet painted.
01 P1080076.jpg
02 P1080077.jpg
Friday March 8th, 2012 . .
A quick update of the work done in these last days. First three images show the boats support structure, the pin-rails and the "pazienze" (I hope now that you can see them you can also name them corretly) after they are painted with red colour. They needed a total of three coats of paint to achieve a good result, So, just to paint then I took three days . .
01 P1080083.jpg
02 P1080080.jpg
03 P1080081.jpg
The pivots that come out from the bottom of these elements are the protruding part of brass nails fixed into the wood. They will be inserted in holes on the decks to increase the strength of the glue.
What do you think about the two decker shown on the cover of the book used as background ? It is a very interesting book about the plans, contruction and history of a 3rd rate vessel of 1678 named Lenox. It contains plans that would allow to build a 1:72 model . . The problem for me is that I have a lot of shipyards open and I cannot open another one !!
04 P1080082.jpg
Kind regards, Jack.Aubrey
March 16th, 2012 . .
Last week I had too many things and they were not involving ship modeling, so the productivity was affected. Result: production below my usual average, average that is often lower than the rest of the world because of my slowness . .
Here I post some images of the work done, just to show something, anyway uncomplete. In the first two images the guns for the forecastle and the quarterdeck, different from the guns of the upper deck, with their red painted trucks. Again the wheel are not painted.
01 P1080084.jpg

02 P1080085.jpg

Then I started to build the four anchors. I'm still far from the end and here I show one anchor with the raw wooden stock and the other with the same element shaped and stained. Today I made all of them, including the iron hoops. For these last details I used a personal method instead of the one suggested by the instructions. I will explain better in the next message which will include finished anchors images.
03 P1080086.jpg

04 P1080087.jpg
Kind regards, Jack.Aubrey.
Wednesday March 21st, 2012 - last updates . .
Here follow some updates on the new superstructures of this week. Not too much but the wheels are still in movement . .
Two images of the anchors, 98% finished. To complete I have to cover the ring with a drawstring, in accordance with the books describing these details. To fix the stock to the shank I used a bi-component epoxy glue, which assures a much stronger adherence that the cyan-acrilate.
01 P1080096.jpg

02 P1080097.jpg

Two images of some superstructures red coloured and the two catheads.
03 P1080098.jpg

04 P1080099.jpg

Kind regards, Jack.Aubrey
Last week I had too many things and they were not involving ship modeling, so the productivity was affected. Result: production below my usual average, average that is often lower than the rest of the world because of my slowness . .
Here I post some images of the work done, just to show something, anyway uncomplete. In the first two images the guns for the forecastle and the quarterdeck, different from the guns of the upper deck, with their red painted trucks. Again the wheel are not painted.
01 P1080084.jpg
02 P1080085.jpg
Then I started to build the four anchors. I'm still far from the end and here I show one anchor with the raw wooden stock and the other with the same element shaped and stained. Today I made all of them, including the iron hoops. For these last details I used a personal method instead of the one suggested by the instructions. I will explain better in the next message which will include finished anchors images.
03 P1080086.jpg
04 P1080087.jpg
Kind regards, Jack.Aubrey.
Wednesday March 21st, 2012 - last updates . .
Here follow some updates on the new superstructures of this week. Not too much but the wheels are still in movement . .
Two images of the anchors, 98% finished. To complete I have to cover the ring with a drawstring, in accordance with the books describing these details. To fix the stock to the shank I used a bi-component epoxy glue, which assures a much stronger adherence that the cyan-acrilate.
01 P1080096.jpg
02 P1080097.jpg
Two images of some superstructures red coloured and the two catheads.
03 P1080098.jpg
04 P1080099.jpg
Kind regards, Jack.Aubrey
Friday March 23th, 2013 . . continuation . .
I continue today the message I started two days ago . . I began the building of the ship's boats.
I built a cuople of years ago two boats for another ship and I had the plan to reuse them, but I had to accept the fact that they were not of the proper size, one boat being too big and the other to small for this model. So I had to plan the building of two new boats: a not short and simple task !
I took into consideration a couple of methods, in fact there are several ways to build these boats, but at the end I took the decision to work around the material supplied by De Agostini.
But this doesn't mean I will build these boats as described in the instructions, there are too many details made in a way that I cannot accept; some of them totally out of scale. But I can use the material provided for the initial structure of the boat, that is planned and made quite well.
Anyway, before starting to use this material I made with a scanner a copy of the pre-cut keel and bulkheads to have, in case of failure of my project, the possibility to rebuild these pieces and restart . . a kind of backup . .
I know this task can be quite long, and honestly I started it with the objective to mix this new activity with the others around the guns and the superstructures, this in order to differentiate the work and make it less boring. I'm also waiting for new materials from De Agostini, materials that arrived to me, by the mail service, in a very poor state that I requested a re-shipment to De Agostini.
01 P1080093.jpg

02 P1080094.jpg

On the fronline of the superstructures I started and finished the construction of the two privy (I hope the term is correct). They will be installed at the prow in the future.
03 P1080100.jpg

04 P1080101.jpg

Kind regards, Jack.Aubrey.
Friday March 30th, 2012
The last week was a little unproductive . . The spring is coming and the fact I do not receive new materials from De Agostini has "iced" me, so, all what I made is to start planking the two boats, and nothing else of interest.
An interesting matter is that the two boats are exactly the same, one is only a little smaller. Infact the same defect I found on the larger is present also on the smaller and this probably means that the plans are the same, just a matter of a greater reduction of the scale.
Again, after having assembled the structure, I proceeded following my own way: instead of using the supplied planks (3x1mm), I used my veneer.
For the large boat I used planks of 2,5x0,5mm while for the smaller I used 2x0,5mm. My intention is to plank the hull three times and then remove the internal boat structure . .
As probably I wrote some message ago, the veneer I'm using has a very thin sheet of fabric on one side, so the first planking was applied capsized, with the fabric outside. I think the reason of this is obvious: the visible side will be the one oriented inside . .
Yesterday, in addition to the work done for the boats, I finished to prepare all the single elements for the installation of the guns . . at this point I can proceed with different options: continue with the ship boats or resume the ship guns . .
Cheers, Jack.
01 P1080110.jpg

02 P1080111.jpg

I continue today the message I started two days ago . . I began the building of the ship's boats.
I built a cuople of years ago two boats for another ship and I had the plan to reuse them, but I had to accept the fact that they were not of the proper size, one boat being too big and the other to small for this model. So I had to plan the building of two new boats: a not short and simple task !
I took into consideration a couple of methods, in fact there are several ways to build these boats, but at the end I took the decision to work around the material supplied by De Agostini.
But this doesn't mean I will build these boats as described in the instructions, there are too many details made in a way that I cannot accept; some of them totally out of scale. But I can use the material provided for the initial structure of the boat, that is planned and made quite well.
Anyway, before starting to use this material I made with a scanner a copy of the pre-cut keel and bulkheads to have, in case of failure of my project, the possibility to rebuild these pieces and restart . . a kind of backup . .
I know this task can be quite long, and honestly I started it with the objective to mix this new activity with the others around the guns and the superstructures, this in order to differentiate the work and make it less boring. I'm also waiting for new materials from De Agostini, materials that arrived to me, by the mail service, in a very poor state that I requested a re-shipment to De Agostini.
01 P1080093.jpg
02 P1080094.jpg
On the fronline of the superstructures I started and finished the construction of the two privy (I hope the term is correct). They will be installed at the prow in the future.
03 P1080100.jpg
04 P1080101.jpg
Kind regards, Jack.Aubrey.
Friday March 30th, 2012
The last week was a little unproductive . . The spring is coming and the fact I do not receive new materials from De Agostini has "iced" me, so, all what I made is to start planking the two boats, and nothing else of interest.
An interesting matter is that the two boats are exactly the same, one is only a little smaller. Infact the same defect I found on the larger is present also on the smaller and this probably means that the plans are the same, just a matter of a greater reduction of the scale.
Again, after having assembled the structure, I proceeded following my own way: instead of using the supplied planks (3x1mm), I used my veneer.
For the large boat I used planks of 2,5x0,5mm while for the smaller I used 2x0,5mm. My intention is to plank the hull three times and then remove the internal boat structure . .
As probably I wrote some message ago, the veneer I'm using has a very thin sheet of fabric on one side, so the first planking was applied capsized, with the fabric outside. I think the reason of this is obvious: the visible side will be the one oriented inside . .
Yesterday, in addition to the work done for the boats, I finished to prepare all the single elements for the installation of the guns . . at this point I can proceed with different options: continue with the ship boats or resume the ship guns . .
Cheers, Jack.
01 P1080110.jpg
02 P1080111.jpg
Wednesday April 11th, 2012
Again , also in these last ten days I was not much productive, or better, I made some important activities, but not too much visible and I can't show only few things.
In detail I:
01 P1080122.jpg

02 P1080121.jpg

Again , also in these last ten days I was not much productive, or better, I made some important activities, but not too much visible and I can't show only few things.
In detail I:
- Smoothed definitely the hull, after the application of the second planking, with sandpaper of decreasing grain. With this task I obtained two goals: smoothing the hull and reveal everywhere the same color for a given wood. In fact the color of the wood, in particular for the chestnut, was greatly influenced by the daylight and in this way I made the wood color homogeneous on the whole hull.
- Applied a coat of oil for wood on the whole hull, having in this way the possibility to admire the final colour of this ship after months of work . . and keep it stable.
- Installed the pintles and gudgeons to the rudder; next step is to fix definitely the rudder to the stern.
- Applied the second planking for the ship boats; I achieved a good result on the large boat, while I have to start the smaller.
01 P1080122.jpg
02 P1080121.jpg
April 12th, 2012
The long boat is now ready for the third planking while the smaller is ready for the second planking
01 P1080132.jpg

I made a little error with the second planking of the long boat that I will correct with the third planking. But this will not happen for the smaller . . power of experience . .
02 P1080135.jpg

In the next image I show the pintles and gudgeons applied to the rudder.
03 P1080131.jpg

I have also taken some photos to the overall hull, where I applied some coats of oil. May be in the images it is difficult to understand the difference, but in the real world the difference is great . . specially over the mahogany.
Image 04 shows the hull after the oil, while the 05 shows how it was just after sanding and before applying the oil.
04 P1080123.jpg

05 P1080031R.jpg

Kind regards. Jack.
The long boat is now ready for the third planking while the smaller is ready for the second planking
01 P1080132.jpg
I made a little error with the second planking of the long boat that I will correct with the third planking. But this will not happen for the smaller . . power of experience . .
02 P1080135.jpg
In the next image I show the pintles and gudgeons applied to the rudder.
03 P1080131.jpg
I have also taken some photos to the overall hull, where I applied some coats of oil. May be in the images it is difficult to understand the difference, but in the real world the difference is great . . specially over the mahogany.
Image 04 shows the hull after the oil, while the 05 shows how it was just after sanding and before applying the oil.
04 P1080123.jpg
05 P1080031R.jpg
Kind regards. Jack.
April 13th, 2012
I take this opportunity to show some new images of the hull, after the treatment with oil for wood. Note that a kind of disappointment comes from the fact that the colour of the beechwood (Wales) and the chestnut (2nd planking), after the coats of oil, is very similar, and this was not what I expected !! I'm seriously thinking to paint the wales in black (or another dark colour) . . also if I foresee some difficult problems with this unplanned painting.
01 P1080124.jpg

02 P1080125.jpg

03 P1080126.jpg

04 P1080127.jpg

05 P1080128.jpg

Thursday April 19th, 2012
During these days I have mounted the rudder to the sternpost. It may seem a simple task but it is not exactly true. To finish this work I spent a complete afternoon . .
Another work done was the planking of the ship boats. Each boat has now three layers of planks. I have also fixed the boat's keel. The next step is to detach the boats from their building base to allow working inside the hull.
Friday April 20th, 2012
I selected first the long boat to work on the internal side of the hull. First of all I refined the external planking with sandpaper and then I detached the boat from the building basement.
Here below two images of the external sides with the planking completed.
01 P1080136R.jpg

02 P1080137R.jpg

Here, on the other hand, you can see the internal side of the boat. Now I have to start the task to empty the inside to obtain a clear shell made up by the three layers of veneer.
03 P1080138R.jpg

04 P1080139R.jpg

I take this opportunity to show some new images of the hull, after the treatment with oil for wood. Note that a kind of disappointment comes from the fact that the colour of the beechwood (Wales) and the chestnut (2nd planking), after the coats of oil, is very similar, and this was not what I expected !! I'm seriously thinking to paint the wales in black (or another dark colour) . . also if I foresee some difficult problems with this unplanned painting.
01 P1080124.jpg
02 P1080125.jpg
03 P1080126.jpg
04 P1080127.jpg
05 P1080128.jpg
Thursday April 19th, 2012
During these days I have mounted the rudder to the sternpost. It may seem a simple task but it is not exactly true. To finish this work I spent a complete afternoon . .
Another work done was the planking of the ship boats. Each boat has now three layers of planks. I have also fixed the boat's keel. The next step is to detach the boats from their building base to allow working inside the hull.
Friday April 20th, 2012
I selected first the long boat to work on the internal side of the hull. First of all I refined the external planking with sandpaper and then I detached the boat from the building basement.
Here below two images of the external sides with the planking completed.
01 P1080136R.jpg
02 P1080137R.jpg
Here, on the other hand, you can see the internal side of the boat. Now I have to start the task to empty the inside to obtain a clear shell made up by the three layers of veneer.
03 P1080138R.jpg
04 P1080139R.jpg
Saturday April 21st, 2012
I spent these days emptying the inside of the boat, more in detail only the visible area, not the complete shell. This tasks may seem complex but in the reality it was quite simple, thanks also to the soft wood used for the boat skeleton.
To remove the wood I used the Proxxon minidrill with the tool shown here below :
RulloAbrasivo.jpg

and the following for the final cleanup :
Mole.jpg

Then I fixed the false frames, obtained from strips of mahogany veneer, and the bottom, from chestnut veneer. The result can be seen in the next images.
Cheers, Jack.Aubrey
01 P1080144R.jpg

02 P1080145R.jpg

03 P1080147R.jpg

Thursday April 26th, 2012
I continue to post images of the work done for the ship boats . . here I introduce you the large boat with more details applied that some time ago. I don't think it is worth to comment the images.
There are still many details to finish. such as the rudder, oars, etc. and after some painting in selected areas. Then some reels of rope, a couple of buckets or casks and the boat should be considered complete.
01 P1080151.jpg

02 P1080152.jpg

03 P1080153.jpg

04 P1080154.jpg

I spent these days emptying the inside of the boat, more in detail only the visible area, not the complete shell. This tasks may seem complex but in the reality it was quite simple, thanks also to the soft wood used for the boat skeleton.
To remove the wood I used the Proxxon minidrill with the tool shown here below :
RulloAbrasivo.jpg
and the following for the final cleanup :
Mole.jpg
Then I fixed the false frames, obtained from strips of mahogany veneer, and the bottom, from chestnut veneer. The result can be seen in the next images.
Cheers, Jack.Aubrey
01 P1080144R.jpg
02 P1080145R.jpg
03 P1080147R.jpg
Thursday April 26th, 2012
I continue to post images of the work done for the ship boats . . here I introduce you the large boat with more details applied that some time ago. I don't think it is worth to comment the images.
There are still many details to finish. such as the rudder, oars, etc. and after some painting in selected areas. Then some reels of rope, a couple of buckets or casks and the boat should be considered complete.
01 P1080151.jpg
02 P1080152.jpg
03 P1080153.jpg
04 P1080154.jpg
Monday April 30th, 2012
Hare some really "visible" news about one of the ship boat . . these news required some time to be achieved mainly due to the long time intervals waiting for the paint to dry. I added the rudder, the tiller and also some false pintles and gudgeons.
I have then mounted the oarlocks and now I'm trying to build the oars . . I'm using for them some components taken directly from the kitchen . . Cheers, Jack.
01 P1080155R.jpg

02 P1080159R.jpg

03 P1080161R.jpg

Hare some really "visible" news about one of the ship boat . . these news required some time to be achieved mainly due to the long time intervals waiting for the paint to dry. I added the rudder, the tiller and also some false pintles and gudgeons.
I have then mounted the oarlocks and now I'm trying to build the oars . . I'm using for them some components taken directly from the kitchen . . Cheers, Jack.
01 P1080155R.jpg
02 P1080159R.jpg
03 P1080161R.jpg
Thuesday May 3rd, 2012
Here are the new elements I prepared in these last days: the oars for the first boat and a kind of boarding ladder that is positioned in number of two in the front side of the forecastle. Regarding this last element the instructions where for me unsatisfactory so I decided to use a different method.
Boarding ladders: here below are shown the instructions suppplied. As i said this method, given the small size of these elements, makes things very difficult to achieve the goal to have all of them equal and correcly positioned. I used an alternate way that I show here.
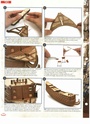 ---
---
Full Size: http://i46.servimg.com/u/f46/12/86/14/83/090-re10.jpg
First of all I made a special strip of wood made by the union of two different strips (4 x 1 and 2 x 2) glued together. Later I prepared a small table of veneer (mahogany), then I cut 10 steps (obtained previously) and I fixed them on the veneer all at the same distance. The day after, by using the table saw I cut a couple of ladders of the right width (8mm) and the boarding ladders were ready to be fixed in the proper place . . another way to use the table saw and another experience: I surely will use the same method when I will have to build the "true" boarding ladders on the two sides of the ship.
01 P1080171.jpg

Oars: the raw materials are toothpicks, some strips of beechywood (0,5mm depth) properly shaped and paper. The oars are painted with the same colours of its boat. The total number of these oars should be 10 but I didn't build all of them: I made only four . . too much work . .
02 P1080174.jpg

03 P1080175.jpg

Cheers, Jack.Aubrey.
Here are the new elements I prepared in these last days: the oars for the first boat and a kind of boarding ladder that is positioned in number of two in the front side of the forecastle. Regarding this last element the instructions where for me unsatisfactory so I decided to use a different method.
Boarding ladders: here below are shown the instructions suppplied. As i said this method, given the small size of these elements, makes things very difficult to achieve the goal to have all of them equal and correcly positioned. I used an alternate way that I show here.
Full Size: http://i46.servimg.com/u/f46/12/86/14/83/090-re10.jpg
First of all I made a special strip of wood made by the union of two different strips (4 x 1 and 2 x 2) glued together. Later I prepared a small table of veneer (mahogany), then I cut 10 steps (obtained previously) and I fixed them on the veneer all at the same distance. The day after, by using the table saw I cut a couple of ladders of the right width (8mm) and the boarding ladders were ready to be fixed in the proper place . . another way to use the table saw and another experience: I surely will use the same method when I will have to build the "true" boarding ladders on the two sides of the ship.
01 P1080171.jpg
Oars: the raw materials are toothpicks, some strips of beechywood (0,5mm depth) properly shaped and paper. The oars are painted with the same colours of its boat. The total number of these oars should be 10 but I didn't build all of them: I made only four . . too much work . .
02 P1080174.jpg
03 P1080175.jpg
Cheers, Jack.Aubrey.
Wednesday, May 9, 2012
I photographed the rudder pintles and gudgeons I scratch build long time ago. A big job that I mentioned a few posts ago. The rudder is not stained plywood but true solid mahogany.
01 P1080180.jpg

02 P1080181.jpg

03 P1080182.jpg

See you next time, Jack.Aubrey.
I photographed the rudder pintles and gudgeons I scratch build long time ago. A big job that I mentioned a few posts ago. The rudder is not stained plywood but true solid mahogany.
01 P1080180.jpg
02 P1080181.jpg
03 P1080182.jpg
See you next time, Jack.Aubrey.
Thursday May 10, 2012
Tired of chasing the construction of the boats, I took a couple of "sabbatical" days and I enjoyed it to mount some superstructures in the bow and stern area. I had already prepared them long time ago. . in short, a slight deviation from the usual routine of last recent times.
Attached are some pictures of the superstructures under discussion. Unfortunately, the red color is not very "photogenic", as I have explained a bit of posts back.
01 P1080179.jpg

02 P1080177.jpg

03 P1080178.jpg

04 P1080184.jpg

05 P1080185.jpg

Kind regards, Jack.
Tired of chasing the construction of the boats, I took a couple of "sabbatical" days and I enjoyed it to mount some superstructures in the bow and stern area. I had already prepared them long time ago. . in short, a slight deviation from the usual routine of last recent times.
Attached are some pictures of the superstructures under discussion. Unfortunately, the red color is not very "photogenic", as I have explained a bit of posts back.
01 P1080179.jpg
02 P1080177.jpg
03 P1080178.jpg
04 P1080184.jpg
05 P1080185.jpg
Kind regards, Jack.
Wednesday, May 16, 2012
Two photographs to show the "big" boat practically finished. Probably when I'll have finished the little, too, I'll build a couple of buckets that I will place on the bottom.
01 P1080220.jpg

02 P1080222.jpg

I promised not to publish images of the "small" boat, until it was over, as in fact it would be a duplication of the construction process almost like the "great" boat, but I remembered that I missed an important step regarding the emptying process of the internal side of the hull, when the same was being detached from the building slip.
So I go further now to fill the gap showing the "small" with the third planking terminated with the interior emptied and ready for next steps.
03 P1080223.jpg

04 P1080224.jpg

Kind regards, Jack.Aubrey.
Sunday, May 20, 2012
This is the "small" ship boat, largely completed. It is not really 100% finished because some small details (rudder, oars, coils of rope and dry) are missing, but the more, that is the hull as a whole, is finished. I must admit this boat came better than the "big" one and I think the best method would be to build a prototype, to make the necessary experience and then, enforced with this knowledge, build the final models. Obviously the time of their completion lengthens but the result improves.
01 P1080229.jpg

02 P1080231.jpg

03 P1080232.jpg

04 P1080233.jpg

Kind regards, Jack.
Two photographs to show the "big" boat practically finished. Probably when I'll have finished the little, too, I'll build a couple of buckets that I will place on the bottom.
01 P1080220.jpg
02 P1080222.jpg
I promised not to publish images of the "small" boat, until it was over, as in fact it would be a duplication of the construction process almost like the "great" boat, but I remembered that I missed an important step regarding the emptying process of the internal side of the hull, when the same was being detached from the building slip.
So I go further now to fill the gap showing the "small" with the third planking terminated with the interior emptied and ready for next steps.
03 P1080223.jpg
04 P1080224.jpg
Kind regards, Jack.Aubrey.
Sunday, May 20, 2012
This is the "small" ship boat, largely completed. It is not really 100% finished because some small details (rudder, oars, coils of rope and dry) are missing, but the more, that is the hull as a whole, is finished. I must admit this boat came better than the "big" one and I think the best method would be to build a prototype, to make the necessary experience and then, enforced with this knowledge, build the final models. Obviously the time of their completion lengthens but the result improves.
01 P1080229.jpg
02 P1080231.jpg
03 P1080232.jpg
04 P1080233.jpg
Kind regards, Jack.
Thursday, May 24, 2012 - Starting the installation of the guns
Now the time has come that I can no longer postpone the installation of the twelve guns on the upper gun deck. For this occasion, because there are no jobs that make dust or mess, I temporarily transferred the site at my house so that I can use all the useful moments to complete this activity that I remember often being long and tedious.
This morning I started with the positioning of the various pieces that will be placed on the upper deck: I drilled holes for fixing "pazienze" and "cavigliere" around the mainmast, I similarly prepared the holes for the joints for the structure to support the ship boats, and finally the holes to "nail down" the carriages of the guns, when it's time to fix them permanently.
And now this deck, as of now empty, is "magically" filling up. .
01 P1080234.jpg

02 P1080235.jpg

From a very early consideration there are three aspects to keep in mind:
1) in the images are visible five guns per side, the sixth is almost hidden under the half-deck above. This trolley and its cannon can not be fixed by a metal pin as it is not possible to bore the necessary hole. In addition, the fitting of the same is virtually impossible, unless contortions and acrobatics think out of my reach (and patience). If we consider that when you apply the gangways these two guns will be almost invisible, I think I will just paste them on the deck using the glue which I think is the most suitable for this type of bonding: two-component epoxy glue. It take long time to dry, but on the other hand are as strong as, and perhaps more of Attack and less sensitive to sharp blows that cause the release of Attack.
2) Similarly, the pair of cannons on the right are partially covered by the forecastle, but here the work is easier: first can be fixed with the pin and also the fitting is possible, at least for the exposed side.
3) The structure for the housing of ship boats, positioned as instructed by De Agostini, is a place that hinders the operations of the second pair of cannons on the right. And so I'm gaining seriously consider the idea of moving it to about 10/12 mm to the left. The problem is that I have no idea from the instructions in my possession, if the area would go to be occupied partially, that is marked in the black box below, you will have to accommodate other superstructures. The plans Sergal would seem an area free, apart from the ladders to access the decks. .
03 P1080234M.jpg

Cheers, Jack.Aubrey
Now the time has come that I can no longer postpone the installation of the twelve guns on the upper gun deck. For this occasion, because there are no jobs that make dust or mess, I temporarily transferred the site at my house so that I can use all the useful moments to complete this activity that I remember often being long and tedious.
This morning I started with the positioning of the various pieces that will be placed on the upper deck: I drilled holes for fixing "pazienze" and "cavigliere" around the mainmast, I similarly prepared the holes for the joints for the structure to support the ship boats, and finally the holes to "nail down" the carriages of the guns, when it's time to fix them permanently.
And now this deck, as of now empty, is "magically" filling up. .
01 P1080234.jpg
02 P1080235.jpg
From a very early consideration there are three aspects to keep in mind:
1) in the images are visible five guns per side, the sixth is almost hidden under the half-deck above. This trolley and its cannon can not be fixed by a metal pin as it is not possible to bore the necessary hole. In addition, the fitting of the same is virtually impossible, unless contortions and acrobatics think out of my reach (and patience). If we consider that when you apply the gangways these two guns will be almost invisible, I think I will just paste them on the deck using the glue which I think is the most suitable for this type of bonding: two-component epoxy glue. It take long time to dry, but on the other hand are as strong as, and perhaps more of Attack and less sensitive to sharp blows that cause the release of Attack.
2) Similarly, the pair of cannons on the right are partially covered by the forecastle, but here the work is easier: first can be fixed with the pin and also the fitting is possible, at least for the exposed side.
3) The structure for the housing of ship boats, positioned as instructed by De Agostini, is a place that hinders the operations of the second pair of cannons on the right. And so I'm gaining seriously consider the idea of moving it to about 10/12 mm to the left. The problem is that I have no idea from the instructions in my possession, if the area would go to be occupied partially, that is marked in the black box below, you will have to accommodate other superstructures. The plans Sergal would seem an area free, apart from the ladders to access the decks. .
03 P1080234M.jpg
Cheers, Jack.Aubrey
Saturday, May 26, 2012
Today I returned to work with the guns. I'm at a stage of the assembly of the guns that I define "intermediate", there is still a lot of work to do but the more critical activities and requiring precision can be considered concluded.
In practice, all trucks have been fixed to the deck below by means of a brass pin that runs through the base of the truck and slips into a hole in the deck. The whole thing is secured with four drops of Attack Gel under each wheel and also the pin is glued to both the truck and the deck. . the pin head can be seen in the images in high resolution.
01 P1080236.jpg

02 P1080237.jpg

03 P1080238.jpg

Sincerely, Jack.Aubrey.
Today I returned to work with the guns. I'm at a stage of the assembly of the guns that I define "intermediate", there is still a lot of work to do but the more critical activities and requiring precision can be considered concluded.
In practice, all trucks have been fixed to the deck below by means of a brass pin that runs through the base of the truck and slips into a hole in the deck. The whole thing is secured with four drops of Attack Gel under each wheel and also the pin is glued to both the truck and the deck. . the pin head can be seen in the images in high resolution.
01 P1080236.jpg
02 P1080237.jpg
03 P1080238.jpg
Sincerely, Jack.Aubrey.
Monday, May 28, 2012
New progresses with the guns assembly on the deck . .
01 P1080240.jpg

02 P1080241.jpg

See you next message . . Jack.
New progresses with the guns assembly on the deck . .
01 P1080240.jpg
02 P1080241.jpg
See you next message . . Jack.