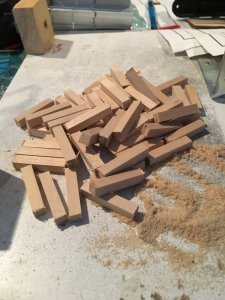
Something different with lunch today 


 |
The beloved Ships in Scale Magazine is back and charting a new course for 2026! Discover new skills, new techniques, and new inspirations in every issue. NOTE THAT OUR NEXT ISSUE WILL BE July/August 2026 |
|
 |
As a way to introduce our brass coins to the community, we will raffle off a free coin during the month of August. Follow link ABOVE for instructions for entering. |
|


I guess, mostly because of the Kit manufacture manual. They provide with a 'false' desk by means of securing bulkheads (before the hull planking begins)A general question, but done in this model too: Why do nearly all builders from Kits always INSERTING the DECKS before Planking.
Yes, I expect that. Now nearly all building instructions are wrong. Nearly none take care of adding the "false Keel" to the "real Keel"Stern and Bow parts from the beginning. As I have only making Kits in my over 40 Years of modelling, I know the Strong and MORE the week point. Sometimes I have the Idea to make some Notes about Kits- price comparations, Wood quality- together with the first point, the planking and its importance to start correctly. I have about 5000 images from start to end. Starting with surveys, minimum Tool necessary, Gadget, Working place, Building up the False Keel with the Keel, insert bulkheads, secure them with a very cheap 90º angel in PVC and so on. All these images are apart from specific images from specific ships here on this side. P.S. I do not know if this is the right place to do this commentsI guess, mostly because of the Kit manufacture manual. They provide with a 'false' desk by means of securing bulkheads (before the hull planking begins)
Love to see some of your photos and some of your modelling tipsYes, I expect that. Now nearly all building instructions are wrong. Nearly none take care of adding the "false Keel" to the "real Keel"Stern and Bow parts from the beginning. As I have only making Kits in my over 40 Years of modelling, I know the Strong and MORE the week point. Sometimes I have the Idea to make some Notes about Kits- price comparations, Wood quality- together with the first point, the planking and its importance to start correctly. I have about 5000 images from start to end. Starting with surveys, minimum Tool necessary, Gadget, Working place, Building up the False Keel with the Keel, insert bulkheads, secure them with a very cheap 90º angel in PVC and so on. All these images are apart from specific images from specific ships here on this side. P.S. I do not know if this is the right place to do this comments
....40 years of ship modeling, WOW! Hope you didn't change your mind to write notes, and SOS is one of those places you can surely post them. I am sure with such experience there are a ton of valuable information we will absolutely appreciate (not to mention 5000 photos)Yes, I expect that. Now nearly all building instructions are wrong. Nearly none take care of adding the "false Keel" to the "real Keel"Stern and Bow parts from the beginning. As I have only making Kits in my over 40 Years of modelling, I know the Strong and MORE the week point. Sometimes I have the Idea to make some Notes about Kits- price comparations, Wood quality- together with the first point, the planking and its importance to start correctly. I have about 5000 images from start to end. Starting with surveys, minimum Tool necessary, Gadget, Working place, Building up the False Keel with the Keel, insert bulkheads, secure them with a very cheap 90º angel in PVC and so on. All these images are apart from specific images from specific ships here on this side. P.S. I do not know if this is the right place to do this comments

I used my IPhone 6 and edited it using IMovie (free)Good first attempt video, did you shoot with camera or phone and used an editing program?


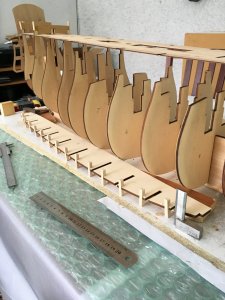
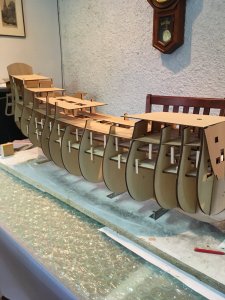
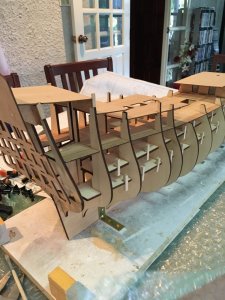
 Thursday afternoon. Got the two lower gun decks glued in place. Dry fitted the rest of the decks. Now I will sit down and decide wether I’ll add more thickness to some of the frames. But maybe a cold beer would be better.