Linberg's "Captain Kidd"

Donnie

Administrator
Staff member
Administrator
Forum Moderator
Le Rochefort Moderator
Joined
Aug 21, 2011
Messages
5,097
Points
738

Location
Madison, MS
Originally Date: January 01, 2006

This will start the Build Log Linberg's "Captain Kidd" a.k.a. "Wappen Von Hamburg" for those that want to follow or are just curious. This is not a wooden kit. It is plastic and purchased at a local hobby store. After some research, I found out that this model could actually be the Wappen Von Hamburg. You can make the decision!
As always, thank you for visiting the site and perhaps you are building this ship or have a desire to.
 
Originally Date: January, 06, 2006

I am in process of choosing the color schemes for this ship. I started to read those directions and I can´t believe some of the color scheme that they are wanting me to use on the deck. Red ! The colors that they want you to do on the Linberg Captain Kidd is quite strange. If anyone has done the Linberg's Captain Kidd, I could use a few tips on what paint colors you used for what main parts (Deck, Hull, I can handle the rest). If not, then that is ok as well. I can decide on my own!
I just got "The young sea officer´s sheet anchor" by Darry Lever and I must say that this is quite a compilation of very techy drawings. It seems very nice as I have only skimmed over so far.
Back to the Wappen Von Hamburg (WVH). I noticed that on what very few ships out there, it seems that dark green for the upper sides of the hull. I know that I can get close, but just curious as to what color others has used on this. Of what I can tell these Testor paints might work:

1) Medium Field Green / FS34095
2) European Geen / FS 34092
3) Forest Green / FS 34127

The directions just say green and they say "look at carton of box" but the box has no green to be found. ( I thought this to be a little funny).
Right off the bat, there are alot of weird things with the directions and colors schemes. I don´t think that I will be painting my deck Red as the directions say. I have no idea (as usual) as to what color to choose for the deck here. If anyone gets in on this, it would be helpful to tell me what Testors or Model Masters Color to use. I know that alot of folks here use various techniques to produce what they want. I am not quite there yet as I still like the simple route I guess (for now).
I did pick up some flat gray primer to paint the larger parts—you all should be proud of me for at least doing this ( I am learning—you know ). I thought this time, I would start with a primer and see what happens. Nope—I do not have an airbrush. Still using brush by hand.
 
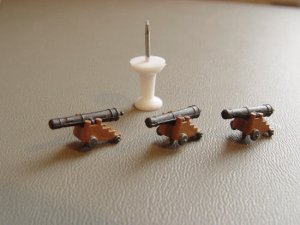
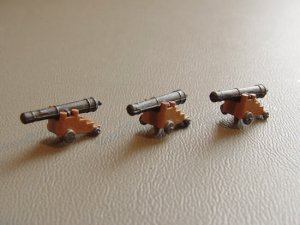
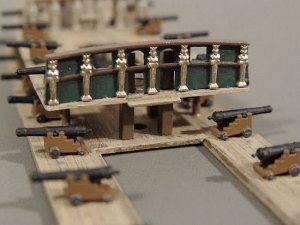
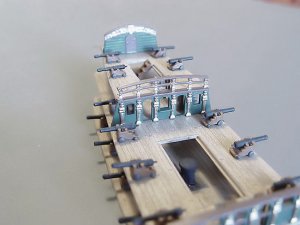
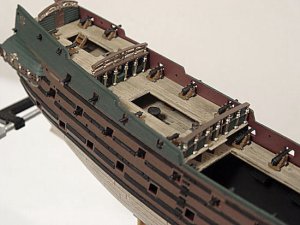
Well, I am way underway with this new project, and since I am doing the cannons first, I notice that I am having to cut each cannon away from the sprue. It is rather messy as the part has alot of heavy plastic that I have to cut away to get the cannons off. This ship has 56 cannons. Some cannon / carriages are already molded as one piece.
 
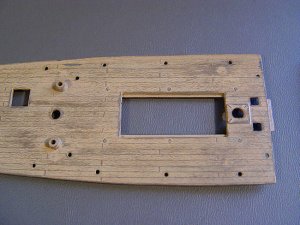
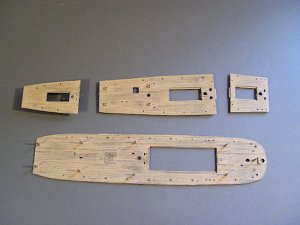
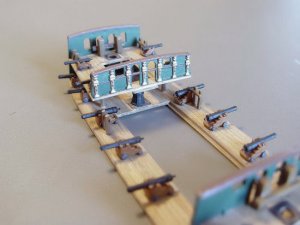
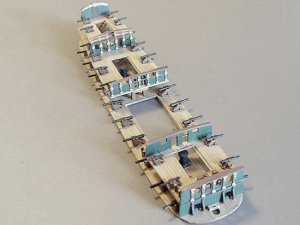
Well underway with the Deck and Cannons:

On the Deck, this is what I done:
1) 3 coats of paint.
2) First coat used Model Masters #4249 #4 Brown
3) Second coat used Model Masters #4735 Wood
4) Third, I went back to the brown and painted a few individual planks. Didn´t get facy, they will get comvered up again.
5) Forth coat, used Model Masters #4697 Tan for final coat.
6) Lightly sanded surfaces to desired effect.

On the Cannons: 1) I used Testors #1166 Flat Brown for carriages
2) Testors #1149 Flat Black
3) Wheels of carriage Floquil #818656 Iron Black
(I know it will not get seen, but I enjoyed it).

cannon1.jpgcannon2.jpgdeck1.jpgdeck2.jpg
 
  • Like
Reactions: ulf
Original Date: January, 23 2006

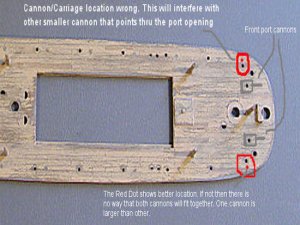
Found problem with Cannon—carriage assembly for those that are interested in this in the future. I found that according to the directions, two cannons should be outfitted at the front of ship, however both will not fit (even though one cannon is smaller). I found that the mounting hole is placed too far back and it interfers with the placements. Below is an image that I edit to show problem. Later I plan to most likely not to drill a hole, but to remove the mounting pin on bottom of carriage and find another way to mount assembly.

deckcorrect.jpg
 
Original Date: January, 26 2006

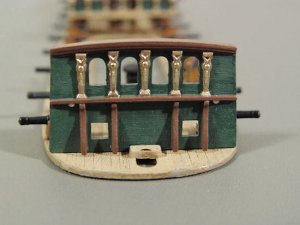
I know that there are spots that need some touch up paint from the sanding, but the emphasis is on the "headboard" (green, gold, and brown)—sorry, but don´t know the nautical terms.

deck3.jpgdeck4.jpg
 
Original Date: January, 26 2006

I meant to include the paint that I used for people that might be interested on the Beakheads (bulkheads):
1) Model Masters #4235 Flight Deck Brown for brown trim
2) Model Masters #1764 Euro Dark Green For main wood panels
3) Testors #1144 Gold for ornaments figures

I ran test color strips to decide which green I liked. The green is a like a blend of pine green and blue green. I like it myself.
 
Original Date: January, 29 2006

More Deck Photos—continue using same paints as mentioned before.

deck5.jpgdeck6.jpgdeck7.jpg
 
Original Date: January, 29 2006

I hate to say this, but at present, I do not know anything about rigging a cannon unless I do some research on some books that I have purchased recently under the advice of others. Another point is that I am afraid that it would be too tedious task to perform since it is so tiny of parts. I am sure that it can be done, however, but I think about the law of dimishing returns if I were to undertake rigging of the cannons.
 
Original Date: January, 29 2006

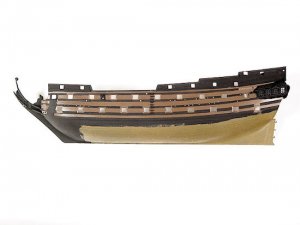
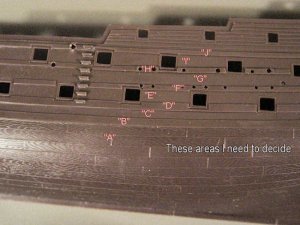
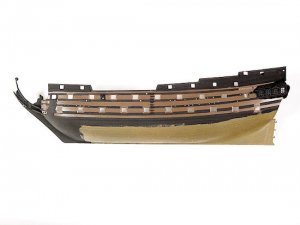
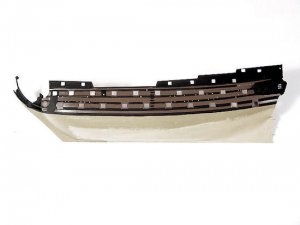
I have studied this Hull and I do not know what to do about the color scheme. I have seen several pictures on the net about the hull in general, but I am at a loss. The Hull on this boat requires a little different scheme that what I have done so far. If any one has any suggestions, I would take the advise. I have the letters A—J showing which ones I need to decide.

hull01.jpghull1.jpg
 
Original Date: January 30, 2006

The directions call for the inside hull to be painted red. Well, I was wondering if this is a common practice in real life. Also the instructions have already given me some pretty wild painting schemes that I disagree with already. This is why I quesiton the red inside wall of hull. I also found that the directions call for one color while they are saying "please refer to the box cover" and the box cover and the directions conflict with each other. According to the experts here I have learned that this is a reboxing—but at least I find it entertaining that the two do not match. I feel for the young modeler though. Doing a google search, I only found one WVH that had what looked like a dark red inside the hull. I do not mind doing it red, but I do like to stay within what is reasonable. I am sure that a young modeler would love the various colors, but I like to stay more to true.
 
Original Date: February 06, 2006

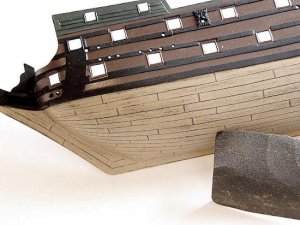
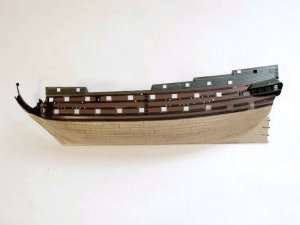
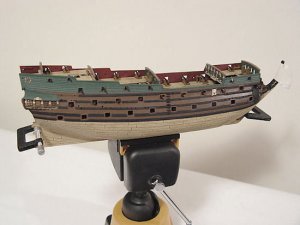
I do not have any pics of my hull as of yet becuase I have successfully ruined my hulls due to not liking my color schemes Sigh [sigh] and doing it over and over again. I thought about posting some images of what I did have, but I am sure that everyone would get a decent laugh—hey won´t hurt my feelings—I thought it looked funny myself. I just have all that wasted time. However, I am happy now with what I am going to do and it is funny how it turned out. I happen to go into my living room where my wife was watching TV and for about 5 seconds I saw a ship from the side that looked very simular to the hull style that I was doing and I liked the darkness of the ship sides and I remembered what I saw and went to my little workbench and pulled out my colors swatches. I was able to get a scheme that I liked just by happen chance ! I do not know what program my wife was watching february 06, 2006 at about 8:00 CST or a little after, but it helped me alot. I think it was on AMC. I can go back to the channel guide I guess and look it up. But, what I did was that used that Testors Spray again (except flat black sray) and sprayed the whole hull flat black. [the other half of the hull is ruined] the other half has not been touched. The Testors Spray Flat black is GREAT—I did not have the experience with the Flat Black Spray like I did the Gray Flat Spray. I was able to paint over the Flat Black in about 1 hour with NO problems at all. I am keeping the raised wales Flat Black and painting the rest a #4235 Mahagony Flight Deck Brown. I will stay with the Euro Green for upper deck. For the lower hull I am using the same brown with a final coat of lighter #4735 Wood color. I will go back and use the sanding technique for the lower hull to reveal the planking. I will show some pics. I am rather excited now, but it took some discouragement to get this far.
 
Original Date: February 11, 2006

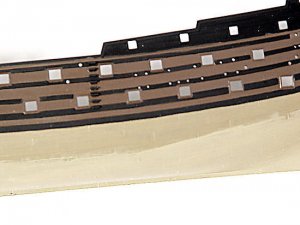
As a matter of fact, I have finally decided on what I want to do with the hull scheme. I used Testors Flat Black Spray—just srayed about 2 coats—dries fast. I used Model masters #4235 Mahogony Flight Deck for the upper hull. I used Model Masters #4249 (#4 Brown) starting with the lower Hull. I am going to use the same technique and color scheme on the lower hull as I did the deck. If you go back to my notes on the deck, you will see the technique there. I show how I am going to start with the lower hull building it up with different layers of paint. Then I will lightly sand down these layers to give the look I want (only on the lower hull - not on the upper)

hull01.jpg
 
Original Date: February 12, 2006

More pics of how I am building up the layers of paint before I sand it.

hull02.jpghull03.jpg
 
Original Date: February 12, 2006

Sanding off final layers of paint. I will sand more until I get the effect that I want. I am using Black PowerPlus GatorGrit #220, but any #220 would do I guess. I am very lightly sanding. Too much sanding will reveal too much of the underlayers. This is the time to really be patient and not get in a hurry. The point is that I am looking for a uniform look.

hull04.jpghull05.jpg
 
Original Date: February 12, 2006

I am still new to ship building. I call myself trying to so as much research as possible on this before starting. Well, I don´t know what to do. Actually I did think about that Waterline. I know what you are talking about, but don´t know what or how to do this accurately. I am thinking two things here. This is good advice that I need to take in hand next time and also, what can I do minimally to this ship now to make it better. I was wondering if it would look too goofy to keep my exposed planks and do some type of waterline that would be solid below that waterline. In other words, have a waterline and paint it solid below and keep my planking above the waterline—or would that look stupid ?
 
Original Date: February 20, 2006

More pics of Hull. Just got it clamped for fitting only. my eyes are worn out with the details. So this is it for a while. Its called one of those mid—life moments.

hull06.jpghull08.jpg
 
Original Date: February 20, 2006

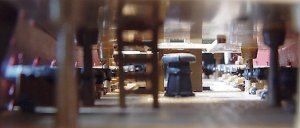
A different perpective of trying to get the inside shot before final assembly. The was from multiple tries. Got tired of fumbling around with best exposures—times—shutter speeds—lighting. So I guess I am somewhat happy with this shot, but not entirely. Just did it more for fun anyway. I know that the ship does not have a waterline and I have taken seriously the advice here. Personally, I guess I am the one to admire this, except for some that may visit and want to look at it. So, I am happy with it—having fun and relaxing—that is the most important for myself. Also, not only for me but to share my build experience to others so that someone starting out (like me) will have a good reference to start from. I have learned alot here—and I want to make sure that I pass along what I have learned mistakes and all. So, its not just for me, it for others to enjoy !

cannon4.jpg
 
Original Date: February 24, 2006
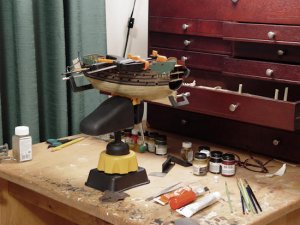
(Take Note of my first Workbench !!! )

This is my humble bench and picture of the Wappen Von Hamburg all stressed out with all the clamps on it. I just finished gluing the hull together and got it clampped. The tool box was almost a give away at lowes—their last one and it was opened and box was very ragged. They wanted to just get rid of it. Right place right time kinda thing. My wife insisted that I get this tool box. Anyway enough of that—enjoy.
I must add that this work bench no longer exist, but now has been replaced with much more working room and two work benches. However, I will add that I had a lot of fun working in this tiny area of the room. I had no idea that this hobby would grow to what it is now.
bench.jpg
 
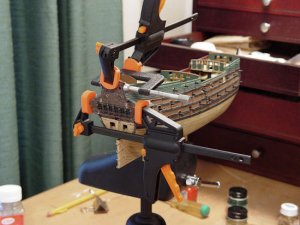
Original Date: February 26, 2006

Ok, so I am posting this one for laughs. This is part of the Stern assembly, and I tell you that it took me collectively about 5 hours to get to the point that I could glue this thing on to the boat. The fit is horrible. With a lot of grinding, sanding, ect. and as you can see the overkill of clamps, I was determined not to let the ship beat me. I was determined that I was going to get this stern on here. It has alot of gaps that I am now going to have to fill with putty. But, thats ok ! It is part of the enjoyments. (and frustrations). I also broke loose one of the cannons on the lower deck and I had to fish back in there with a pair of tweezers with wet glue all over the place. Anyway—enjoy—and have a good laugh—I posted this picture for humor !!! (if ship building has an ugly side to it—I am sure that this is it Laugh.

hull09.jpg
 
Back
Top