• LUCZORAMA SHIPWRECK SCAVENGER HUNT GIVEAWAY. 4 Weeks of Fun • 1 Legendary Prize ((OcCre’s Fram Ship)) • Global Crew Welcome!
    **VIEW THREAD HERE**

L'Orenoque Mamoli 1:100 scale

Chuck, great research on your part, what a shock on the bulwarks! Magic Mike
Magic Mike! Thank you! I appreciate you checking in! I'm very glad that I gave some forethought to this project - a learning from my Harriet Lane build ;) As I said, at least I didn't discover the problem after the hull was fully painted and coppered inside and out:eek:

Blessings.
Chuck
 
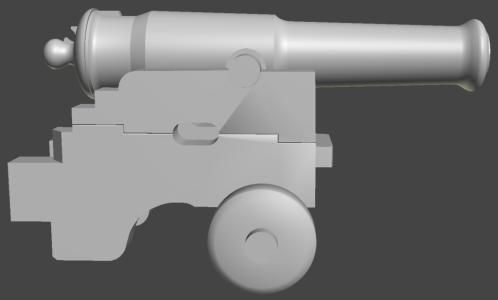
Dahlgren guns are big! Here's a random period picture of one shipboard with crew:
But also came in other sizes. More information and pictures on the Wikipedia page. I just remember being dwarfed by one somewhere when I was a little kid and marveling it was over 100 years old.
Yes, sir! Thank you for sharing these images. It was nice to see them again!

Blessings.
Chuck
 
I don't see much resemblance of this to an American 8in shell gun of 63cwt
View attachment 530454
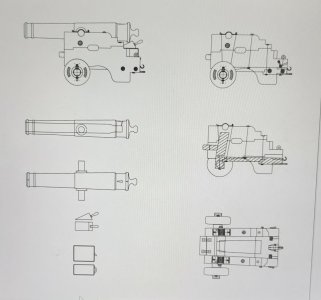
The tube isn't an issue with a measured drawing available, but I wonder at the French carriage, and if this drawing is of any value.
View attachment 530456

I did find this image from NAVAL ARTILLERY French navy 1650-1850 that shows a Marsilly type carriage at the bottom:
View attachment 530462
JERRY!

Thank you for adding your deep knowledge to this project. As to the similarities between the guns I absolutely defer to your opinion. I was mainly relying on the statement in Arming the Fleet that the 8 inch gun of 63 cwt followed the Paixhans form. I did not pay particular attention to the fact that the Paixhans canon-obusier No1 which L'Orenoque would have been armed with is 124.7 inches long to the 8 inch gun's 106 inches in length in addition to other distinctions in form which, now that you mention it, stick out like sore thumbs! So at 1:100 scale, I know someone will correct me if I'm wrongROTF, the Paixhans for my project will be just under 1.25 inches long. Not nearly as large as the Dahlgren (131 inches long), but certainly not the Lilliputian object that came with the kit.

As to the carriage, I did see that picture when I was researching the Paixhans guns. I think, however, that the Marsilly carriage from the last image is more appropriate given what Martin shared in his post. More on that below!

Again, thank you for coming to the rescue, Jerry!

Blessings.
 
Last edited:
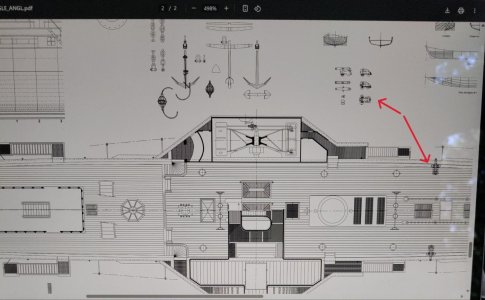
I can't help much here as guns just aren't my thing, but theres a pretty good plan of the Marsilly carriage and i believe the same cannon here on the download pdf for the L'Aigle which is pretty much contemporary. They struck me as very tall and unbalanced which won't help with your problem. It seems to me that dodgy bulwark hights are a pretty common problem as i've also come across it a couple of times in other kits. pdf is on this page: https://ancre.fr/en/monograph/127-aigle-yacht-imperial-1857.html PS.. note i've changed my moniker cos it looked like i was shouting at everyone !
Martin! Welcome back! I trust all's well in your garden?

Thank you for sharing the information on L'Aigle! I clicked on the link and got to the PDF but could not save it in a form where I could just repost the image - unless I just take a pictureExclamation-MarkStand by . . .
 
LO LAigle guns.jpg

This from L'Aigle. In any event, I am glad Martin put me on to this monograph because it helps tremendously to have an informed idea of what was likely on L'Orenoque's deck, other than the guns. So I bought a copy with the plans in 1:100 scale and paid 45 euros extra for fast shipping. I know what you're thinking - because I know you've done the same thing to try to get it accurate ROTF

Blessings.
Chuck
 
This from L'Aigle. In any event, I am glad Martin put me on to this monograph because it helps tremendously to have an informed idea of what was likely on L'Orenoque's deck, other than the guns. So I bought a copy with the plans in 1:100 scale and paid 45 euros extra for fast shipping. I know what you're thinking - because I know you've done the same thing to try to get it accurate ROTF
That's a big help as Arming the Fleet doesn't show the trunnion width or any carriage at all.
 
Martin! Welcome back! I trust all's well in your garden?

Thank you for sharing the information on L'Aigle! I clicked on the link and got to the PDF but could not save it in a form where I could just repost the image - unless I just take a pictureExclamation-MarkStand by . . .
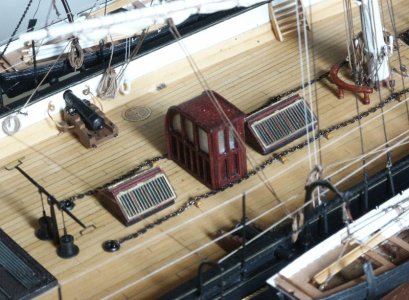
that is why i just gave you the link, not sure about copyrights either. I am building the L'Aigle but i haven't bought the plans ! she's not exactly a warship, i think these are more for signalling salutes than anything. Note that the bulwarks are quite tall in the forward section , with high water channels, rather than the open decorative style at the rear of the ship. Big steam capstan at the front, plenty of deck gratings over the boiler room and a small item you may have noticed...coal loading scuttles, the circles marked fore and aft of the cannons. i eventually found something similar from china made for toy transformers bots. You can see one here , note that the modeller here has used commercial bell mouthed cannons with ordinary carriages.

ds_00810.jpg
 
Last edited:
Sorry this is so late after the fact, but I had to say something !
As a ham radio operator, I worked emergency and support communications for the "Dirty 30" which is a 50K race in the mountains of Colorado. It has a total of 7500 feet of elevation changes between 7500 and 9500 ft altitude along it's 30 mile ultra marathon trail run. It occurred in the Golden Gate Canyon State Park if anyone wants to check it out (unfortunately the race is no longer run because of the authorities at the park) The emotions at the completions of the run were nothing short of amazing and the determination of these people was just off the chart !
It was an event that I will NEVER forget !

Chuck, I salute you for toughing it out ! You should wear that buckle proudly (I'm sure you do) as it is an enormous accomplishment !
Major congratulations !
Jeff! Thank you for the compliment and for the cool story! I wear the buckle exactly as you describe. It adds to my swagger :cool:

Thank you for checking in on this build!

Blessings. Peace. Gratitude.
Chuck
 
that is why i just gave you the link, not sure about copyrights either. I am building the L'Aigle but i haven't bought the plans ! she's not exactly a warship, i think these are more for signalling salutes than anything. Note that the bulwarks are quite tall in the forward section , with high water channels, rather than the open decorative style at the rear of the ship. Big steam capstan at the front, plenty of deck gratings over the boiler room and a small item you may have noticed...coal loading scuttles, the circles marked fore and aft of the cannons. i eventually found something similar from china made for toy transformers bots. You can see one here , note that the modeller here has used commercial bell mouthed cannons with ordinary carriages.

View attachment 530697
Martin! Understood. I was in a rush and did not notice the changes in the bulwark profile. I did see the coal scuttles! Very cool! On the L'Orenoque kit they have only two - one to port, one to starboard. I'll probably add another pair. I'm very excited to receive the monograph and the plans. I'll keep you posted.

Blessings.
Chuck
 
What ho, shipmates!

Now the story of the 1st planking . . . .

As you know fairing the plywood bulkheads was strictly a pain in the backside! I used my small Dremel and got carried away at some points and had to glue on some basswood and try again. In the end, I achieved a fair ROTF result. The kit supplies parts in the same plywood that are meant to be glued to the bow and stern and to be faired to the appropriate shapes for the planks to rest on. First, I had learned that fairing this plywood was a ridiculous undertaking. Second, given the curve of the bow, but particularly the stern, I knew I needed filler blocks to make sure that the planks held the right shape. I used balsa in the bow and a combination of balsa and basswood in the stern. See above for the discussion of the different sanding rates for balsa compared to the plywood:eek:

Now, the stern of this kit is a PROBLEM. The instructions are useless. The kit plans do not help. The actual plans did not really help me except to suggest the approximate end shape. If I understood the sections profile lines I might have been mor accurate and less creative. In the end, I came out with a stern that works for me, at least.

In some earlier post I alerted you to the fact that the plans call for the planks aft to be feathered into the plywood keel. Same for the planks forward. There is no rabbet in the plywood keel. Some of you master builders would probably have carved one. Me stone age. Stone age tools. No carve. Only glue down. Then sand, sand, sand, sand. Also, there is no sternpost.

Yes. I have positive things to say about the kit. How dare you! Here's one: the kit's planking material for the first planking is excellent!

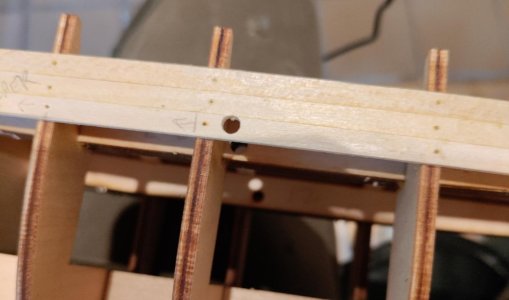
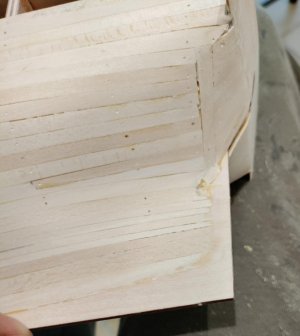
Here we go! So, I began with the garboard strake and worked up a bit. The instructions say to place three rows of planks at the deck level starting at the level of the deck and working down. You can see that I started that process. You can also see the holes in the planks at the frames. I don't know how I "just discovered this" but I found that drilling and pinning the planks really works great! Much better than clips and clamps!
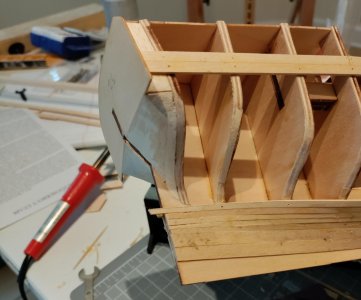
LO 1st Planking 1.jpg

Here's a detail showing the dirty secrets. The yellow arrows show a repair I had to make to add back material I recklessly removed with my Dremel. Red and blue arrows pointing out all of the material I had to add to form the stern filler blocks.
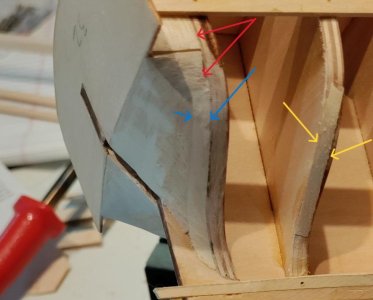
LO 1st Planking 1 stern detail.jpg

Stern profile:
LO 1st Planking 2.jpg

Bow:

LO 1st Planking 3.jpg

Midship - I almost forgot about the axle for the paddle wheels:eek:

LO 1st Planking 4.jpg

Here's a detail shot of the bow. You see that I have run the lower planks pretty far out onto the stem. I sanded the underside pretty thin before I glued them on. I know it looks nasty, but it worked out fine.
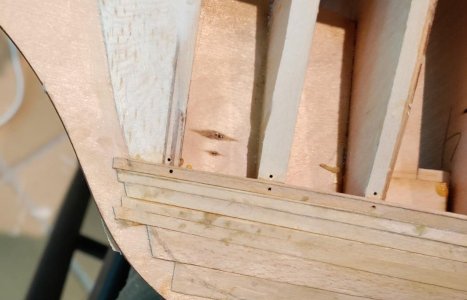
LO 1st Planking 5 bow detail.jpg

Detail of the finished first planking up to the level of the deck and you can see that I was able to shape up those lower planks:
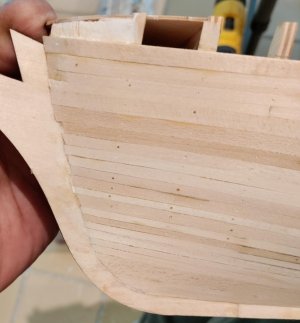
LO 1st Planking 8 bow detail ugly.jpg

And the ugly truth of the stern. Hey! I was just doing my best to get her butt covered!
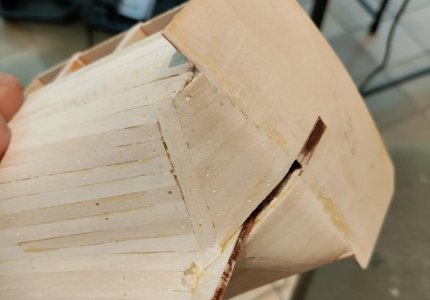
LO 1st Planking 7 stern detail ugly.jpg

You can see that the feathering worked out:)

LO 1st Planking 6 stern feather.jpg
 
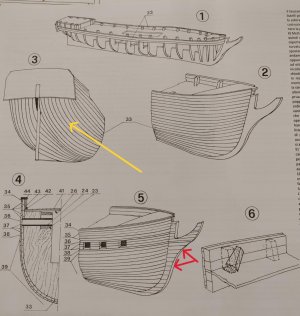
Here's what the planking instructions look like:

Yellow arrow to the very helpful drawing of what the stern is supposed to look like at the end of the first planking. Red arrows pointing out that the instructions call for planking the stem!?!?!?! Is that a thing?

LO Planking Plans.jpg

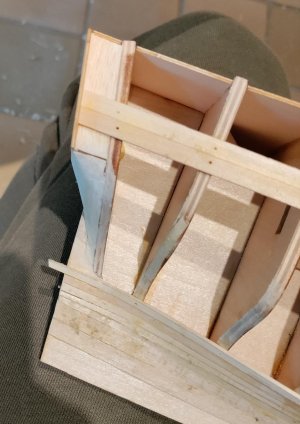
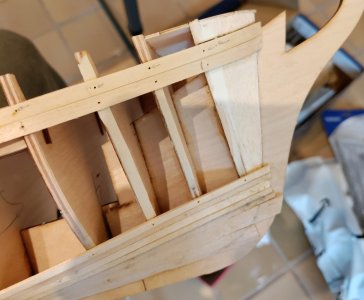
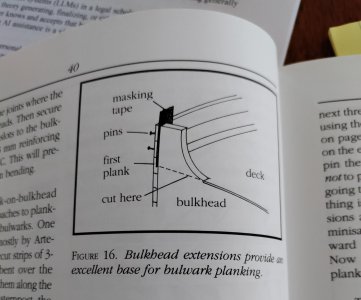
Now, I'm sure you noticed my emphasis on planking from the deck down. That's because the bulwark planking happens last. The shape of the bulwarks from the deck up is maintained by bulkhead extensions. I couldn't figure out how to deal with this new (to me) construction problem. How do I glue the planks to the lower planks and not to the bulkhead extensions? Absolutely nothing in the instructions about this. I need something to keep the plywood bulkhead extensions from absorbing any glue. Bees wax? Saranwrap? Finally, I looked back at my old standby, Mastini's Ship Modeling Simplified and presto - the answer.

LO Mastini on bulkhead extension planking.jpg

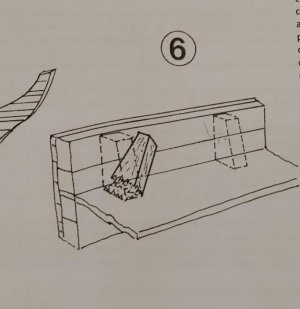
One final note - the instructions say to snap off the ends of the bulkhead extensions after the glue dries. Snap then off with pliers. Two things wrong with that. First, even if it does work, you'll be left with a lot of plywood to chisel, file and sand down flush with the deck. Second, what a ridiculous thing to say. "Snap off the bulkhead extension with pliers" Gad zooks and odds bodkins!

LO Planking Plans bulkhead extensions.jpg

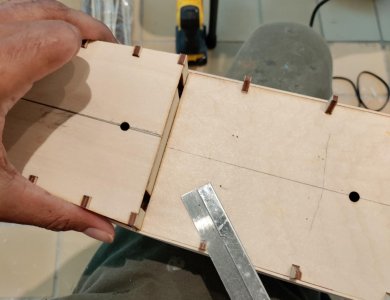
Riffing on Mastini, I used Scotch tape - thinner and less porous than masking tape - and taped all the way round the bulkhead extensions. Also, I used a razor saw and pre-cut almost all the way through the bulkhead extensions. It worked AWESOME! BTW, I did snap the ends off with a pair of needle nose pliersROTF

LO 1st Planking bulwarks 1.jpgLO 1st Planking bulwarks 2.jpg
 
Back
Top