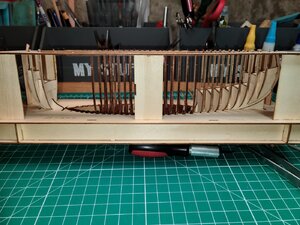
Marmara Trade Boat, 1:48 , SC brand [COMPLETED BUILD]

Hi all.
Truly nice boat but I would like to stay on its history..
Having read the origin of the boat as is presented in kit's manual, which I believe it's the right one...I give you a riddle.
In the below link you can see what the Museum of Palermo calls as "Fishing boat of Malta". http://www.museodelmarepalermo.it/il-museo/modelli/barche-da-pesca/gozzo-maltese/
I don't know how much accuracy there is on this model or even whether is really a Maltese traditional boat but as you can see,
the boat's hull is identical with the Turkish Traditional boat, "Marmara Kancabas".
Is there anyone (members from Malta -Sicily-Turkey) who might have more information about the “Maltese”-"Turkish" boat?
Is there any relationship between those two boats?
I have sent also emails in "Malta Maritime Museum" and "Museum del mar" in Palermo but I think I took them by surprise since I don't have any answer so far...
Thx
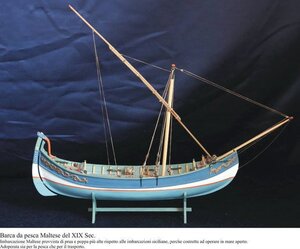
Maltese fishing boat.jpg
 
Hi all.
Truly nice boat but I would like to stay on its history..
Having read the origin of the boat as is presented in kit's manual, which I believe it's the right one...I give you a riddle.
In the below link you can see what the Museum of Palermo calls as "Fishing boat of Malta". http://www.museodelmarepalermo.it/il-museo/modelli/barche-da-pesca/gozzo-maltese/
I don't know how much accuracy there is on this model or even whether is really a Maltese traditional boat but as you can see,
the boat's hull is identical with the Turkish Traditional boat, "Marmara Kancabas".
Is there anyone (members from Malta -Sicily-Turkey) who might have more information about the “Maltese”-"Turkish" boat?
Is there any relationship between those two boats?
I have sent also emails in "Malta Maritime Museum" and "Museum del mar" in Palermo but I think I took them by surprise since I don't have any answer so far...
Thx
View attachment 169617

Thank you !!!

You are truly correct on how similar they are. I hope some other member can provide a bit more of info.

Daniel
 
Hi all

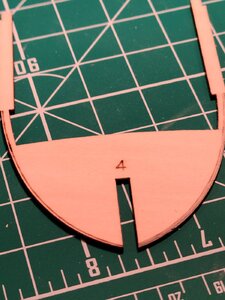
A have a question about beveling. Lets see what I did today.

First glued 2 pieces. One at the stern, another at the bow.

20200801_170523.jpg

20200801_170533.jpg

I have to slightly sand them to have them flash to the kill. They where like 2 hairs wider than the keel wood. Enough to have trouble to place the keel within the berth.

Nevertheless, all parts, so far, fit perfectly.

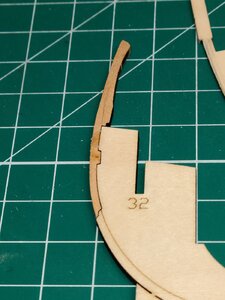
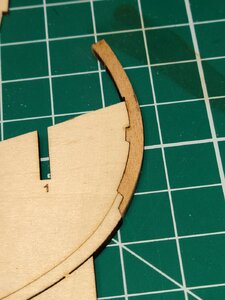
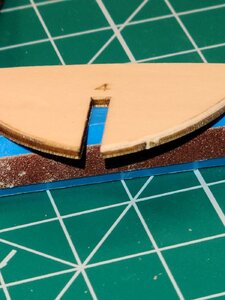
Then I started to do the beveling of the stern and bow bulkheads. I always did the beveling (sanding) with the bulkheads already glued to the hull. This was my first time doing the sanding bulkhead by bulkhead over the bench up to a laser mark.

Can you please tell me if the angle of my sanding looks acceptable ?

Here goes some pictures.

Before the sanding
20200801_164454.jpg

After (one side to compare)
20200801_165218.jpg

Same here

20200801_163953.jpg

20200801_164051.jpg

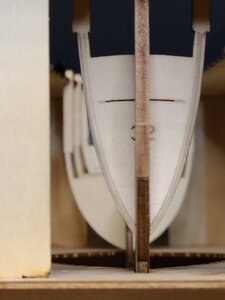
Bulkheads placed at the keel. Nothing is glued at all.

20200801_173032.jpg

20200801_173144.jpg

Thanks
Daniel
 
Yes... you have the right idea. But I would not sand it any further until you are ready to test the run of the planking. The purpose of the bulkhead shaping is to ensure the planks lie flat and true along the length of the boat. This is what will give it the shape it requires. Lucky for you the kit provides a laser etched line as a guide for the beveling. In older kits that line does not exist and it has to be shaped by eye.

Take a piece of your planking and lay it across the bulkheads you have already shaped and see how it lies. The plank should lie flush against each bulkhead with no dips or gaps. Also remember the bevel should have a flat contour not rounded as the plank that rests against it is flat itself.

Hope this helps....
 
Finished the beveling of the stern and bow bulkheads. Now, during the week will start the ribs.

20200802_173431.jpg20200802_173456.jpg20200802_173529.jpg

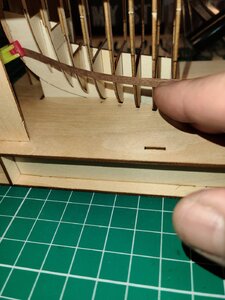
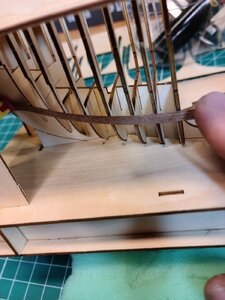
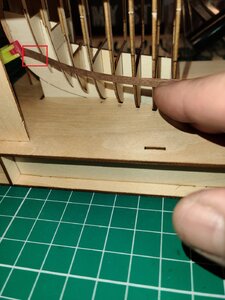
Then I used, as it was suggested by Mike, a plank piece left over from the Red Dragon. Looks like fit flat against the bulkhead. Tried to take a picture, but wasn't easy. With the berth, my big fingers and all being so fragile I did my best.

20200802_173146.jpg
20200802_173017.jpg

To be continued..... :cool:

Daniel
 
Hi Daniel, It sure looks good. Just check - not sure if it is just distortion caused by the camera lens angle, but it almost looks like a very slight indentation of the plank in the red block. On the next pic it looks fine though!

20200802_173146.jpg
 
Hi Daniel, It sure looks good. Just check - not sure if it is just distortion caused by the camera lens angle, but it almost looks like a very slight indentation of the plank in the red block. On the next pic it looks fine though!

View attachment 170042

Thank you Heinrich !!!! Tomorrow I will take a look again. For me looked OK. Trying to take a picture was an issue. On one hand the phone, the other on the plank, and on top of that I wasn't really getting a good angle of vision due to the berth.... I took more than 20 pictures and finally saved those 2. Al the rest trashed.

Let see when the time comes for the planking out of the berth. At that time I will be able to do small adjustments to the beveling. All will be glued and I believe the decks will be in place (need to check again the instruction manual)

Please, keep checking the log and pointing me what you see, mainly the potential mistakes !!!

Thank you !!
Daniel
 
Last edited:
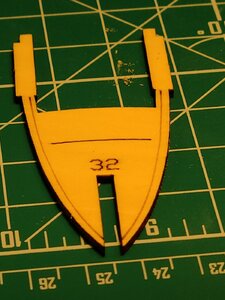
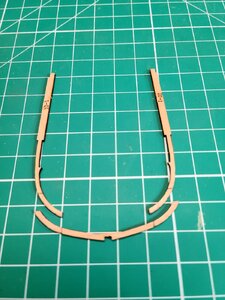
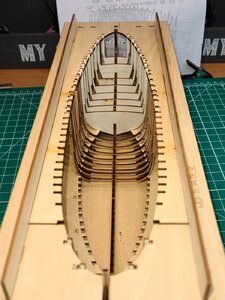
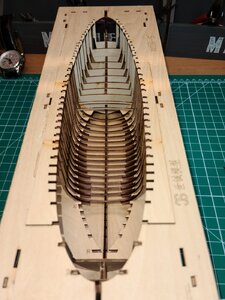
Started to work on the ribs. Did ribs 9-16. Those that needed beveling was done before gluing the pieces.

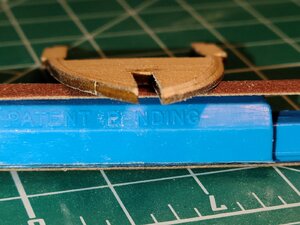
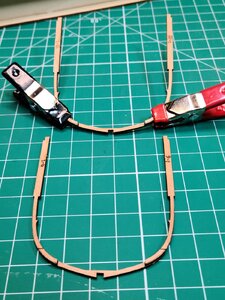
I tried to glue them using some clips (probably they have other name I can't remember now, you will see the picture). But it is too dangerous as this ribs are VERY FRAGILE.

I found that just adding a bit of wood glue and placing the pieces together they stay in place. The pieces are so lightweight that a little of glue is enought to keep them together. In the following minutes, under the magnifier you aline the 3 pieces with the marks they have. By the time you finish the alignment, they are already well attached. A few minutes latter you can drop them in the berth.

Take a look to the pictures.

3 pieces of a rib already beveled
20200803_132346.jpg

Gluing them. Only on 1 rib I used those clamps... too dangerous.
20200803_133100.jpg

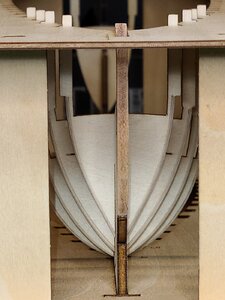
Inside the berth
20200803_171150.jpg
20200803_171257.jpg

I have questions :

First one....
Nothing is glued yet. When I finish with all the ribs and check they all fit well.......Do I add a little of glue to the keel and glue each one within the berth without taking them totally out ?

Second one: planking

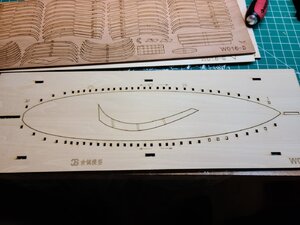
All will be glued inside the berth. Imposible to plank there. The kit has also this berth:
20200731_162943.jpg
This berth comes in the standard kit. The upgraded one has my berth you saw in the pictures and also this one.

To plank the ship the designer and the instructions use the ship placed on that berth

Screenshot_20200803-183646_Chrome.jpg
Screenshot_20200803-183754_Chrome.jpg

So.... here goes my question. When the time comes for planking:

Do I try to take the hull out of my berth and place it over the other berth OR... I just place upside down my berth and cut what is now the berth base ?

Then the hull will finish as the picture for planking. And avoided taking out the hull from the top of the berth with the risk of breaking a rib.

I hope you understand this second question/dilema.


Thanks
Daniel
 
I would "place it upside down and cut what is now the base" ... not sure if it is possible to "transfer" it from one berth to the other

to your first question: yes, I would just add glue to the ribs/keel inside the berth when I am satisfied with the fit ... I thought that was what the berth was made for in the first place - giving me 100 extra fingers to hold everything in place for gluing ;)

Thank you !!!! And you are correct about the hundred fingers :).

I will start today gluing the already done ribs to the keel.

Daniel
 
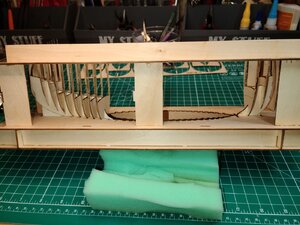
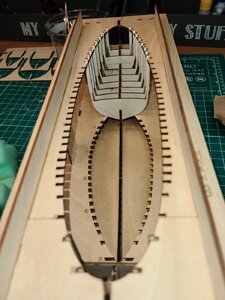
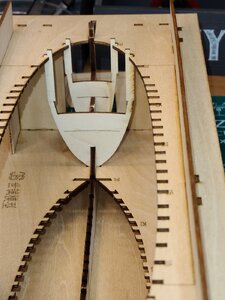
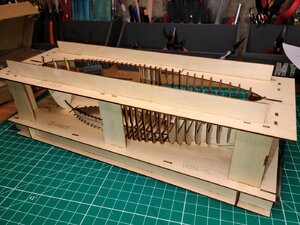
Have done a few more ribs. Definitely this ship will not go out of the berth without cutting it at the columns after placing it upside down. We will see that soon.

I was wondering why I can not add the decks when still in the berth and then take it out and do the planking. It will be all stranger.

The instructions call to do the planking first. But they are based on the fact that the berth used is different (see screenshot picture) and you can't add the decks until you finish the planking.

What do you guys think about decks addition at this stage, before taking it out of the berth ?

Screenshot_20200803-183754_Chrome.jpg20200804_165112.jpg20200804_165207.jpg

Best
Daniel
 
Just an fyi... it is commonly called "a jig". It is also not unusual to have to destroy the jig to remove the assembled model. After all, the jig is only needed once.

Ok perfect. Will change to building jig. I keep it calling berth because it was fixed in my brain from the Chinese instructions. Also is good to know that most modelers have to destroy the building jig. I haven't realized about that reading other threads. All is a learning experience.Thank you !!!

Moreover, taking advantage of your experience. What do you think about adding the decks before taking it out of the building jig and hence before planking it ?

Thank you !!
Daniel
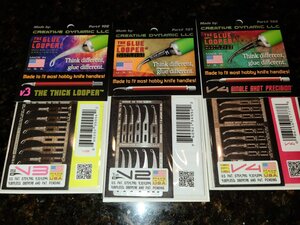
PS : today I received the Glue Loopers that you said you are using for small detailed gluing. Great !!!
 
Back
Top