Mayflower 1/64 - Billing Boats

Joined
Jan 22, 2024
Messages
49
Points
68

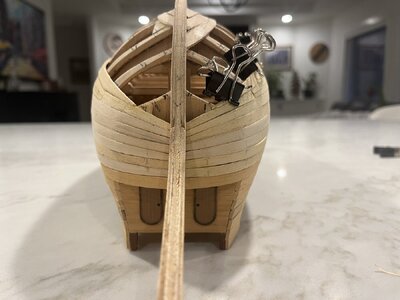
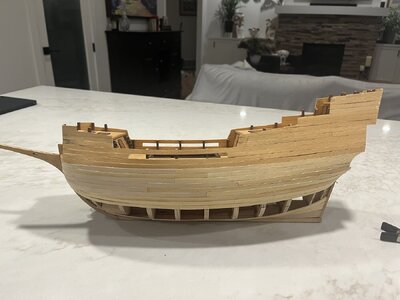
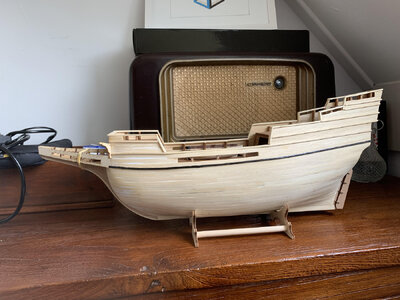
I bought this kit at a thrift store. It had the upper planking done (darker wood) and I have been plugging away at it for a few months. Getting close to closing it in. It has been a learning experience for a first attempt at a wooden ship. Oh, and an inventory of the box indicates that nothing is missing! Not bad for $40.

IMG_2412.jpeg

IMG_2411.jpeg

IMG_2410.jpeg

IMG_2425.jpeg

IMG_2441.jpeg

IMG_2440.jpeg

IMG_2442.jpeg

IMG_2455.jpeg

IMG_2454.jpeg
 
Planking continues and am only about 3-4 strakes left to go!

IMG_2600.jpeg

I’ll need lots of putty and sanding but I plan on painting the bottom up to the waterline anyway. Good news is that the putty takes the stain fairly well and if the top is pretty tight then the stain should look good.

IMG_2443.jpeg

Thanks for looking.
Dave
 
Hi David. You are making good progress - as you say that hull is almost closed. From what I can gauge from the pictures, the wood looks to be of good quality so the hull should come out looking good!
 
The weekend was a success! Got the hull closed in. Now it’s sanding time. I will do some rough sanding first before applying a bunch of putty. Hopefully that way I won’t just be removing all the putty I put on. Although the instructions are minimal, I am assuming the beak would be next followed by rubbing strakes and chain plates. The rudder, I think, will wait until I am done manhandling the hull.

IMG_2614.jpegIMG_2615.jpegIMG_2616.jpegIMG_2617.jpeg
 
Hi David. You are making good progress - as you say that hull is almost closed. From what I can gauge from the pictures, the wood looks to be of good quality so the hull should come out looking good!
Thanks Heinrich! I don’t know about the wood quality. It came with kit. The grain seems quite a bit more open than the basswood I bought recently.
 
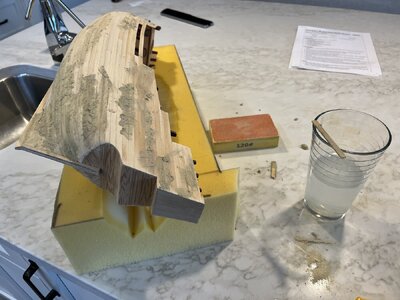
I started to patch and sand the hull. Gave it an initial knock down with 120 grit. Now I’m using Lepage’s wood filler and find that applying it with a palette knife wetted with some water helps it go on smoother. Otherwise it is dry and crumbles.

IMG_2620.jpeg

Thanks for looking!
Dave
 
Now that the hull is basically smooth, it’s time to start looking at adding the details. It was pointed out to me that the angle of the stern planking was incorrect and the drawings agreed. IMG_2626.jpeg

So after a little measuring, I was able to lop off the offending piece. A legacy of the person who started this model before I rescued it from the thrift shop.

IMG_2627.jpeg

Dave
 
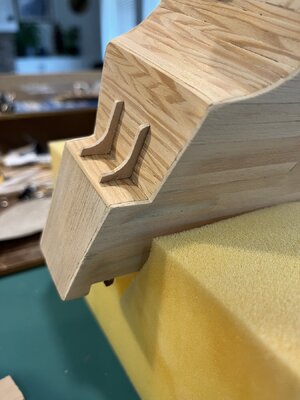
This kit comes several plastic bits as well as wood. I’d rather have all wood but some parts will be too difficult for me to reproduce but I will if I can. These are two supports at the stern between the three lites (for the captain’s cabin, I guess). Pretty finicky and they broke along the grain at the narrow part but the fix shouldn’t be visible at the end of the day.

IMG_2635.jpeg

IMG_2637.jpeg

IMG_2639.jpeg

Thanks for looking.
Dave
 
These are the water transfer decals. The kit calls for them to be put on a flat plastic piece, that I assume is supposed to replicate a frame but I think I will just glue them to the wood and add some thin strip around the lites for the frames

IMG_2640.jpeg

Dave
 
Carrying on with beak, the kit has plastic and wood pieces. No instructions or even pictures of what it should look like so I’m trying to figure that out. To make things worse, the grating and side pieces don’t seem to match. The sides have a gentle curve to them whereas the grating sits flat on the sprit (?). The sides appear too long or the grating too short. I can either shorten the wooden sprit to match or trim the sides down to fit snugly against the bow. ‍♀️
Again, not sure if the cutout in the side piece is meant to accept a rubbing strake or fit over the ledge at the bow. So many questions….

IMG_2641.jpegIMG_2642.jpeg
IMG_2643.jpeg
IMG_2644.jpeg

Any tips or comments are welcome. Thanks for looking

Dave
 
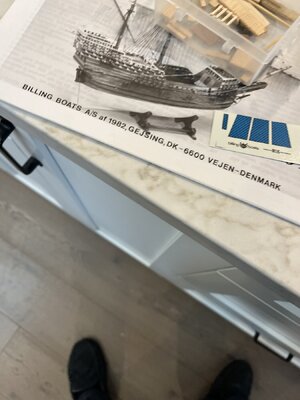
It is disappointing that the box art and photos don’t match what the kit has. The box shows, what must be the prototype, a fully wooden beak.
D
 
Carrying on with beak, the kit has plastic and wood pieces. No instructions or even pictures of what it should look like so I’m trying to figure that out. To make things worse, the grating and side pieces don’t seem to match. The sides have a gentle curve to them whereas the grating sits flat on the sprit (?). The sides appear too long or the grating too short. I can either shorten the wooden sprit to match or trim the sides down to fit snugly against the bow. ‍♀️
Again, not sure if the cutout in the side piece is meant to accept a rubbing strake or fit over the ledge at the bow. So many questions….

View attachment 434503View attachment 434504
View attachment 434505
View attachment 434506

Any tips or comments are welcome. Thanks for looking

Dave
Hey David, thanks for your post on my Mayflower build. I looked at your model and see you had a different kit with plastic parts. All the material in my kit was made of wood, included the material used for the beak. I also had a bit of a misalignment with the beak, but since my kit is made of wood it was a bit more bendable. i do remember sanding a bit off and the end of the beak so that it would fit better, but i'm not sure you can do that with the plastic material. I think there are a couple things you could do;

Shave some plastic of at the end with a scalpel until it fits;
Make a new platform from wood which will give you a more headroom with correcting the fit;

You could also try to fit the plastic beak as is, which would create a gap on both sides at the end, but you could fill the gaps up with some small wooden parts so that i looks normal.

I also just noticed that i haven't even put the small wooden side planks to support the beak on my kit haha. I'll have to adress this by adding them. I'll probably glue them on without having them going through the opening, which will negate your problem that the holes between the wooden sprit and the beak. Just cut the beams and glue them on both sides.
 
Last edited:
I know! The picture on the box clearly shows all wood construction.
Thanks for your tips. Could I bother for some shots of the beak to see how it ended up looking?
Cheers,
Dave
 
Looking good as you rework a used kit.

It is always fun to take on work someone else started and spend time figuring out what was and wasn't done in the instructions.
 
You know i think i might have overlooked something. I see you haven't yet fitted a small wooden strip between the ship and the beak. This might explain why it doesn't correctly fit right now. I added a photo with two arrows pointing towards the wooden beam (painted black). Adding this before putting on the beak might resolve the issue of the misalignment (at least most of it). I will make better photos tonight or tomorrow for you to show the entire construction the way i fitted it

IMG_0521_edited.jpg

Mayflower beak construction.jpg
 
I have a hard believing it is the same model from the same company….Your beak is totally different than mine. Thank you for posting these. They will surely help!
Cheers,
Dave
 
I love your colours. Did you paint or stain your hull? I see pots of GW paints in the background.
Dave
 
Back
Top