Mayflower 1/64 - Billing Boats

I have a hard believing it is the same model from the same company….Your beak is totally different than mine. Thank you for posting these. They will surely help!
Cheers,
Dave
You posted a photo of the manual earlier and it says Billing Boats, only difference i see is that your ship has a different scale. Yours seems to be 1:64 whilst mine is 1:60. I can't find anything with your scale with the search combination "Billing boats" "scale 1:64, so perhaps it's an older release? Either way they are different so
 
I love your colours. Did you paint or stain your hull? I see pots of GW paints in the background.
Dave
Thanks! I didn't do any staining or aging during layering of the hull. For the deck i used two layers of dark oak varnish (2 layers max), and for the hull i used a lighter oak varnish (4/5 layers). I did the white water line with the kit instructed paint but it's terpetine based so i did everything else with games workshop paint after that. Using waterbased paints just gave me more freedom for detailing. I used to have decals on the side of the ship, which i painted on thin strips of balsa wood but i removed them later because i didn't really liked the end result. And of course the Mayflower emblem on the back of the ship

unnamed (1)f.jpg

IMG_0573.jpg
 
Last edited:
René that would explain a lot. I bought mine at a second-hand store so who knows when it was produced. I think I saw a date somewhere in the early 80’s. I really appreciate your help with this.
Cheers, Dave
 
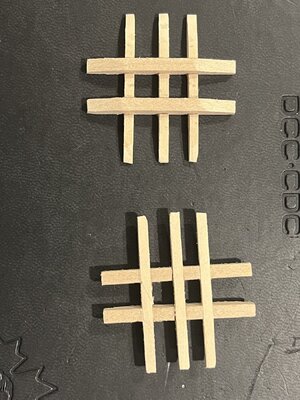
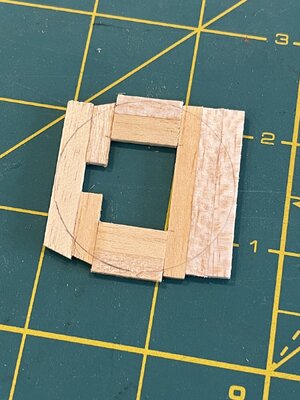
I have decided to attempt to make the beak out of wood. I traced the outline of the plastic piece onto paper and cut some planks to match. I put a bit of curve in the top piece as well. I have a thin plastic cutting mat that I put the pattern under. That allowed me to match up the pieces and glue the edges with gumming up the pattern. I still have to sand it down once the glue dries completely.

IMG_2655.jpeg

IMG_2676.jpeg

I already feel better about it. Hopefully I can make it work.
Thanks for looking.
Cheers
Dave
 
So, when I went to build the beak I found that the sides stood way proud of the planks making up the beak. I compared them to the drawing and found that the plastic piece I used as a pattern was too small. So back to the drawing board.

IMG_2682.jpeg

You can see how the drawing is larger than the piece.

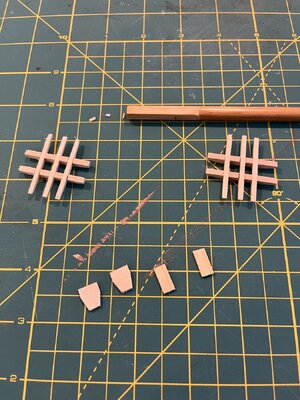
Here are the original plastic, first go-around and (hopefully) final attempt. I must say that the second try went much quicker with some experience behind me.

IMG_2687.jpeg

I used my saw and some rare earth magnets to hold the pieces as the glue set.

IMG_2686.jpeg

I also added some trim to the front. It seemed to make sense and should help fit the beak.

IMG_2683.jpeg

Thanks for looking!
Cheers,
Dave
 
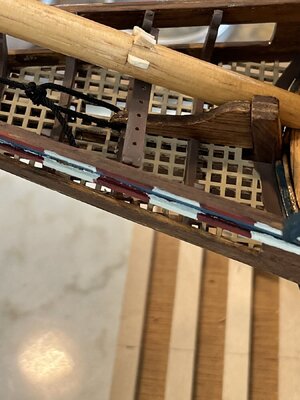
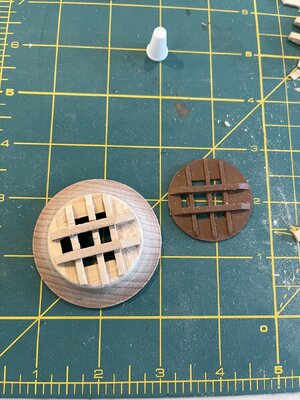
Work is progressing. Got the new beak done and I opted to keep the plastic grating and supports. I used CA glue to bond the wood sides to the plastic. I noticed that my small hull strips don’t all match up. I guess I should have built the beak first and figured out where to put the strips.
IMG_2721.jpeg

On a different note I also noticed that the bulkhead extensions are too wide for the supplied railings. I have opted to shave them down so that they taper more at the top.

IMG_2725.jpeg

IMG_2722.jpeg

We’ll see how it goes. Without instructions, it seems there is too much to keep track of and know what sequence things should accomplished. I keep staring at the drawings and trying to work out where my next snag will come from and how to prevent it.

Thanks for looking.
Cheers,
Dave
 
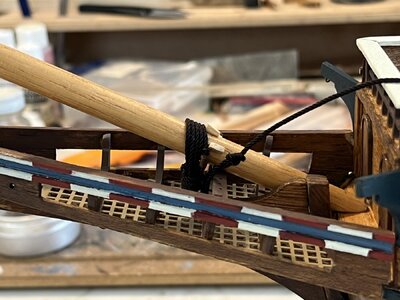
Got the railings done. I think that once everything is painted, the trimmed down bulwark extensions will go unnoticed. IMG_2739.jpeg

IMG_2738.jpeg

Next is sea ladders and chain plates, I think. Also have to make three knights (I think that’s what they are called), attach some bits and the bell. There is also a small cabin on the second-last deck (mariners are probably squirming at my nomenclature) that seems unique to my build.

Thanks for looking.

Dave
 
So here are some issues I have run into. The stern spar is supposed to be fastened to the deck and goes through the “wall” but I have a bulwark extension right in the middle. Is the drawing off or is the build incorrect? It looks like I will have to butt-join the spar to the hull.
IMG_2744.jpeg

IMG_2745.jpeg

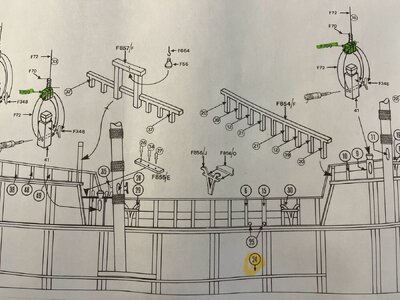
Next, the drawings show some kind of vertical piece that is tapered and runs along the trim pieces and is supposed to be made of the same stock as the rubbing strakes. I don’t see it on other Mayflower models but the drawing seems to indicate that a sheet runs through it to tie off at #30 on a Y-shaped piece. To drill an acceptable hole through a piece and shape it, I would think it needs to be twice the thickness of a rubbing strake. For those who don’t have this piece, where does that sheet go?

IMG_2741.jpeg

IMG_2742.jpeg

IMG_2743.jpeg

As always, thanks for looking. Dave
 
So here are some issues I have run into. The stern spar is supposed to be fastened to the deck and goes through the “wall” but I have a bulwark extension right in the middle. Is the drawing off or is the build incorrect? It looks like I will have to butt-join the spar to the hull.
Is the exact location not shown in this drawing (this is all what I found in the web)?
Screenshot 2024-04-10 173433.png
 
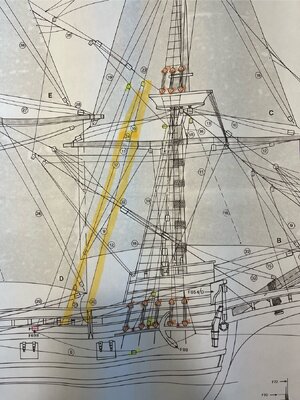
After a while of staring at the drawings and very fuzzy photos in the instructions, I have decided that the spar must be to the right of the bulwark extension. Also the sheet for the (is it the) mizzen sail seems to run along the spar back to the cleat on the deck. So I either need to make a bigger hole for the spar or a second one for the sheet.
I have also decided that the vertical piece on the hull be comprised of the same material as the rubbing strake but on edge, so that will give me the room for a hole to run the sheet and taper it. I may laminate two pieces together to give me more “heft” but from what I can see, the piece is pretty skinny.
In studying the drawings I now found some eye-bolts that have no rigging attached but, worse, they are shown in the elevation view but not in the plan, so I have no idea where they are actually located on the deck!! Argh! Will the puzzle never end?
Off to bed to ponder life’s mysteries…..
Cheers,
Dave
 
First let down by Billing (not counting poor instructions and quality of wood)….. there was only one anchor in the package instead of two - despite the parts list.
Not sure how to get around that. I imagine there must be after market anchors out there.
Dave
 
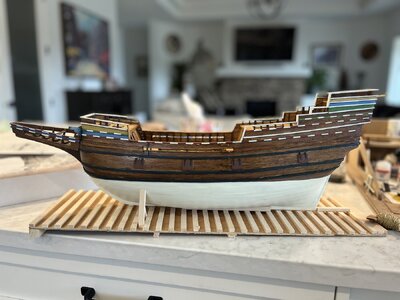
Progress is slow and not very exciting to talk about but I have given the hull some stain (3 coats of mini wax Golden Oak) and a coat of Bull’s Eye Shellac. I will give it a second coat tonight and a light sand and see where to go from there.


I noticed that the stain is splotchy due to the different woods and wood filler. It looks worse in the picture but I may just give it a wash of something to even out the colour.

IMG_2753.jpeg

Thanks for looking.
Cheers,
Dave
 
Progress is slow and not very exciting to talk about but I have given the hull some stain (3 coats of mini wax Golden Oak) and a coat of Bull’s Eye Shellac. I will give it a second coat tonight and a light sand and see where to go from there.


I noticed that the stain is splotchy due to the different woods and wood filler. It looks worse in the picture but I may just give it a wash of something to even out the colour.

View attachment 442340

Thanks for looking.
Cheers,
Dave
Please let us know what you will use and if it worked the way you intended. I have the same problem on my Esmeralda. I wiped down with acetone and did som light scraping. It did improve some but I am willing to try anything and learn a new method to correct my mistakes.

port.jpeg
 
I don’t know if mistake is the right word…finishing is a bit of an art and sometimes things work and sometimes not. I am not too surprised by the outcome since despite my concerted efforts to remove all traces of glue, it is apparent that I wasn’t completely successful and coupled with a first attempt at planking (and no second layer) resulting in some bigger patches of filler I couldn’t expect more. Also (new to me) it seems basswood is a poor candidate for stain at the best of times.
I expect that a thin wash of a brown acrylic might help mitigate the splotchiness.
Will keep all y’all updated.
Cheers, Dave
 
I had some AK model paint which was a dark brown. I thinned it and gave the hull a wash. It seemed to tone down the sheen as well as darken the light spots. Letting it sit for a bit and will revisit tonight to see if I am happy.

IMG_2756.jpeg

Cheers,
Dave
 
Back
Top