-

Win a Free Custom Engraved Brass Coin!!!
As a way to introduce our brass coins to the community, we will raffle off a free coin during the month of August. Follow link ABOVE for instructions for entering.
-

PRE-ORDER SHIPS IN SCALE TODAY!
The beloved Ships in Scale Magazine is back and charting a new course for 2026!
Discover new skills, new techniques, and new inspirations in every issue.
NOTE THAT OUR FIRST ISSUE WILL BE JAN/FEB 2026
You are using an out of date browser. It may not display this or other websites correctly.
You should upgrade or use an alternative browser.
You should upgrade or use an alternative browser.
The deck looks awesome,I like the cherry,I never used it yet.
Aaaachuuu.
Sorry Mike!As Zoly said, the deck's planking is world class.
I wish I had a laser, things you can do with it is amazing.
Havagooday mate
Greg
Guys: When Mike was cutting out the decking and planking, he took care to move around the individual planks so that there was a true random pattern to all of them . That was a great idea and it’s paid off in how great the decking looks!
This was a very wise decision to mix - othervise it would be very unrealistic if the pattern of the grain is continuing within the neighbour-plankGuys: When Mike was cutting out the decking and planking, he took care to move around the individual planks so that there was a true random pattern to all of them . That was a great idea and it’s paid off in how great the decking looks!
Mike: confirm for me that the gun port sills are appreciably thinner than 3/16" and must be sanded down to fit the mortises in the hull framing. I measure those mortises as a hair under 5/32" (maybe 9/64").
Mike: confirm for me that the gun port sills are appreciably thinner than 3/16" and must be sanded down to fit the mortises in the hull framing. I measure those mortises as a hair under 5/32" (maybe 9/64").
Yup, that is correct. Build to the model, not the plans. I used my Byrnes disc sander to very, very carefully thin the sills down until the proper thickness was reached for a tight fit in the slots. I should have mentioned it. When building the prototype, the soft basswood sill parts easily pressed into the poplar frame mortises. With cherry on cherry it is a lot tighter!!
In Australia we haven't used imperial measurement since I was about 6 years old.Mike: confirm for me that the gun port sills are appreciably thinner than 3/16" and must be sanded down to fit the mortises in the hull framing. I measure those mortises as a hair under 5/32" (maybe 9/64").
I'm so glad that metric is so much simpler, that talking about 3/16 or 5/32 etc.
It's hard to teach an old dog new tricks!
HappymodelingGreg
In Australia we haven't used imperial measurement since I was about 6 years old.
I'm so glad that metric is so much simpler, that talking about 3/16 or 5/32 etc.
It does sound funny.. Doc and I seem to jump around from imperial to fractional imperial to metric depending on what we are doing. I don't even think about it anymore. LOL
I must admit. I use inches sometimes. E.G. if I measure something ind it 3/4 inch and I have to find the center, then i put an mark at 3/8''. Its simple than finding the middle of 33.8 mm.
Greg
Greg
You're right Mike! I tend to switch back and forth. My Ship of the line build has plans done in metric. "Independence " is 5/16" scale which works out to 8mm = 1 foot, so both Imperial and metric.
Today we are back at planking the lower deck of the battle station.
Because the deck is curved, I very slightly sanded the bottom inside surface of each plank. This will help ensure a tight fit along the plank seams and help us end up with the correct number of planks.
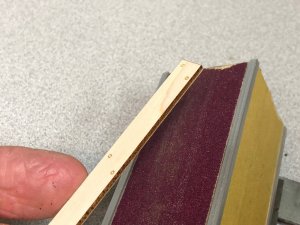
I used metal fences to ensure the planks were installed square to the cherry beams.
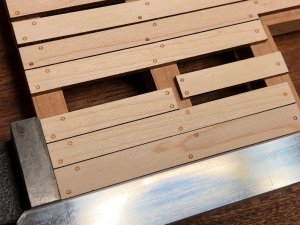
I used dots (nails) of gel CA/super glue to attach each plank. Notice the fence on the right.. very important.
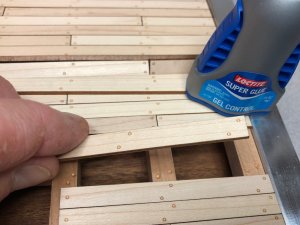
Because the deck is curved, I very slightly sanded the bottom inside surface of each plank. This will help ensure a tight fit along the plank seams and help us end up with the correct number of planks.

I used metal fences to ensure the planks were installed square to the cherry beams.

I used dots (nails) of gel CA/super glue to attach each plank. Notice the fence on the right.. very important.

Where did you start the planking, Mike? At the bulwark or at the inboard end of the deck?
Where did you start the planking, Mike? At the bulwark or at the inboard end of the deck?
Once again... I forgot to mention... start at the inboard edge and work towards the bulwark. Once you get to the bulwark you will find a partial "half-plank". If the edge sanding, fitment, and my math are correct.. everything should fit perfect.. If not, adjustment will be easy. We shall find out soon.
Thanks, Mike!
I love your step by step explanations. It will not only help the new modelers, but give great ideas to others.
Thanks mate!
Happymodeling
Greg
Thanks mate!
Happymodeling
Greg
Hi Mike,
Do you use the laser char as caulking for the deck planks? Seems to do the trick.
Do you use the laser char as caulking for the deck planks? Seems to do the trick.
Hi Maarten!
Yes, we're using the laser char to simulate caulking. It was one of the things that convinced us to go with laser cut planking.
Yes, we're using the laser char to simulate caulking. It was one of the things that convinced us to go with laser cut planking.
Gives a great result, also for the tree nailing.
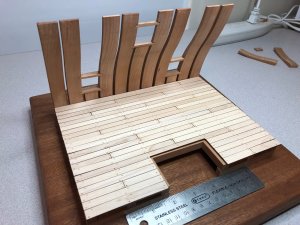
Thanks for all the views and comments. We are having a lot of fun with this build. Have just completed the lower deck planking. Take a look!!
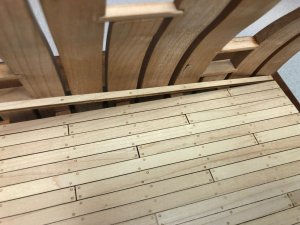
After lightly edge sanding and gluing down 21 strakes of planking there was just enough room left at the bulwarks to install the custom half-plank. I needed to manually sand it just a bit on my block sander and it fit right in.
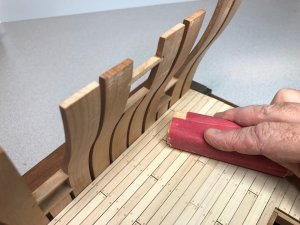
Then I wrapped a piece of 320 sand paper around a wood block and lightly sanded the deck across the grain. This will even out the edges of the planks, slightly tone down the caulking effect, and provide a nice smooth surface for the finish. There is no need to sand very much as the parts are already precisely machined.
I cleaned the model off with compressed air and gave it another coat of satin wipe-on poly to include the deck, insides of the gunports and around the areas of the lower deck framing that are visible.
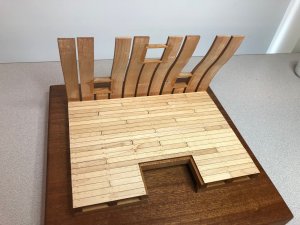
With the poly finish the randomized plank grain of the hard maple really shows up nicely.
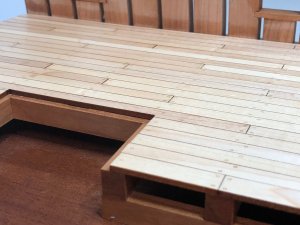
After lightly edge sanding and gluing down 21 strakes of planking there was just enough room left at the bulwarks to install the custom half-plank. I needed to manually sand it just a bit on my block sander and it fit right in.

Then I wrapped a piece of 320 sand paper around a wood block and lightly sanded the deck across the grain. This will even out the edges of the planks, slightly tone down the caulking effect, and provide a nice smooth surface for the finish. There is no need to sand very much as the parts are already precisely machined.

I cleaned the model off with compressed air and gave it another coat of satin wipe-on poly to include the deck, insides of the gunports and around the areas of the lower deck framing that are visible.

With the poly finish the randomized plank grain of the hard maple really shows up nicely.


