Mike's 17th Century Battle Station

Mike: The only trimming needed for the lodging knees is the fit between the deck beams, correct? You didn't cut an angle into them to match the angle on the outboard end of the deck beams, did you? There seems to be no need to do that.
 
Mike: The only trimming needed for the lodging knees is the fit between the deck beams, correct? You didn't cut an angle into them to match the angle on the outboard end of the deck beams, did you? There seems to be no need to do that.

Correct. I looked at that but it did not seem necessary.
 
Doing some work on the gunport lids...

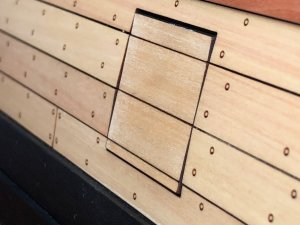
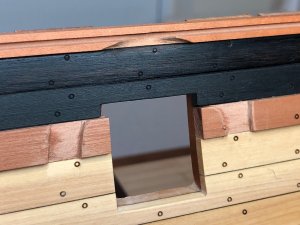
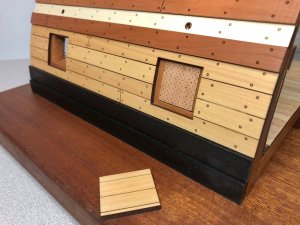
Each lid has an inner portion made of pear that fits precisely inside the gunport and and outer portion made up of boxwood planks. I used my small file to shape the gunport so that the inner portion of the lid would fit snug but no so tight that the lid wouldn't operate (if needed).
IMG_1103.JPG

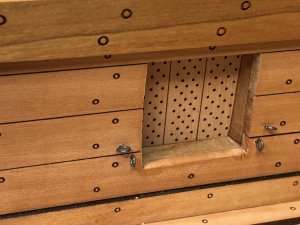
Here is the view from the inside of the lid in the closed position.
IMG_1104.JPG

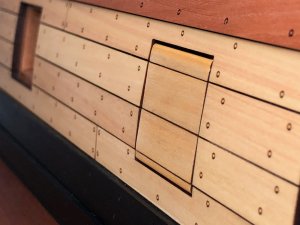
Once the fit was established, I glued the outer portion onto the inner portion while in-place on the gunport. This will ensure the lid still fits later on. You will notice the lid stands proud top and bottom due to the curvature of the hull.
IMG_1105.JPG

Used my round files and hard sanding block to slowly shape the top and bottom of the outer lid into a more rounded shape.
IMG_1106.JPG

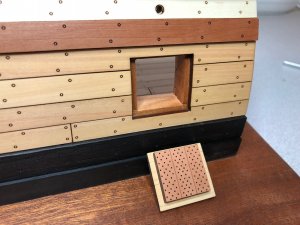
After a coat of wipe on poly the lid is ready to receive mounting hardware.
IMG_1116.JPG

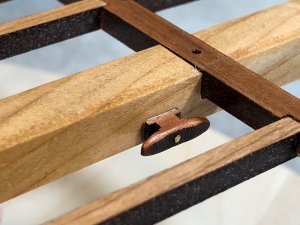
I also cleaned up and mounted a couple of the laser cut rope cleats needed on the model. These were designed from scratch by Don.
IMG_1115.JPG
 
The lid is realy looking good.......are the nails of the inside of the lid "real" or laser dotts? Great look and very accurate pattern.
In the meantime I like your char :cool:
 
The lid is realy looking good.......are the nails of the inside of the lid "real" or laser dotts? Great look and very accurate pattern.
In the meantime I like your char :cool:
They are laser dots that are the same size to scale as nails would be.... actually the dots are holes.. if we wanted we could put little brass nails in there...hmmm..

This is un-char-ted waters!!!
 
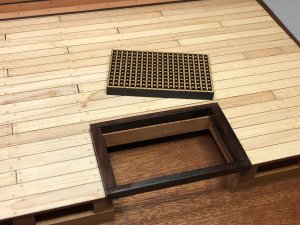
It took us quite some time to finalize our design for the hatches. The original in the Staudt plan was very simple and we wanted to do something more detailed. After at least 8 different prototypes we came up with what you see here. Don gets the credit for most of the hatch design itself while Dave provided the choice wood.

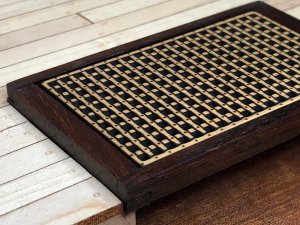
The coaming is cut from rosewood and features half-lap joints on the corners. I glued a tiny little shelf at the bottom of the coaming so the boxwood hatch grating can drop right in. The grating is laser etched and is removable. Other than a coat of wipe on poly, no other finish has been applied. Nothing is glued in and I might add some additional detail in this area later.
IMG_1117.JPGIMG_1118.JPG
 
The grating is looking realy good....and here, I have to admit, I like the char - with this you get the imagination of darkness in the deck below ..... looking realy good
 
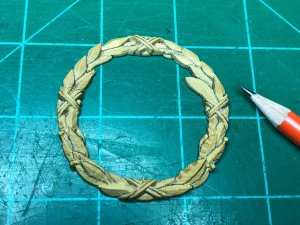
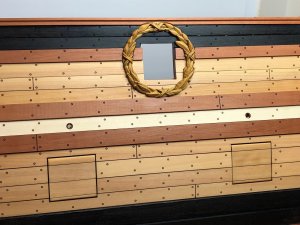
Instead of a lid, the upper gunport is surrounded by a military wreath which was CNC carved from Osage orange. I then used an old-school modeler's trick to use a sharp pencil to darken the lower recessed areas of the carving. This will provide more visual depth to the final look.
IMG_1121.JPG

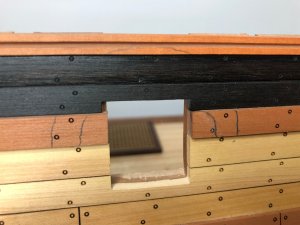
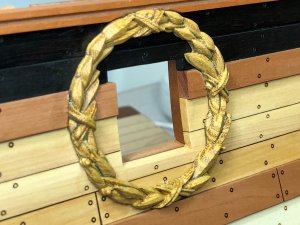
The great wale and sheer trim will need to be carved away to accept the wreath as those strakes are thicker than the others. I used the wreath to mark the areas where material needed to be removed.
IMG_1122.JPG

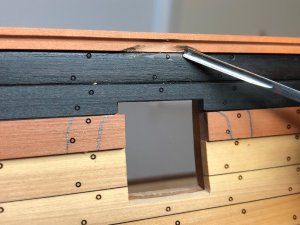
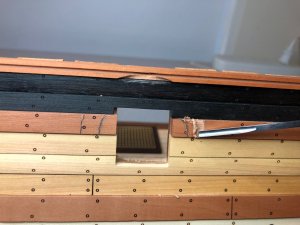
I then used my small carving tools to very carefully remove the material. Take time here and go slowly.
IMG_1123.JPGIMG_1124.JPGIMG_1126.JPG

The wreath should be soaked in water for a few minutes as it has to be slightly bent when pressed into place (got a couple tiny cracks in mine). Carefully glued into place with CA, it fits nice and flush both inside and outside and follows the contour of the hull. Added some wipe-on-poly and finished! The Osage looks gold when contrasted against the other colors.
IMG_1127.JPGIMG_1128.JPG
 
Fantabulous Mike!
Outstanding Mike! The osage orange was the right choice for the wreaths. I'm toying with painting the ribbons crimson on mine. It' going to make me nervous, though, carving up the planking like that!
Great stuff Mike. I'm with Dave when he talks about being nervous with the carving
I'm with Dave and Don about carving out the trim and the great wale.
I would be nervous a seeing 'a bull in a China store'.
(Can you guess where that quote came from?)
You must have a very steady hand, Dave will be fine, as being a doctor as such.
Happymodeling
Greg
 
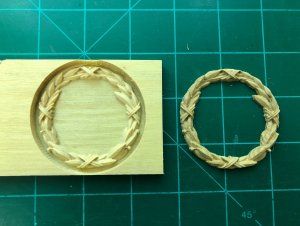
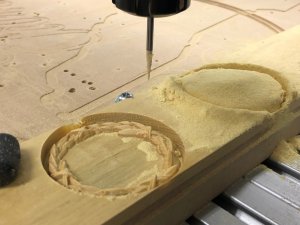
Here are a couple extra picture for you guys that like CNC. Doc asked me to cut him a couple wreaths in yellowheart to compare against the osage I used on my model.

Notice the billet of yellowheart is barely larger than the wreath (Dave must trust my CNC skill). The 3d carving is done with a 1/32" tapered (6.2 degree) ballnose bit. I ran it at about 15,000 rpm. Each wreath took nearly 30 minutes to emerge from the wood. Notice the beautiful fine powdered sawdust on the right... the sign of a good bit. The wreath can easily be removed from the billet with an xacto knife as the layer of wood holding it in is paper thin.
IMG_1136.JPG

The yellowheart has about the same result as the osage (on the right). The yellowheart has perhaps slightly finer grain and the osage has a slightly darker color. Both are very, very nice.
IMG_1137.JPG
 
Back
Top