Thanks, Mike. The planking turned out really well. Nice little model!
-

Win a Free Custom Engraved Brass Coin!!!
As a way to introduce our brass coins to the community, we will raffle off a free coin during the month of August. Follow link ABOVE for instructions for entering.
-

PRE-ORDER SHIPS IN SCALE TODAY!
The beloved Ships in Scale Magazine is back and charting a new course for 2026!
Discover new skills, new techniques, and new inspirations in every issue.
NOTE THAT OUR FIRST ISSUE WILL BE JAN/FEB 2026
You are using an out of date browser. It may not display this or other websites correctly.
You should upgrade or use an alternative browser.
You should upgrade or use an alternative browser.
Absolutely stunning!
I don't blame you Mike. If I was you if would be Googling at it also.Dave done a brilliant job on the wood selection.
Bravo to all
Greg
We also can not stop looking ..... great job
Thanks guys. We are on a roll now!!
Next up is the stairs..
Dave decided on cherry stringers with boxwood steps. The stringers are CNC cut and are so delicate that I cut two sets for each of us. I ended up breaking one during the prototype build and again during this build so its a good thing.
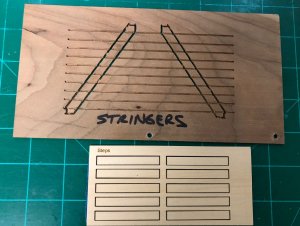
It is very important to ensure the overall width of the stairs will fit into the well created by the upper deck framework. I had to shorten my steps by 1/16" each to get a more comfortable fit.
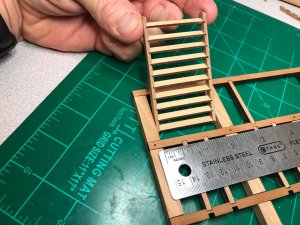
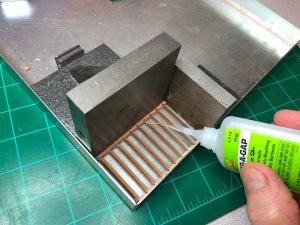
Once the steps were carefully assembled and everything was squared up in the jig, I carefully applied a drop of CA via capilary action from the backside of each step. The steps fit very tight so not much glue is needed. The assembly is very fragile so be careful!!
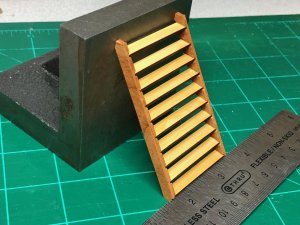
Once assembled, a quick coat of wipe on poly and we have a nice looking set of stairs.
Next up is the stairs..
Dave decided on cherry stringers with boxwood steps. The stringers are CNC cut and are so delicate that I cut two sets for each of us. I ended up breaking one during the prototype build and again during this build so its a good thing.

It is very important to ensure the overall width of the stairs will fit into the well created by the upper deck framework. I had to shorten my steps by 1/16" each to get a more comfortable fit.

Once the steps were carefully assembled and everything was squared up in the jig, I carefully applied a drop of CA via capilary action from the backside of each step. The steps fit very tight so not much glue is needed. The assembly is very fragile so be careful!!

Once assembled, a quick coat of wipe on poly and we have a nice looking set of stairs.

Really nice, Mike! They turned out well.
Thanks Dave!!
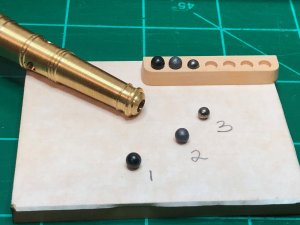
So, we CNC cut these beautiful shot racks out of boxwood. We needed shot that would match Don's cannon as well as look good in the racks. #1 is shot from a Caldercraft kit, it looks nice but is too large for the cannon. #2 came from Don and is lead shot from a shotgun shell (I think?), it is just slightly too large for the cannon looks nice in the rack and has an interesting dark grey color. #3 also came from Don and seems to be a steel bearing, it fits perfectly into the cannon but is slightly too small for the shot rack. Hmm... this is one of those situations where visual appearance is more important than dimensional accuracy. For my model, I am going with #2.
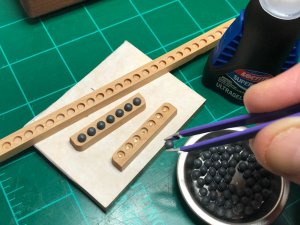
After cleaning up the boxwood parts and giving them a coat of wipe on poly we begin the simple process of a single drop of gel CA for each cannon ball, slightly press it in, done..
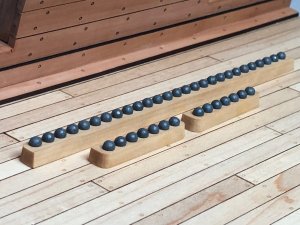
The final look on the completed model should fit right in with Dave's overall color scheme.
So, we CNC cut these beautiful shot racks out of boxwood. We needed shot that would match Don's cannon as well as look good in the racks. #1 is shot from a Caldercraft kit, it looks nice but is too large for the cannon. #2 came from Don and is lead shot from a shotgun shell (I think?), it is just slightly too large for the cannon looks nice in the rack and has an interesting dark grey color. #3 also came from Don and seems to be a steel bearing, it fits perfectly into the cannon but is slightly too small for the shot rack. Hmm... this is one of those situations where visual appearance is more important than dimensional accuracy. For my model, I am going with #2.

After cleaning up the boxwood parts and giving them a coat of wipe on poly we begin the simple process of a single drop of gel CA for each cannon ball, slightly press it in, done..

The final look on the completed model should fit right in with Dave's overall color scheme.

The color is perfect, Mike!
G'day Mike and Dave
The wood colours match perfectly. Well done Dave! But not taking away from the chosen wood(s), your extra care in the production department has made this whole build brilliant, Mike, well done to you also!
Happymodeling
Greg
The wood colours match perfectly. Well done Dave! But not taking away from the chosen wood(s), your extra care in the production department has made this whole build brilliant, Mike, well done to you also!
Happymodeling
Greg
After each of the 4 lodging knees are custom cut to length to fit into the deck frame, I marked the position of the mortises with a pencil.
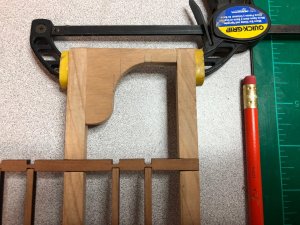
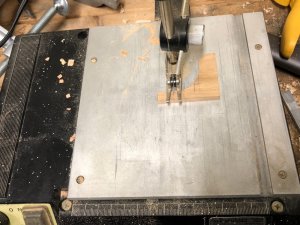
I then used my ancient Micro-Lux mini scroll saw to rough cut the mortises - yes, freehand.. Then I finished them off with a file and blade.
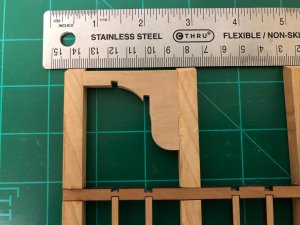
Test fitment back in place and the lodging knee looks nice and tight. Will repeat this 4 times and also install the laser cut ledges. Quite a bit of work considering most of it will be covered with deck planking. Fun to build anyway.

I then used my ancient Micro-Lux mini scroll saw to rough cut the mortises - yes, freehand.. Then I finished them off with a file and blade.

Test fitment back in place and the lodging knee looks nice and tight. Will repeat this 4 times and also install the laser cut ledges. Quite a bit of work considering most of it will be covered with deck planking. Fun to build anyway.

That looks great, Mike!
G'day MikeQuite a bit of work considering most of it will be covered with deck planking. Fun to build anyway.
We do this only for our knowledge so we know it's there, maybe it can be seen or maybe not.... but it is there, that's the main point.
Excellent work mate!
Happymodeling
Greg
Thanks Dave and Greg. I did the work, so it will be there whether we can see it or not!! 
Got the 4 lodging knees installed along with their matching ledges. This completes the upper deck framework. Next up will be the hanging knees.
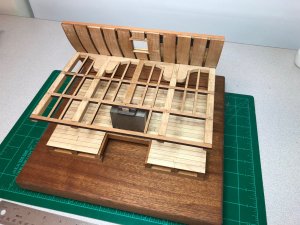
Dave, Don and I had a lot of discussion regarding the historical accuracy of the deck framing. As was said over on Dave's build log, the plans for this model were intended for intermediate builders and had a simplified framing plan. In order to accommodate the two lower gunports the framing was stylized further to render it historically inaccurate. We came upon a couple different ways to deal with the lodging knees. This is my version which has more symmetry than Jeff's original plan. It all gets covered over with planking anyway.. but we know...
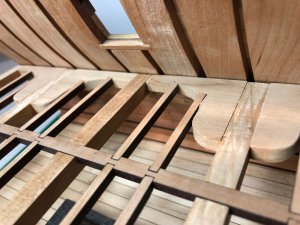
While I had the upper deck test fitted I took a look from underneath to see how the hole for the gunport control line came out.. Looks right on target to me!!
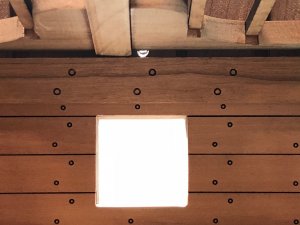
Got the 4 lodging knees installed along with their matching ledges. This completes the upper deck framework. Next up will be the hanging knees.

Dave, Don and I had a lot of discussion regarding the historical accuracy of the deck framing. As was said over on Dave's build log, the plans for this model were intended for intermediate builders and had a simplified framing plan. In order to accommodate the two lower gunports the framing was stylized further to render it historically inaccurate. We came upon a couple different ways to deal with the lodging knees. This is my version which has more symmetry than Jeff's original plan. It all gets covered over with planking anyway.. but we know...

While I had the upper deck test fitted I took a look from underneath to see how the hole for the gunport control line came out.. Looks right on target to me!!

The model includes 3 CNC cut hanging knees made of cherry. They have to be custom notched to fit tightly against the spirketing, upper deck clamp, and the upper deck frame. I did this work using my scroll saw and a file.
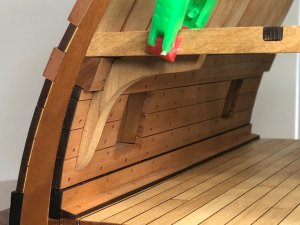
After I got the first hanging knee fitted, I simply transferred the notch marks to the other two parts and repeated the cuts.
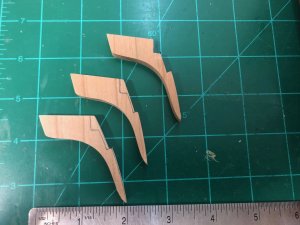
I softened the sharp edge of each knee using a round file.
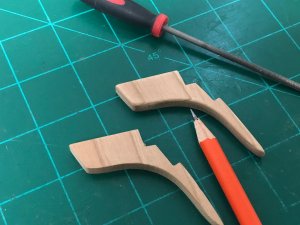
After thoroughly cleaning the parts, I applied a coat of Wipe On Poly to the upper deck framework, the 5 support posts and the 3 hanging knees. This completes all of the major components needed to install the upper deck. But before we do that, we still have quite a few more details to take care of.
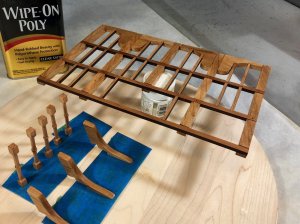

After I got the first hanging knee fitted, I simply transferred the notch marks to the other two parts and repeated the cuts.

I softened the sharp edge of each knee using a round file.

After thoroughly cleaning the parts, I applied a coat of Wipe On Poly to the upper deck framework, the 5 support posts and the 3 hanging knees. This completes all of the major components needed to install the upper deck. But before we do that, we still have quite a few more details to take care of.

Very nice, Mike ! I’m anxious to be where you are in the build.
The knies are looking very good, also that you choosed once more a different wood, so that there is a slight difference in the color
It is looking great
It is looking great
Mike: Are you planning to pin or treenail the support columns to the underside of the deck beams?
Mike: Are you planning to pin or treenails the support columns to the underside of the deck beams?
Hi Doc!!! Yup, I will pin/glue the tops of the posts to the deck framework prior to mounting to the deck. However, the bottoms of the posts will only be glued. I'm glad you brought this up because I wanted to mention there is quite a bit of detailed work to do on the lower deck with the rigging of cannon, gunport control line rigging, shot racks, cleats, hardware for mounting tools, etc.... I don't plan to actually permanently glue my upper deck assembly to the model until AFTER all the lower deck detail work is completed. I think it will just be too tight in there with fat thumbs otherwise!!
I thought so!
Used the little mock up cannon from the prototype build to set the position for the breech rings and block/tackle rings on the bulwarks. Four are needed for each lower gunport. I used a #74 bit to make the holes. This provided for a tight fit of the homemade blackened rings provided by Don. I won't glue them until the cannon get rigged. You might also note the small notch I carved into the upper deck clamp as a rope guide for the gunport lid control line. Just another small detail nobody will ever see once the model is fully assembled.
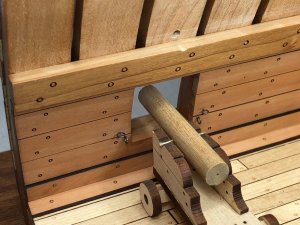

HA!! I did the same thing for the lid control line: a "divot" in the upper surface of the deck clamp!


