Actually, I have never thought about using the milling machine to fabricate gratings. I would be the one to learn if you will do. I usually do gratings using the table saw but this discussion for another day...I can imagine that it will be much easier to make a grid/greating with a machine like this.
-

Win a Free Custom Engraved Brass Coin!!!
As a way to introduce our brass coins to the community, we will raffle off a free coin during the month of August. Follow link ABOVE for instructions for entering.
-

PRE-ORDER SHIPS IN SCALE TODAY!
The beloved Ships in Scale Magazine is back and charting a new course for 2026!
Discover new skills, new techniques, and new inspirations in every issue.
NOTE THAT OUR FIRST ISSUE WILL BE JAN/FEB 2026
You are using an out of date browser. It may not display this or other websites correctly.
You should upgrade or use an alternative browser.
You should upgrade or use an alternative browser.
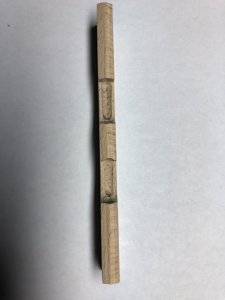
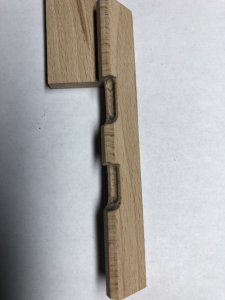
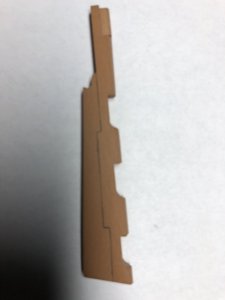
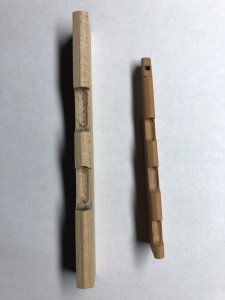
Let's continue building the part of the rudder with a score. Final Part.
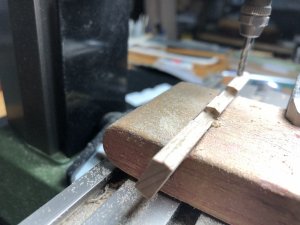
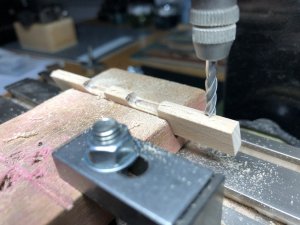
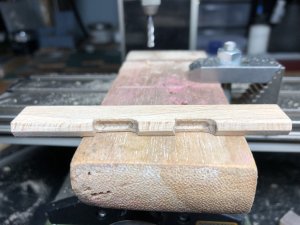
The rudder was hinged to the stern by means of rudder irons consisting of pintles on the rudder and gudgeons on the stern post. The spacing of the rudder irons was no more than 5ft. The forward edge of the rudder was bevelled up to 45 degrees to allow full movement. As you may guess, our next step is to bevell the forward edge. I found a suitable holder (sanding block) with needed angle. I have attached the block to the XY table using machinist square and step clump set and tighten firmly. Rudder blank was firmly inserting making sure with the level it is parallel to the table. Apply the same technique as you would mill the base: while the mill is ON move down the head until end mill touches the wood. Using the Y lever mill the entire piece. Move the head a notch down, and mill it again. Complete until you see the exact half of it done. Then turn the opposite side and repeat the milling steps until you reach the center line.
That should be it, folks. I hope it was informative (in some way). Any comments, suggestion or questions - let me know.
Many questions answered, Thank You for sharing and please continue
Excellent Jim, Need to let it sink, I will posting the slot size to see if the vice you are using will work on my WORK STATION, then the questions. Don
Hi Don. Let me get fully understand what do you call 'work station' Is it a Dremel drill stand or XY coordinate table itself? There should be either 4 holes or 2 longitudinal grooves for attaching the coordinate table to the base. The Dremel base should have also grooves or holes - both cordinate table and base should match. Using bolts you can tight them together.
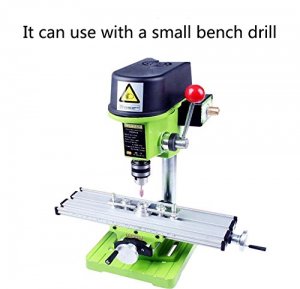

Hi Jim, What I have is the Dremell work station I can send you the instruction that show what I have, I have a dremll rotary attached to it, the X-Y table is an AMWAY, it is thge X-Y table is attached to the Dremell Work Station with the four screws, what I have a few questions but I was looking at your thread and it showed the small proxon vice that you have, the question was can that fit my table, what is that small drill press that you show, I like that set up, but have some physical problems also my daughter will not let me get another power tool if it is to heavy, do you know the weight. THANKS Don
Hi Don. This little drill press is actually Proxxon MF70 - mini mill. It is not too heavy, but I don't think you will need one. It is not cheap and you will still need accessories like a vise, end mills, etc. You already have most, if not all components when assembled to work as the mill. You just need some local help. I am sure your coordinate Y-X table can fit Dremel workstation. Your daughter may drive you to a local hardware store and they will more than glad to help you assemble it.
Proxxon vise I am using on my milling machine will not fit Amway coordinate table as the attaching groves are wider on your table. If you decide to go to the shop, take your wise with you and they should help you to fit. If the local store is not an option, you may try an auto repair shop, for a small fee they may able to help you.
Proxxon vise I am using on my milling machine will not fit Amway coordinate table as the attaching groves are wider on your table. If you decide to go to the shop, take your wise with you and they should help you to fit. If the local store is not an option, you may try an auto repair shop, for a small fee they may able to help you.
Hi All
For what is worth,I spent twenty years without my Proxxon mill.Now I have it,I would not be without it.The more you use it,the more jobs you find you can do on it.
The Sheerline is a far better made and more expensive machine but for really small work the Proxxon is superior due to the 20,000 rpm available.You can increase effective cutting speed by having a milling cutter with more flutes,but you won't find cutters with plenty of flutes 1mm in diameter.This is where the Proxxon machine comes into it's own.
The only issue I can see with using a drill press other than the RPM is the lack of micro adjustment in the z axis(up and down).This creates issues of not knowing how much you take off If you a wanting to reach a predetermined depth.
Kind Regards
Nigel
Actually, I have never thought about using the milling machine to fabricate gratings. I would be the one to learn if you will do. I usually do gratings using the table saw but this discussion for another day...
Jim I have made gratings with my mill.Will post how to do it at some point
Kind Regards
Nigel
Thanks Jim, I already have everything attached, my only problem is 2 need to find the right size vice for my table, and I do not know how to use the set up that I have, I can not figure out how the stop works on my Dremell Work Station, and when I need help with tools my SON-IN-LAW, does most of that work there is very little that he can not due or once seen the instructions he knows what to do, he is quite busy with his consulting company so I try very hard to do things myself, I really would like to get this working especially getting more involved wit scratch building, I already have an 8inch bench drill press that I have what I call my poor mans thickness sander and so far it does wonders you can see my set up if you go to my building log ( PAINTING WITH WOOD/MIDWEST FLATIE) check it out it can be two tools in one thickness sander and spindel sander at half the cost of the other thickness sanders. THANKS AGAIN FOR YOU PATICENCE AND HELP Don
Thanks, Nigel, that would be great. looking forward to your post!Jim I have made gratings with my mill.Will post how to do it at some point
Thanks, Nigel, that would be great. looking forward to your post!
Jim I will post a how to with a demo just as soon as I am settled in the new house.I managed to do a 1mm square grid with two 0.18mm holes for copper nails per joint using the proxxon calibrations.
I wont be able to do the nails anymore as my table is now a hybrid,I robbed parts off my now discontinued Proxxon Pantograph to build a table with much more travel.Only downside is I lost some of the precision due to backlash in the leadscrew.Normally you can only get a table this size if you buy the CNC MF70 mill.
Kind Regards
Nigel
Oh ZOLY forgot to use the enlargment pictures will not happen again. Don
I also have (and love) the Proxxon MF 70. The only issue with it is the dreadful play in the vertical (Z) adjustment. Otherwise it is brilliant.
Using a drill for milling helps a lot, provided you don't use it often. The bearings in the drill are not designed for lateral forces, so they will give up after a while ot the lateral play will increase. This might not be an issue if the drill is used for machining timber only.
Janos
Using a drill for milling helps a lot, provided you don't use it often. The bearings in the drill are not designed for lateral forces, so they will give up after a while ot the lateral play will increase. This might not be an issue if the drill is used for machining timber only.
Janos
Hi Janos,
I have issues with the horizontal xy adjustable table on my Proxxon mill. When I'm winding in the wheel, the table wobbles around terribly.
I have issues with the horizontal xy adjustable table on my Proxxon mill. When I'm winding in the wheel, the table wobbles around terribly.
Brian,
You have to adjust the strips alongside tha table (there is one alongside the longitudinal and one alongside the cross table), adjustible with 3 Allen-keyed grub screws. If this strips are too tight, it becomes very difficult to 'drive' the table, if too loose, the table will wobble.
I can send you a picture if this explanation is misleading, please notify!
Janos
Don, you can always learn basic milling technics from Youtube videos. here are some of the links. While this is not technically exactly your setup, the techniques are the same:Hi Jim, Here is the pictures, of my set up, and yest I have all the accessories as per epicdoom sugestions, parrells, clamps and cutters now only to figure out how to use it. Don
https://www.google.com/search?q=usi....14319j0j7&sourceid=chrome&ie=UTF-8#kpvalbx=1
Hope this will give you an idea of how you can use your own setup.




![20190504_181845[4672].jpg 20190504_181845[4672].jpg](https://shipsofscale.com/sosforums/data/attachments/78/78397-d48d67ae93c1618ac738786b7522f6e7.jpg?hash=1I1nrpPBYY)
![20190505_051003[4708].jpg 20190505_051003[4708].jpg](https://shipsofscale.com/sosforums/data/attachments/78/78461-d6df9572d9263c282fae130434bd8b50.jpg?hash=1t-VctkmPC)
![20190505_050847[4709].jpg 20190505_050847[4709].jpg](https://shipsofscale.com/sosforums/data/attachments/78/78462-5abb4c1df45aac8875b4a237a15b80c6.jpg?hash=WrtMHfRarI)

