THANK YOU SO MUCH PETER I will try that, hope you are avaible if I have more questions. Don
-

Win a Free Custom Engraved Brass Coin!!!
As a way to introduce our brass coins to the community, we will raffle off a free coin during the month of August. Follow link ABOVE for instructions for entering.
-

PRE-ORDER SHIPS IN SCALE TODAY!
The beloved Ships in Scale Magazine is back and charting a new course for 2026!
Discover new skills, new techniques, and new inspirations in every issue.
NOTE THAT OUR FIRST ISSUE WILL BE JAN/FEB 2026
You are using an out of date browser. It may not display this or other websites correctly.
You should upgrade or use an alternative browser.
You should upgrade or use an alternative browser.
Don,
It is not difficult to set up the vertical position (Z axis) on the mill at all. First of all you have to make sure that the work piece is fixed to the table properly. If not, you can easily hurt yourself or at least brake that milling bit. Then fix the milling bit in the chuck. Make sure that you have the proper height arrangement of the milling bit relative to the workpiece. For this, the tip of the milling bit has to be able to be lowered somewhat lower than the deepest point you want to mill. From this position, lifting up yhe milling bit with the vertical adjustment wheel, the tip of the milling bit has to be able to be lifted somewhat higher than the top of the work piece. With this you finished the preparations and you can start milling. Set the rpm of the mill according to the manual or the table on the mill itself, depending on the type of the material you want to work on. Turn on the motor. (Caution: memorize and practice the position of the OFF switch in case if you have to turn the machine off abruptly). Then lower the bit until is JUST TOUCHES the top of the workpiece. This will be the height reference point. Set the vertical adjustments dial to 0. From here on you should lower the bit by as much as deep the cut in the workpiece has to be. So if you want to get a 3mm deep cut into the workpiece, you obviously have to lower the bit by 3mm. Then you can start milling by using the X and Y adjusters on the table... with one consideration: the depth of the cut must obviously be not deeper than the active length in the milling bit. But usually this height is rather determed by the type of the material of the workpiece. For brass do not take deeper cuts than 1mm. For hard wood this can be 1-3mm, softer woods 3-5 mm. If the milling bit diameter is small (say 2mm and under) you even have to take smaller cuts.
So start practicing and enjoy your mill. Be cautious, don't hurt yourself! You can replace the broken milling bit, but can't replace your finger!
Janos
Thanks Janos, have to absorb this so I understand it, I know there will be more questions comming, I am determined to learn to use this X-Y TABLE. THANKS AGAIN Don
Hello shipmates. Here is I will try to show the use of mill by making part of the rudder. I am not sure this is the correct way using the mill, but it does work for me. Please, if seeing I am wrong I strongly encourage you to note it. I love learning!!!
Part 1: Setup Mill
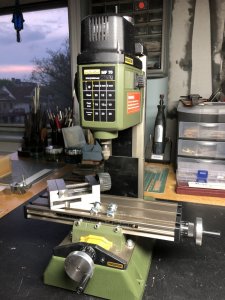
In this demonstration, I am using Proxxon mini Mil MF 70. It is cast iron base with the permanent motorhead. Very solid, and great for miniature work. Some of us using a combination of a drill stand alone with X Y table and griding tool. The working principle is the same. Janos @janos explained very-vel the basic principles.
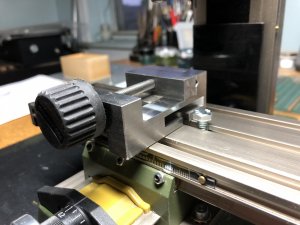
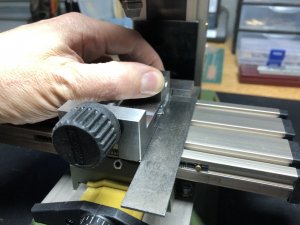
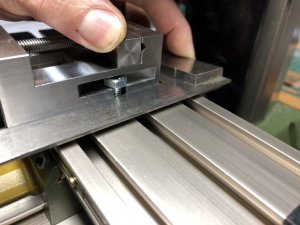
Let's begin. To begin with, we will install a vice. When tightening the need to withstand the angle of 90 degrees relative to the Y table (see the photos). Here I use machinist square to control an angle.
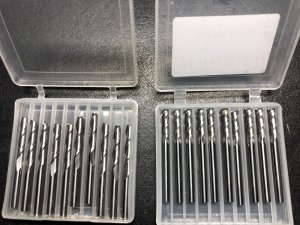
Here is the mill ends we will use for this exercise.
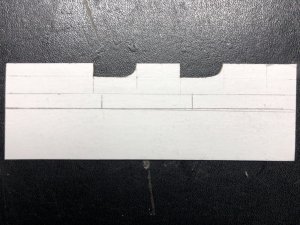
Let see how the rudder made up in a simple way (my drawings)
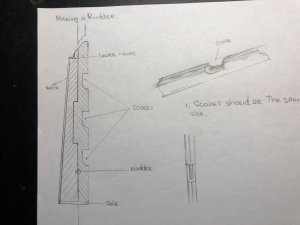
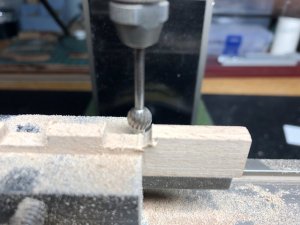
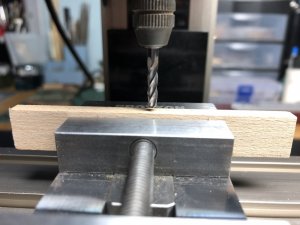
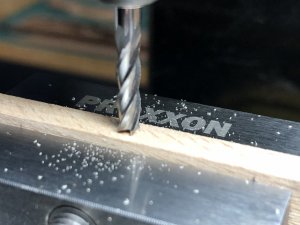
In our exercise will be making rudder's score where pintle and brace attached. I am using birch wood. Please note: this is not a scale, it is rather free hand without proportions. just for demonstration and visibility. First establishing a baseline along with entire blank. While motor ON, lower the head until the end mill lightly touch the wood. Then using the nub from X table, turn it so end mill cut wood along the entire workpiece.
to be continued tomorrow
Part 1: Setup Mill
In this demonstration, I am using Proxxon mini Mil MF 70. It is cast iron base with the permanent motorhead. Very solid, and great for miniature work. Some of us using a combination of a drill stand alone with X Y table and griding tool. The working principle is the same. Janos @janos explained very-vel the basic principles.
Let's begin. To begin with, we will install a vice. When tightening the need to withstand the angle of 90 degrees relative to the Y table (see the photos). Here I use machinist square to control an angle.


Here is the mill ends we will use for this exercise.
Let see how the rudder made up in a simple way (my drawings)

In our exercise will be making rudder's score where pintle and brace attached. I am using birch wood. Please note: this is not a scale, it is rather free hand without proportions. just for demonstration and visibility. First establishing a baseline along with entire blank. While motor ON, lower the head until the end mill lightly touch the wood. Then using the nub from X table, turn it so end mill cut wood along the entire workpiece.
to be continued tomorrow
Hi Jim,
I have the same Proxxon milling machine, and its ideal for the model ship builder.
I have the same Proxxon milling machine, and its ideal for the model ship builder.
It is great for miniature work (small scale ships)!!!have the same Proxxon milling machine, and its ideal for the model ship builder.
Agree, and I also have the Proxxon pen sander for those fiddly bits.
- Joined
- Dec 3, 2018
- Messages
- 2,451
- Points
- 538

Very good demonstration Jim, waiting excitedly for the next.
This is a machine I have been thinking about for a long time to buy.
Your buddy in Israel showed some techniques with the same machine
And then I became convinced that I can use the machine to solve many challenges.
BDW impressive drawing skills.
Thanks.
This is a machine I have been thinking about for a long time to buy.
Your buddy in Israel showed some techniques with the same machine
And then I became convinced that I can use the machine to solve many challenges.
BDW impressive drawing skills.
Thanks.
I’m interested in getting a mill myself. Not sure whether to get a Proxxon or spend more on a Sherline. Opinions, anyone?
Hi Jim and all, I have the amway X-Y TABLE IT IS MOUNTED ON MY DREMELL WORK STATION, from that I am at a loss with every thing else, I have the cutters, T nuts and clamps as per EPICDOOM(JOE), hope he is OK, I really need some help will post picture today, one of my problems is the work station I can not lock the station at the requred depth, also I will ask how to use my stuff item by item, THANKS FOR THIS THREAD. Don PS must have missed it but is there a link to the man in ISREAL, also how expensive is the PROXON X-Y table and can it be mounted on a Dremell Work Station, or do YOU NEED THE PRXON MILL
- Joined
- Dec 3, 2018
- Messages
- 2,451
- Points
- 538

Hi, donfarr, I have the same setup as you, but not the xy table.
When I have looked at JIM's work, I am convinced
that there is much more exact result after using the proxon mill.
I want to expand my machine park with this machine when money starts to flow
into.
Just a little less to drink.
When I have looked at JIM's work, I am convinced
that there is much more exact result after using the proxon mill.
I want to expand my machine park with this machine when money starts to flow
into.
Just a little less to drink.
@Norway and\or @donfarr Knut and Don, My tutorial in no way to promote\advertise Proxon mini mill, though it is a good tool! It just happened that I don't have Drill stand and XY table combined and set up as Milling machine. The same results can be achieved by using either device as the milling principles are the same.or do YOU NEED THE PRXON MILL
But let me step back and ask: Does the milling machine is an absolutely necessary tool? I don't think so. Specifically, if you are building primarily from the kits. Most time, kit parts will not require milling. This type of machinery considered for advanced users and required some prior metalsmith knowledge. Can this be learned?
Absolutely!!
The machine and setup might be quite expensive as it will require additional tooling: precision vise, dividing attachment and various milling cutters, just to name a few. Before buying any tool, specifically machinery ask your self: Do I really need one? Will, I ever use it? How I will benefit from it? Hoping this will help to make a good decision.
Happy Milling!
Hi All, I can not afford the proxon right now, no sence getting it when I do not know the basics of using it, here are some pictures of my set up and can not figure out how to lock the press in a fixed position, also how does the T nuts work are they suposed to lock in like the aluminium ones mine I can not lock them in they move, also WHAT DO THEY MEAN WHEN THEY SAY LOCK IN THE ZERO and HOW DO YOU DO IT, also my unit has a little side to side rock and the X part is hard to turn the little set screws I can not turn with my ALLEN WRENCHES, could use a lot of help
Hi Jim, to answer, the dark side has bitten me along with a love of POF builds, and yes it will both enhance and speed up my builds, I already purchased A milling vice (HARBOR FREIGHT), parrells, clamps and cutters as per EPICDOOM(JOE) sugestions, but my use does not warrant a PROXON TYPE MILLING MACHINE THE COST IS WAY TO EXPENSIVE FOR ME, for the use that I WILL GIVE IT, especially since I can not even know what I am doing on the low cost items that I have. Don
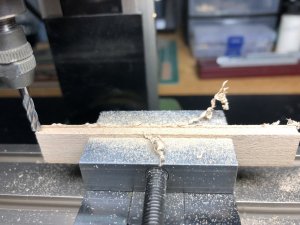
Part 2 continues where we left...
In Part 1 (click link), we left milling a baseline. This is rather a very important point, this becomes our reference side. Turn upside down and tight blank in the vise. You may use 'parallels' (precision ground metal sticks, usually comes in pairs, absolutely the same size) and mill that side as well. As a result, we have absolutely even blank full-length. Guess what - this is one of the many possibilities for using a milling machine.
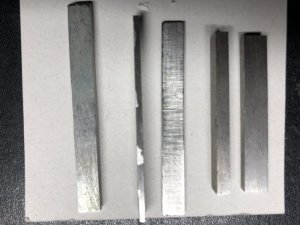
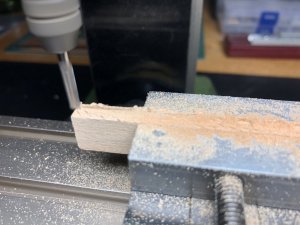
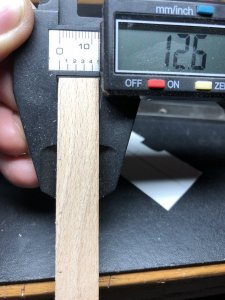
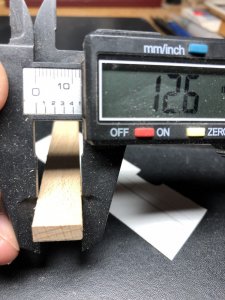
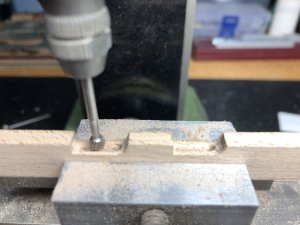
But our goal is to make rudder scores... Transfer template to a wood stock and firmly tight in the vise. Here I am using parallels to avoid damage vise as the grooves (scores) in the workpiece are hidden in the jaws of the vice. Make sure you can see a reference line. This is just a guide to know how deep you will need to make a grove. Point the end mill (while it is turning) to a light touch with the wood in the middle of the score. move the 'X' table back and forth to make a grove close enough to a reference line. Before we will switch a 'ball' end mill let's make all score's equal size. To do this, move the end mill close to left end score lightly touch the wood. Deep the milling head a notch (until you touch the reference line) moving the X table make the side even, with Y table move to the next edge. DO NOT lift up the head of the mill, just slide the X table out of working peace. With Y table slide it to the next score and do the same. Bingo both scores the same size.
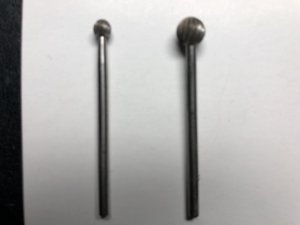
Now we switch the end mill and make the halves with larger round burr and pintle grooves with a smaller head burr.
to be continued...
In Part 1 (click link), we left milling a baseline. This is rather a very important point, this becomes our reference side. Turn upside down and tight blank in the vise. You may use 'parallels' (precision ground metal sticks, usually comes in pairs, absolutely the same size) and mill that side as well. As a result, we have absolutely even blank full-length. Guess what - this is one of the many possibilities for using a milling machine.


But our goal is to make rudder scores... Transfer template to a wood stock and firmly tight in the vise. Here I am using parallels to avoid damage vise as the grooves (scores) in the workpiece are hidden in the jaws of the vice. Make sure you can see a reference line. This is just a guide to know how deep you will need to make a grove. Point the end mill (while it is turning) to a light touch with the wood in the middle of the score. move the 'X' table back and forth to make a grove close enough to a reference line. Before we will switch a 'ball' end mill let's make all score's equal size. To do this, move the end mill close to left end score lightly touch the wood. Deep the milling head a notch (until you touch the reference line) moving the X table make the side even, with Y table move to the next edge. DO NOT lift up the head of the mill, just slide the X table out of working peace. With Y table slide it to the next score and do the same. Bingo both scores the same size.
Now we switch the end mill and make the halves with larger round burr and pintle grooves with a smaller head burr.
to be continued...
WONDERFULL JIM, I CAN STILL LEARN, hope KNUT JOINS IN AS WE BOTH HAVE THE SAME SET UP AND I SURLY AM NOT MECHANICALLY INCLINED. Don
Hello, my friend, Don. As far as I can see, your drill press all set up and ready to make some dust. Let me ask you: did the XY table tight to a base of your Dremel drill? I hope the answer is yes! Now, take off all of your step clamps and attach your milling vise (you mention that you have it).how to lock the press in a fixed position, also how does the T nuts work are they suposed to lock in like the aluminium ones mine I can not lock them in they move, also WHAT DO THEY MEAN WHEN THEY SAY LOCK IN THE ZERO and HOW DO YOU DO IT, also my unit has a little side to side rock and the X part is hard to turn the little set screws I can not turn with my ALLEN WRENCHES, could use a lot of help
Zero the Vise (American Spelling) Vice (British Spelling)
Make sure the table is clean of any swarf or debris. When using a mill, precision is key and the debris from previous users can affect the alignment of the vice jaw. By using a brush, work towel, and/or compressed air (safety: take extra care when using compressed air.) to remove all errant chips.
Get your vise and set it on the mill's table. You will need mounting bolts and nuts as well. Generally, the center of the table is the best spot to put the vise. Position the vise so that its clamps are parallel to the long side. Make sure that the vise's tightening bolt is pointed towards you for easy access. Now hand tightens the bolts.
Tighten the vise with a wrench. Make it tight but do not overdo it.
Now you can tighten parts in the vise and start milling!
Great JIm, And you are my friend that is what i LOVE ABOUT THIS FORUM I have to see if My vice works I think it does as I got it expresilly for the WORK STATION will try it tommorrow, BY THE WAY I will be starting another log tommorrow wich you might be interested in I CALL IT PAINTING WITH WOOD, NOT MY IDEA ORIGINALLY A MEMBER OF MSB AT THE TIME DID IT, and it has an offical name starts with an A can not remember it, what I am doing is using different kinds of wood that I AM using my poor mans thickness sander, HOLLY, ROSEWOOD, RED GUM, BOXWOOD, for my finished items using what you have taught me about oils, will show it tommorrow. THANKS FOR ALL THE HELP VERY MUCH APPRECIATED Don
- Joined
- Dec 3, 2018
- Messages
- 2,451
- Points
- 538

I can imagine that it will be much easier to make a grid/greating with a machine like this.
J I would also like to make the spacer plates to my slidingtable with different goals,
then the distance to the saw blade is exactly when I make planks and beams ex.
Greeting-
J I would also like to make the spacer plates to my slidingtable with different goals,
then the distance to the saw blade is exactly when I make planks and beams ex.
Greeting-



![20190501_180123[4649].jpg 20190501_180123[4649].jpg](https://shipsofscale.com/sosforums/data/attachments/77/77896-42b74b8ada233b287401e18ffee6644f.jpg?hash=QrdLitojOy)
![20190501_180246[4648].jpg 20190501_180246[4648].jpg](https://shipsofscale.com/sosforums/data/attachments/77/77897-0360fce7982e68c8c5e0d4b4ad703934.jpg?hash=A2D855guaM)
![20190501_180349[4647].jpg 20190501_180349[4647].jpg](https://shipsofscale.com/sosforums/data/attachments/77/77898-12b0c2634ccbc2a318c7ec1f13b40a81.jpg?hash=ErDCY0zLwq)
